You've just installed Windows 10 afresh on your PC and all set to get back to work. But wait! Aren't you a little bit concerned about securing your PC from any threats? Well, you should be. Let us tell you why.
If you have recently installed fresh Windows 10 on PC, then read the guide carefully. Here, we have discussed 10 possible ways to secure your computer after a fresh Windows 10 installation from known & unknown bugs.
Why is it Important to Secure Your PC after a Fresh Windows 10 Installation?
Windows 10 is undoubtedly the most recommended and secure OS in the world. With the growing popularity and enhanced usage, there's a pressing need to make it more secure for users. Although Microsoft regularly releases security patches and updates for improving user experience, there are chances of hackers releasing malware that can bypass Windows 10 security.
It is vital to keep your Windows 10 PC secure from malware threats and other bugs designed to steal or misuse your data.
Securing your Windows 10 PC doesn't have to be complicated. You have to know all the Dos and Don'ts. Read this article to learn the top 10 ways to protect your computer after a fresh Windows 10 installation. These tips will help you enable all the Windows privacy and security features to keep your system safe and sound.
Dos and Don'ts to Secure your PC after Windows 10 Installation
DOs
#1 Enable BitLocker Encryption
It is essential to encrypt your hard drive to protect the files and documents from unauthorized access. You may encrypt the hard drive using Windows built-in disk encryption utility – BitLocker. Encrypting your drive will help you protect the data, and only you or people who have authorization will be able to access it.
The BitLocker utility is available on Windows 10 Pro and Windows 10 Enterprise, but not on Windows 10 Home. However, you may turn on device encryption or use other disk encryption tools available online.
Enabling complete disk encryption will minimize the chances of your device data being misused. Just remember to keep the recovery key secured and handy so that when BitLocker or any other encryption tool prompts you to enter the recovery key to access the encrypted drive, you will be able to access your data.
What if I lose data from BitLocker encrypted drive?
You can recover it quickly using Windows data recovery software. Read this guide to learn how to recover deleted or lost data from BitLocker encrypted drive.
To turn on the BitLocker in Windows 10, follow the below-said steps:
- Open Control Panel and go to System and Security. (See Image 1)
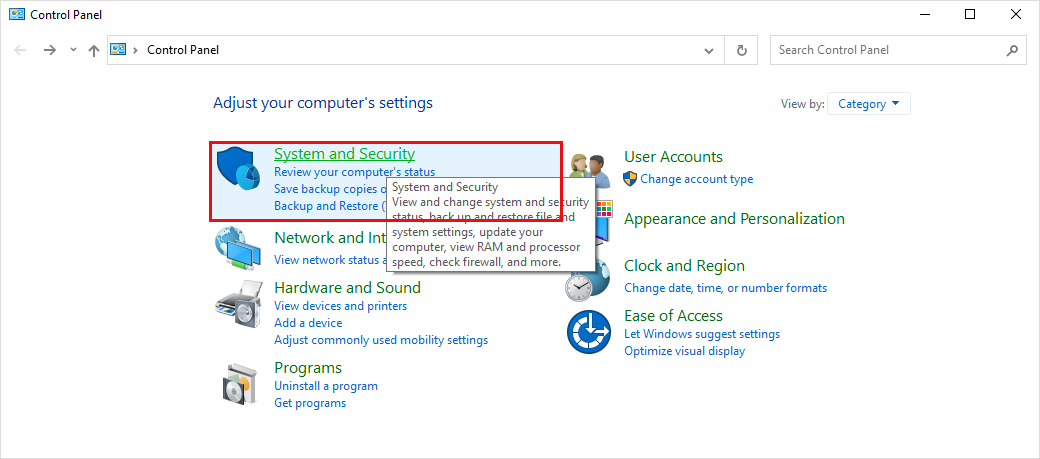
Image 1: Open System and Security in Control Panel
- Next, click BitLocker Drive Encryption to open it. (See Image 2)
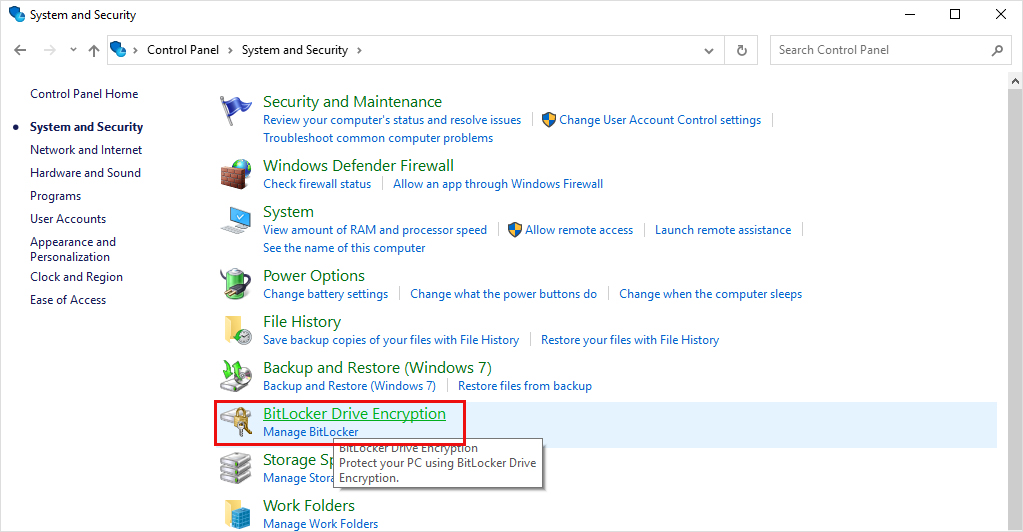
Image 2: Open BitLocker Drive Encryption
- In the BitLocker Drive Encryption window, click Turn on BitLocker. (See Image 3)
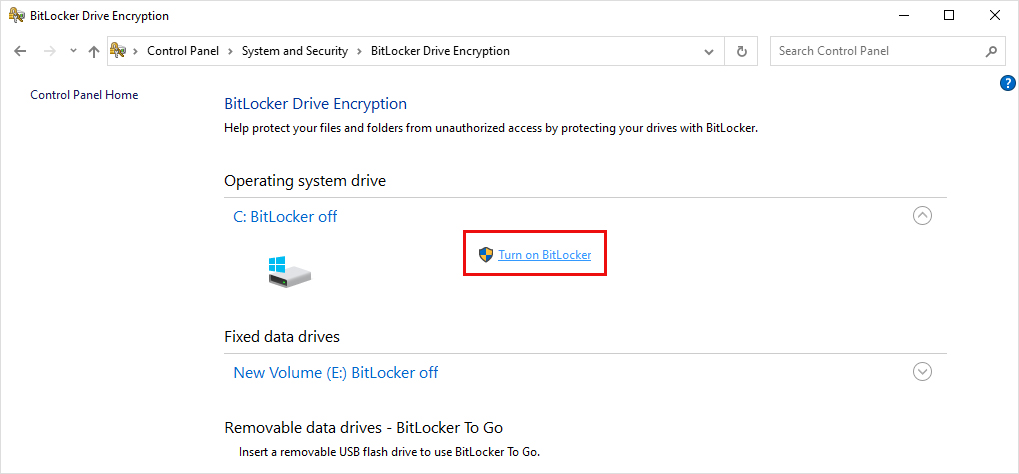
Image 3: Turn on BitLocker
- Follow the on-screen instruction to turn it on.
#2 Enable Windows Defender
Enabling Windows Defender is as good as any paid third-party antivirus tools available in the market. This Windows built-in firewall protection can help you block any unwanted intrusions. Even if you have mistakenly downloaded a malicious file, enabling the Windows Defender real-time protection and setting up the virus and threat protection scanning will help you remove such files before your PC security is compromised.
To enable Windows Defender in Windows 10 PC, follow the given steps:
- Open System Settings by pressing Windows + I.
- Go to Update & Security > Windows Security > Virus & threat protection.
- Select Manage settings under Virus & threat protection.
- Now, turn on the Real-time protection and Cloud-delivered protection by flipping their switch. (See Image 4)
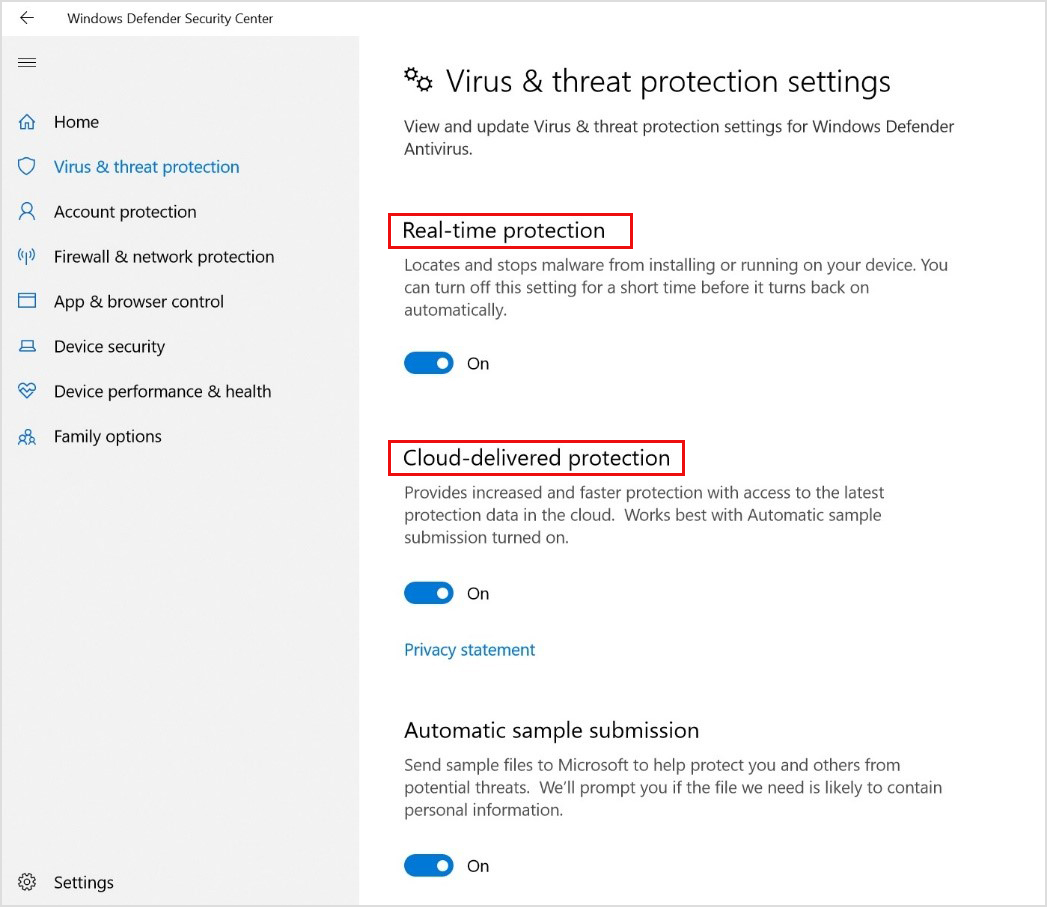
Image 4: Turn on Real-time protection and cloud-delivered protection
#3 Keep your Windows 10 PC updated
One of the most important things to do after installing windows 10 is to keep your PC updated with all the latest security updates and patches. To check for Windows updates, follow the given steps:
- Open System Settings and go to Update & Security > Windows Update.
- Check for all the latest updates and click 'Install now.' (See Image 5)
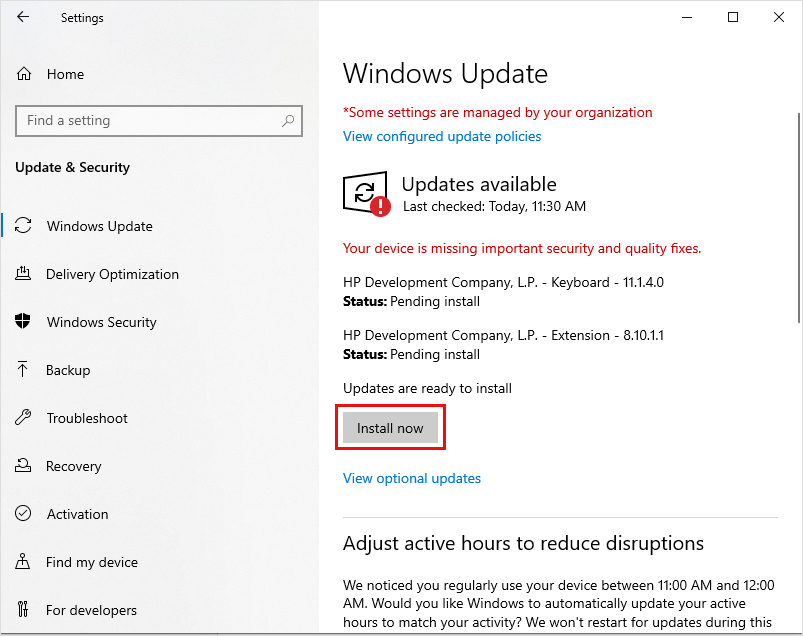
Image 5: Install the latest Windows updates
- Give it some time and wait until the updates are installed.
- Now, keep the automatic update turned on to download updates in the future to protect your PC against new-generation of virus threats.
#4 Backup your PC
Backing up your Windows 10 PC should also be an essential part of your strategy. You may use trusted cloud backup services, such as OneDrive, Google Drive, etc., to automatically backup your data. Also, keep an offline copy of your essential files locally, ideally in an external storage drive. You may also create a backup of your system files and folders using Windows built-in backup utilities, such as File History, Backup & Restore, and Previous Versions.
#5 Enable System Restore
Enabling System Restore helps you create restore points, so whenever you face any issues, such as BSOD errors or system crashes due to any reasons, you'll be able to solve the problem and come back to the fresh install and start with a clean slate. However, this may make you lose access to your system files, apps, drivers, and updates installed after the restore point was created.
Read: How to Recover Files Lost After System Restore in Windows 10
#6 Install or Update Your Hardware Drivers
Device drivers act as translators between a hardware device and the operating system. The hardware manufacturers usually provide the driver software, which users can download from their official site.
However, sometimes the drivers could be full of bugs or incompatible with the latest versions of Windows; which is one of the most common reasons behind several BSOD errors, such as 0xc0000001, 0x0000009F, 0x000000C2, 0xc0000225, etc. Therefore, we recommend installing or updating Windows 10 PC drivers to ensure your hardware runs at optimal performance.
#7 Control Windows Privacy Settings
Windows 10 gathers all the data about how a user operates the system, which helps Microsoft improve the ever-evolving product. However, many users see it as an invasion of privacy. Fortunately, you can control the privacy settings following the given steps:
- Open Settings and go to Privacy. (See Image 6)
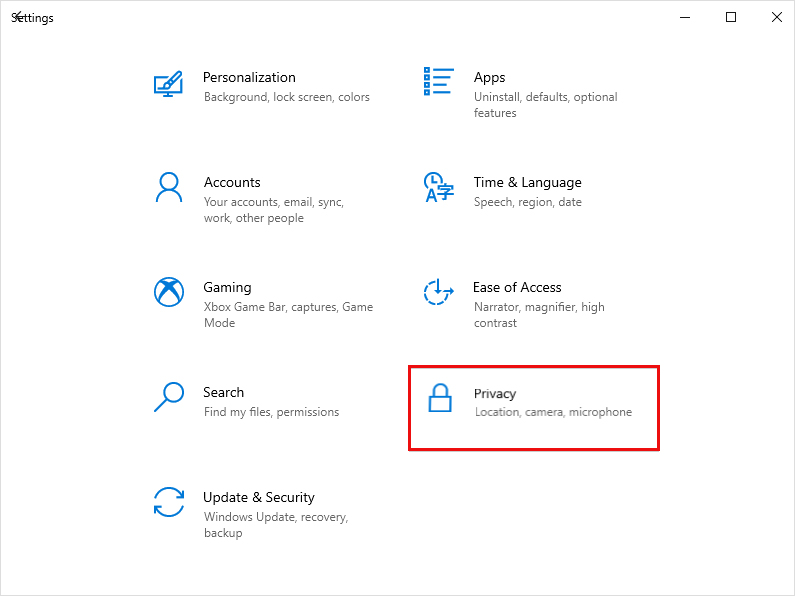
Image 6: Open System's Privacy
- You will see several privacy setting options. Scroll down the window and click 'Changing privacy settings.' (See Image 7)
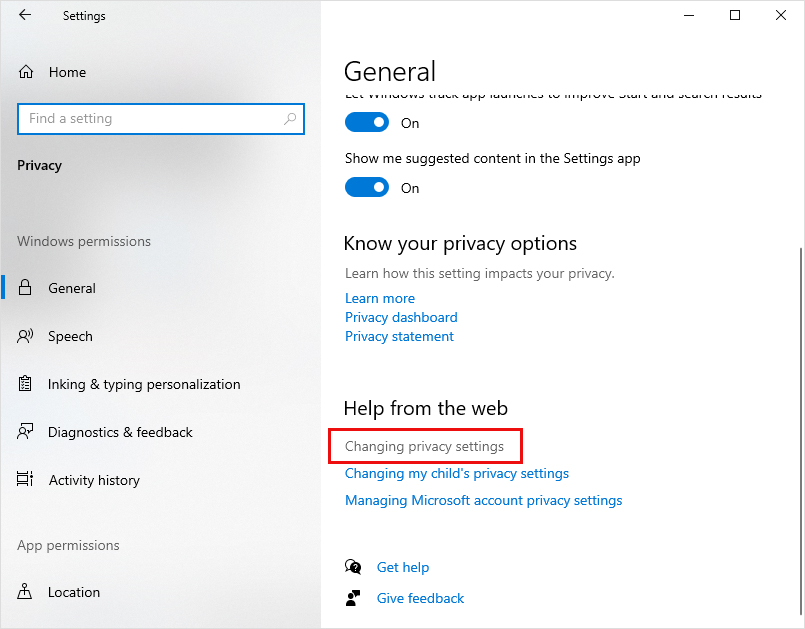
Image 7: Change privacy settings
- You may also click 'Managing Microsoft account privacy settings. (See Image 8)
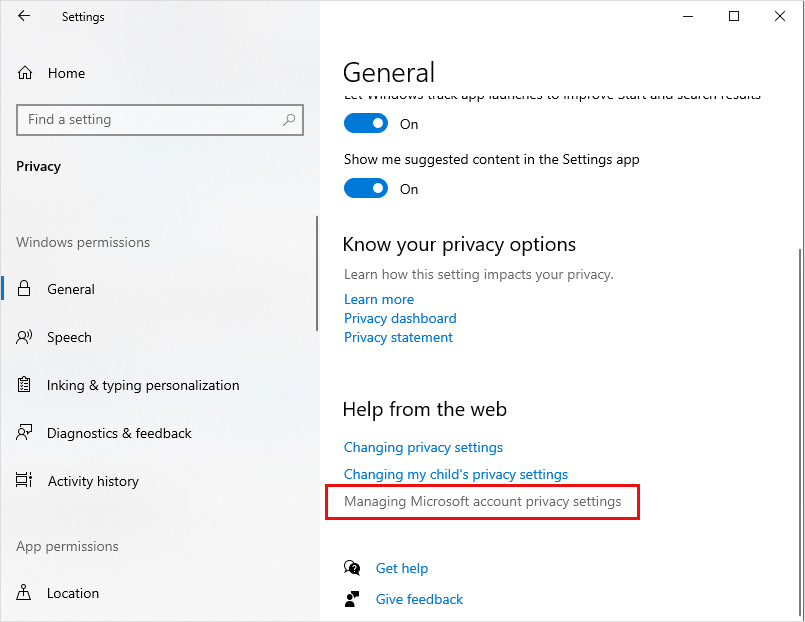
Image 8: Manage Microsoft account privacy settings
#8 Keep a Data Recovery Software Handy to Secure PC Data
Don't forget to keep reliable data recovery software, such as Stellar Data Recovery Professional, installed on your Windows 10 PC. It is a DIY software that can recover lost or deleted data from Windows 10 PCs, laptops, and external storage devices, such as HDD, SSD, USB Drives, SD Card or Micro SD Cards. It supports recovery in all data loss case scenarios, including accidental deletion, formatting, corruption, malware-attacks, and storage drives encrypted with Microsoft's BitLocker utility.
You can even recover data from a non-bootable or crashed Windows system using the 'Create Recovery Drive' feature of this software. This feature enables you to build a bootable media drive, which you will have to connect to the affected PC to get back your data.
Learn: How to Create and activate Bootable USB media? So, no matter if you happen to lose access to your data due to a malware attack on your PC, or a blue screen error leading the system to a complete crash, you may use this software to get back your data. Watch this video to learn how this software works:Don'ts
#9 Don't Use the Admin Account for All the Activities
Set up separate password-protected user accounts. Create only one administrator account but don't use it for every little activity. Use admin account only for installing new software or updates while keeping the other user account for everything else. Moreover, make sure that all the accounts are secure with strong passwords. It is the best practice to follow for all Windows 10 Pro and Windows 10 Enterprise, and Windows 10 Home users to avoid phishing attacks and other threats.
#10 Beware and Don't Click on Suspicious Links
The hackers' primary purpose is to get you to click on a malicious link or download an attachment. Be very careful and take extra caution with attachments. Don't even click on the links within an email you seem to be suspicious about; they can be disguised malware that will infect your PC.
Hover your mouse over the text or the link and check if you are redirected to a legitimate location to ensure you don't get infected by clicking on a malicious link. Or better! Open a new browser window and type the URL yourself to prevent it from being redirected. (See Image)
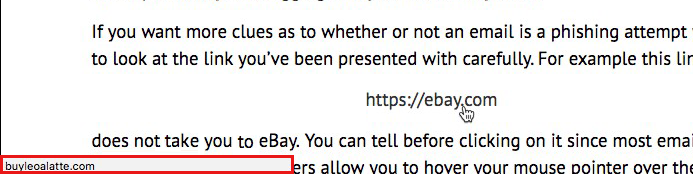
Image: The URL doesn't match the destination site
Closing Thoughts
Now, you know the top 10 ways to protect your computer after a fresh Windows 10 installation. People usually ignore these essential steps until they face any problem with their system, but it is a bit of sage advice. As there is a saying, 'An ounce of prevention is worth more than a pound of cure,' so you must consider all these security measures after setting up or installing Windows 10 afresh on your PC.


A seasoned technology writer and tech enthusiast with keen interest for everything in technology.

 27 min read