Importing or syncing iPhone pictures to Mac is a convenient way to backup, edit, share, or archive photos. However, sometimes iPhone photos don't show up or you find random photos are missing from Photos app or iCloud on your Mac. So naturally, the situation is annoying as you are not able to access mobile photos on your computer.
iPhone photos not showing on Mac could be a technical glitch due to outdated software. It's also possible that iCloud Photos is turned off on your iOS device, due to which you are not able to view the images on the computer.
No matter whatever the cause of the problem, you can fix the issue by using the free methods shared in this article. The solutions are applicable for all MacBook variants and iPhones, including the latest iPhone 13, iPhone 12, iPhone 11, iPhone 8, MacBook Pro, MacBook Air, and others.
Why iPhone Photos not showing up on my Mac?
Some common reasons for Mac not showing iPhone photos are:
- macOS or iOS is not updated.
- Incomplete or faulty macOS update, commonly noticed after Catalina or Big Sur update.
- iCloud Photos is not enabled on Mac.
- iPhone photos not synced to iCloud.
- You have used complete iCloud storage and no free space is left.
- Photos library on Mac is corrupt.
- You are using another photo manager along with Photos app on Mac.
- Your iPhone image files have turned corrupt.
How to fix iPhone Photos not showing on Mac?
Method 1: Restart iPhone and Mac
Most of the time users were able to fix the issue on Mac just by restarting their devices. Close all the applications and windows on Mac and iPhone. Then turn off and restart your devices. Now check if the photos are showing up on Mac.
Method 2: Update your Mac and iPhone system
Update both your macOS and iOS to the latest version and then check if the photos from iPhone are showing up on Mac.
Steps to update macOS:
- Click on the Apple menu.
- Navigate to System Preferences > Software Update.
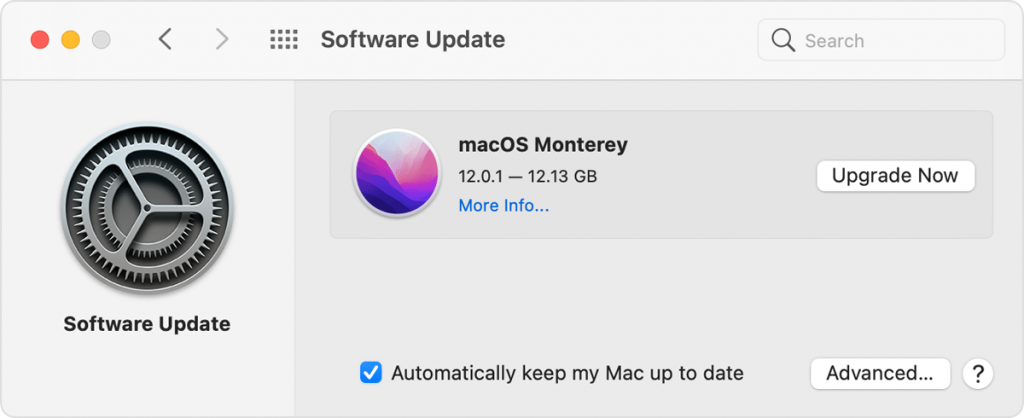
- Click either Update Now or Upgrade Now, whichever option is appears. 'Update Now' installs the latest updates of the current macOS on your system while 'Upgrade Now' gets the latest macOS such as macOS Monterey, if you are using the older version.
Steps to update iPhone:
- Connect your iPhone to power and turn on Wi-Fi.
- Go to Settings > General > Software Update.
- Select the software update and tap Install Now.
Method 3: Enable iCloud Photos
If iPhone photos are not showing on Mac, make sure you have enabled iCloud Photos. The feature keeps your iPhone photos available on all of your devices. If you have set up iCloud Photos on Mac, there's no need to import or transfer images from iPhone. Any changes you make in the iPhone photos, will display on Mac as well.
Steps to enable iCloud Photos on iPhone:
- Go to Settings and click on your name.
- Tap iCloud > Photos and turn on iCloud Photos.
Steps to enable iCloud Photos on Mac:
- Go to Apple menu > System Preferences.
- Click Apple ID > iCloud in the sidebar.
- Select Photos.
Method 4: Remove photo storage app
'I have Photos app setup to save images when I connect my iPhone 11 to MacBook Pro. I also use Dropbox that automatically imports my pictures when my iPhone is connected to Mac. Recently, I can see my iPhone connected to Mac, but its photos don't show up. How to fix? '
Sometimes, if you have installed other photos storage app such as DropBox or Flickr, on Mac, they may create software conflict with Mac's built-in Photos app. So, try to access photos from iPhone on Mac by removing the other picture managers on your system.
Method 5: Make space in your iCloud storage
Apple offers free 5GB storage in iCloud Photos. iPhone photos may not show up on Mac if you have crossed this storage limit.
To check storage space in iCloud, open iCloud.com. In the 'Settings' under 'Storage' check the storage occupied by iCloud Photos. In case of insufficient storage space in your iCloud, make space or upgrade the storage plan.
If you don't want to buy iCloud storage, transfer the photos from iPhone to Mac.
Method 6: Transfer pictures from iPhone to Mac
If none of the above method, works then transfer the photos from iPhone to Mac.
Steps to transfer/import photos from iPhone to Mac:
- Connect your iPhone to Mac.
- Open Photos app on your Mac.
- From the Photos app menu, select Import.
- Click Import all new photos. You can also select the required pictures and click Import Selected.
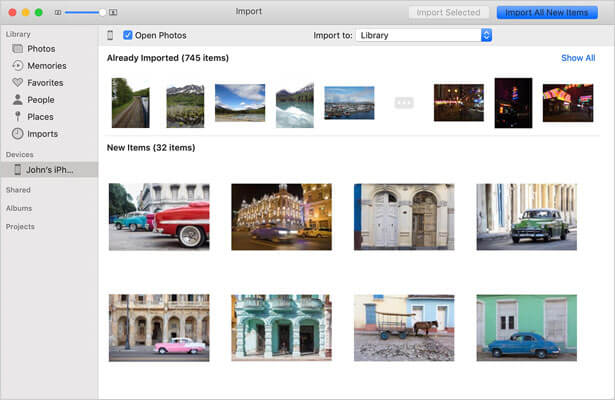
Wait until the transfer process finishes and you receive a notification.
You can also use AirDrop or Image Capture apps to transfer photos to Mac from iPhone. Both these applications are available on the new macOS Monterey also.
Learn steps to transfer iPhone photo to Mac via Image Capture.
Learn steps to transfer iPhone photos to Mac via AirDrop.
Method 7: Use Photos Library Repair tool
If you cannot access iPhone photo library on Mac, try to fix the issue by repairing the application. Use the 'Repair Library' feature that scans the app's database and repairs the corruption. The repairing process may take long depending upon the size of your photos library.
Steps to repair Photos Library:
- On your Mac select Photos > Quit Photos
- Press Option-Command. Double-click the Photos icon in the Dock.
- In the Repair Library window, click Repair to start the process.
Method 8: Use a photo repair software
If photos are not opening on Mac, showing error, or distorted, the image file is corrupt. In such a situation, get a photo repair software — Stellar Repair for Photo for macOS. It's smart algorithms repair the corrupt image file header and data and open it in pristine form. You can quickly repair multiple photos of JPEG/JPG, HEIF, RAW, DNG, TIFF, and other files from iPhone, Android, and other popular cameras on Mac.
The software is extremely easy to use and completes the repair process in 3 steps — Add file, Repair and Save. You can also see the preview of the repaired file before saving. Stellar Repair for Photo is compatible with the new macOS Monterey, High Sierra, Catalina and below.


 6 min read