

How to Recover Deleted Files from Empty Mac Trash (Step-by-Step Guide)
July 23, 2026| 10 min read


Our content follows trusted Editorial Standards - accurate & unbiased.
Summary: Many Mac users do not use terminal commands due to its non-graphical interface. But it is quite useful in many situations. In this article, you’ll learn how to safely manage your external hard drive using Mac's Terminal commands. In case you accidentally delete your files or format a wrong drive using Terminal commands, download this free Mac data recovery software to recover up to 1 GB of files.
Free Download 100% SecureThe Terminal is a useful application in your macOS that allows you to access macOS features and APIs through the command-line interface. You can open the Terminal app on your Mac by launching Finder from Dock and then navigating to Applications > Utilities > Terminal.
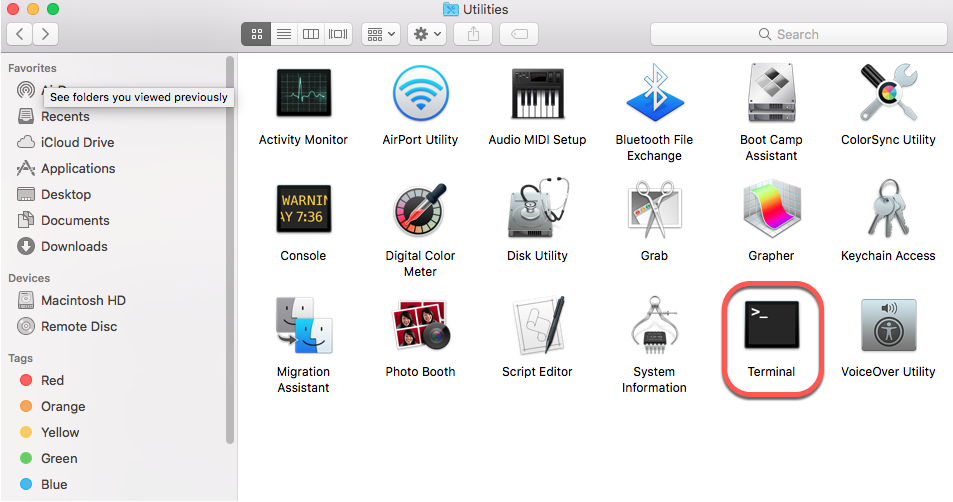
Image: Launch Terminal app
Terminal helps you manage your external hard drive far better than the GUI. All you need to do is enter the required Terminal command, then hit Return. The app will execute the requested command immediately. But, Terminal won’t show any warning while executing any commands.
So, back up your Mac before using Terminal to avoid data loss due to the remove command's accidental use. The backup ensures you can restore data in case of any data loss event. And suppose you didn’t back up your data and executed some unsafe commands that resulted in a data loss disaster. In that case, you can still recover your data using data recovery software.
The next sections describe commonly used Terminal commands and free Mac data recovery software to salvage your lost data.
The first thing you would like to do with your external drive is to view it using Terminal. The command line to view the list of all your connected drives is as follows.
diskutil list
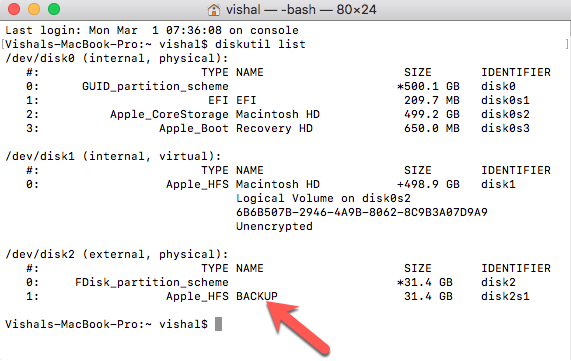
Image: diskutil list
This command will return all the mounted or unmounted drives and their partitions. Alternatively, you can look for the external hard drive using the following command:
ls /Volumes
Please note down the external hard drive's identification; a sample DriveID could be /dev/disk2. The correct DriveID is required to manage your external hard drive using Terminal.
In GUI, you need to plug the external hard drive into your Mac to mount it automatically while drag and drop the drive icon to Trash to eject or unmount it. To remount the drive, you require to unplug the drive and plug it again.
But you can easily unmount and remount your external hard drive using the Terminal command without the need to reconnect the storage device. The Terminal command to unmount an external drive is shown next:
diskutil unmount $DriveID
If the above method doesn’t work, you can force unmount the drive. The Terminal commands to unmount an external hard drive forcefully is shown next:
diskutil unmount force $DriveID

Image: Unmount disk command
To mount the external hard drive once again, enter the following command:
diskutil mount $DriveID

Image: Mount disk
The storage drive will mount on your Mac, and you can access all the stored content.
When you remove any file or folder using Terminal, it won’t move to Trash and is removed permanently. So, backup your external hard drive to yet another storage medium to preempt data loss. The Terminal commands to delete a file from an external drive is shown next:
rm $FilePath
Here, replace the $FilePath with the path of the file that you want to remove permanently. In case you want to remove a folder instead of a file, you need to use the remove command recursively. The Terminal commands to delete a folder from an external drive is shown next:

Image: use rm command to remove files
rm -r $FolderPath
Replace the $FolderPath with the path of the folder that you want to delete.
When an external hard drive is not working as expected or is corrupt, you can verify it using Terminal and repair it when needed. The command to verify an external hard drive is shown next:
diskutil verifyVolume $DriveID
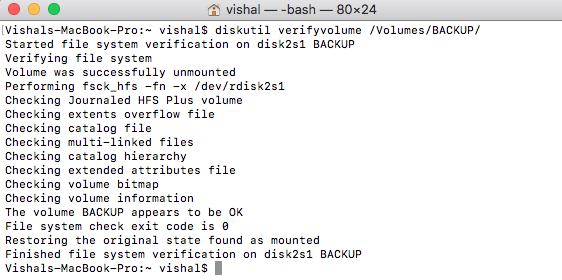
Image: Verify your drive
If the command doesn’t show any message, it means no error is found. Else, you need to repair the Mac drive. The terminal command to repair the external hard drive is as follows:
diskutil repairVolume $DriveID
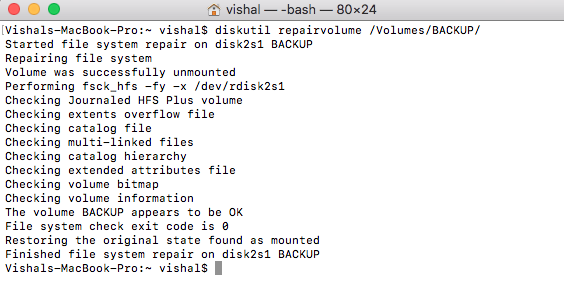
Image: Repair Mac External Drive
When the repair succeeds, you can access your storage drive without any issue. Else, erase the drive to create a new file system.
You need to be more cautious while erasing your external drive using Terminal. Because the use of the erase command on a wrong drive can result in a data loss disaster. So, back up your data before executing the command. The Terminal commands to erase an external hard drive is shown next:
diskutil eraseDisk $FileSystem $DriveName $DriveID

Image: Erase External Hard Drive
Here, replace the entities with the required file system (APFS, JHFS+, HFS+, FAT32, or ExFAT), drive name, and drive identification. The command will erase the external drive and format it to the specified file system. Later, you can restore the backed-up data to the newly formatted drive.
When you have accidentally lost data due to unsafe Terminal command, employ free Mac data recovery software to recover it on Mac. The steps are as follows:
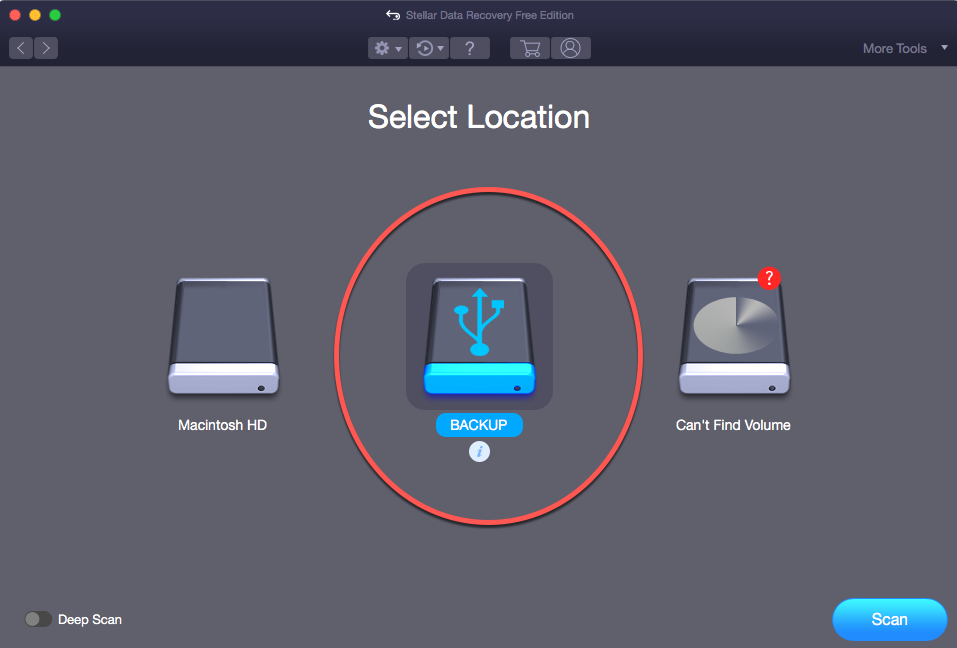
Image: Recover external drive
Now you know how to manage your external hard drive with Terminal commands on Mac. You can view, unmount, mount, repair, and erase your external hard drive or delete files from it. In case of accidental data loss, use a free data recovery software for Mac to recover your deleted or lost files.
Senior Content Writer
This article was written by Santosh Kumar Gupta, a Content Writer at Stellar Data Recovery.
Curious about our content creation process? Take a look at our Editor Guidelines.
July 23, 2026| 10 min read
-1920.jpg)
July 22, 2026| 10 min read
July 22, 2026| 10 min read


 10 min read