Introduction
Migrating MySQL (source) database to SQL Anywhere (target) database involves several stages. This article demonstrates the process of transitioning schema and data from the MySQL sample database 'sakila' to SQL Anywhere database.
To migrate database schema and data, you can use the 'Migrate Database Wizard' included with SQL Anywhere. But, keep in mind, you need to be patient when using the Wizard, as it makes migration a tedious and time-consuming process. Further, the Wizard does not support migrating views, stored procedures, triggers, and user-defined functions. You will need to manually migrate these database objects by making modifications to the T-SQL code. Also, you need to have the Migrate Database Wizard installed on your system and establish a connection to the source (MySQL) database to perform the migration.
To make the migration process easier, you can use a specialized database converter to convert database tables and its records from MySQL to SQL Anywhere easily and quickly.
What is the Difference Between MySQL and SQL Anywhere?
Before we proceed with migration, let's compare MySQL and SQL Anywhere databases based on some important features.
NOTE: Not interested in the comparison of MySQL and SQL Anywhere? Skip to the next section.
| Features | MySQL | SQL Anywhere |
|---|---|---|
| Overview | MySQL is an open-source Relational Database Management System RDBMS owned by Oracle. | SQL Anywhere primarily known as Sybase SQL Anywhere is a proprietary Relational Database Management System RDBMS from SAP. |
| Usage | The application is used for data warehousing, e-commerce and other applications. | This application is used for IoT and data intensive applications. |
| Installation and set up | Installing and setting up MySQL database can take time. | Less efforts are required to install, setup and manage an SQL Anywhere database. |
| MSupport | Since Oracle has taken over MySQLs development, the company hasn't released code for errors correction and detection. | The support team from SAP is known for providing good support. |
| Deployment | Can take more time compared to SQL Anywhere in the deployment of data | Takes less time to execute small and large queries, ensuring faster deployment of data. |
| Interface | User-friendly interface | Not very user-friendly. |
Things You Need to Know
Here are a few concepts you need to know before starting the migration process:
Consolidated (Backend) Database
The backend database (in our case MySQL) holds system tables and procedures that need to be migrated to SQL Anywhere database.
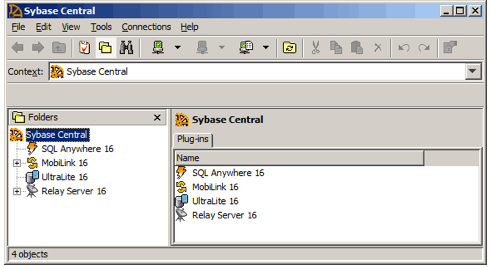
Sybase Central
It is a simple to use database management tool that helps work with database objects on the Windows system. It lets you create SQL Anywhere database objects, including tables, views, indexes, etc.
Data Types
There are a few MySQL data types that do not match exactly with SQL Anywhere data types. For example, SQL Anywhere does not support MySQL YEAR data type. And so, the YEAR data type needs to be mapped to INTEGER.
The following table lists some of the major MySQL data types that need to be mapped to SQL Anywhere:
NOTE: For a detailed list of data types that need to be mapped in SQL Anywhere, refer to this link.
| MySQL | SQL Anywhere | Mapping notes |
|---|---|---|
| TEXT | VARCHAR | - |
| TEXT | TEXT | - |
| TINYINT UNSIGNED | TINYINT | TINYINT is unsigned in SQL Anywhere. |
| BOOL | BIT | |
| LONGTEXT | TEXT | - |
| INTEGER | INTEGER | - |
| TIME | TIME | The TIME data type in MySQL does not support fractional seconds. The MySQL TIME data type range from '-838:59:59' to '838:59:59'. In SQL Anywhere, the range of TIME data type is '00:00:00.000000' to '23:59:59:999999'. |
| YEAR[(2|4)] | INTEGER | MySQL YEAR data type is not supported by SQL Anywhere and needs to be mapped to INTEGER. The value of INTEGER must range from 1000 to 9999. |
| DECIMAL | DECIMAL | - |
Getting Started
Make sure that your system meets these prerequisites:
• MySQL database must be installed on your machine
• MySQL ODBC driver 3.51 (or later version) must be installed on the system running the SQL Anywhere database.
• ODBC Data Source Administrator
• SQL Anywhere 16
• Sakila sample database version 0.8
Migrating from MySQL Database to SQL Anywhere
The migration comprises the following stages:
Stage 1 – Create a New SQL Anywhere Database
You will need to create a new SQL Anywhere database to which you want to migrate the source database. Below are the steps that explain the process of creating a new database by using Sybase Central:
Step 1: Launch Sybase Central (Start > Programs > SQL Anywhere 16 > Administration Tools > Sybase Central). Close the Tips dialog and/or Welcome dialog if they appear.
Step 2: From the Tools menu, expand SQL Anywhere 16, right-click an SQL Anywhere 16 database, and then click Create Database.
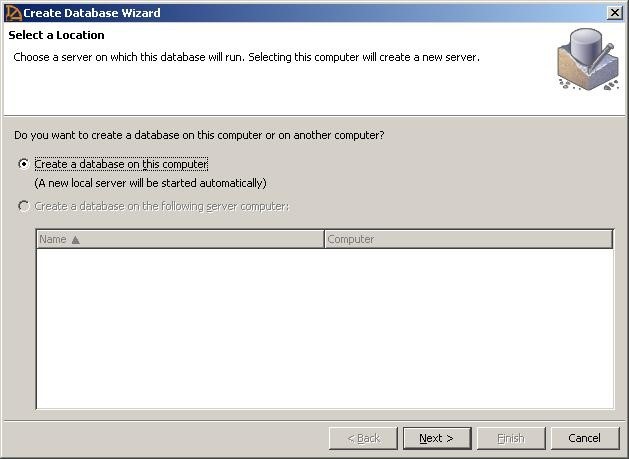
Step 3: In Create Database Wizard, select 'Create a database on this computer', and then click Next.
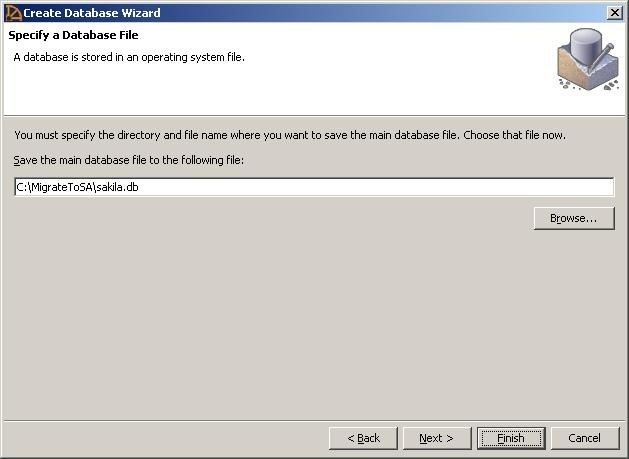
Step 4: Save database file with the name sakila.db.
NOTE: Once you have created a new database, you can change the database default settings (such as page size, encryption, etc.).
Step 5: Click Finish to complete the database creation process.
After creating the database, close the Create Database Wizard.
Stage 2 - Creating an ODBC Data Source for MySQL Database
To proceed with migration, you will need to set up an ODBC connection to the source database. To do so, follow these steps:
Step 1: Open Sybase Central, click Tools > SQL Anywhere 16 > Administration Tools > ODBC Data Source Administrator.
Step 2: In the window that appears, click Add.
Step 3: From the list of drivers, select MySQL ODBC 3.51 Driver, and then click Finish.
NOTE: Download and install the MySQL ODBC driver (if you haven't downloaded the driver).
Step 4: The MySQL Connector/ODBC Data Source Configuration window opens. Fill in the required details in the Connection Parameters section to connect to the database.
Step 5: Click OK to exit the MySQL Connector/ODBC window. Again, click OK to exit ODBC administrator.
Stage 3 – Migrate Schema and Data from MySQL to SQL Anywhere
Once SQL Anywhere Server database is running and can communicate to the MySQL database via ODBC, the next step requires moving the source database schema and data to the target (SQL Anywhere) database.
SQL Anywhere comes with a built-in Migrate Database Wizard that can be used to migrate MySQL database schema and its data to the newly created SQL Anywhere database. This wizard helps in creating tables, indexes and other database objects to match the source database (MySQL) schema to the target database schema. It then copies all the table data from the source to the target database.
NOTE: Besides the 'Migrate Database Wizard', you can also use the sa_migrate system procedure to migrate all tables from MySQL database to SQL Anywhere database.
Steps to use Migrate Database Wizard are as follows:
Step 1: In Sybase Central, click Tools > SQL Anywhere 16 > Migrate Database. This will launch the Migrate Database Wizard.
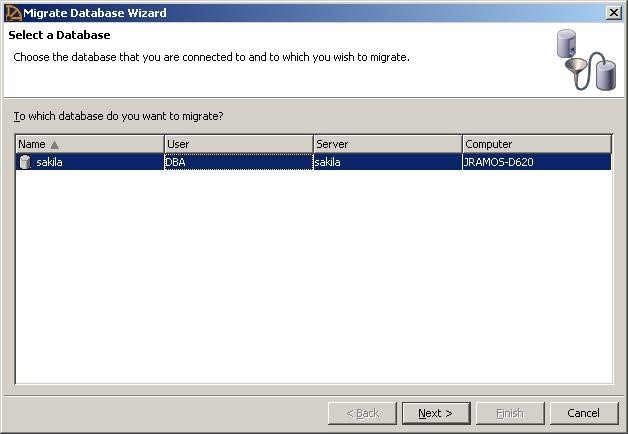
Step 2: In the Wizard, select the 'sakila' database, and then click Next.
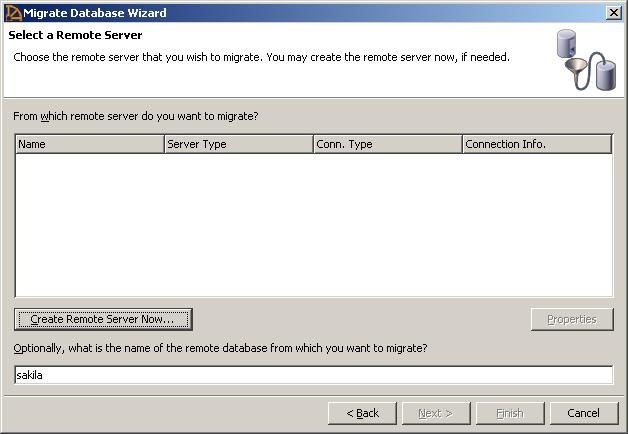
Step 3: Enter 'sakila' as the name of the remote database from which you want to migrate, and then click Create Remote Server Now.
NOTE: The MySQL 'sakila' database contains all the database objects that need to be migrated to the target database.
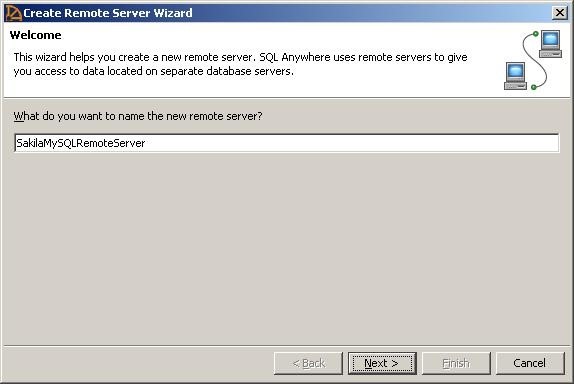
Step 4: When prompted, enter 'SakilaMySQLRemoteServer' as the remote server name, and click Next.
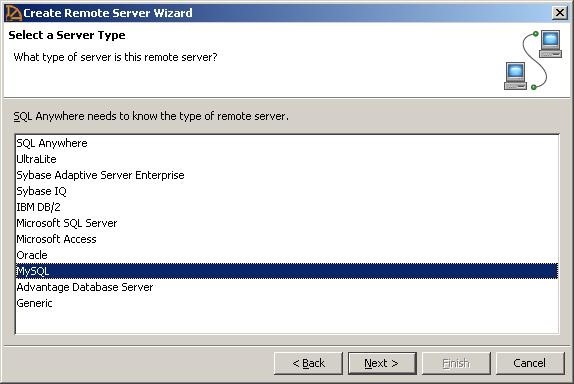
Step 5: In Select a Server Type screen, choose 'MySQL' from the remote server type list, and press the Next button.
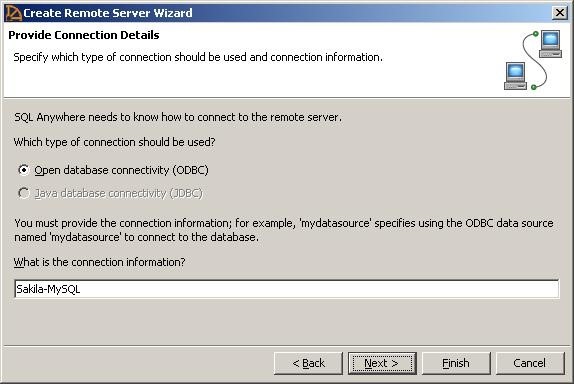
Step 6: In Provide Connection Details screen, select Open database connectivity (ODBC), and type the name of the ODBC data source for MySQL database (i.e. the MySQL ODBC source data created earlier) in the connection information textbox. Click Next.
Step 7: Avoid making the server read only, and then click Next.
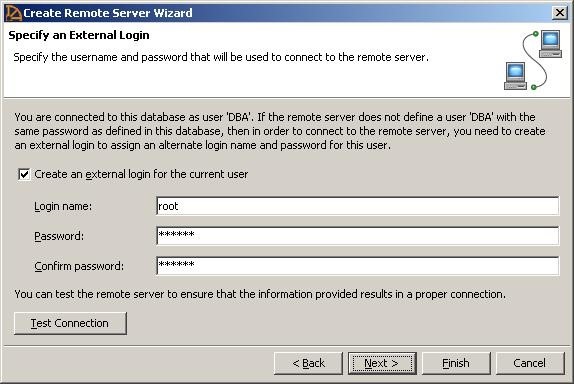
Step 8: You are connected to the SQL Anywhere database as DBA. Since the remote server (MySQL) has no knowledge of this user, you should create an external login that maps the SQL Anywhere DBA to the MySQL user. Next, check the 'Create an external login for the current user' checkbox and enter the correct credentials to log in to the MySQL database server. Click Next.
Step 9: A summary page will display the SQL statements that the target database will execute to create the remote server (MySQL). Click Finish for creating the remote server.
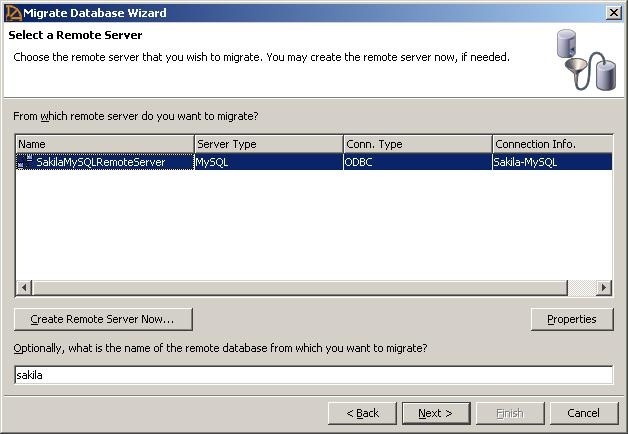
Step 10: You will be back at the Migrate Database Wizard. In the Wizard, select the newly created 'SakilaMySQLRemoteServer' and click Next.
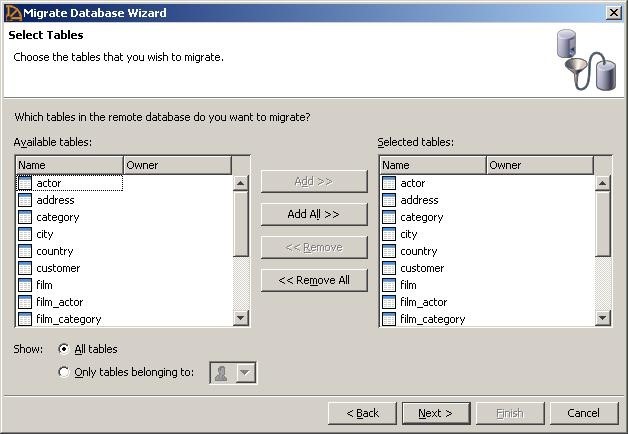
Step 11: In Select Tables screen, select all or specific tables from the 'sakila' database in the left list box you want to move. Once the tables are selected, click Add All, and then Next.
Step 12: You can add the tables to the user 'DBA'; however, let's create a new user who can have access to the Sakila database objects. For this, click Create New User Now.
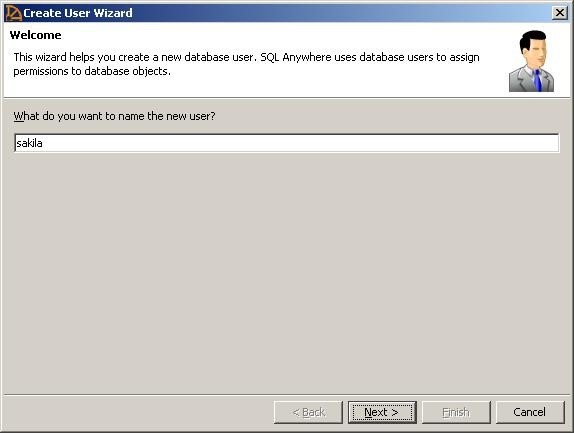
Step 13: The Create User Wizard window appears. Type 'sakila' as the new user's name, and then click Next.
Step 14: Assign a password to the newly created user, and click Next.
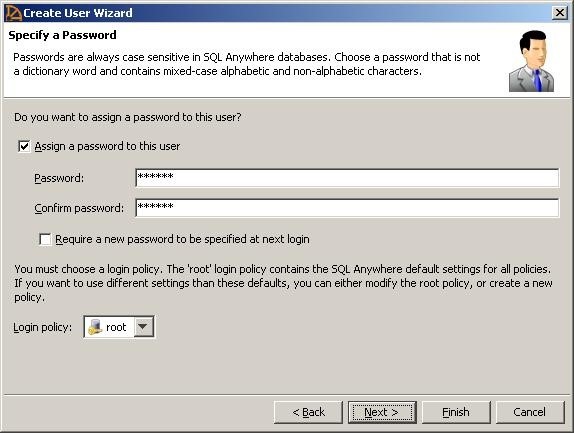
Step 15: A window will appear asking to change the default settings for the new user. You can skip this step, and click Finish.
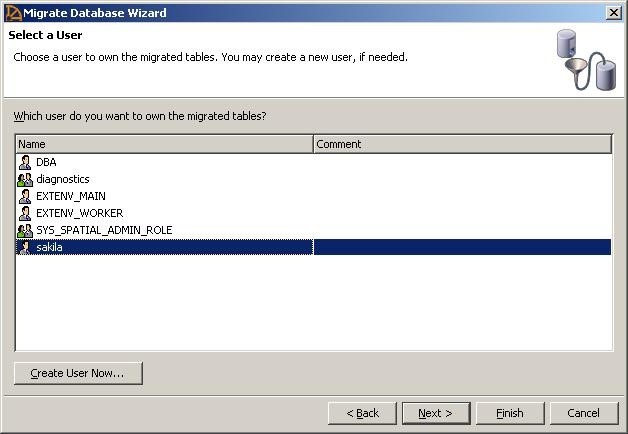
Step 16: The Migrate Database Wizard window will appear. Select the newly created user 'sakila' from the list (as shown in the screenshot below) and click Next.
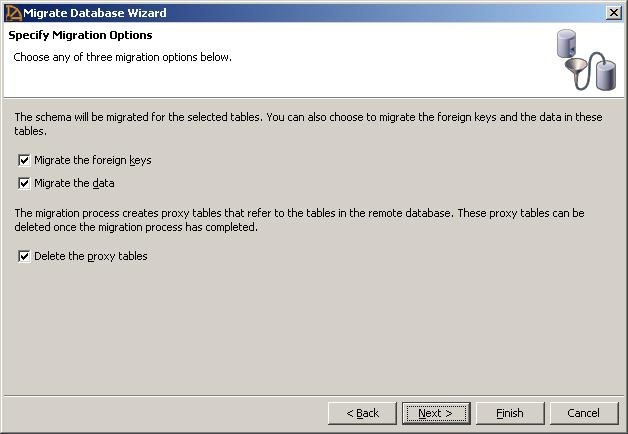
Step 17: In the Specify Migration Options screen, leave all options checked, and then click Next.
Step 18: The Summary screen appears displaying the SQL statements that will be executed by Migrate Database Wizard for migrating database schema and data.
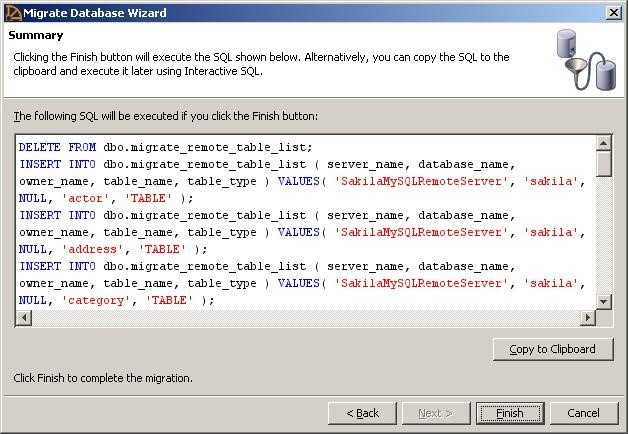
Step 19: Click Finish to initiate the migration process.
The Migrate Database Wizard will move the schema and data from the MySQL 'Sakila' database to the SQL Anywhere 'Sakila' database.
The next phase of migration requires verifying the migrated database schema and data. Once, you have examined the data, you can proceed with migrating views, stored procedures and other MySQL database objects to SQL Anywhere database.
Limitations of Migrate Database Wizard
The SQL Anywhere migration wizard has certain limitations listed as below:
• Converting schema and data from MySQL database to SQL Anywhere database is a lengthy and time-consuming process.
• Requires technical expertise.
• Both source and target database needs to be installed on the computer.
• Moves source database files to live database only.
How You Can Overcome These Limitations?
Stellar Converter for Database can help you overcome the limitations associated with Migrate Database Wizard. Here's how:
• Converts data from MySQL to SQL Anywhere database by using a few simple steps.
• The software user interface (UI) can be operated easily, without technical assistance.
• Only target database server needs to be installed.
• Allows saving converted files to live or offline database.
Steps to use the software to perform the conversion are as follows:
• SQL Anywhere (target) databases must be installed on your machine.
• A new database file should be created in SQL Anywhere application.
• The drive on which database is stored must have free space equivalent to the size of the selected database.
Step 1: Download, install and launch Stellar Converter for Database software.
Step 2: In Select Database dialog box, choose MySQL as your source database type.
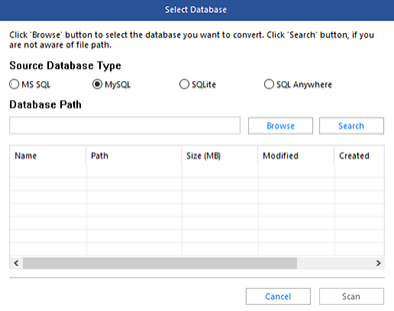
Step 3: To select the database file you wish to convert, click Browse under Database Path, and then click Scan.
NOTE: If you cannot find the database files, click 'Search' to locate database files in your system's hard drive or a folder.
Step 4: When 'Scan Complete' dialog box appears, click OK. Preview of MySQL database objects that can be converted to SQL Anywhere is displayed.
NOTE: The preview process can take time depending on the number of records in a table. You can skip the process by clicking Stop on File menu.
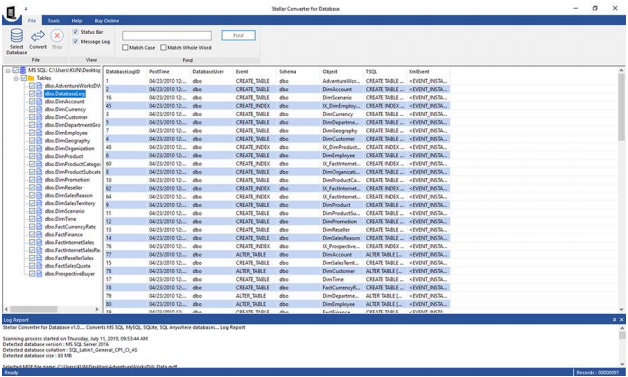
Step 5: To proceed with conversion, click Convert on File menu.
Step 6: In Convert and Save Database dialog box, perform the following:
1. Select SQL Anywhere under Select Database Type.
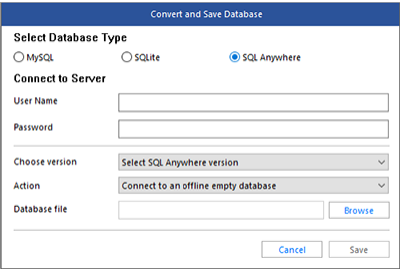
3. Step 9: Next, choose one of the following Actions from the drop-down list:
• To save converted file to an offline database, select 'Connect to an offline empty database'.
• To save the file to a live database, select 'Connect to a running database', and specify the Server Name.
4. Click Save.
The selected MySQL database files will be converted to SQL Anywhere database file format.
NOTE: Stellar Database Converter software only converts tables and table data. However, the software tries to execute database objects (such as views, procedure, triggers, indexes, constraints, functions, etc.) queries. If query fails to execute, the software generates a '.txt' file of the failed queries in the source path.
Conclusion
This article demonstrated the major stages of migrating MySQL (source) database to SQL Anywhere (target) database. Most importantly, it covered how to use 'Migrate Database Wizard' for smooth transition of data from source to target database. But, the migration wizard has some downsides. The steps to convert MySQL database schema and data to SQL Anywhere are complex and requires technical expertise. If you are a beginner and looking for a quick way to perform MySQL to SQL Anywhere conversion, use Stellar Converter for Database software.


 7 min read