&media=https://www.stellarinfo.com/public/image/article/mysql-Incorrect-Information-in-File-corrupt-error (1)-642.jpg&url=https://www.stellarinfo.com/article/mysql-incorrect-information-in-file-error.php)


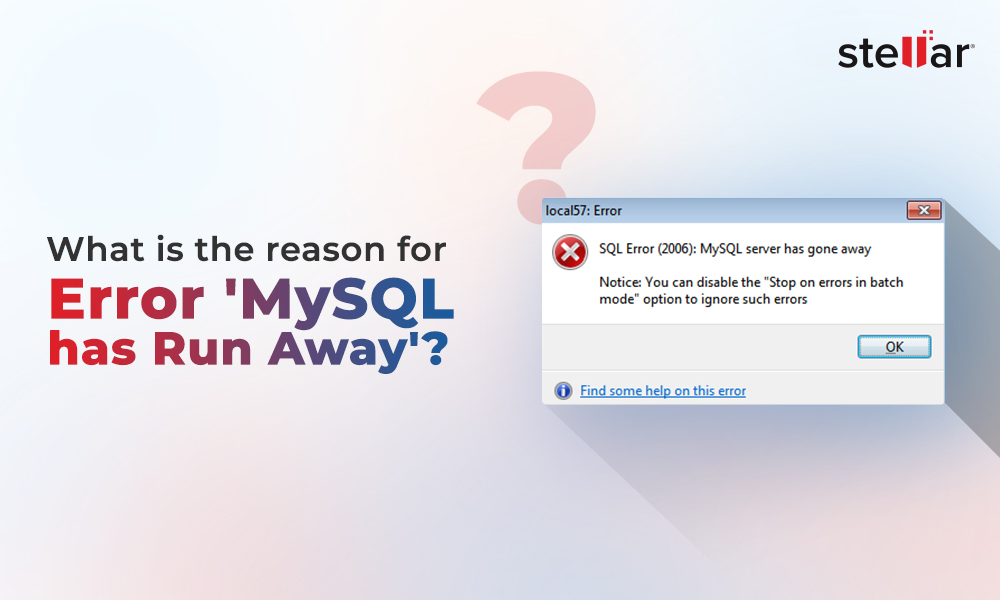
Many of the MySQL users have reported encountering the “Incorrect information in file” error when restarting the MySQL Server after a crash. The complete error message appears as:
It usually appears when InnoDB recovery fails after a system restart. It indicates that MySQL cannot correctly interpret or validate the table metadata or storage engine information. It occurs when it fails to read the data in table’s .frm descriptor file. This error occurs for specific reasons, depending on the scenario.
Example 1: StackOverflow – Reboot & Port Conflict
A MySQL Server running on CentOS 6 was rebooted after slowdown issues. During startup, InnoDB attempted crash recovery and began rolling back uncommitted transactions. The logs then reported:
This indicates corruption in the member_list.frm table definition. At the same time, the server failed to start because another MySQL daemon was already bound to port 3306, causing a port conflict.
Example 2: Forum: Log File Size Mismatch
Experienced MySQL Error 1033 during replication between master and slave servers due to an inconsistency. This problem mainly occurred when the innodb_log_file_size in the slave’s configuration file known as my.cnf, did not match the actual log files copied from the master. This results in InnoDB initialization failure. So when trying to access tables, it causes the error.
What is MySQL ERROR 1033 'Incorrect Information in File'?
MySQL ERROR 1033 ("Incorrect Information in File") occurs on server‑side storage engine due to damaged table files. In older versions of MySQL (prior to 5.6), it is associated with corruption or mismatch in .frm (table definition), .MYD (data), or .MYI (index) files, affecting both InnoDB and MyISAM tables. However, in MySQL 8.0 and later, .frm files have been removed and replaced with data dictionary. So, the error now occurs due to metadata corruption or upgrade mismatches within this dictionary.
You can even face this MySQL error in tools, like phpMyAdmin, MySQL Workbench, or mysqldump, while trying to access or creating backup/exporting a corrupted table. But these tools do not cause the error.
Common Causes of MySQL ERROR 1033 (HYOOO): 'Incorrect Information in File'
This error can occur due to one of reasons below:
- Corruption in MySQL database/tables
- MyISAM (Index (.MYI) files are corrupted
- Lack of permissions to read/write the database files
- Issues in configuration file
- Corruption in Data Dictionary files (in MySQL newer versions)
- Your system has shutdown abnormally due to power outage, OS crash, or forced kill (kill -9) during a write operation
- File system corruption has damaged MySQL data directory integrity
- Modifying .frm, .MYD, or .MYI files outside of MySQL without stopping the server
- Restoring an .frm file from a different MySQL version where the .frm format has changed
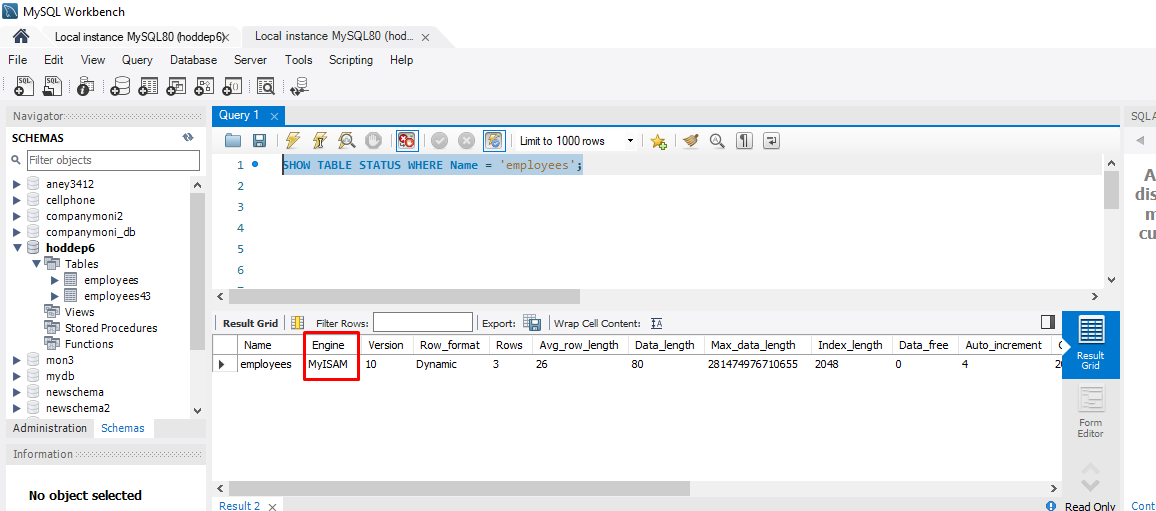
How to Identify which Storage Engine is Affected (MyISAM or InnoDB)?
To fix MySQL error 1033, you have to first identify whether the table uses MyISAM or InnoDB storage engine. Since the repair commands are engine‑specific, running the wrong command won’t help — and might even damage the table further. That’s why confirming the engine first is the most important step in recovery.
You can run the below command in MySQL to check the engine of the MySQL table.
Methods to Fix the MySQL 'Incorrect Information in File' Error
The correct fix for ERROR 1033 depends on whether the table (on which you're facing error) uses the MyISAM or InnoDB storage engine. Methods 1–3 apply only to MyISAM tables. Method 4 is used for InnoDB tables when the issue is caused by a misconfiguration in my.cnf. Method 5 (Stellar Repair for MySQL) works for both storage engines and is recommended when the manual methods fail or when data recovery is required.
Follow these five methods to repair corrupted tables and fix the “Incorrect information in file” MySQL error.
Method 1 – Run the REPAIR Command with use_frm
If you add use_frm command in the REPAIR statement, it means you’re asking the server to reconstruct the index of the table, by ignoring the corrupted index data. It helps to fix corrupt MyISAM tables. Here’s how:
tbl1 is the table name in this example; replace it with the actual name of the table you need to repair.
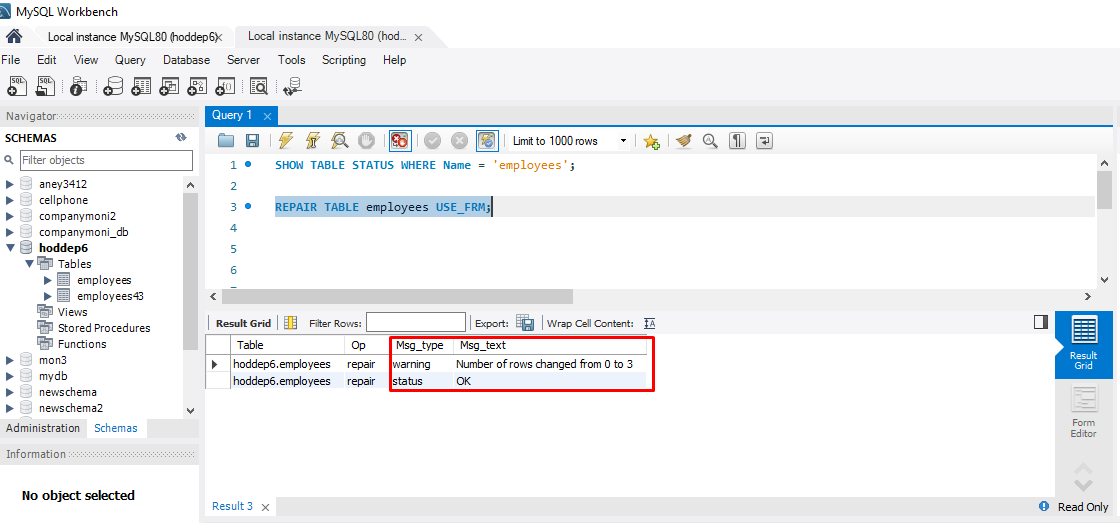
Check the Msg_text column in the result:
status = OK → The repair was successful, and the table is fixed.
status = Table is already up to date → The table is not corrupted; check another table.
status = Error → The .frm file itself may be corrupted; proceed to Method 2.
Method 2 – Drop and Recreate the Corrupt Table
You can also try the drop and recreate method to resolve the 1033 error in MySQL. It forces server to generate a fresh .frm descriptor file while preserving the original data (.MYD) and index (.MYI) files from backup. For this, you should know the exact table structure before recreating it. You can run the below-cited command to do so:
To drop and recreate the table, follow these steps:
- Stop the MySQL Server instance.
- Backup tbl1.FRM (table structure), tbl1.MYD (table data), and tbl1.MYI (indexes) files.
- Drop tbl1 table.
- Start the MySQL Server.
- Use CREATE TABLE statement to recreate the table (i.e., tbl1 in our case).
- Stop the server once again.
- Copy the MYD and tbl1.MYI files to the database directory (datadir).
- Restart the MySQL instance.
If this doesn't help resolve the issue or there's a lot of missing data in the table, skip to the next method.
Method 3 – Correct the Configuration File
In InnoDB tables, the ERROR 1033 can occur when MySQL starts using the configuration file (my.cnf on Linux or my.ini on Windows) where the innodb_data_file_path setting does not match the actual size of the InnoDB system tablespace file (ibdata1) on disk. Because MySQL uses this configuration to map InnoDB data pages, any mismatch can prevent proper initialization and lead to such table access error.
For instance, the my.cnf file has defined the size of the parameters incorrectly. Suppose, the actual ibdata1 file on disk is 4GB, but the configuration specifies a different value, such as 2GB. This mismatch can cause error.
Incorrect configuration:
To resolve this, shut down the MySQL Server and then correct configuration file to match the actual file size:
Correct configuration:
Save the applied changes and restart MySQL. InnoDB now loads the correct tablespace mapping and restores normal database access.
Method 4 – Restore from Backup (MyISAM and InnoDB)
Restoring from a backup is the most reliable fix for MySQL ERROR 1033 (“Incorrect Information in File”), when the underlying table files are too corrupted to repair. You can use this method if you have a valid and readable backup (dump) file or physical backup of the MySQL data directory.
Restore from mysqldump
In MySQL Server, you can use mysqldump - a command-line tool – to create the dump file for backup and reload the dump file using mysql client to restore the MySQL databases. Before performing this process, you can use the SHOW GRANTS statement as given below to ensure you have all permissions:
SHOW GRANTS
[FOR user_or_role
[USING role [, role] ...]]
user_or_role: {
user (see Section 8.2.4, “Specifying Account Names”)
| role (see Section 8.2.5, “Specifying Role Names”.
}
Now, follow the below instructions to restore the dump file using the mysqldump utility in your system command prompt:
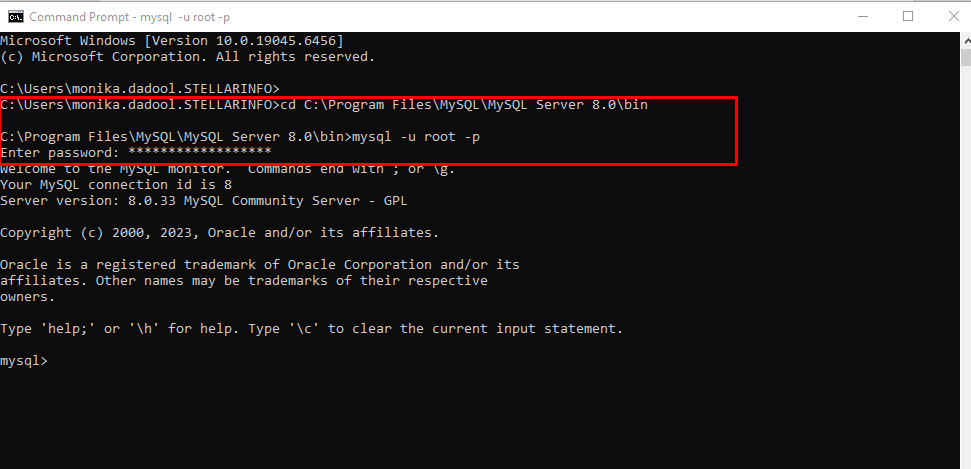
- In the CMD window, first connect to your MySQL Server by using these commands:
cd C:\Program Files\MySQL\MySQL Server 8.0\bin
mysql -u root –p
Enter password
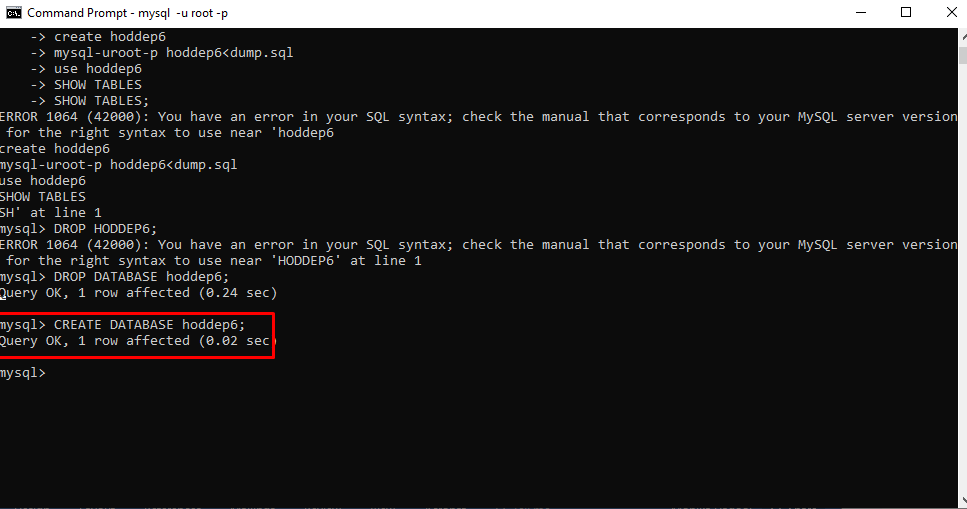
- Next, drop and recreate the MySQL database. For this, use the following command:
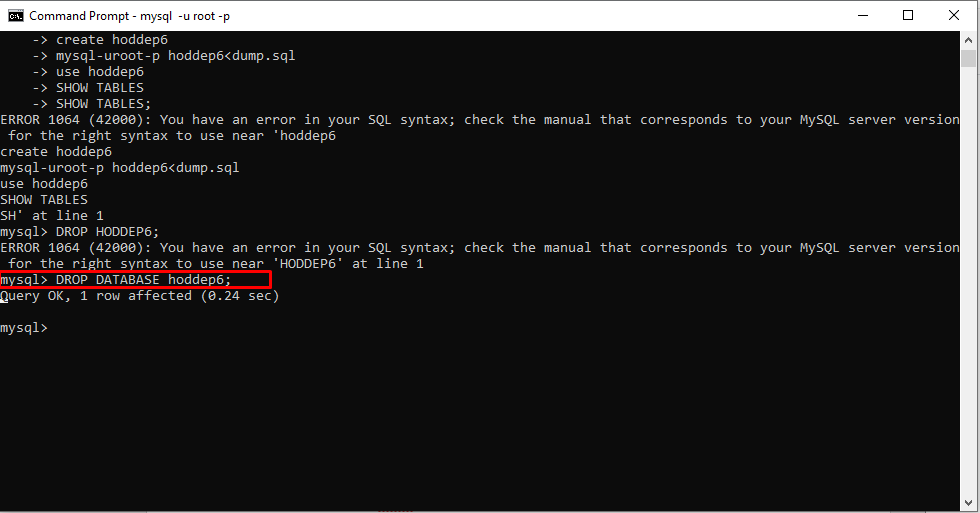
- This command will drop the selected database and then create a new database.
- Once the new database is created, you can use this command to restore the database:
mysql -u root -p db_name < dumpfile.sql
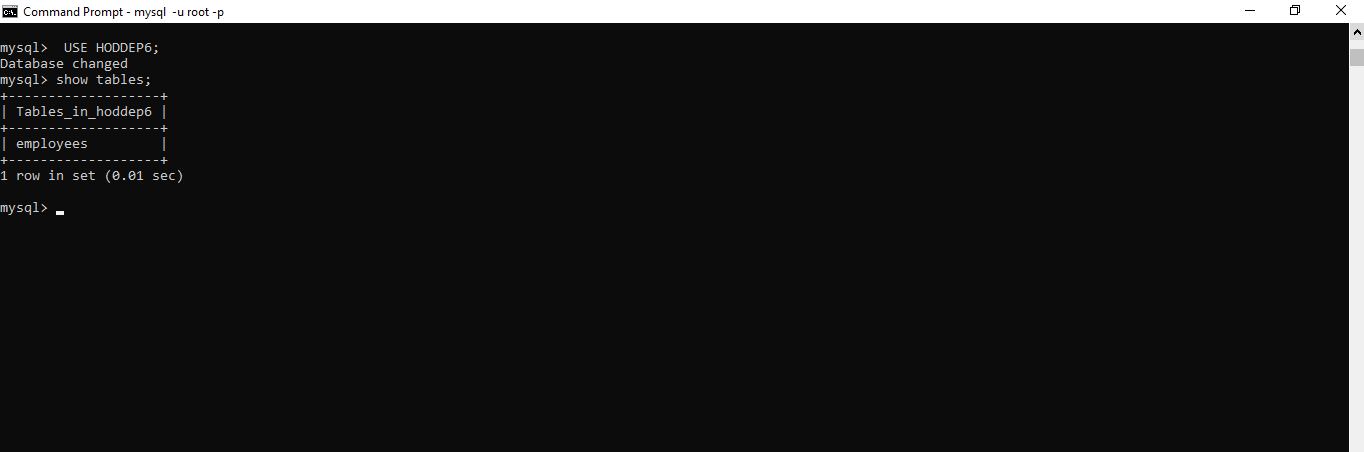
- After its execution, you can check if the restored database has all the tables. Use the following command:
Mysql> USE hoddep6;
Mysql> SHOW TABLES;
The mysqldump utility only works if the MySQL server is running. It can let you recover corrupt MySQL database. It usually fails to restore a dump file if it contains an InnoDB table with the CREATE TABLESPACE statement.
If your backup was created from the MySQL data directory, you can follow the detailed guide on restoring MySQL databases from the data folder in Windows. If you have a file-level backup of MySQL, see this guide to recover MySQL database from .frm and .ibd files.
If you don't have a backup, using a professional MySQL repair tool can help.
Method 5 – Use a MySQL Repair Tool
When restoring MySQL database from backup is not an option, you can use Stellar Repair for MySQL to repair corrupt MySQL database tables. It can help you repair definition files (.frm), data files (.ibd, .MYD), and index files (.MYI) in corrupted and damaged tables, with no data loss. It can quickly repair InnoDB/MyISAM tables of all MySQL versions (including the latest MySQL 8.0.26), and also allows you to check whether the recoverable data is correct with its demo version. The tool ensures complete recovery of database objects.
Steps to Repair a MySQL Database using Stellar Repair for MySQL
- Once you have downloaded and installed the software, launch it.
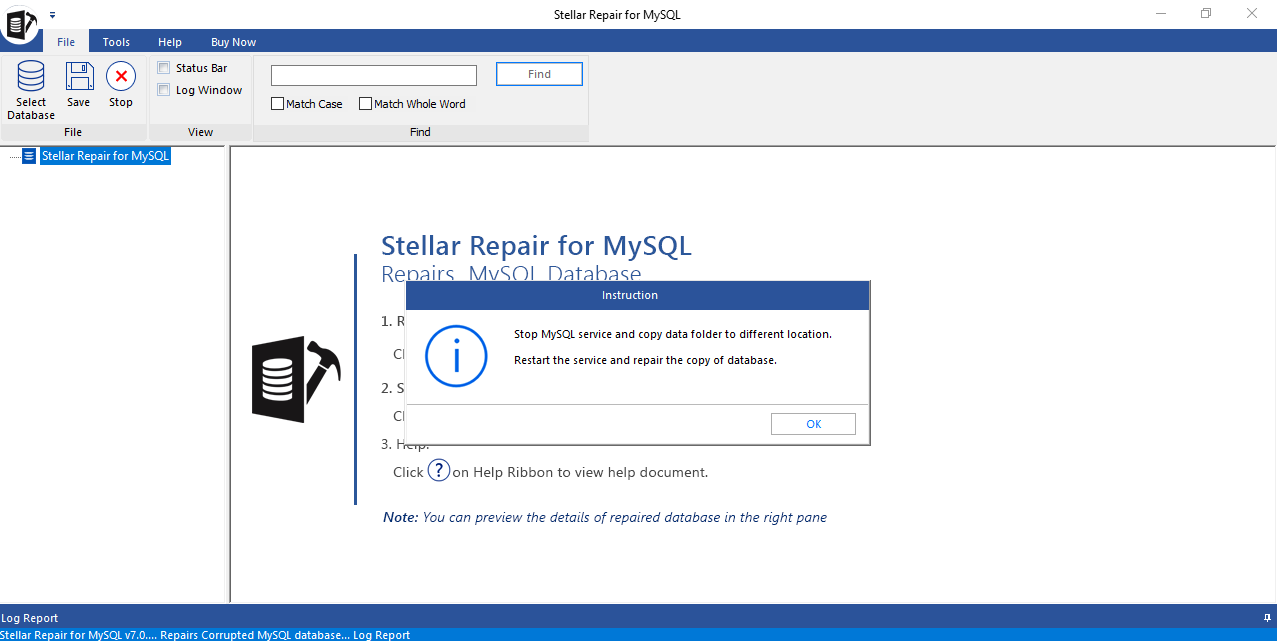
- Read the instructions and click OK to proceed.
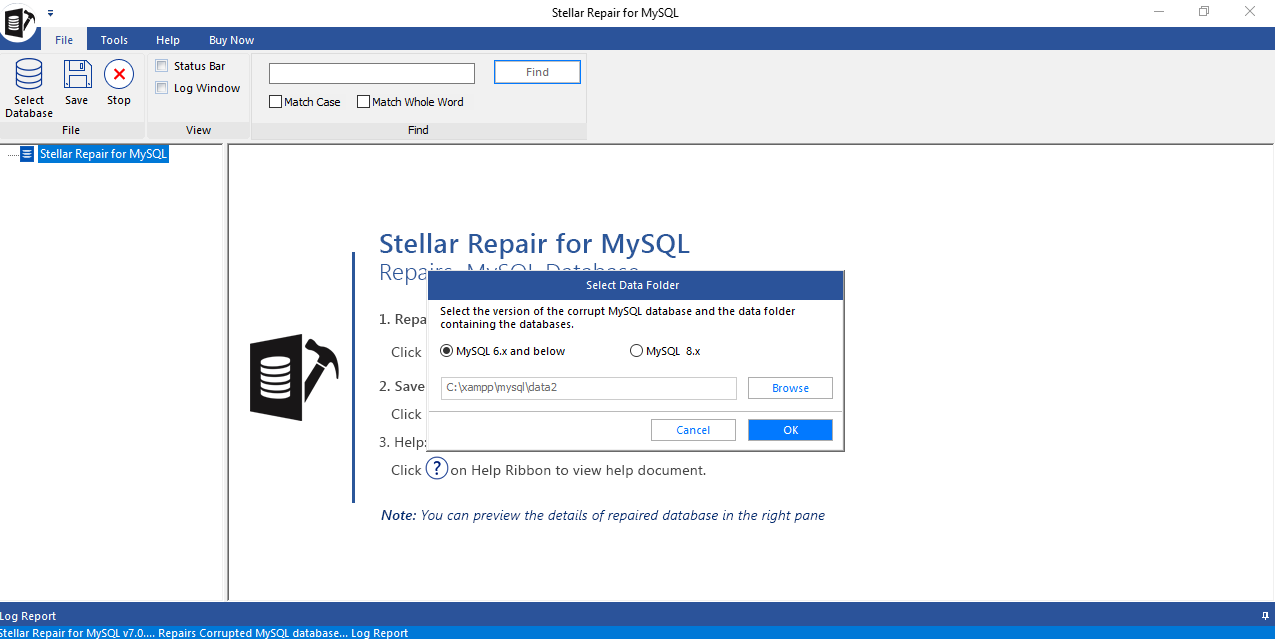
- Browse and select the MySQL data folder containing the database you want to repair. Then, click OK.
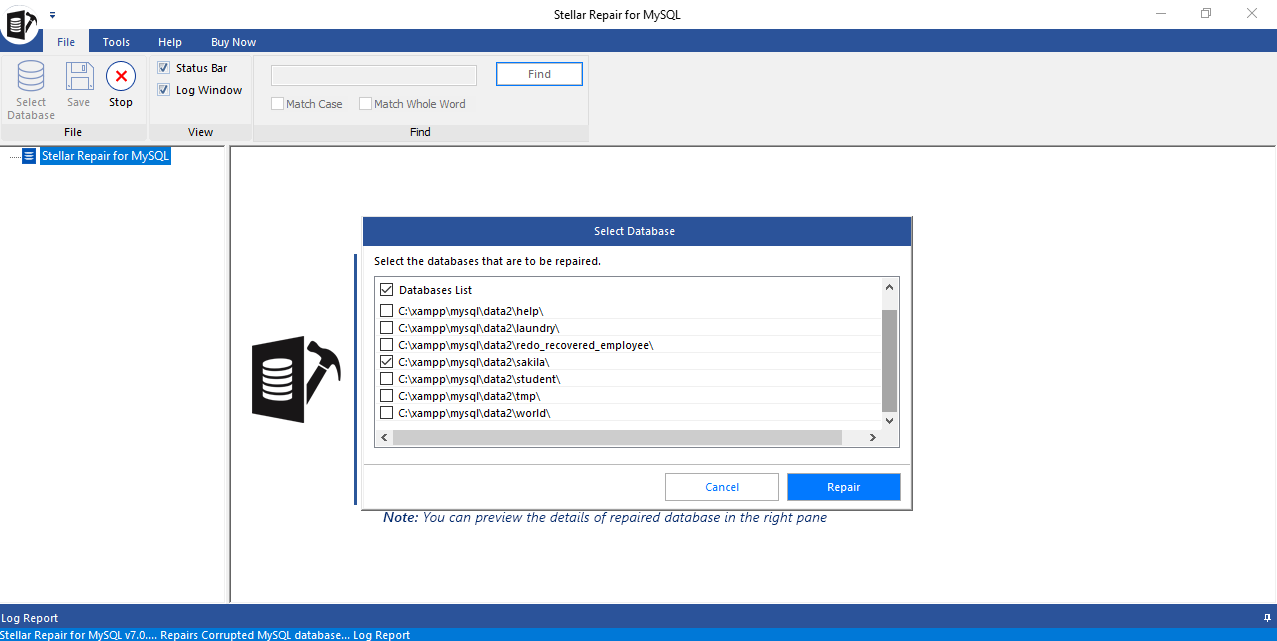
- Select the database that has the corrupt table and click Repair.
- Click OK when presented with the 'Repair Complete' message box.

- A preview of all the repaired tables and their recoverable data is displayed.
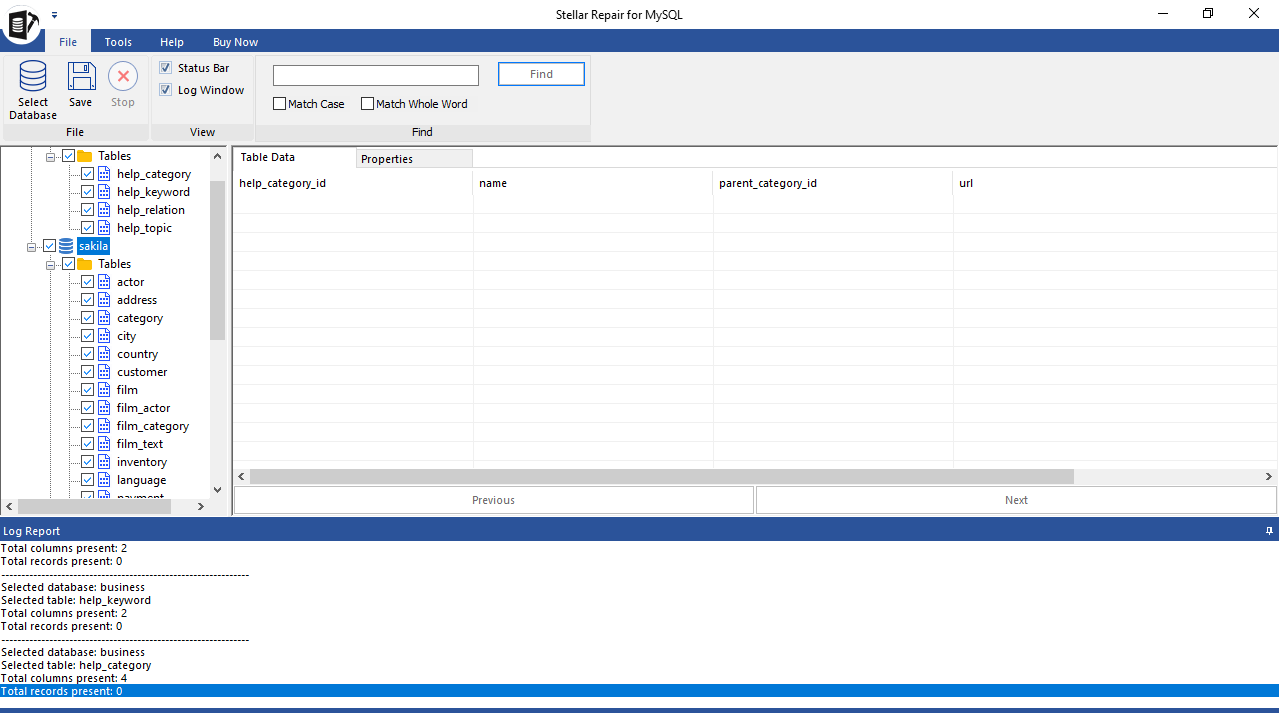
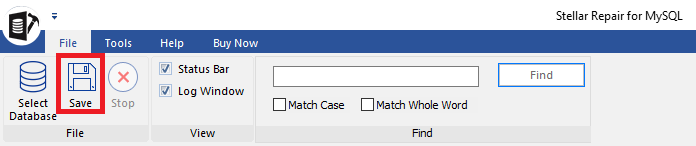
- Select all or specific items you want to restore and click Save on the File menu.
- Choose to save the repaired database to a new MySQL database or other file formats like CSV, HTML, or XLS. Press the Save button.
- Select the location to save the database and click Save once again.
The repaired database and all the restored tables will be saved at the selected location.
If you’re facing the MySQL “Incorrect Information in File” error, this video demonstrates practical steps to fix it effectively.
Which Fix Should You Use? MySQL ERROR 1033 Decision Table
The table below can help you to select the correct method for your situation:
|
|---|
To Conclude
MySQL Error 1033 (“Incorrect Information in File”) indicates corruption that prevents MySQL from reading table metadata or data files, which can happen due to multiple reasons. Some are incorrect configuration, damaged table files, or file system issues. The repair process depends on the storage engine in use—whether MyISAM or InnoDB—so identifying the engine first is an important task. If you're looking for a reliable MySQL repair that supports both InnoDB and MyISAM tables, use Stellar Repair for MySQL. This tool can restore both MyISAM and InnoDB tables and helps in severe cases, where they are severely corrupted, and a backup is not available.


- Keep master and slave configurations consistent.
- Avoid manual file manipulation.
- Always shut down MySQL cleanly.
- Make sure you have privileges on the affected tables:
SELECT
INSERT
UPDATE
DELETE
ALTER


Monika Dadool is a Senior Content Writer at Stellar with over 5 years of experience in technical writing.

 5 min read