Your Outlook emails may not be updating automatically due to issues with your internet connection, Outlook settings, or problems with your Outlook profile or data file. You can fix this issue by checking your network, adjusting your Outlook settings, or creating a new profile or data file. In this article, we will discuss all the possible reasons behind the Outlook emails not updating automatically issue and the solutions to resolve the issue.
What are the Reasons for Outlook Emails not Updating Automatically?
There are several reasons that can result in the emails not updating automatically issue in Outlook, such as:
- Poor or no network connection.
- Faulty or incompatible add-ins.
- Incorrect email settings.
- Conflict with other applications.
- Corrupt or damaged Outlook profile.
- Oversized local cache (.ost).
- Inconsistent Outlook data file (.ost).
- Low mailbox storage or local drive storage.
- Work Offline mode is enabled.
How to Fix Outlook Emails not Updating Automatically Issue?
Follow these solutions to fix Outlook not auto-updating the emails and mail items in Inbox or Outbox folder.
1. Check your Internet Connection
Make sure the internet is working and the mailbox server is online and available. To verify, you can log in to your webmail account using a web browser. If you can log in successfully and access all mail items, send/receive emails, etc., the issue could be with your Outlook client, profile, or data file (.ost). Follow the next solutions to troubleshoot and fix the issue.
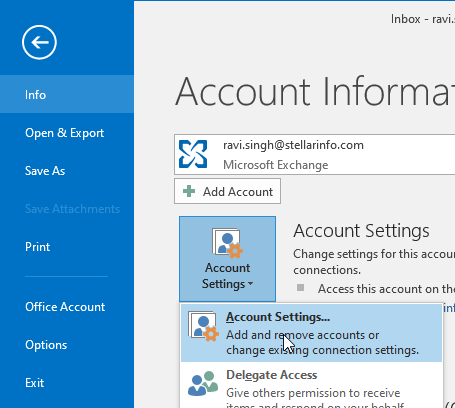
2. Verify Outlook Settings
Outlook prompts users when it fails to connect to the mailbox server and asks for the new password if changed. Sometimes, it may not prompt. Thus, you can check your email credentials and account settings manually to ensure Outlook establishes a connection with the mailbox server and synchronizes mail items to/from the server. The steps are as follows:
- In Outlook, navigate to File > Account Settings > Account Settings and select your email account.
- Click Change > More Settings.
- Verify and update the email credentials, and check that the email account settings are correct.
3. Disable Antivirus or Add Exception
If third-party apps, such as Antivirus, are not Outlook-friendly, they may affect normal Outlook operations. If your emails are not updating automatically, try disabling the antivirus program temporarily. If disabling the antivirus program fixes the problem, try adding your Outlook to the exception list of your antivirus program. Alternatively, you can uninstall it and install an Outlook-friendly or Outlook-aware antivirus program on your system to avoid the issue.
4. Toggle Cached Exchange Mode
Cached Exchange Mode is highly recommended for live Exchange Server and Office 365 email accounts to ensure Outlook performance. When the emails are not updating or you are experiencing sync errors, toggling Cached Exchange Mode may help resolve the issue. When you disable the Cached Exchange Mode, Outlook connects to the server directly and all changes made are reflected immediately across all devices and OWA. The steps to disable the Cached Exchange Mode are as follows:
- In Outlook, go to File > Account Settings > Account Settings.
- Under the Email section, click on your email account and then click Change.
- Under the Offline Settings, disable the Use Cached Exchange Mode option.
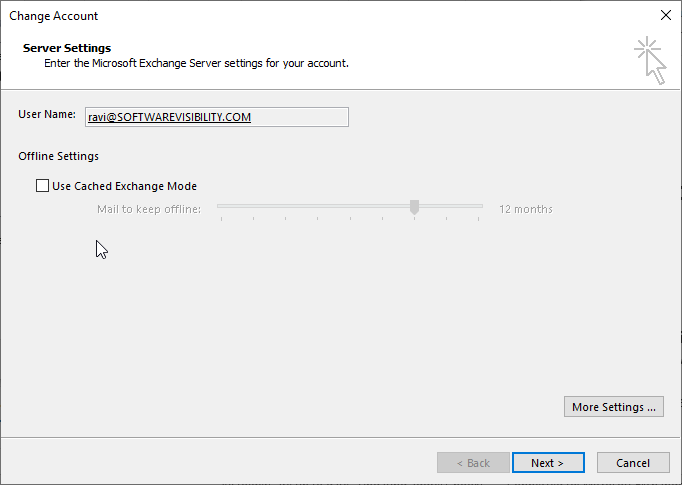
- Click Next.
- Restart Outlook for the changes to take effect.
Outlook will connect to the mailbox server in Online Mode. Any changes made are updated in real-time and reflected in the Outlook client and web app.
You can continue using your Outlook client in Online mode if you want to. Else, repeat the above steps to enable the Cached Exchange Mode. After enabling the mode, restart the system and open Outlook. Try sending a test email to check if the emails are updating automatically.
5. Enable Send Immediately Option
Send immediately when connected is an advanced option that forces Outlook to update emails as soon as it connects to the mailbox server. To enable this option, follow these steps:
- In Outlook, click File > Options > Advanced.
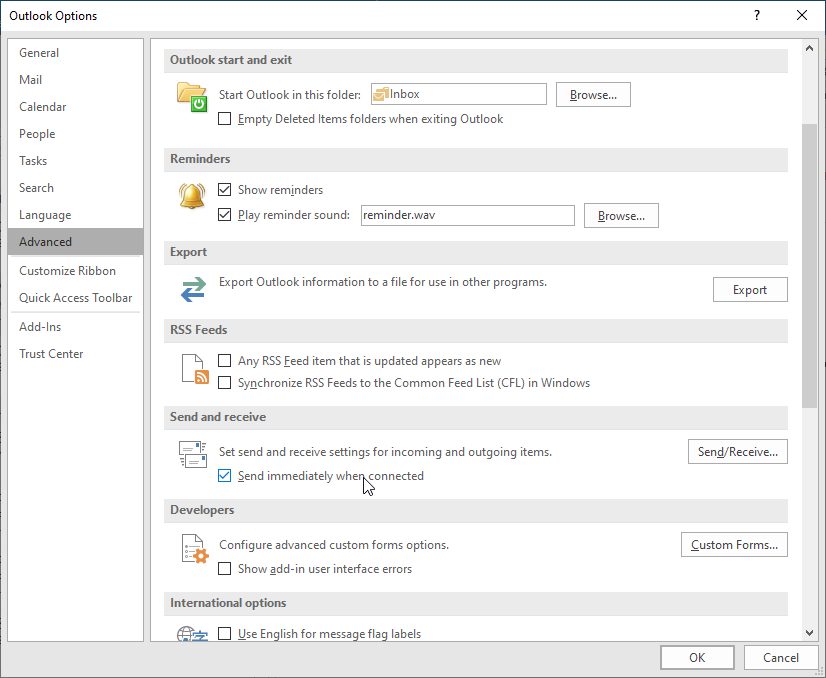
- Under Send and Receive, click Send immediately when connected
- Click OK and restart Outlook.
Your emails should automatically update. If not, continue following the solutions given below.
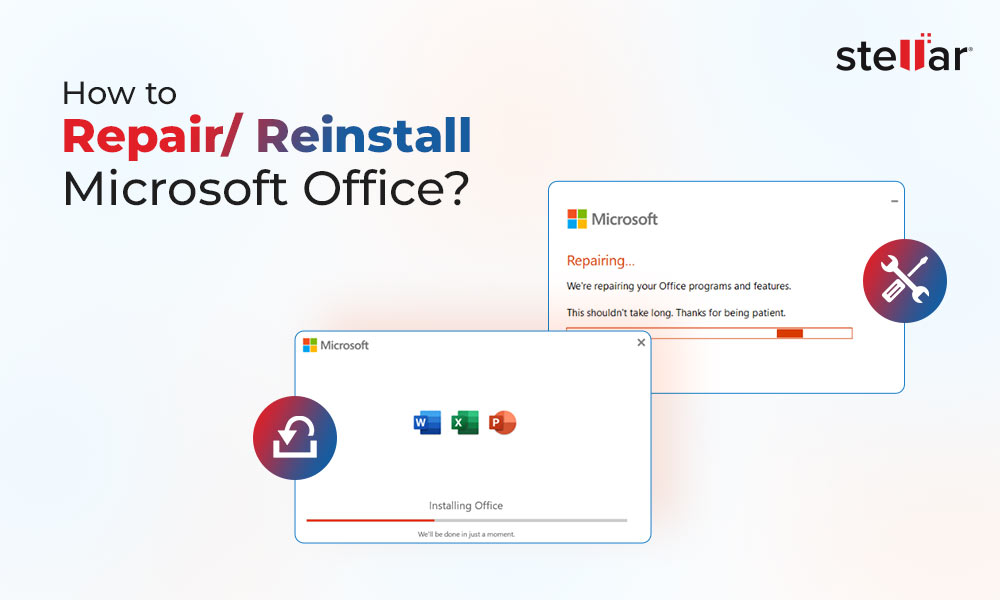
6. Repair Microsoft Office
You may also try repairing Microsoft Office to fix the emails not updating automatically issue on your Windows laptop or PC. The steps are as follows:
- Open Control Panel and click Uninstall a program under Program.
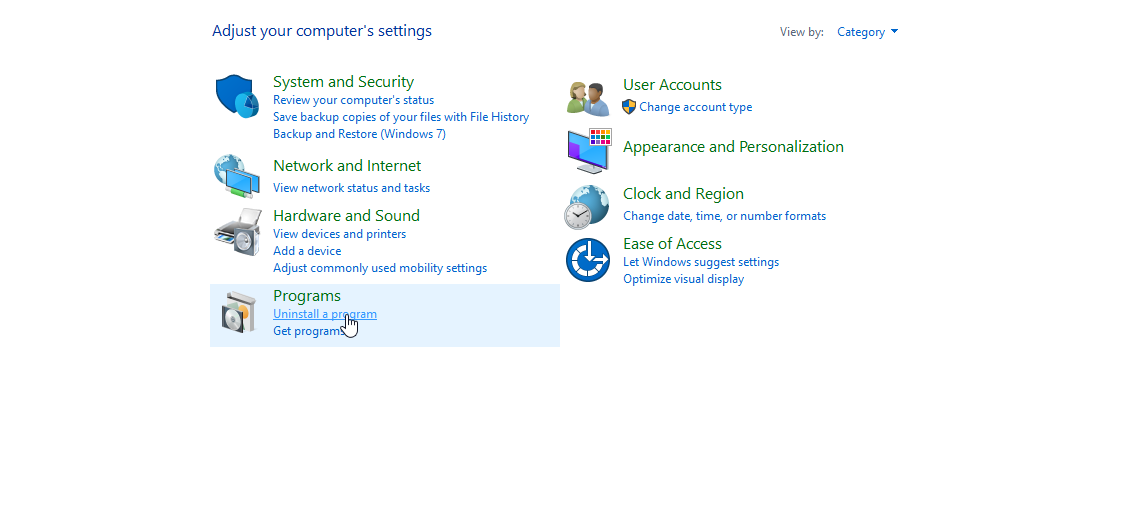
- From the list, choose Microsoft Office…. and click Change.
- From the available options, choose Repair and click Continue.
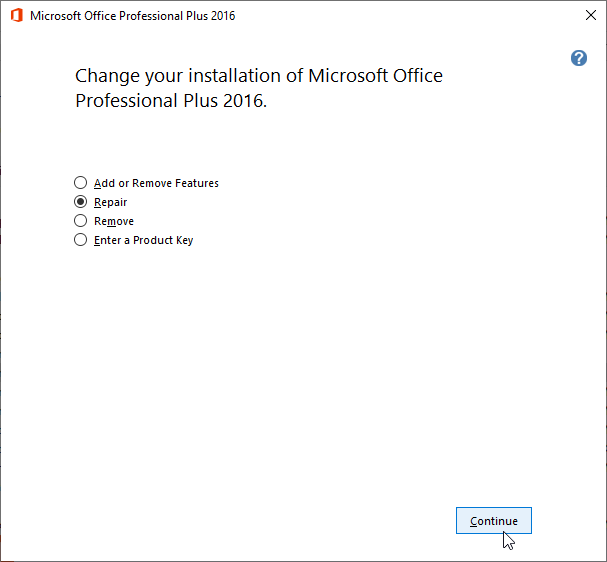
- This will start repairing the Microsoft Office (including Outlook) program files.
- After the repair, restart the system and then launch Outlook. Check if the emails are now updating.
7. Setup a New Outlook Profile
You can create a new Outlook profile, which may fix the problem (if caused by a corrupt profile). The steps are as follows:
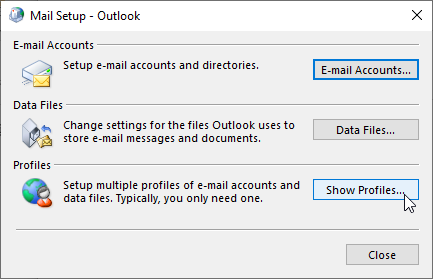
- Close Outlook and open the Control Panel.
- Search and click on Mail > Show Profiles.
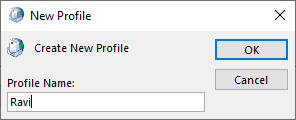
- Click Add and type the new profile name. Click OK.
- Add your email account by entering the email credentials. Continue the setup wizard to configure your email under this new Outlook profile.
- Once set up, Outlook will start the synchronization process and update all mail folders and items automatically.
After the synchronization, make sure all the mail folders are updated.
Note: If you find some mail items missing, move them to your new profile from the old one. Once all emails are moved, you may remove the old profile, which will also remove the OST file associated with that profile.
8. Recreate OST File
If the Outlook data file (OST) file becomes inconsistent, it can lead to Outlook synchronization issues that can result in outdated emails and mailbox items, delays in sending or receiving emails, slow search results, etc. In this case, try recreating the offline Outlook data file (.ost). The steps are as follows:
- Open Outlook and right-click on your email in the left pane.
- Choose Open File Location. This will open the OST file location.
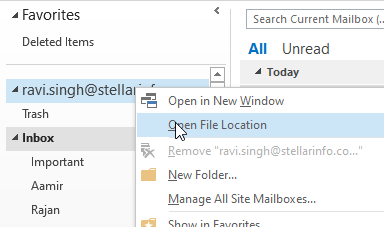
- Once located, close the Outlook client and copy the OST file to another drive or folder location.
- After copying, delete the default Outlook OST file and start Outlook.
- Outlook will check for the OST file. Since you have deleted it, Outlook will create a new OST file and synchronize all mail items and emails from the mailbox server to this local OST file. This may take a while to complete depending on your mailbox size.
After the synchronization is complete, check your mail folders and items. In case of missing mail items, you can use the backup (copied) OST file and convert it into Outlook importable PST format using Stellar Converter for OST – an advanced OST to PST converter software. After the conversion, you can import the PST file into your Outlook profile to restore missing mail items. This software can also recover deleted mail items from the OST file. You may also use the software to export the converted mail items from the OST file directly to a live Exchange or Office 365 mailbox.
Conclusion
There are different reasons why your Outlook is not updating the emails automatically. However, the above-mentioned solutions can help you fix this issue in Outlook 2021, 2019, 2016, 2013, or 2010. When you created a new profile or recreated the OST file to fix the problem, you should check your mail items and ensure there are no missing items. If there are any, then you can use Stellar Converter for OST to recover the missing items from the backup OST file. This OST to PST converter software can help you scan the orphaned (backup) OST file, search and select specific items, and save them in Outlook importable PST format.


You can enable the automatic email updates in Microsoft Outlook by following these instructions:
- Open your Outlook.
- Go to the Send/Receive
- Click on Send/Receive Groups > Define Send/Receive Groups.
- Enable the Schedule an automatic send/receive every X minutes option.
- Set the desired interval and click OK.
There are various reasons why your Outlook is stuck on Updating Inbox or Processing. Some common ones are:
- Large mailbox size
- Corrupted Outlook profile
- Slow internet connection
- Server synchronization issues
- Inconsistencies in the Outlook data file (OST)
Yes. If the mailbox size is too large, Outlook takes longer to synchronize emails, especially in Cached Exchange Mode. You can archive old emails or move emails to PST file to reduce the mailbox size. This can improve synchronization performance.

Jyoti is a Senior Content Writer at Stellar, specializes in simplifying complex concepts in an easy-to-understand way for the end users. Her core expertise lies in providing solutions related to MS Outlook, Microsoft 365 and other email platforms. She focuses on addressing real-world challenges, such as data file (mailbox) corruption and data accessibility issues, helping the users find practical and reliable solutions.
 9 min read