


Can PC Overheating Cause Data loss: Causes, Warning Signs & Fixes
July 22, 2026| 27 min read


Our content follows trusted Editorial Standards - accurate & unbiased.
Summary: Performing a clean boot is a way to resolve various system-related issues like performance issues, startup errors, installation errors, malfunctioning applications, and more. If you are about to perform a clean boot but don’t know how to do it safely, do not worry. This exhaustive guide will help you understand how to perform a clean boot safely.
Whenever there are interferences or conflicts due to background applications, startup programs, or updates & application installation errors, we use various troubleshooting methods. One such solution suggested by many experts is to perform a clean boot.
One might think a clean boot would require programming skills and whatnot. However, it is actually quite easy to perform.
If you are stuck with a lingering issue on your Windows 11 computer and wondering how to perform a clean boot, you’ve come to the right spot. In this guide, we will be discussing everything about clean boot and how to perform it safely.
A clean boot is a way to boot your computer to resolve underlying issues causing problems or errors. To begin with, a clean boot starts your computer with a limited set of startup programs, drivers, and applications necessary for the operation.
Whether it is high CPU usage, inability to install updates, or a malfunctioning application, a clean boot helps you fix most problems.
Unlike booting in safe mode, when a user performs a clean boot, it gives them more control over the services and programs running at startup. This helps isolate the root cause by disabling third-party applications and background programs.
A clean boot is performed for the following reasons –
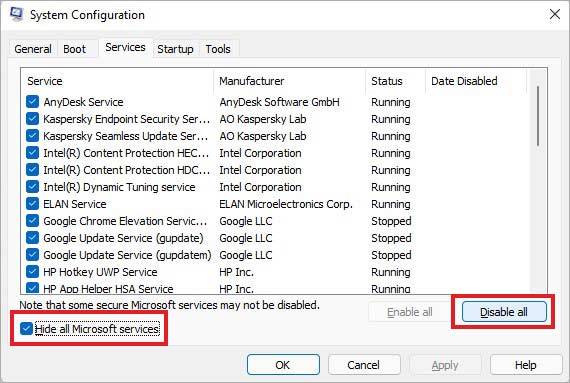
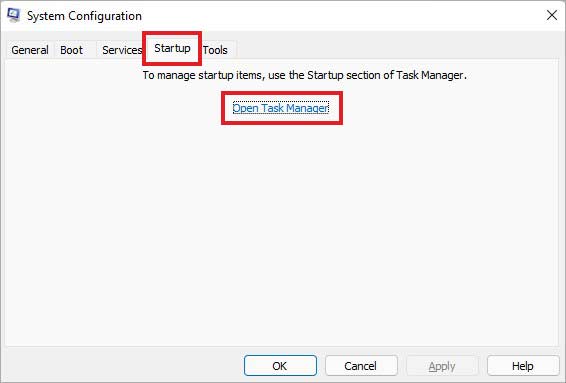
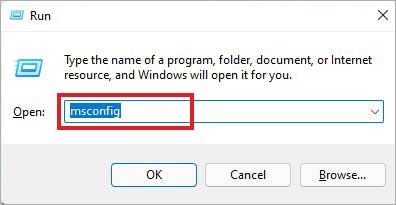
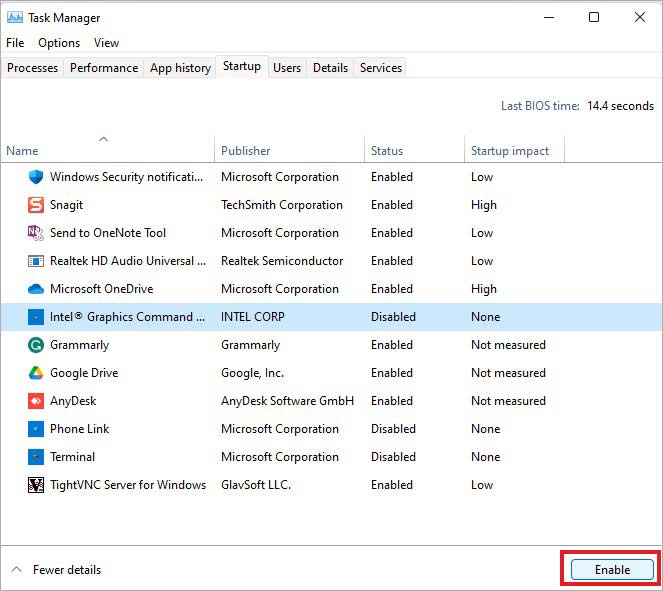
As mentioned before, a clean boot is performed to isolate and resolve the root cause of the problem. It is a very simple but time-consuming. The steps to perform it are pretty simple and straightforward. Carefully follow the steps mentioned below –


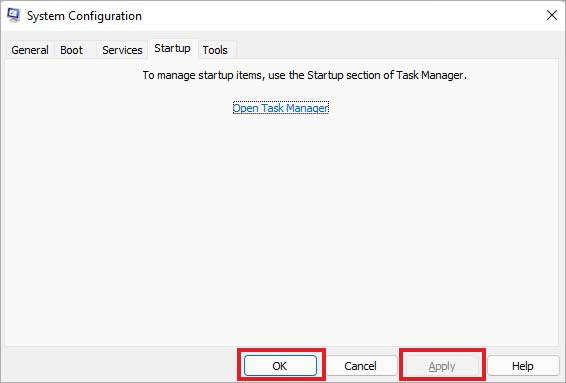
This is how you perform a clean boot on your Windows 11 computer. Doing this will restart your Windows 11 computer in a clean boot environment. Now, use it to troubleshoot the underlying cause of the problem.
NOTES:
Once you are done with troubleshooting the causes of your problem or have identified the problematic application, you will need to reset the System Configuration settings to boot your Windows 11 computer normally. Here are the steps for doing this –
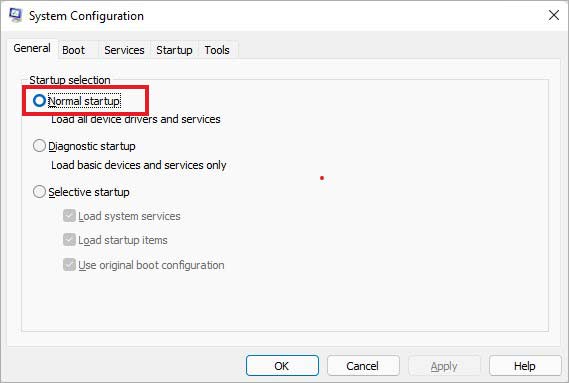
This will restart your Windows 11 computer in a normal environment. This should resolve the problem/s that you were facing prior to performing a clean boot.
A clean boot is similar to a fresh start, which helps you resolve various system-related problems by isolating and eliminating the underlying issues. While people often confuse clean boot with safe mode or use the terms interchangeably, they are distinct.
If you are trying to fix an issue on your computer but are skeptical about performing a clean boot, don’t worry. Performing a clean boot is safe and won’t harm your computer or data. We hope that this guide helped you smoothly perform a clean boot on your computer.
Senior Content Writer
This article was written by Keshav Katyal, a Content Writer at Stellar Data Recovery.
Curious about our content creation process? Take a look at our Editor Guidelines.
July 22, 2026| 27 min read

July 22, 2026| 27 min read
July 23, 2026| 27 min read


 27 min read