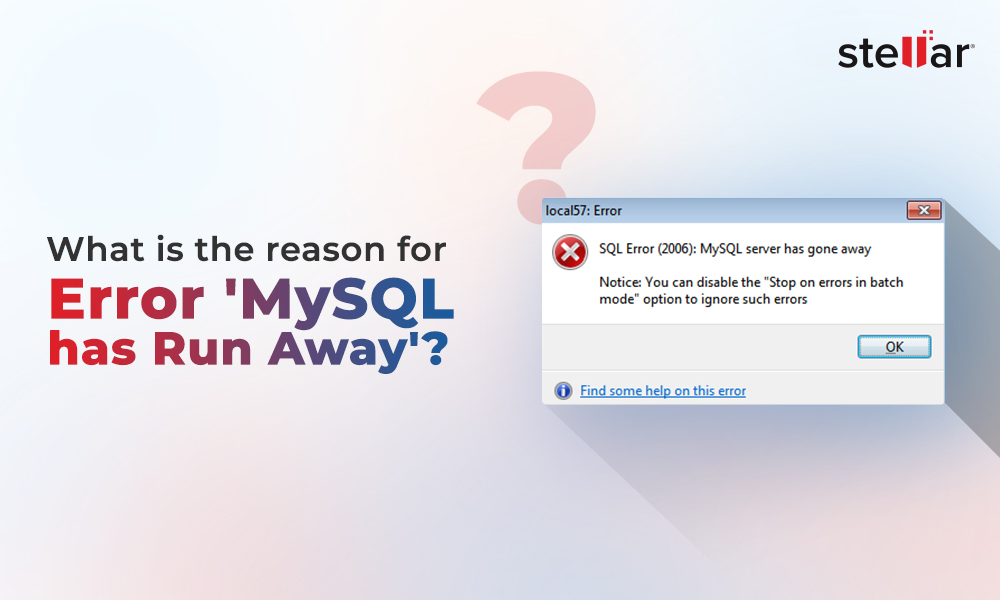
-354.jpg&url=https://www.stellarinfo.com/article/repair-mysql-database-table.php)


Identifying corruption in a database table in MySQL is relatively easy. Queries may stop working suddenly or return incomplete results. Also, you may encounter some of the following errors due to a corrupted MySQL table:
- Receiving “error nnn” from table handler
- “Record file gets crashed”
- “Unexpected end of file”
- “You cannot find tablethatshouldbethere.MYI’ file”
- “tablethatwasworking.frm is locked against change”
How Do MySQL Database Table Get Corrupted?
Following are some factors responsible for the corrupted MySQL database table:
- Fault in the underlying platform, which MySQL uses for data storage and retrieval, such as drivers, controllers, or other hardware defects
- Database shuts down abruptly in the middle of writing data to the disk
- MySQL server instance restarts suddenly
- Bugs in MySQL code
Luckily, MySQL provides built-in utilities such as 'mysqlcheck' to check the table for errors and repair it.
Repairing MySQL Database Tables Step-by-Step
Caution: You must back up the database before performing a repair. This will help reduce the risk of further data loss.
Step 1: Determine MySQL Engine Type for a Table
Note: Skip to Step 2 if you know the database engine being used by the database table(s).
Execute the following MySQL query to know which storage engine a table is using:
| SELECT TABLE_NAME, ENGINE FROM information_schema.TABLES where TABLE_SCHEMA = 'your_database_name'; |
Step 2: Check Table for Errors
If MySQL server is running, use the mysqlcheck command-line utility to check (-c), repair (-r), analyze (-a), and optimize (-o) tables.
To check for errors in a specific table of a particular database in your Linux distribution, use the following command:
| mysqlcheck -c database_name table_name; |
| mysqlcheck -c database_name table_name -u root -p; |
| mysqlcheck database_name -u root -p; |
Note: In the above command, replace ‘database_name’ with the name of MySQL db you are using. And, replace the ‘table_name’ with the name of the table you want to repair. It is also important for you to know that ‘-u’ stands for username and ‘-p’ stands for password.
If a table is not corrupt, mysqlcheck displays ‘OK’ for that table. But, if it reports an error for a table, you will need to repair it.
Step 3: Repairing the Corrupt Table
Note: Make sure you have twice the disk space as the original table to repair MySQL tables, you may run out of disk space even before initiating the repair procedure.
3.1.Repair MyISAM Table
If you want to fix the table without unwanted database downtime, you need to repair MySQL database online. To do so, use the following command:
| mysqlcheck –r database_name table_name –u root –p; |
If this doesn’t help in repairing the tables or the server daemon is not running, repair MyISAM table by using myisamchk offline:
- Stop the MySQL server from running by using the following command for your Linux based system:
| service mysqld stop |
- Next, run the following command:
| cd /var/lib/mysql |
- Change to the directory where the corrupted table database is located. For instance, if the database is named sample, type cd sample.
| cd /var/lib/mysql/sample |
- Enter the following command, replacing table_name with the name of the specific table you want to check:
| myisamchk table_name |
- Type the following command for checking all the tables in a MySQL db:
| myisamchk *.MYI |
Note: If none of the above command work, try deleting temporary files as they may be preventing myisamchk from running correctly. For this, change back the directory to ‘/var/lib/mysql’, and then type this command: ls */*.TMD. If any temporary files with the extension .TMD files get listed, delete those files by using the command: rm */*.TMD
- Now, try re-running the myisamchkcommand and type the below statement to fix the corrupt table:
| myisamchk --recover table_name |
- Restart the MySQL server:
| service mysqld start |
Test the repaired database tables.
3.2.Run InnoDB Recovery Process
To repair the MySQL InnoDB table, try running the InnoDB recovery process. For this, do the following:
- Open the configuration file (my.cnf) on your server, and locate [mysqld] section
- Add the following line of code before restarting the server:
| [mysqld] innodb_force_recovery=1 |
Note: By default, the value of innodb_force_recovery is ‘0’. You may need to change the value to ‘1’ to start the InnoDB engine and dump MySQL tables; you may need to increase the value incrementally (from 1 to 6). But, be wary, using innodb_force_recovery value of 4 or greater involves risk of data corruption.
- Save the changes made to cnf file and close it. Try restarting the MySQL service again.
- If the MySQL service gets started, type the following command to dump all of the MySQL databases to a single file:
| mysqldump -u -p --all-databases > dump_databases.sql |
Note: Change the dump file’ dump_databases.sql’ used in the example above to anything you want.
- Next, disable the InnoDB recovery mode by using this line of code:
| #innodb_force_recovery=... |
- Again save the changes made to the configuration file. Once saved, start the MySQL server.
- Lastly, restore the db from the mysqldump that you have created in step 4:
| mysql> source dump_databases.sql |
Test the restored database and see if you can access the corrupted table.
Also read: Best Ways to Repair InnoDB Table Corruption in MySQL
Recommended Way to Repair MySQL Database Tables
Stellar Repair for MySQL is professional software that helps repair MyISAM and InnoDB tables without downtime. It helps in restoring all inaccessible database objects, including tables, primary keys, triggers, views, etc. in their original format. Further, the software helps repair database tables in both Linux and Windows machines.

Steps to Repair MySQL Database Table with Stellar Repair for MySQL Software
Step 1: Launch Stellar Repair for MySQL software on Windows/Linux based system after installation.
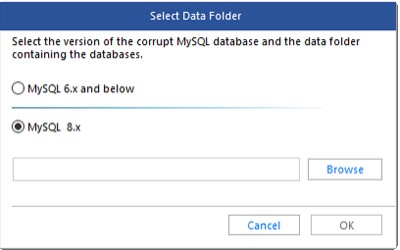
Step 2: The software’s main interface window is displayed with the Select Data Folder dialog box. Select the database version you are using, click browse to select the db file you want to repair, and then click OK.
Step 3: In Select Database window that appears, choose the database that you want to repair.
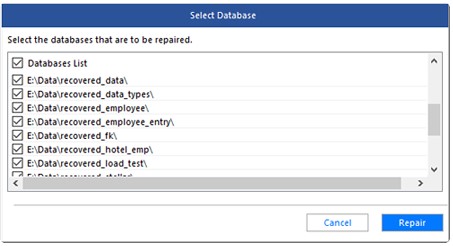
Step 4: To repair mysql database, click Repair.
Step 5: When the Repair Complete message box gets displayed, click OK.
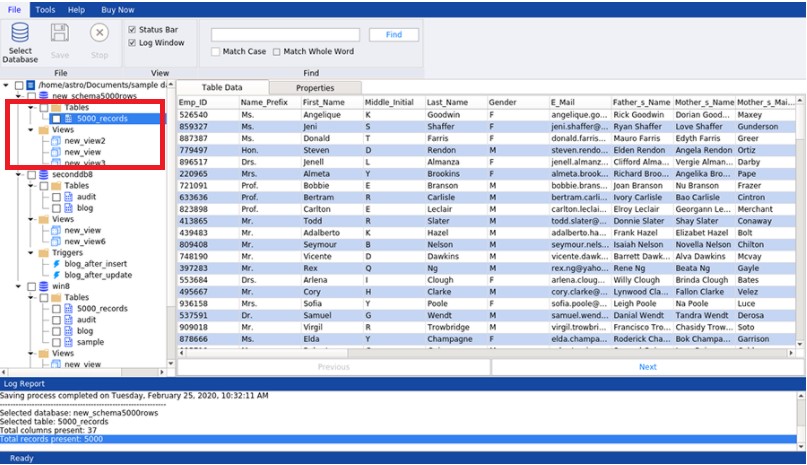
Step 6: The software displays a preview of repaired db tables and other recoverable components. Select the tables you want to repair and recover, and then click Save on the File menu.
Step 7: The Save Database dialog box is displayed. Choose MySQL from the Save As options, enter the required details to Connect to Server, and then click Save.

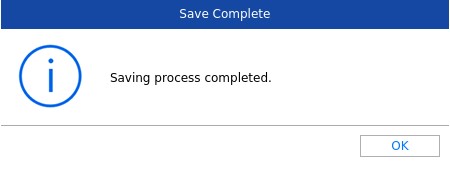
Step 8: Click OK when the ‘Saving process completed’ message appears.
All the selected tables of MySQL database will be repaired and saved.
Conclusion
Issues such as hardware failure, abrupt system shutdown in the middle of writing to a disk, bug in MySQL code, etc. can corrupt database tables in MySQL. You can manually repair MySQL database tables – step-by-step by following the instructions explained in this article. However, the manual method to repair multiple tables requires time and effort. It may also lead to increased database downtime. But, you can save your administrative time, effort, and resources to fix corrupted tables by using an advanced MySQL database repair software such as Stellar Repair for MySQL. It can fix corruption in MyISAM as well as InnoDB tables and restore them to their original state with minimal downtime.


-in-MySQL-to-Restore-Corrupted-Databases-1746.jpg)
 5 min read