Mail flow configuration is an important step to allow client access after installing the Exchange Server 2013, 2016, or 2019 in your organization. Users can access their email accounts and send or receive emails via clients, such as Outlook, ActiveSync devices, or the web only after configuring the mail flow.
Configuring mail Flow in Exchange Server
To configure the mail flow in Exchange Server, you can use the Exchange Management Shell (EMS) and Exchange Admin Center (EAC). Below are the steps you can follow to configure the mail flow using the Exchange Admin Center (EAC) as per your organization's requirements,
Step 1: Add Accepted Domains
By default, Exchange Server adds the AD domain used during the Setup /PrepareAD. However, if you want to add additional domains, you can use the accepted domains under the mail flow option in the Exchange Admin Center (EAC).
You can add the following types of accepted domains,
- Authoritative Domains
- Internal Relay Domains
- External Relay Domains
To create and add accepted domains, follow these steps,
- Click + icon under the accepted domains section in EAC> mail flow, click + icon.
- Enter a unique name, the domain name (abc.com), and then select whether it is Authoritative, Internal Relay, or External Relay.
- Click Save.
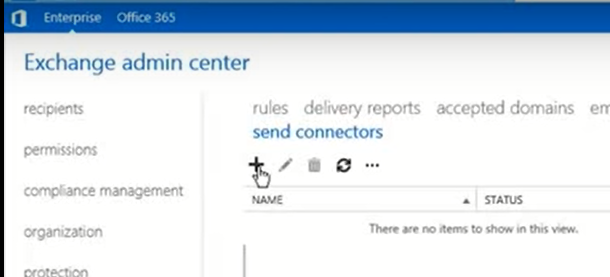
Step 2: Create Send Connectors
By default, implicit send connectors are configured to send emails to others within the organization. However, administrators need to configure a Send Connector in Exchange Server to send emails outside the organization.
You can configure Custom, Internal, Internet, and Partner Send Connectors in Exchange Server to allow users to send emails to other non-exchange mail servers, route emails through Edge transport server, send emails to the internet, or third-party servers via TLS encryption and SSL authentication respectively.
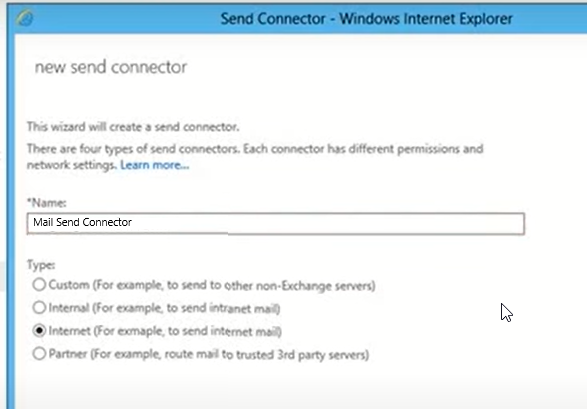
Below are the steps to create the Internet Send Connector,
- Open Exchange Admin Center (EAC) and go to mail flow
- Click send connectors
- Click + (add icon). A new Send Connector wizard will open.
- Give it a name. Be descriptive but keep it short.
- Select Type: Internet and click next. You should choose Internet Send Connector to allow users to send emails to the internet (outside organization).
- You can choose the default MX record associated with the recipient domain, a DNS Send Connector, and click next.
You may also select Route mail through smart hosts, which is essentially an SMTP server that belongs to your service provider (ISP) or third-party SMTP provider (emails are delivered on your server's behalf).
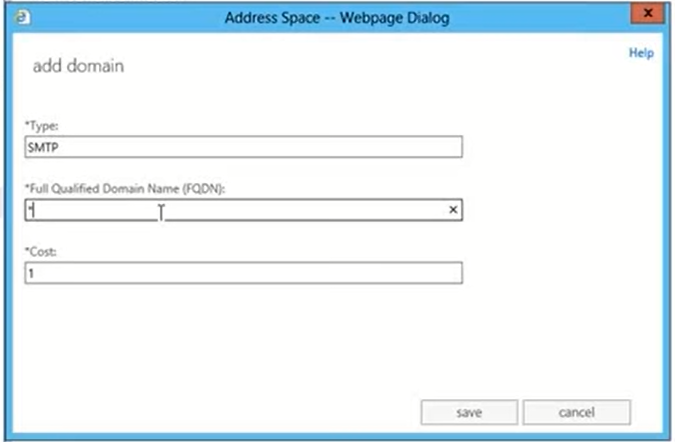
- Click + icon and then add the SMTP send connector. Enter SMTP in Type and your domain name in the FQDN. Add * in FQDN if you want to allow all outgoing mail from this send connector. Click Save and then click
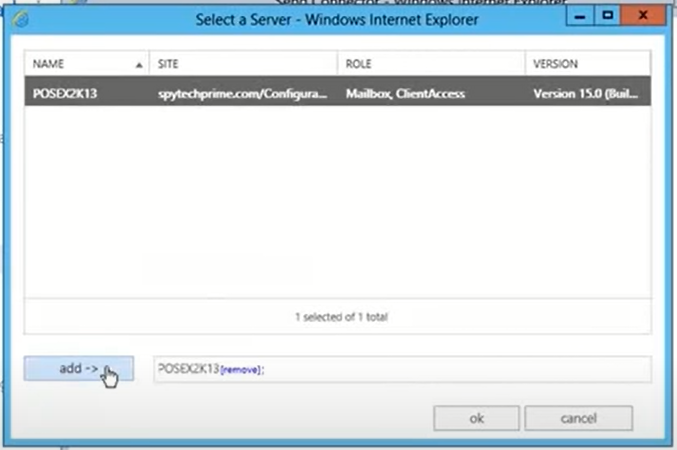
- Click + to add the send connector to your Exchange Server, select it, click add -> and then click OK.
- Click Finish
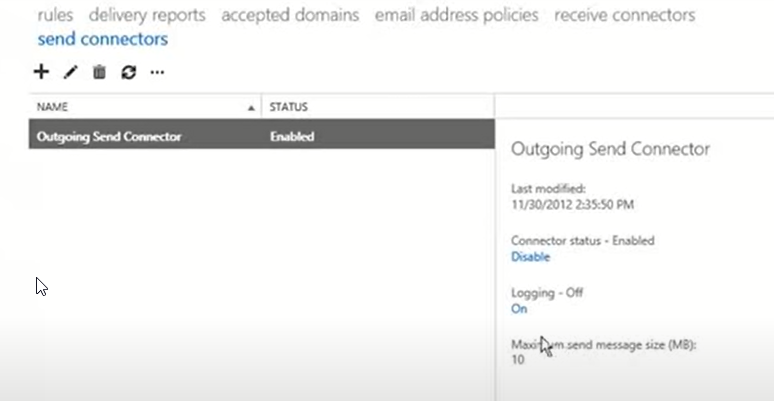
Additionally, you can change the Maximum send message size (MB) value as per your organization's policy.
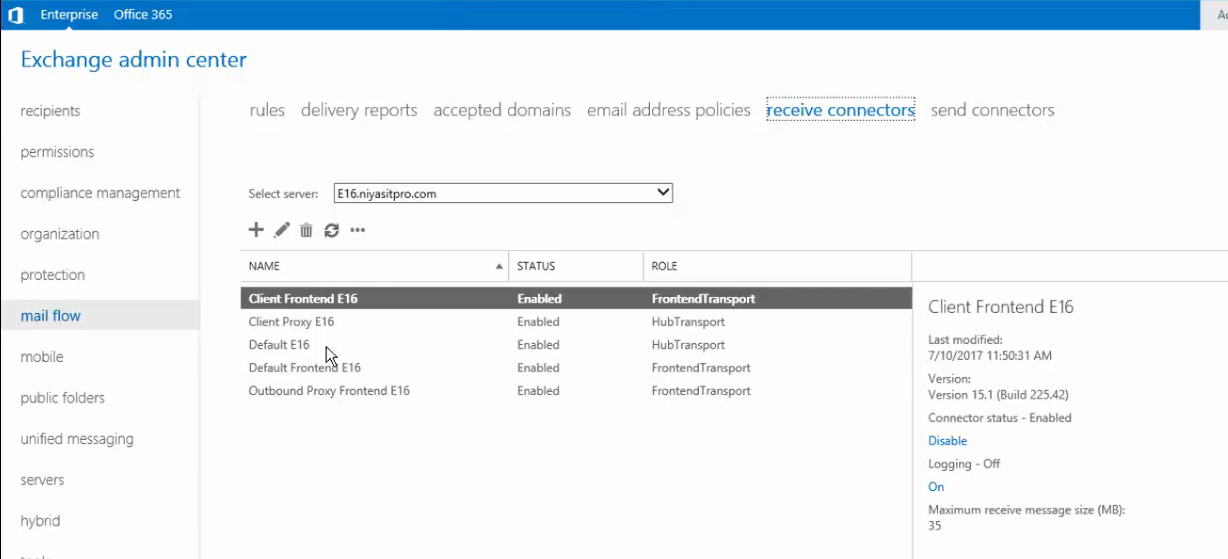
Step 3: Create Receive Connectors
Receive Connectors accept incoming emails from external email servers on the internet and control the incoming SMTP mail flow.
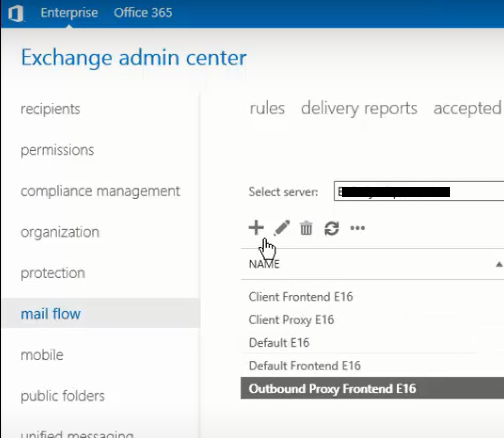
There are a few receive connectors created and enabled by Exchange Server during the setup installation by default.
- Client Frontend to accept connections from SMTP clients at TCP Port 587. IMAP and POP email connections use this.
- Client Proxy is a hub transport service that listens on port 465 and accepts front-end mail. They are used for proxy IMAP and POP connections.
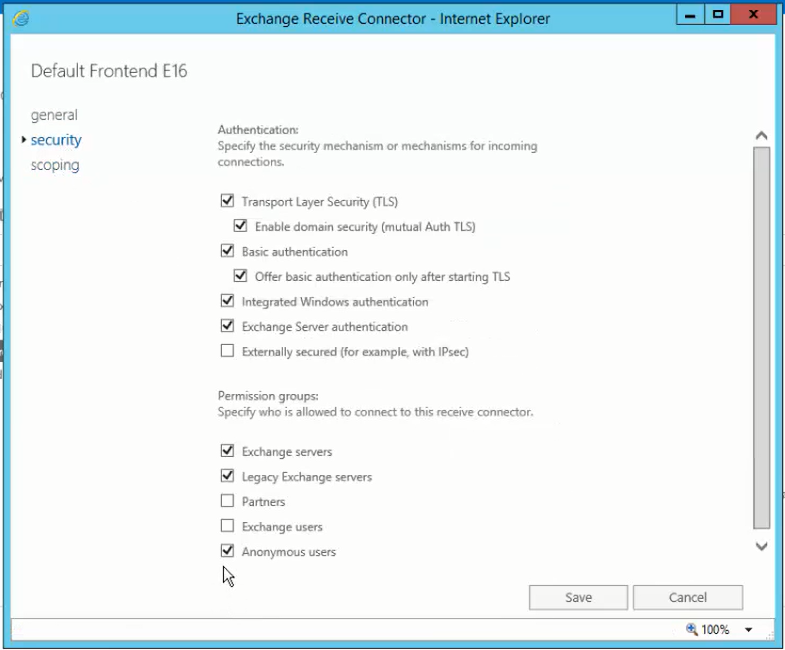
- Default Frontend accepts the anonymous SMTP connections from external email servers at TCP port 25. It sends the received emails to the hub transport receive connector.
- Outbound Proxy Frontend at port 717 accepts the authenticated connections encrypted with a self-signed Exchange certificate from the transport service on the server. This Is active if you have enabled the proxy via CAS in send connector.
You can either edit them or add new receive connectors to customize receive connectors and add security.
The steps are as follow,
- Open Exchange Admin Center and go to mail flow> receive connectors.
- The default receive connectors are displayed. Click on any receive connector, such as Default Frontend, and click the edit icon to see the properties.
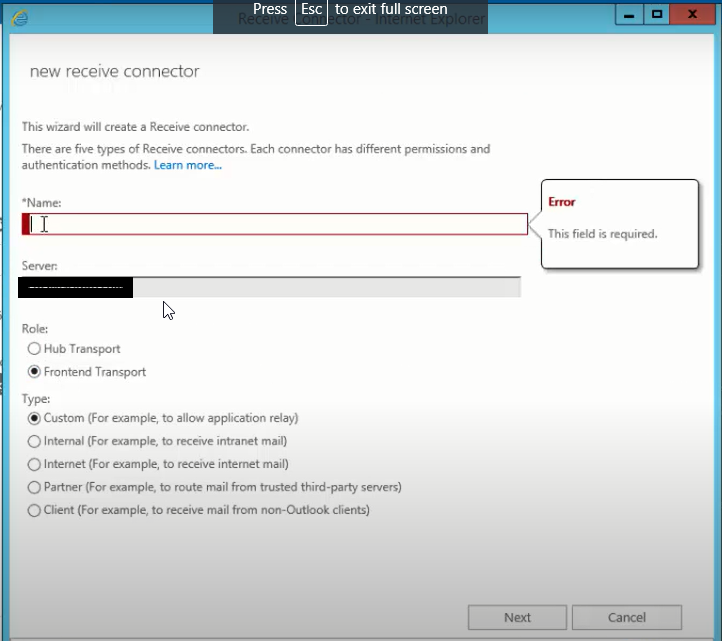
- To create a new receive connector, click the + icon under mail flow> receive connectors.
- Give it a name, and then choose a role and type of the receive connector you want to create. Click next.
- Add or specify network adapter if you have any for internet and intranet connections using the + icon and save
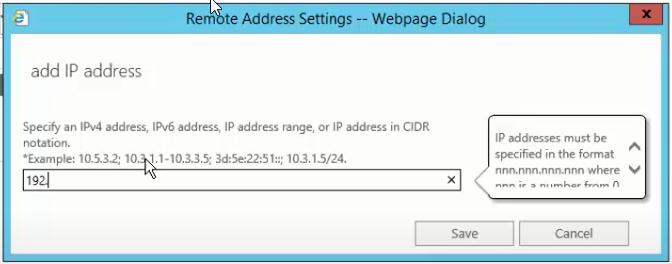
- After adding the IP address range, click finish.
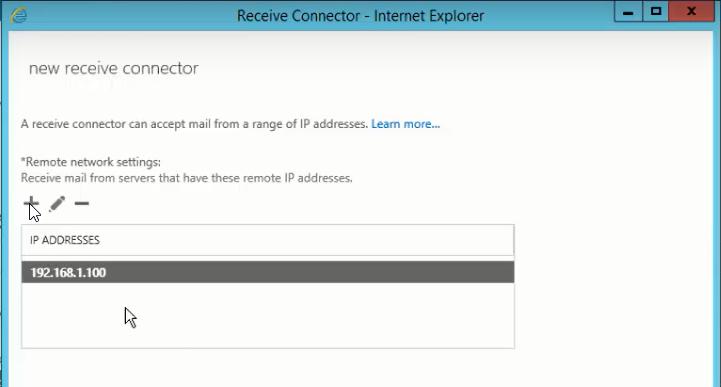
- You may also keep it default if you have only one network adapter and click finish.
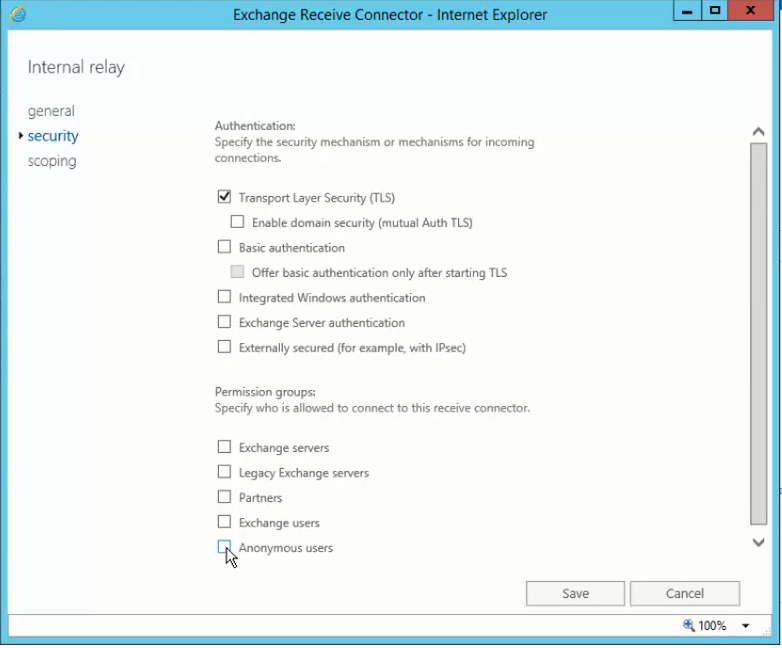
- After adding the receive connector, click the receive connector and click the edit button and edit the security settings based on the receive connector.
Step 4: Define Email Address Policies
Update the default email address policy with the accepted domain to ensure every recipient has the domain name added to the email address. To add or edit/update the default email address policy, follow these steps,
- In EAC, go to mail flow> email address policy.
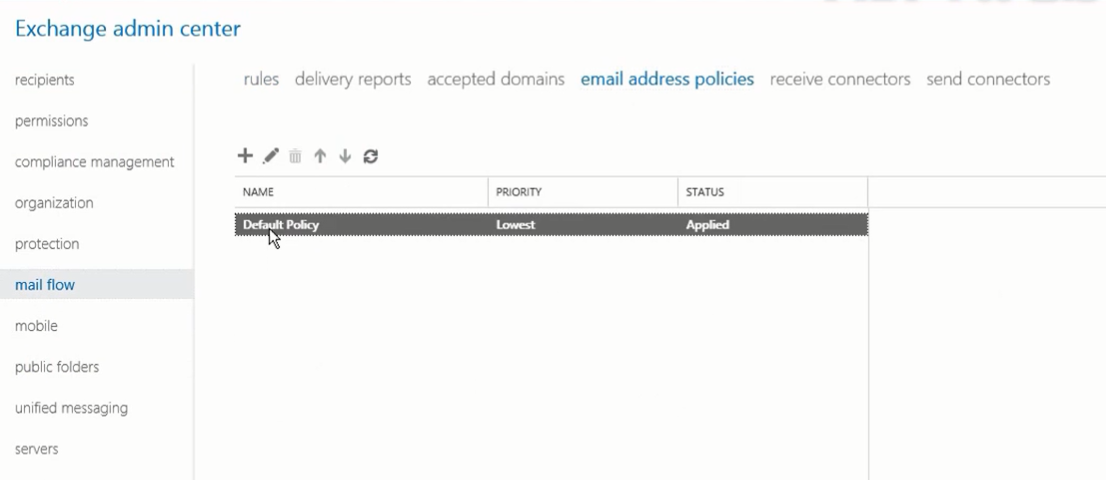
- Click on the Default Policy email address policy and click the edit button.
- Click email address format and then add your email address format or edit the existing one if you want to change it.
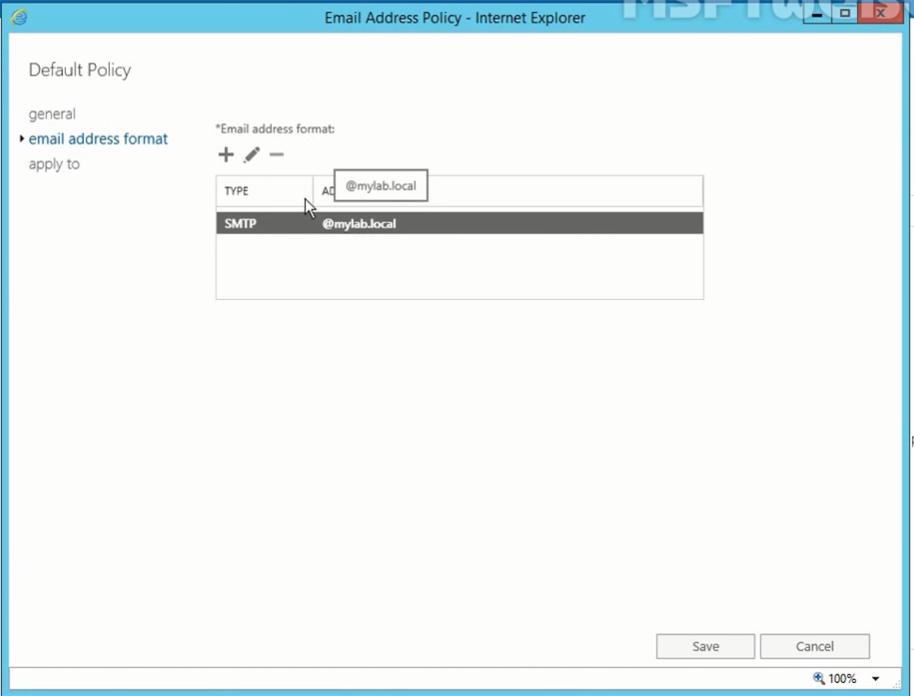
- Save the changes.
Step 5: Add Rules (If Any)
You may also add mail flow rules or transport rules to take actions on emails flowing (transit) in your organization based on certain conditions, properties, and exceptions. You can multiple rules, test them, and enforce them in your organization.
Using logic, such as AND and OR, you may create rules based on multiple conditions, properties, exceptions, and actions.
You may also define who can send emails or not or can receive emails from the internet, etc.
To create a rule, follow these steps,
- Open Exchange Admin Center and go to mail flow> rules.
- Click the + icon and then choose to Create a new rule… You may also select other options to configure a rule.
- Enter a name for the rule, choose a condition in the Apply this rule if… and then action in Do the following… dropdown. You may also configure other settings using More options… and click Save.
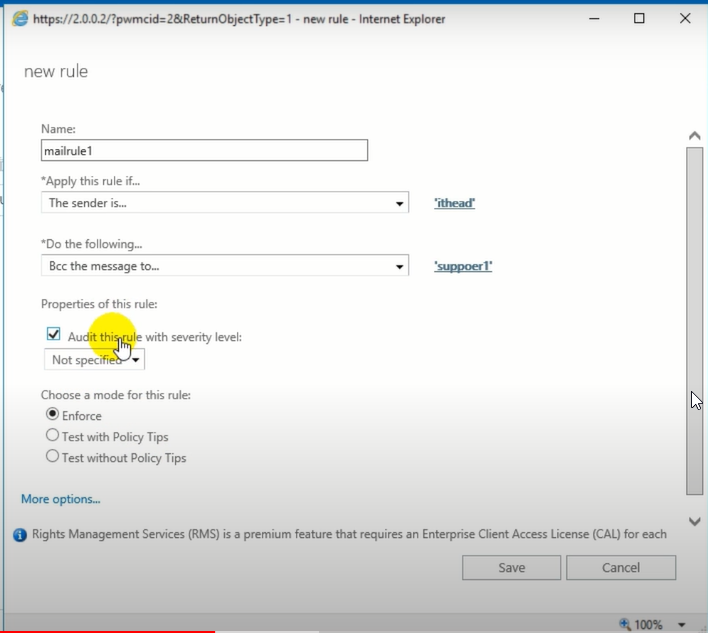
- This will create the rule and will be enforced based on the settings you chose.
The above rule defines that if a user receives an email, a copy will be sent to the selected user(s). Similarly, you can choose desired options from the drop downs and create multiple rules according to your organization's needs and work process.
Conclusion
In this article, we shared information on mail flow configuration after installing Exchange Server in your organization. Once configured, you can create user profiles and mailboxes in the Exchange Server mailbox database, and grant users access to sign in and start using their email accounts for sending and receiving messages.
If you have set up a new Exchange Server or upgraded to a newer version, you need to migrate the mailboxes from your old server. To move all mailboxes quickly and efficiently, use an Exchange migration software, such as Stellar Migrator for Exchange.
The software helps you seamlessly migrate mailboxes from your old Exchange Server to the new Live Exchange or Office 365 in a few clicks. It automatically maps users and mailboxes, ensures minimal downtime, and simplifies the entire migration process.


 6 min read