From time-to-time, you need to upgrade your Exchange Server to improve the features, add compatibility with new software, and secure the server against vulnerabilities and malware/virus attacks. To migrate from old Exchange Server to a new version, you need to make a hop installation to a version before migrating to the new version. However, with Exchange 2016 to 2019 migration, there is no need to hop migrate as both Exchange Server 2016 and Exchange Server 2019 can coexist in the same environment.
Step-by-Step Process for Exchange 2016 to 2019 Migration
Here is the stepwise procedure to migrate from Exchange Server 2016 to 2019:
Coexistence Matrix
Firstly, you must check the coexistence matrix. Your Exchange Server 2016 must be installed with Cumulative Updates 11 (CU11). If you have more than one server in your network, all the servers must be at the same level.
Upgrade Lync Server
If you are using Lync Server with your Exchange Server, you need to upgrade it to Skype for Business 2019 or not use the integration at all. In Exchange Server 2019, the Unified Communication has been deprecated.
Active Directory Schema
You need to ensure that your Active Directory Schema is in top shape and the domain and forest level must be at least Windows 2012 R2 or higher.
Setting up the environment for the new Exchange Server 2019 to process Exchange 2016 to 2019 migration:
Operating System
The operating system needs to be Windows Server 2019 Standard or Datacenter. The installation can be set up on a physical or virtual machine, depending on your current computer.
Prerequisites
After the operating system has been installed, you need to make sure that all prerequisites have been installed so that you do not face any hiccups during the setup. You can install them one-by-one using the Server Manager. Alternatively, you can use the below PowerShell script to install all pre-requisites at one go.
Open a PowerShell window as Administrator and execute the following:
Install-WindowsFeature NET-Framework-45-Features, RSAT-ADDS, RPC-over-HTTP-proxy, RSAT-Clustering, RSAT-Clustering-CmdInterface, RSAT-Clustering-Mgmt, RSAT-Clustering-PowerShell, Web-Mgmt-Console, WAS-Process-Model, Web-Asp-Net45, Web-Basic-Auth, Web-Client-Auth, Web-Digest-Auth, Web-Dir-Browsing, Web-Dyn-Compression, Web-Http-Errors, Web-Http-Logging, Web-Http-Redirect, Web-Http-Tracing, Web-ISAPI-Ext, Web-ISAPI-Filter, Web-Lgcy-Mgmt-Console, Web-Metabase, Web-Mgmt-Console, Web-Mgmt-Service, Web-Net-Ext45, Web-Request-Monitor, Web-Server, Web-Stat-Compression, Web-Static-Content, Web-Windows-Auth, Web-WMI, Windows-Identity-Foundation
Update the Server
Since you are installing certain .NET components, it is best to fully update the server before continuing the installation.
Start the Active Directory Schema
Once the server is fully updated, you need to insert the Exchange Server 2019 media or attach the ISO to your server and start the Active Directory Schema in preparation of the installation.
Open a Command Prompt or PowerShell window as Administrator and execute the following:
Setup.exe /PrepareSchema /IAcceptExchangeServerLicenseTerms
Setup.exe /PrepareAD /OrganizationName:"Contoso" /IAcceptExchangeServerLicenseTerms
Note: Make sure to replace ‘Contoso’ with your company name. If you are installing Exchange Server 2019 CU11 or later, use DiagnosticDataOff or DiagnosticDataON switch.
For instance,
Setup.exe /PrepareSchema /IAcceptExchangeServerLicenseTerms_DiagnosticDataOff
Setup.exe /PrepareAD /OrganizationName:"Contoso" /IAcceptExchangeServerLicenseTerms_DiagnosticDataOff
With this command, you will prepare the Active Directory to be friendly with your new Exchange Server 2019 implementation.
At this stage, all the prerequisites have been installed, all the updates and security patches have been installed, and the Active Directory Schema has been prepared. Now, you can start the installation of your Exchange Server 2019.
Steps for Installation of Exchange Server 2019
- Open Setup.exe from the media or ISO.
- In the first screen, you can enable the feature to connect to the internet to check for any important Exchange updates before proceeding.
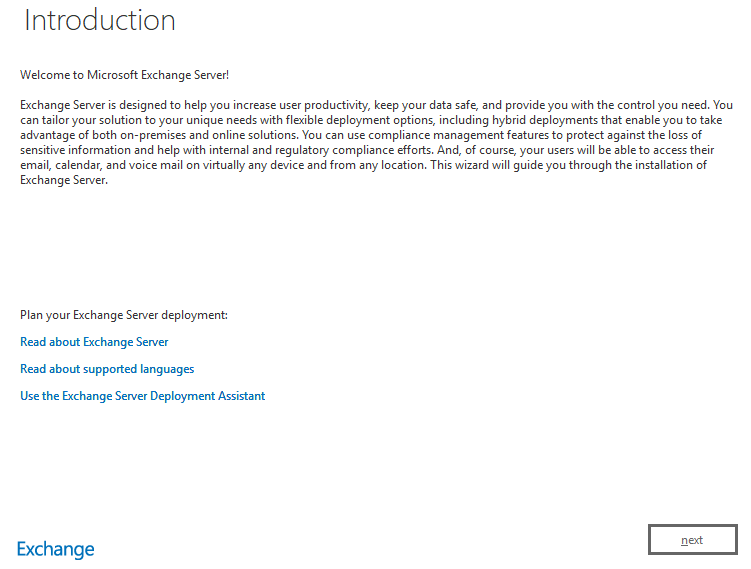
- Click Next.
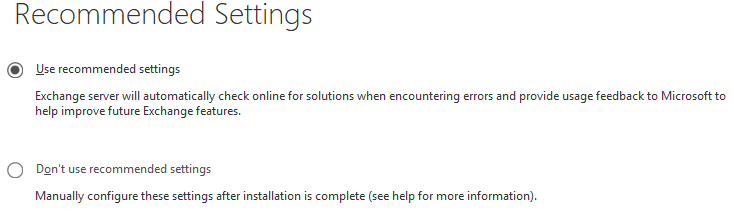
- In the next screen, make sure that you do not use the recommended settings.
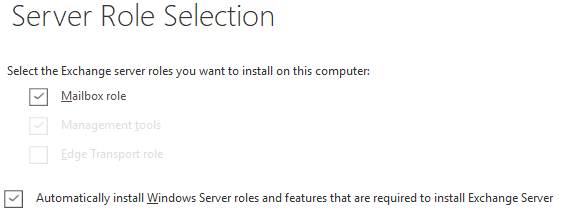
- In the next screen, make sure to tick the Mailbox Role and Management Tools. Also, tick the option to automatically install any missed features.
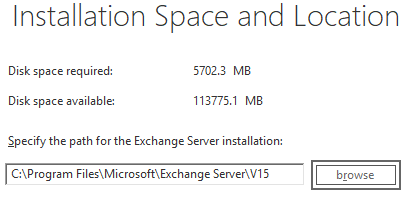
- Choose the installation path for the Exchange Server installation.
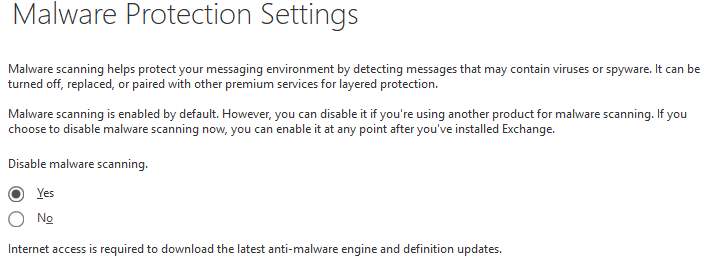
- In the Malware Protection Settings window, click on ‘No’ for now. This can be enabled later.
- After this, the readiness check is executed to make sure that all is fine. If all is fine, the installation will begin. From now on, there is no intervention needed.

- Next, you need to update the Service Connection Point which is the record that will direct the users to the current Exchange Server.
Set-ClientAccessService -Identity "ExSrv01" -AutoDiscoverServiceInteralUri
Note: Replace ExSrv01 with your Exchange Server 2016 server name.
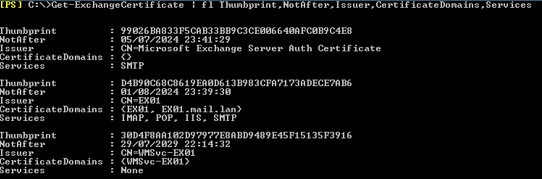
- The next step is to import the certificates into the new server. You need to check the current certificates and see from the list which are the active ones. From the Exchange Management Shell, run the below command:
Get-ExchangeCertificate | fl Thumbprint,NotAfter,Issuer,CertificateDomains,Services
- Run the below command to export the needed certificates and specify the password for the transfer.
$CertPass = ConvertTo-SecureString "LetMeIn" -AsPlainText –Force
Export-ExchangeCertificate -Thumbprint C87C1CBA43733D177B2679BC825808C7BECC659B -FileName C:\temp\Exchange2016Certificate.pfx -Password $CertPass | Out-Null
- Keep a note of the password and copy the files exported on the Exchange Server 2019. Now, run the below command.
$CertPass = ConvertTo-SecureString "LetMeIn" -AsPlainText –Force
Import-ExchangeCertificate -FileName C:\temp\Exchange2016Certificate.pfx -PrivateKeyExportable $true –Password $CertPass | Enable-ExchangeCertificate –Services POP,IMAP,IIS,SMTP –DoNotRequireSsl
- This will import all the certificates. The next step is to redirect all URLs to point to the new Exchange Server 2019, like Offline Address Book, ECP, and others.
Get-OutlookAnywhere -Server srvexc2019 | Set-OutlookAnywhere -InternalHostname ex02.mydomain.com -InternalClientAuthenticationMethod Ntlm -InternalClientsRequireSsl $true -ExternalHostname ex02.mydomain.com -ExternalClientAuthenticationMethod Basic -ExternalClientsRequireSsl $true -IISAuthenticationMethods Negotiate,NTLM,Basic
Get-EcpVirtualDirectory -Server srvexc2019 | Set-EcpVirtualDirectory -InternalUrl https://ex02/mydomain.com/ecp -ExternalUrl https://ex02.mydomain.com/ecp
Get-OwaVirtualDirectory -Server srvexc2019 | Set-OwaVirtualDirectory -InternalUrl https://ex01.mydomain.com/owa -ExternalUrl https://ex02.mydomain.com/owa
Get-WebServicesVirtualDirectory -Server srvexc2019 | Set-WebServicesVirtualDirectory -InternalUrl https://ex02.mydomain.com/EWS/Exchange.asmx -ExternalUrl https://ex02.mydomain.com/EWS/Exchange.asmx
Get-ActiveSyncVirtualDirectory -Server srvexc2019 | Set-ActiveSyncVirtualDirectory -InternalUrl https://ex02.mydomain.com/Microsoft-Server-ActiveSync -ExternalUrl https://ex02.mydomain.com/Microsoft-Server-ActiveSync
Get-OabVirtualDirectory -Server srvexc2019 | Set-OabVirtualDirectory -InternalUrl https://ex01.mydomain.com/OAB -ExternalUrl https://ex02.mydomain.com/OAB
Get-MapiVirtualDirectory -Server srvexc2019 | Set-MapiVirtualDirectory -InternalUrl https://ex02.mydomain.com/mapi -ExternalUrl https://ex02.mydomain.com/mapi
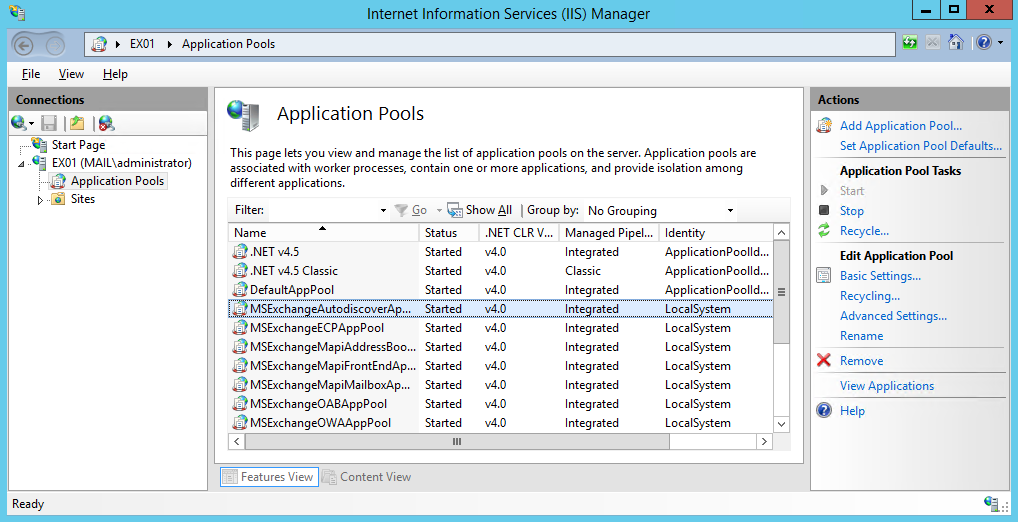
- Open IIS and expand Application Pools. Click on Recycle.
- Contact the network team to change the direction of all the outside ports from the Exchange Server 2016 to the IP address of the Exchange Server 2019. From the Exchange Sever PowerShell, point the SCP record to the 2019 server.
Set-ClientAccessService -Identity "ExSrv02" -AutoDiscoverServiceInternalUri
- Now you can start with the migration of the mailboxes.
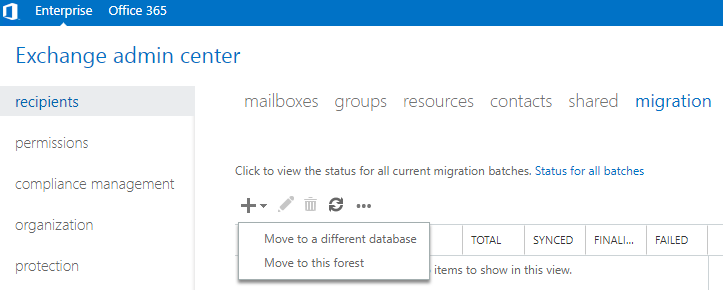
- Make sure that you prepared and created the mailbox databases on the new server. Open Exchange Admin Center, click on Recipients, click on the + button, and then click on ‘Move to a different database’.
- Select the mailboxes to move. It is best to first move a small mailbox to test, before proceeding with all the mailboxes.
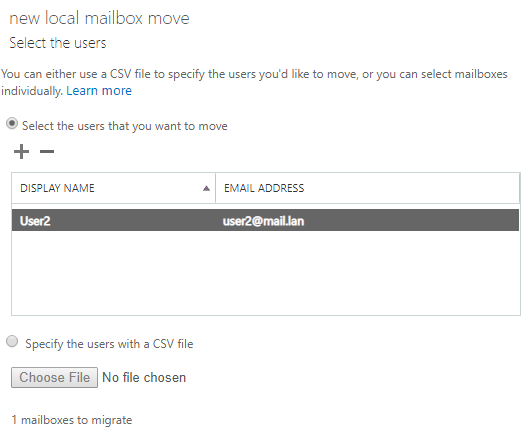
- Specify what to move, like mailbox only, archive only, or all the mailboxes. Select the target server and the target database.
Once all is complete and you have shifted all the mailboxes, you can easily uninstall Exchange Server 2016 from the current server and afterwards decommission it.
Final Thoughts
You can successfully migrate from Exchange Server 2016 to Exchange Server 2019 by following the above-mentioned Exchange 2016 to 2019 migration process. However, things may go wrong and you may face issue with the server or network during the move or installation of Exchange Server. In such situations, you can rely on a Exchange to Exchange Migration tool, such as Stellar Migrator for Exchange. The tool can migrate mailboxes directly from Exchange server 2016 to 2019. It can also export directly to Office 365.


 4 min read