Personal Storage Table or PST is an Outlook data file that stores mail items, such as emails, contacts, attachments, calendar items, etc. The file is created by Outlook when you sign in or add a POP3 email account, such as Gmail, Hotmail, etc. By default, the PST file is stored at a location that varies based on the Outlook and Windows version. Thus, there's no universal path that you may browse to locate or find the PST file. However, you can change the PST file location or relocate it to a different location on your system.
In this article, you will learn the ways to find the PST file location and the steps to change the default PST file location to a different folder, drive volume, or network storage.
How to Find PST File?
There are a few ways to find the PST file location on the Windows system.
- Manually browse to the default PST file location based on Windows or Outlook version
- Use the Outlook option to find the PST file location
- Use an Outlook repair software to automatically find all PST files on your system at the default or any other location
Manually Browse to the Default Location
Refer to the below table to know the PST file location in Windows XP, Vista, 7, 8, 8.1, 10, or 11.
Outlook Version |
Windows Version |
PST File Location |
Outlook 2000, 2003, 2007 |
Windows XP |
C:\Documents and Settings\UserName\Local Settings\Application Data\ Microsoft Outlook |
Outlook 2007 |
Windows Vista Windows 7 Windows 8 Windows 8.1 Windows 10 Windows 11 |
C:\Users\UserName\AppData\Local\Microsoft\Outlook |
Outlook 2010 |
Windows XP |
My Documents\Outlook Files |
Outlook 2010 |
Windows Vista Windows 7 Windows 8 Windows 8.1 Windows 10 Windows 11 |
Documents\Outlook Files |
Outlook 2013, 2016, 2019, 2021 |
Windows Vista Windows 7 Windows 8 Windows 8.1 Windows 10 Windows 11 |
C:\Users\UserName\AppData\Local\Microsoft\Outlook |
You can open File Explorer and manually browse the path or copy the path provided in the table and paste it in the File Explorer address bar to locate or find the PST file.
Use Outlook Options
You can also follow these steps based on the Outlook version installed on your system to find the PST file.
In Outlook 2013, 2016, 2019, or 2021
- Open MS Outlook and navigate to File > Info > Account Settings > Account Settings.
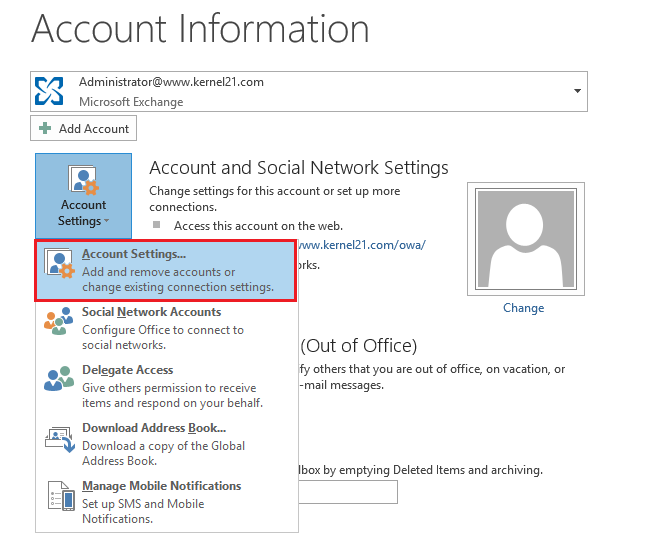
- Click on the 'Data Files' tab and select the email account for which you want to find PST.
- Click 'Open File Location…'
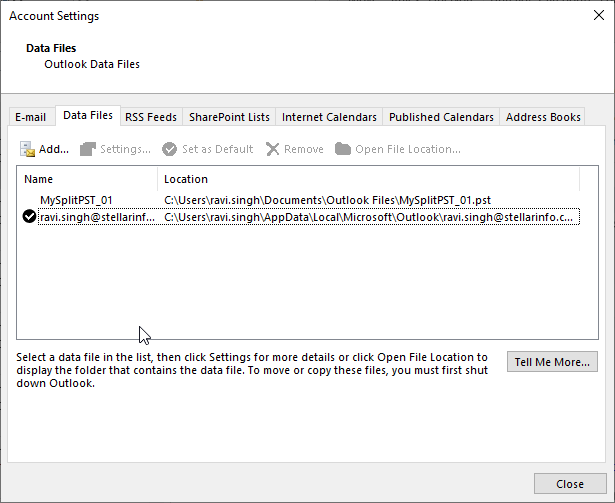
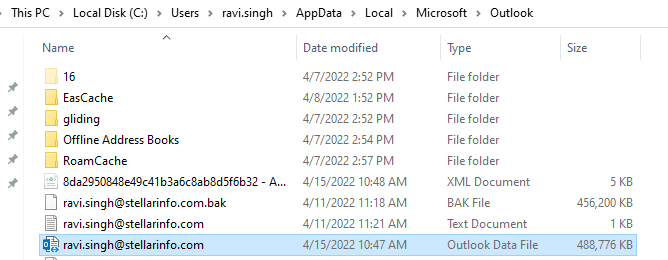
- This opens a new File Explorer window showing the PST file location.
In MS Outlook 2010 or earlier versions
- Open Control Panel.
- Find and click on Mail.
- Click Data Files.
- Select the email account from the list and click Open File Location.
- This opens the location where the PST file is stored.
You may copy the PST file and import it into any Outlook profile or save it as a backup.
However, if you don't have access to Outlook and can't find the PST file at the default location, use Stellar PST file recovery software to find the PST file location and export the mail items to a new PST file. The software automatically fetches and lists PST files from the default location. It also provides an option to find PST files stored anywhere on your system.
How to Change the PST File Location?
You can change the PST file location by following the methods explained below.
Method 1: Use Symbolic Link to Change PST File Location
Symbolic Link or .symlink is a reference to another file or directory, redirecting the application to the new location automatically. You can use it to change the PST file location without breaking anything.
You can create a symlink file at the default location where PST was originally stored. The steps are as follows:
- Once you have found the PST file, copy the path address from the File Explorer address bar and close Outlook.
- Move the PST file to the new folder path where you want to relocate the PST file.
- Open Command Prompt as administrator.
- Then execute the following command in the command prompt
For instance,
mklink "C:\Users\ravi.singh\Documents\Outlook Files\MySplitPST_01.pst" "D:New PST location\MySplitPST_01.PST"
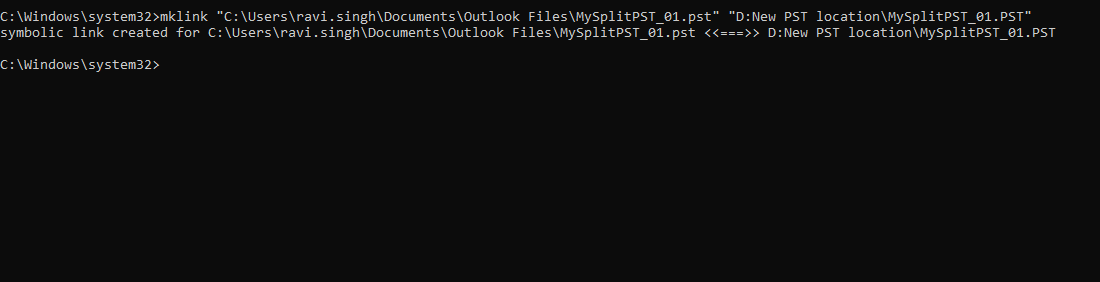
- When you look at the original location, you will see a .symlink file with the same name.
- You can now start and continue to use Outlook as you were earlier with the changed PST file location.
Method 2: Move PST File to Change PST Location
You may also move the PST file without creating a .symlink. However, this will require you to perform additional steps to prevent Outlook errors and issues in sending or receiving new emails. The steps are as follows:
- Once you have located the PST file, cut and paste it to the location where you want to store it. Again, make sure Outlook is not running when you perform this step.
- After moving the PST to a new location, open Outlook.
- The Outlook will display an error, click OK and then browse the new location where the PST file is stored.
- Select the PST file and click Open.
- Outlook will open and display all mail items.
However, it won't synchronize new mail items to or from Outlook. If you don't fix this, you may not send or receive new emails. To fix this, follow these steps:
- Go to File > Info > Account Settings > Account Settings.
- Click the Email tab and select the email account for which you changed the PST file location.
- Click Change Folder.
- Select your email account, expand it, and click on Inbox.
- Click New Folder.
- Enter folder name anything and click OK.
- Click OK.
- Click Change Folder again and this time, choose the Inbox folder and click OK.
- Restart Outlook.
Method 3: Use Registry Editor (Advanced Users)
This is an advanced method recommended for pro users. Registry Editor is a powerful tool that you shouldn't use unnecessarily, especially when you don't know how to use it. Any mistake in making changes to the registry key can render your system unusable or lead to data loss.
To change PST location using Registry Editor, follow these steps:
- Press Windows + R, type regedit, and press the Enter key.
- Navigate to the following registry key: HKEY_CURRENT_USER\Software\Microsoft\Office\15.0\Outlook
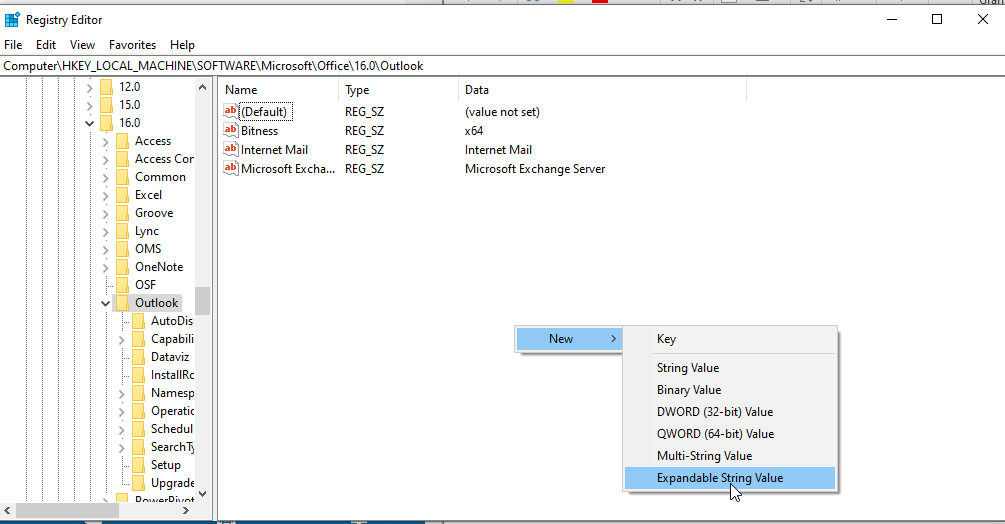
- Then right-click on Outlook and choose New > Expandable String Value.
- Name the registry file as ForcePSTPath.
- Right-click on the ForcePSTPath and select Modify.
- In the Value data field, enter the new PST location path. For example - D:\New PST location.
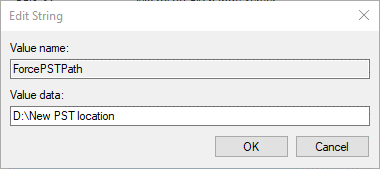
- Click OK.
- Close Registry Editor and restart the system.
Your Outlook client will create a PST file for POP3 email accounts at the new location. However, it will keep creating the OST file for IMAP, Exchange, Office 365, or Outlook.com accounts at the default location. If you want to change that as well, create the ForceOSTPath key.
Conclusion
Locating a PST file isn't a complex task. If you know your Windows and Outlook version, you can refer to the table in this article to find the PST file. You may also use Outlook options to find the PST file location.
You can also change the PST file location to a different volume, partition, folder, or network storage by modifying the registry key, creating a symbolic link, or moving the PST and setting up the new path through the Outlook client.
Storing PST to network storage may result in PST corruption, and thus, you should avoid it unless there's no other option. You can maintain a regular backup to prevent data loss due to corruption. You can use an Outlook PST recovery tool to repair damaged or corrupt PST files and export the recovered mail items to a new PST file, live Exchange, or Office 365.


 5 min read