“Recently, my 2 TB Seagate external hard drive wasn’t mounting on my MacBook Air. So, I used First Aid of Disk Utility to repair the drive. To my surprise, the process failed with the error message ‘File system check exit code is 8’. I don’t know what to do. Could anybody suggest a way to fix the drive and recover data from it? – Thanks a ton.”
When you try to repair Mac storage drive (internal or external) using First Aid of Disk Utility, the application fixes minor disk errors and issues. But, when the trouble is beyond its repairing capability, it might report some error messages. One such error message is the ‘File system check exit code is 8’ error. You can click Done on the message box to close it.
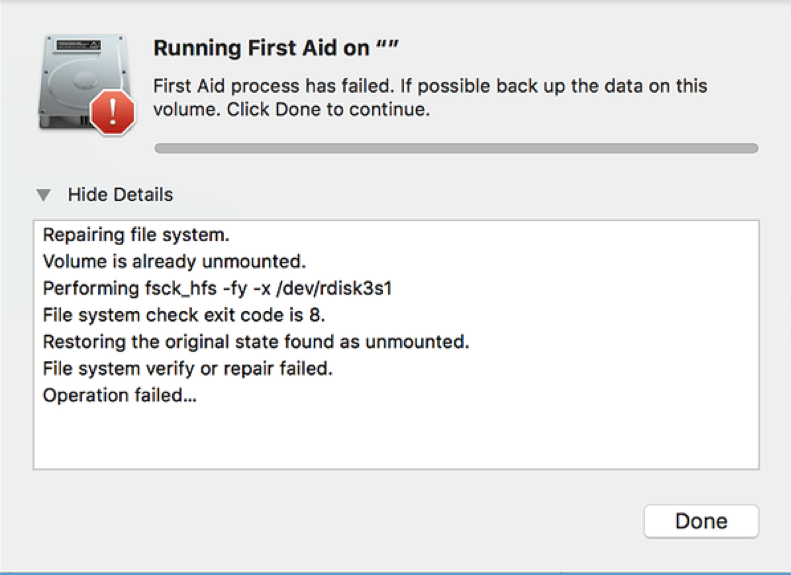
Image: File System Check Error
The exit code 0 is perfect and indicates no error, but when you get the exit code 8, it means there are some irreparable issues with your storage medium, and you need to fix them.
Reasons behind the error message
- Damaged or incompatible file system
- Logical issues such as incorrect system settings
- Outdated driver for the Mac storage drive
- Malware, virus, or other Internet errors
- Bad sectors or blocks on storage disk (HDD or SSD)
Now, learn different ways to fix this error on your Mac running on macOS Big Sur or earlier.
Repair Drive Using First Aid of Disk Utility in macOS Recovery Mode
Till now, you’ve tried to fix your Mac drive using Disk Utility in Desktop. Now, do the same process in macOS Recovery mode. Hopefully, the repair process succeeds. The steps are as follows:
- For Mac with Apple Silicon, start the Mac by pressing and holding the Power button until “Loading startup options” appears. Click Options, then click Continue.
- For Mac with Intel processor, start or restart the Mac, then immediately press and hold the Command + R keys until the startup screen appears.
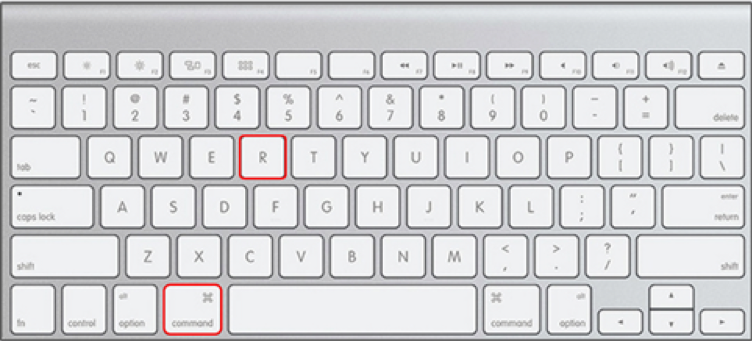
Image: Press Command + R Hotkey Using Keyboard
- Mac boots into macOS Recovery mode. Now, go to the macOS Utilities window, click Disk Utility, and then click Continue.
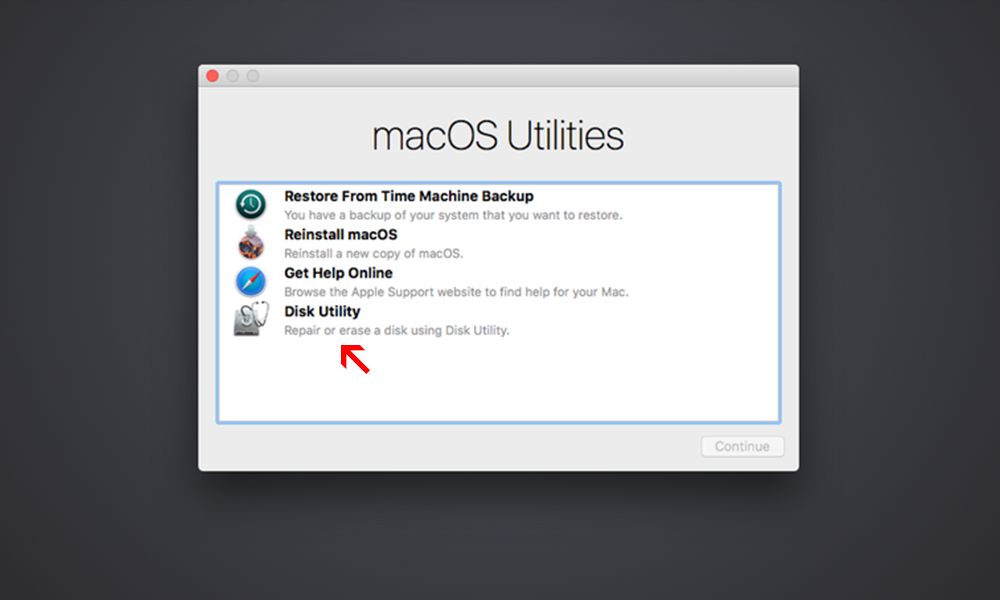
- From the sidebar of Disk Utility, select your Mac storage drive (internal or external), then click First Aid. Next, click Run to initiate the repair process.
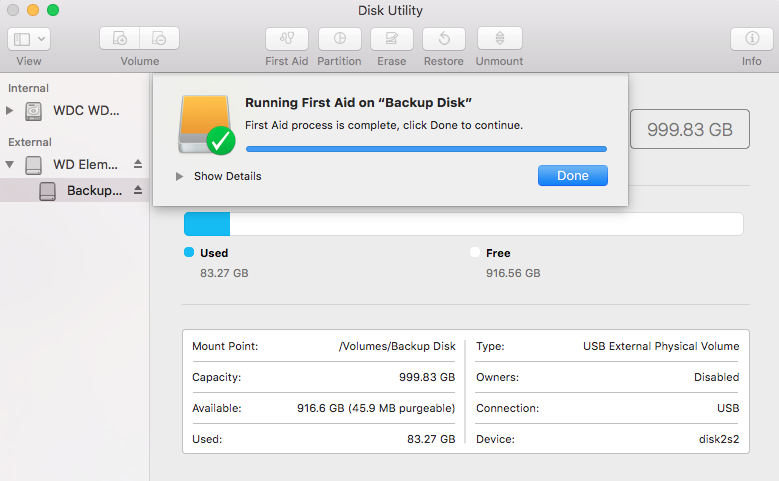
Image: First Aid of Disk Utility
If all goes well, the repair will succeed, and you’ll be able to use the storage drive without any issues. Else, proceed to the next troubleshooting method.
Repair Drive Using FSCK Command in Single User Mode
Try fixing the troubled Mac storage drive's corrupt file system using the file system consistency check (fsck) command in Single User mode. The repair steps are as follows:
- Start or restart the Mac, then immediately press and hold Command + S keys. Release them when some text appears—Mac boots in the Single User mode.
- In the prompt, type the command /sbin/fsck – fy and press Return. If fsck repaired the corrupt drive, it shows the message: “File System Was Modified.”
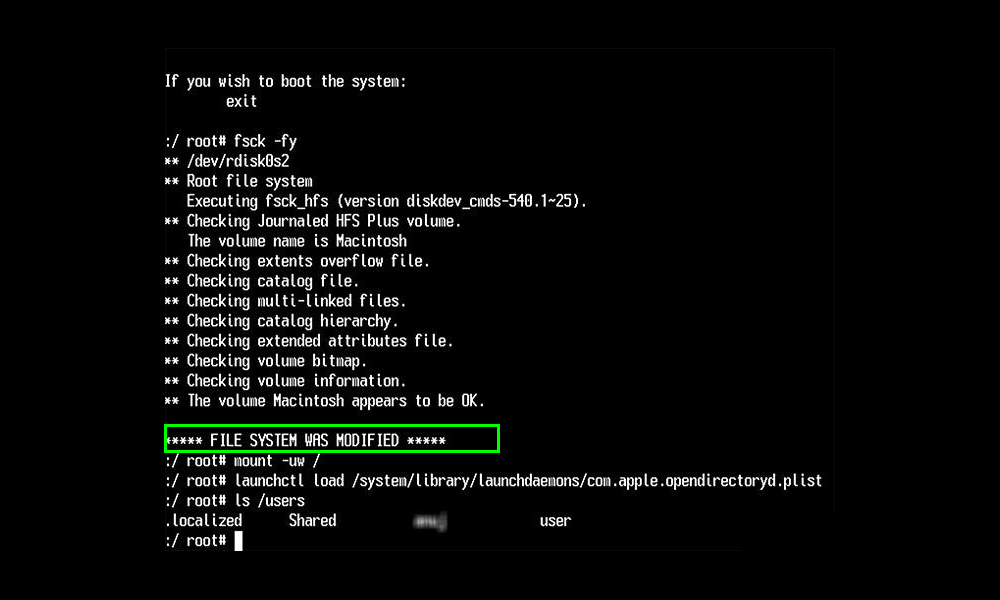
Image: Message File System Modified
- Re-run the above fsck command till it displays “The Volume (name) appears to be OK.” Restart your Mac normally.
In case the drive repair fails, recover data stored on the drive using a free Mac disk recovery software.
Recover Data from the Storage Drive Using Mac Data Recovery Software
When Mac storage drive repair fails in First Aid and FSCK command, recover data from the drive using a Mac data recovery software. The recovery steps are as follows:
- Download and install Stellar Data Recovery Free for Mac on your MacBook Air.
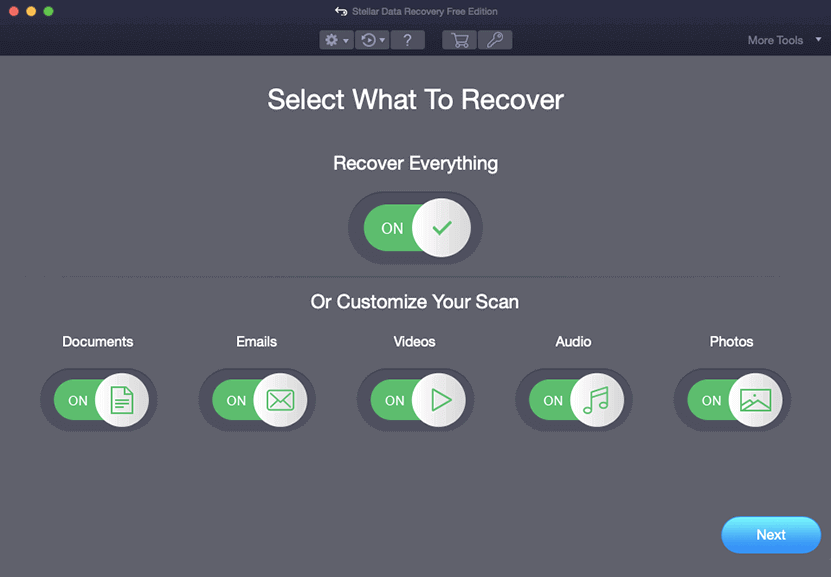
- Launch the software. See the video shared below to recover your lost data from the Mac drive using the software.
Stellar Data Recovery Free Edition for Mac helps you scan your drive, preview files, and recover up to 1 GB of data. To recover more, upgrade the software to Professional or Premium edition. When you buy the software from our official site, you get a 30-day money-back guarantee, just in case.
After the data is recovered, follow the next method to permanently resolve the ‘File system check exit code is 8’ error from the Mac storage drive.
Erase the Affected Mac Drive Using Disk Utility
When the data recovery is over, proceed to erase the affected Mac drive and create a new file system. Erasing the drive will fix the exit code 8 error completely. For an external drive, erase operation is straightforward using Disk Utility, but you need to erase the drive and reinstall macOS in macOS Recovery mode for the startup disk.
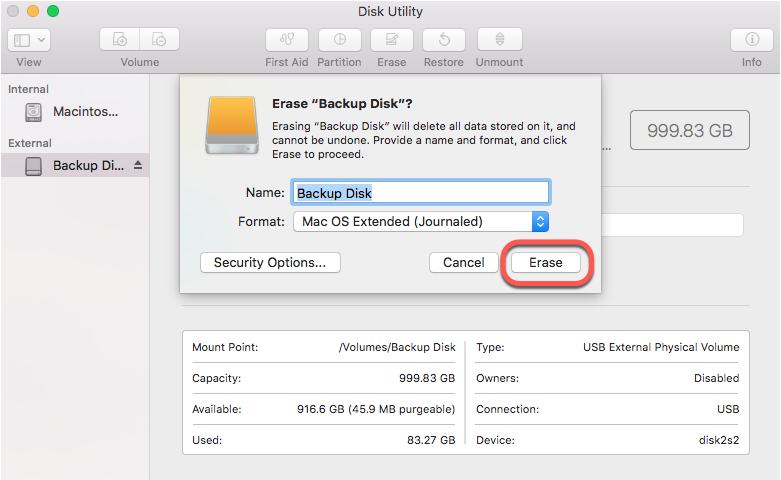
Image: Erased External Hard drive on Disk Utility
Once the erase operation is done, transfer the recovered files to the formatted drive. In case the storage drive has physical damage, replace the drive with a new one.
Conclusion
Hopefully, you’ve resolved the problem of the ‘File system check exit code is 8’ error on your Mac internal or external drive. The use of First Aid of Disk Utility in macOS Recovery mode or the FSCK command in Single User Mode is beneficial in such circumstances. However, when the primary methods don’t work, recover data using the recommended free Mac data recovery software. Erase the Mac drive to create a new file system and then restore the recovered files.


Data recovery expert on Mac & Windows platforms, with 10-year experience in writing
 10 min read
-1920.jpg)