-799.jpg&url=https://www.stellarinfo.com/article/fix-windows-0x80240fff-error.php)


Microsoft releases various security patches and minor or major updates to ensure a better user experience. Most of us regularly keep our Windows system up-to-date with the latest system updates, drivers, apps, etc. But what if you install a critical Windows update, and instead of fixing existing issues, it starts creating new errors? One such error a Windows update may cause is the code- 0x80240fff.
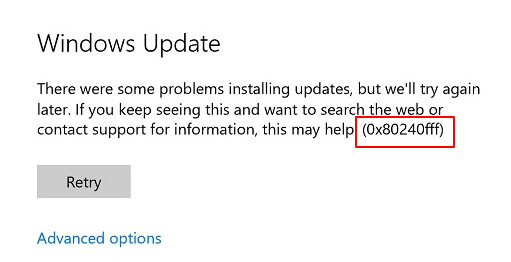
Like many other system errors, 0x80240fff is a cryptic error that doesn't give you much information but disturbs your Windows update installing process. Therefore, if you are bothered by this critical issue, here are some proven DIY methods to help you fix it.
How to Fix 0x80240fff Error?
#1 Defer Updates
The most common way to eliminate the 0x80240fff Windows Update error is to defer updates for a few days. This option was earlier available only for Windows 10 Pro users. However, now, Windows 10 Home users can also use it.
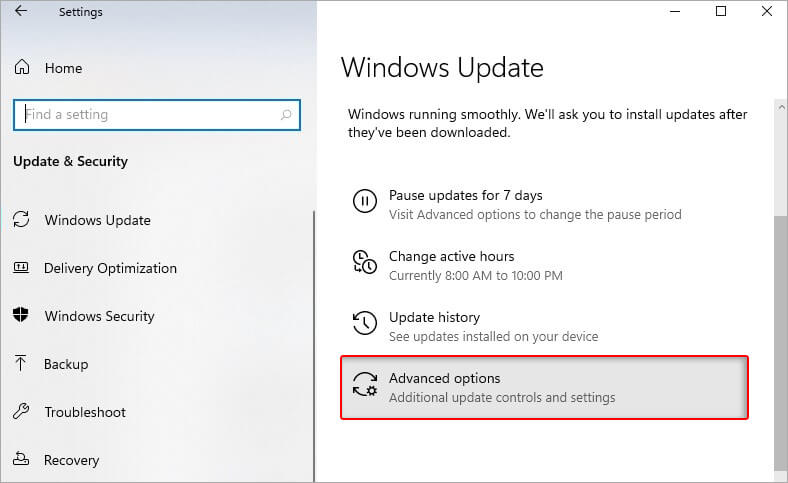
- Open the Settings app and go to Update & Security > Windows Update.
- There, scroll down and click Advanced options.
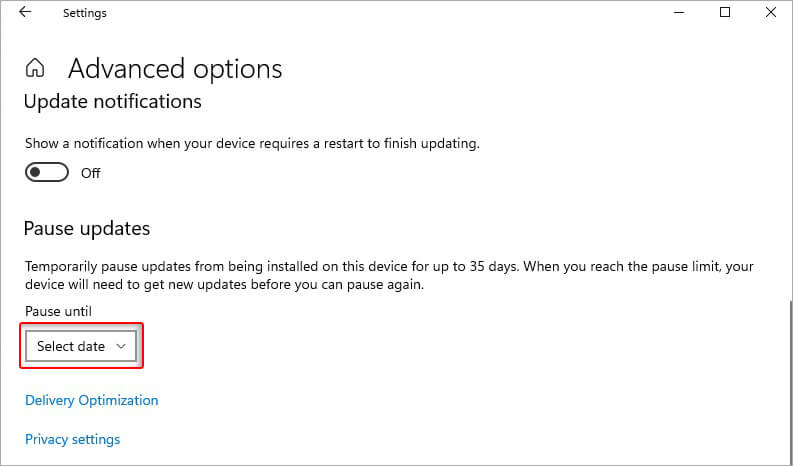
- At the bottom, you'll see the option – Pause updates. From the drop-down menu, select a date, and then Windows won't install any update until that date.
- Doing so will change the Windows update server and may solve the problem.
#2 Run Windows Update Troubleshooter
Windows systems come with multiple built-in troubleshooting tools that can solve various problems. For example, you can try running Windows Update Troubleshooter to fix the 0x80240fff error code with the help of the following steps:
- Press Windows + I to open Settings and then follow Update & Security > Troubleshoot.
- Next, click Additional troubleshooters.
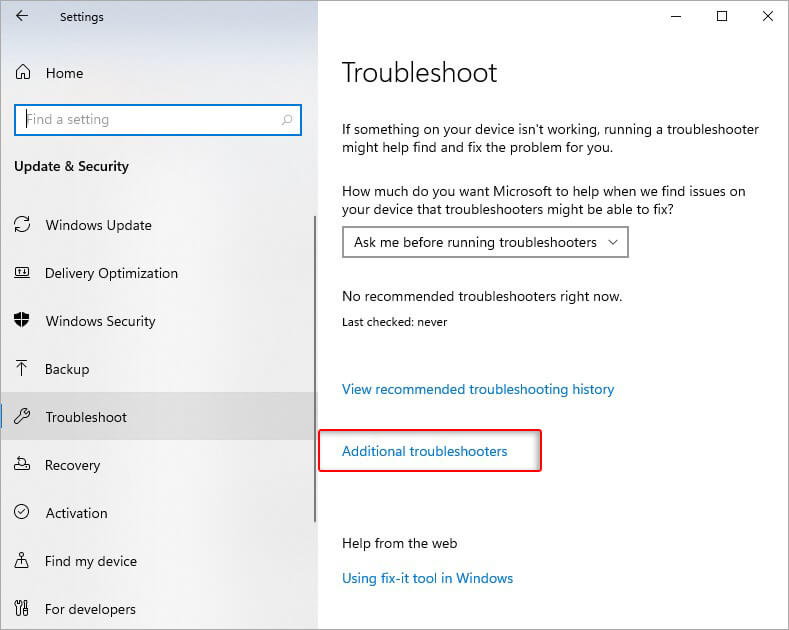
- On the next prompt, click Windows Update and Run the troubleshooter.

- If there are any issues, the utility will try to troubleshoot them.
- Once the process is done, reboot your system and check if the error code is fixed.
#3 Disable any Antivirus App
Sometimes, an antivirus application on your system may interrupt your Windows update installation process. You can try disabling the antivirus. For example, if you've Windows Defender antivirus enabled on your system, you can disable it and then try to reinstall the update. If you don't face the 0x80240fff error code this time, there must be an issue with your antivirus. Follow the given steps to disable Windows Security:
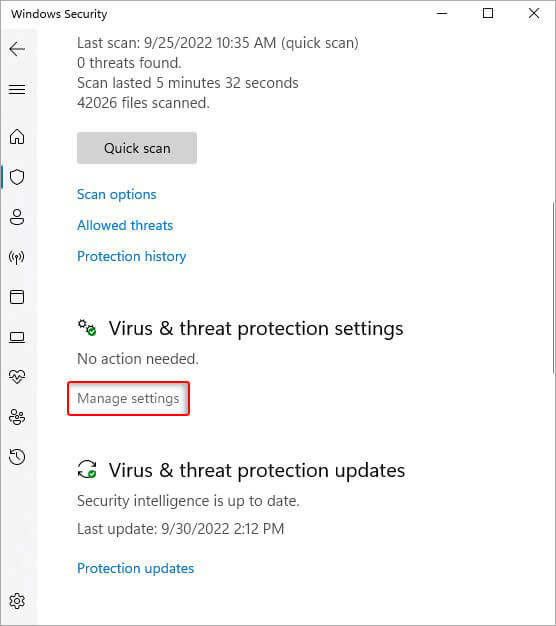
- Press Windows + I to open the Settings app and follow Update & Security > Windows Security. Else, you can open the Search bar and type Windows Security.
- Now, click Virus & threat protection > Manage Settings.
- Toggle the button given under Real-time protection and turn it Off.
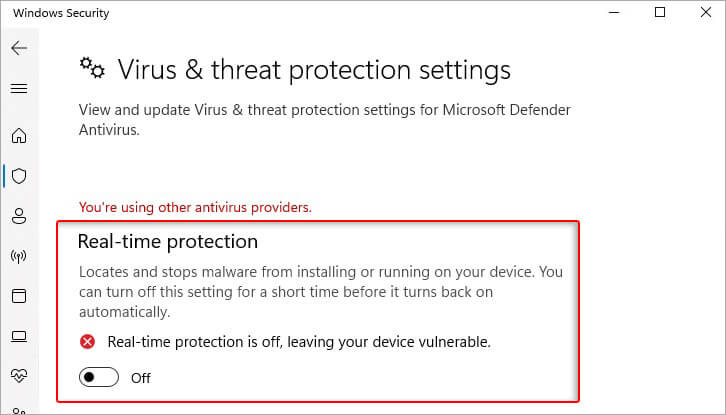
Here, one thing is to remember that scheduled scans will continue to run in the background. However, the downloaded files will not be scanned until the following scan is planned. Some users have been able to fix the error code with this method.
#4 Restart Windows Update Services
Windows Updates also heavily relies on multiple background services. When some background service fails, you may have issues installing Windows Update and encounter a 0x80240fff error code. Hence, try restarting the Windows Update Services with the following steps:
- In the Search bar, type Services and click Open.
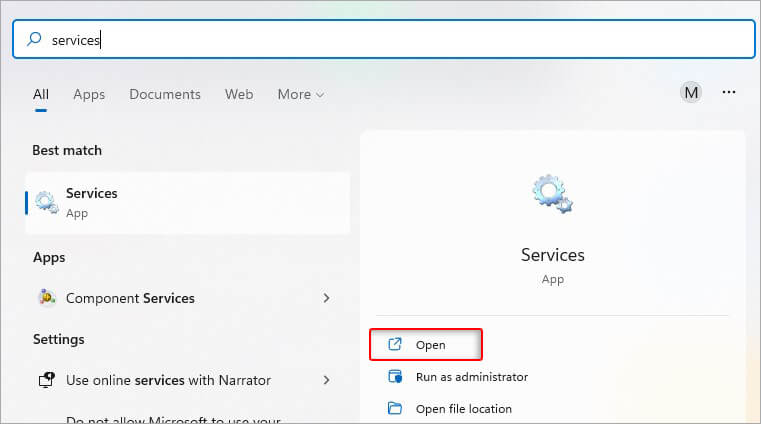
Now, check the status of the following services is "Running.".
- Application Identity
- Background Intelligent Transfer Service
- Cryptographic Services
- Windows Update
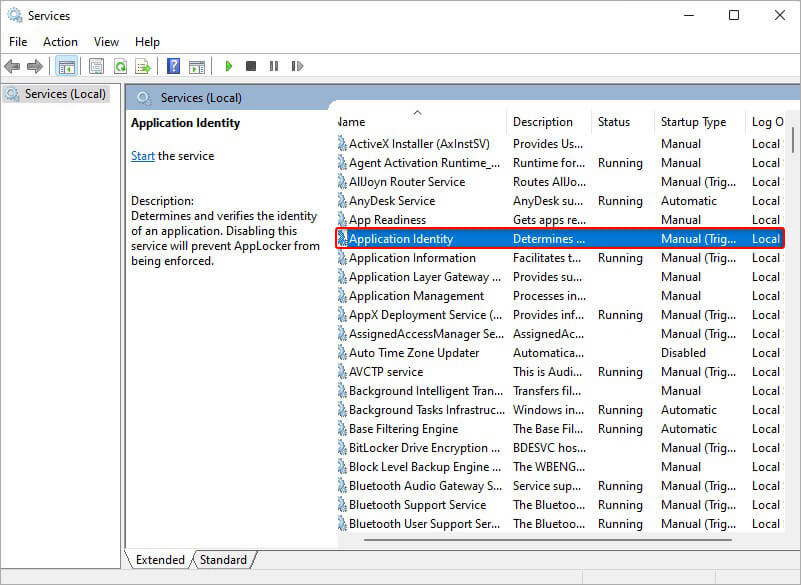
- If the status is Running, right-click on the services one by one and then click Restart.
- If a service is not running, right-click on the same and click Start.
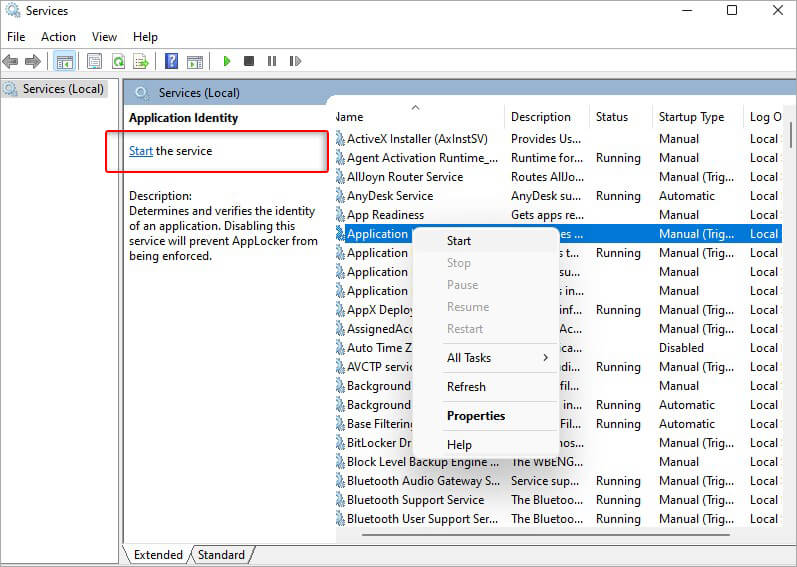
- Finally, reboot your system and check if you can install updates now.
#5 RUN SFC Scan
You can also try running the System File Checker (SFC) utility to fix the 0x80240fff Windows Update error. This utility checks for issues with the system files that may be causing this error. To run an SFC scan, follow these steps.
- Run Command Prompt utility as administrator.
- In the open CMD window, type SFC/Scannow and hit Enter
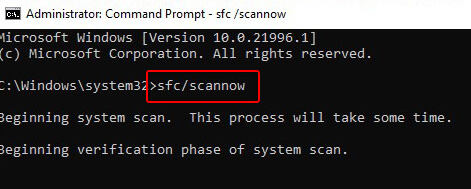
- Don't interrupt the process and wait until the process is completed.
- Finally, close the window and restart your system.
#6 Reset Windows Update Components
You can also try resetting Windows Update Components to fix this issue. Open Command Prompt and type the following commands followed by Enter.
net stop wuauserv
net stop cryptSvc
net stop bits
net stop msiserver
Ren C:\Windows\SoftwareDistribution SoftwareDistribution.old
Ren C:\Windows\System32\catroot2 Catroot2.old
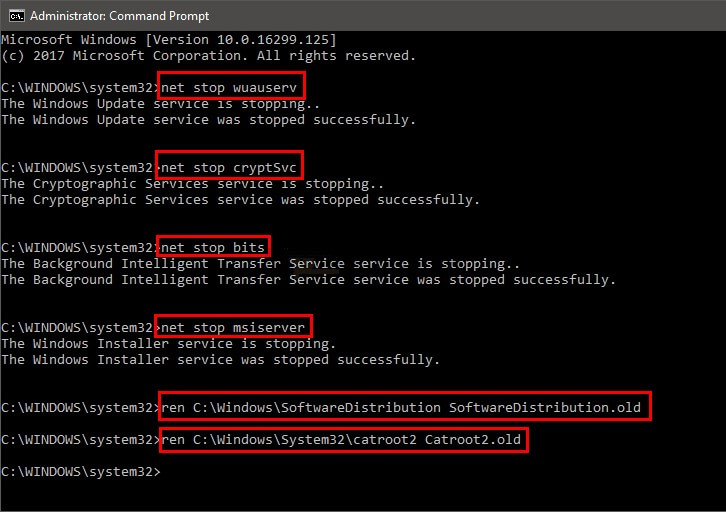
net start wuauserv
net start cryptSvc
net start bits
net start msiserver
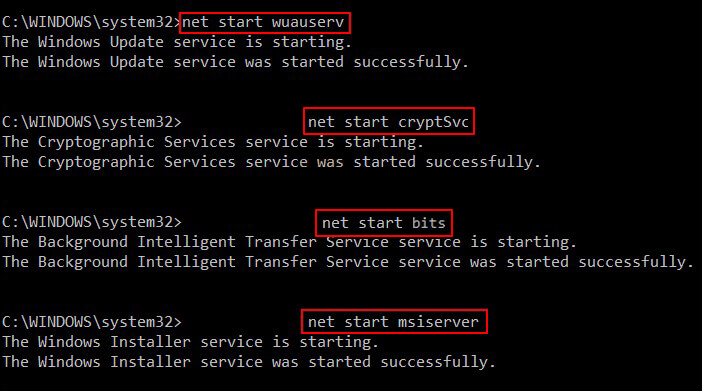
Once done, close the window, reboot the system, and check if the error is fixed.
#7 Install Windows Update with Windows Update Assistant
Some users have suggested that they have been able to fix the update error in Windows 11 with the help of Windows Update Assistant. You can use Windows Update Assistant to download the quality and feature updates.
#8 Reinstall Windows
You can also visit Microsoft's Windows 10 page to download the latest update. If you face any issues with downloading the latest update, you can create a bootable media drive with the Windows Media Creation tool and then choose to boot your system from it. Finally, reinstall the latest updates for Windows 10 following the on-screen instructions. For Windows 11, refer to this page.
Remember, when you reinstall Windows to fix the 0x80240fff error, it may cause permanent data loss. Hence, always have a backup of your system or drive data. If, in the worst-case scenario, you don't back up and lose your files, worry not! You can use professional data recovery software to recover lost data.


A seasoned technology writer and tech enthusiast with keen interest for everything in technology.

 27 min read