


Can PC Overheating Cause Data loss: Causes, Warning Signs & Fixes
July 22, 2026| 27 min read


Our content follows trusted Editorial Standards - accurate & unbiased.
Summary: M.2 SSD may not appear on the computer due to incorrect SATA configuration. This post will address all queries related to this error and guide you to resolve it. In case, the inaccessible SSD contains critical data, you might want to try this professional data recovery software to quickly recover files from SSD.
Free Download 100% SecureSSDs are preferred due to their compact size and fast read/write speeds. Compared to mechanical drives, they are more reliable, as they don’t have any moving parts, making them an ideal storage solution for laptops and portable storage media.
However, like any other storage drive, SSDs too are prone to various errors. The M.2 SSD not showing up on Windows 11 PC is a unique issue that hinders your work and renders data inaccessible. Let’s learn more about this issue in detail.
When we connect an SSD or any other storage device to our computer, the computer detects it and displays it in Windows Explorer. The storage drive is also visible in Disk Management. Sometimes, however, the SSD doesn’t appear in Windows Explorer, Disk Management, or even in the BIOS.
Here are some possible reasons that can cause your M.2 SSD to not show up when connected to Windows PC –
Now that you know what causes this issue, let’s look at some methods to fix it.
Pre Activity: Before moving on to the methods, we would recommend checking the M.2 SATA cable that connects your SSD with the motherboard for any damage or loose connection. If you are using an M.2 NVMe SSD, ensure the SSD is well seated in its port and that the holding screw is fastened properly.
You can also test the M.2 SSD on another PC to rule out any hardware issues.
Once these checks are done, proceed with the methods below to fix this issue.
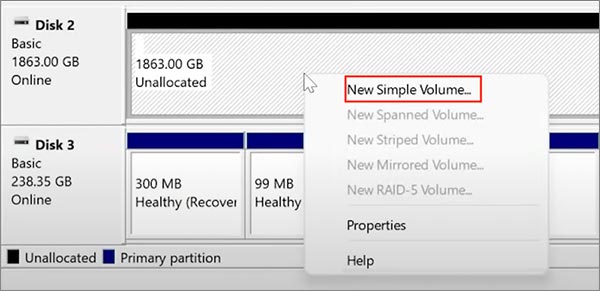
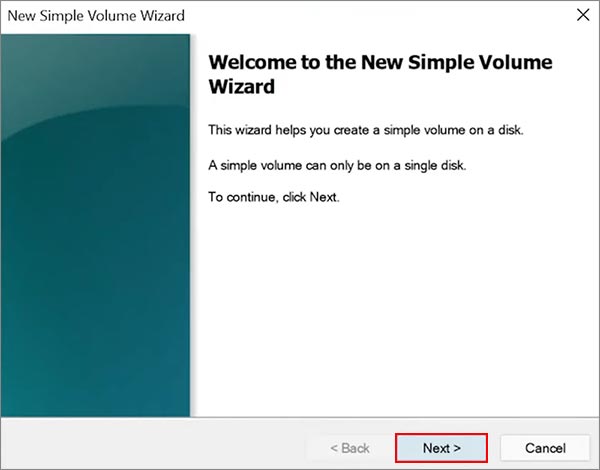
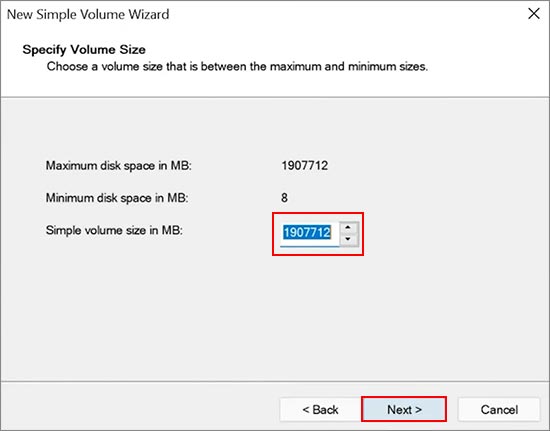
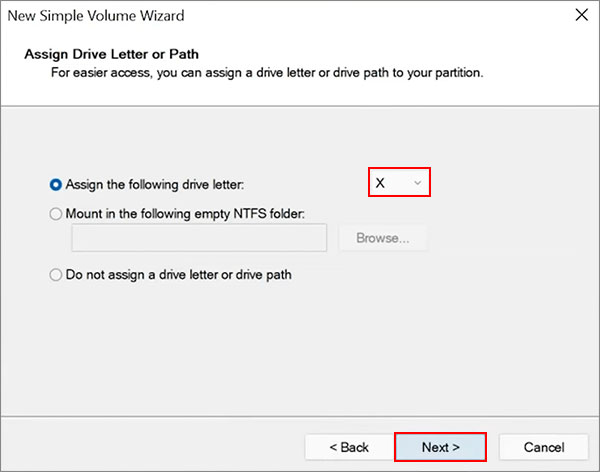
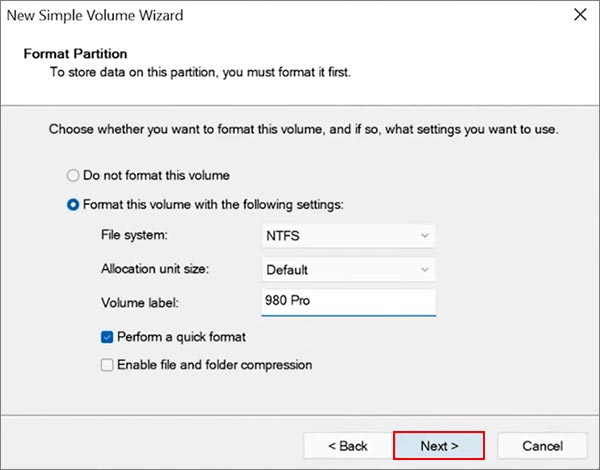
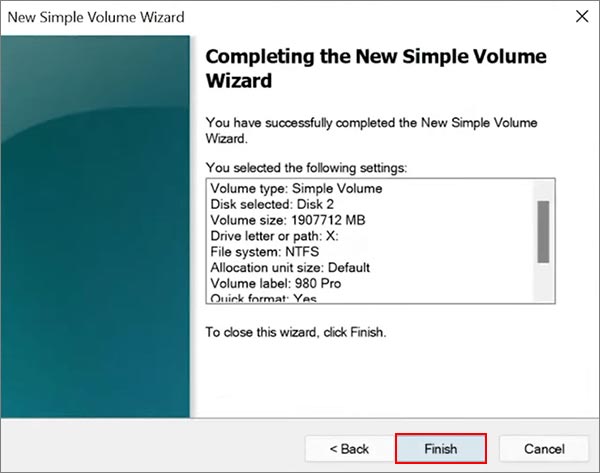
If you have connected a brand new M.2 SSD with your computer, but the drive is not initialized, your SSD might not show in Windows Explorer. You need to first initialize the drive and assign a letter to make it visible in Windows Explorer. Here are the steps –
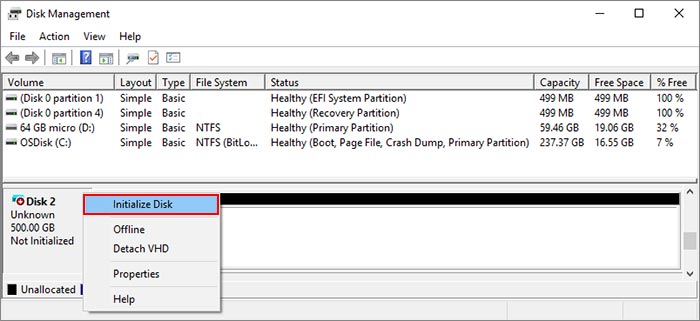
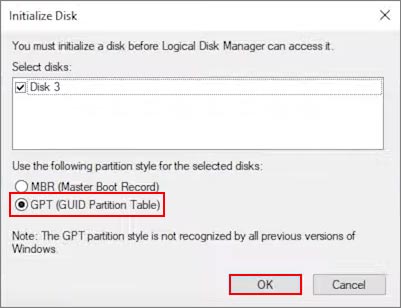
The M.2 drive is now initialized. However, it still needs to be allocated and visible in Windows Explorer. Hence, it will require a drive letter. To do this –
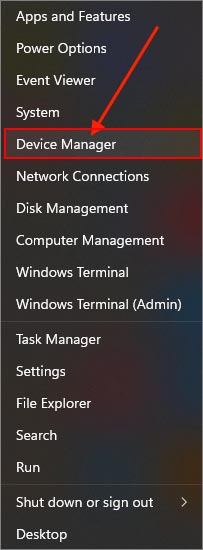
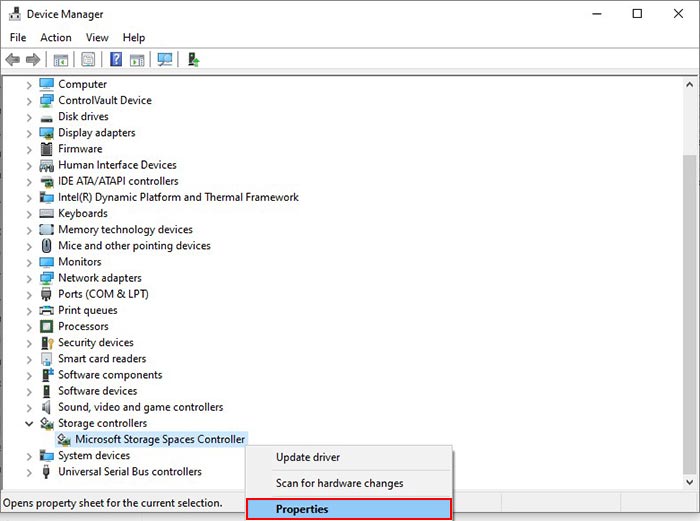
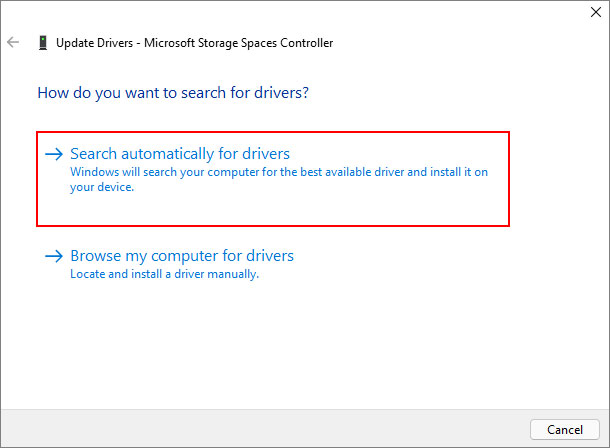
We all know that using outdated device drivers can cause the device to malfunction. This could be why the M.2 SSD is not showing up in Windows Explorer on your Windows 11 PC.
Here’s how you can update the drivers to resolve this issue.
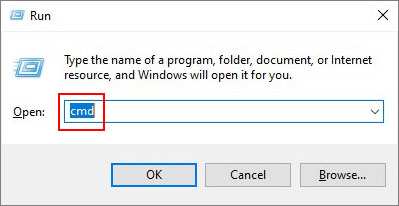
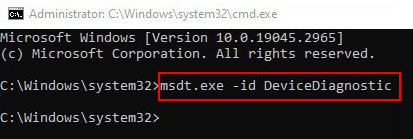
If you cannot see the connected M.2 SSD or NVMe drive in Windows Explorer or Disk Management, there might be some fault with the storage drive. You can run the Hardware and Devices Troubleshooter using CMD to identify and fix the exact cause. Here’s what to do –

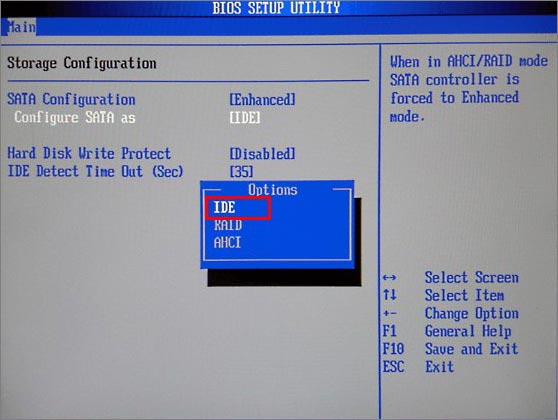
In some cases, you can’t see the M.2 SSD on your Windows 11 PC or even in the BIOS due to improper SATA configuration. If your SSD is not configured with the right SATA controller settings, you might encounter this issue frequently. Here, you must go into the BIOS and alter the settings. Carefully follow the steps mentioned below –
Not being able to access your data due to such errors can be quite frustrating. The methods mentioned in this post should help you fix this issue and make your M.2 SSD visible on your Windows 11 PC. However, if none of the methods work, simply download a professional data recovery software and retrieve your data first.
Note – Data recovery from an M.2 SSD is only possible if the TRIM command is disabled. If not, then you won’t be able to recover your files successfully.
Using Stellar Data Recovery Professional, you can easily recover lost files from any storage device. You can also use it to perform data recovery on inaccessible storage drives.
In this post, we discussed the causes behind inaccessible M.2 SSD and why it is not showing up on your computer. We hope the methods above methods helped make your SSD visible on Windows Explorer.
Was this article helpful? Let us know in the comments.
Senior Content Writer
This article was written by Keshav Katyal, a Content Writer at Stellar Data Recovery.
Curious about our content creation process? Take a look at our Editor Guidelines.
July 22, 2026| 27 min read

July 22, 2026| 27 min read
July 23, 2026| 27 min read


 27 min read