

Office 365 Email Limits: How and When to Disable EWS Throttling in MS 365 & Exchange Online?
April 7, 2026| 6 min read


Our content follows trusted Editorial Standards - accurate & unbiased.
Summary: There are many reasons why you need to create or setup SMTP relay in the local Exchange Server. In this article, we will discuss creating the SMTP relay in Exchange Server 2016 and 2019 using the Exchange Admin Center and the PowerShell commands.
In older versions of Exchange Server, like 2007 and 2010, the Hub Transport Service is used to take care of anything related to SMTP. In newer versions of Exchange Server (2016 and 2019), there are two services for this purpose.
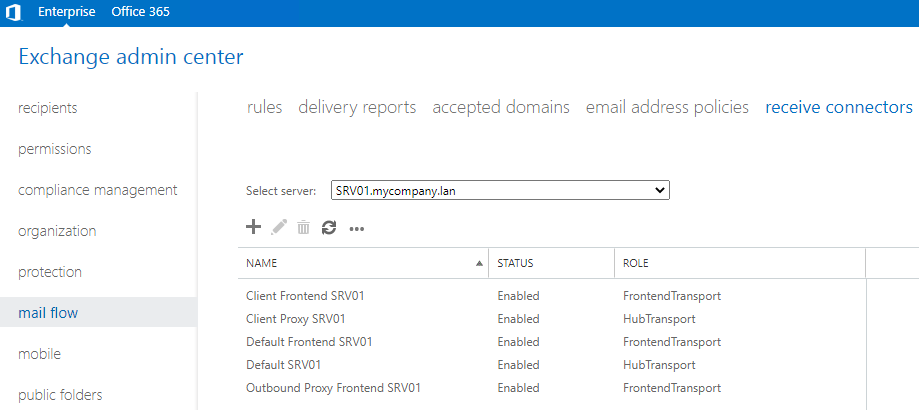
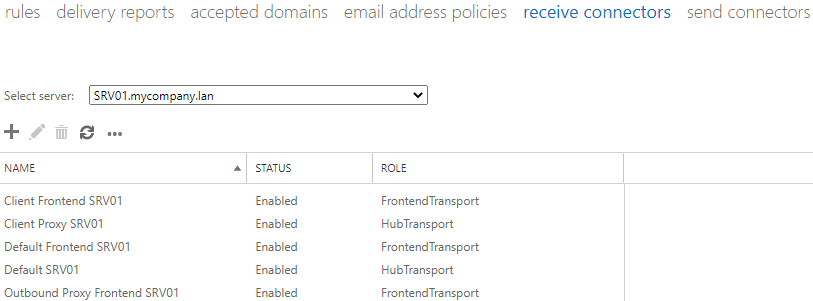
To view the connectors, follow these steps:
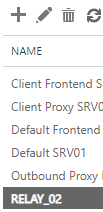
Here you can find the mentioned receive connectors.
 M
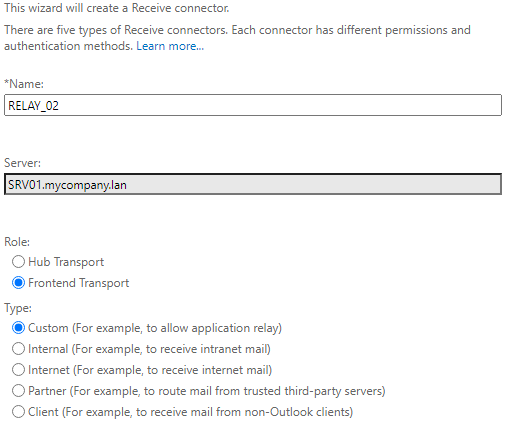
MIf there are connectors already created, you can still create new ones to allow other devices to send emails, like server notifications. You can also create connectors to allow other servers to relay through the local Exchange Server, like in a hybrid setup or other external devices.
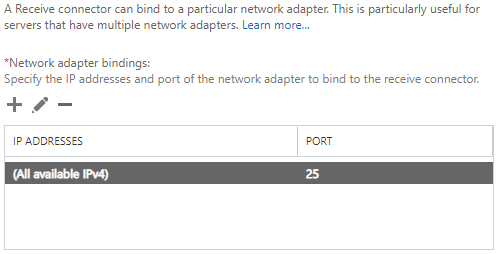
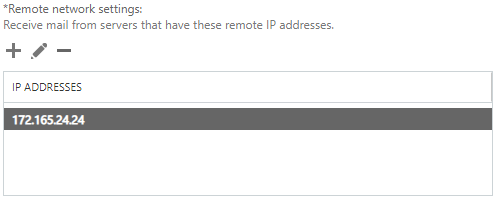
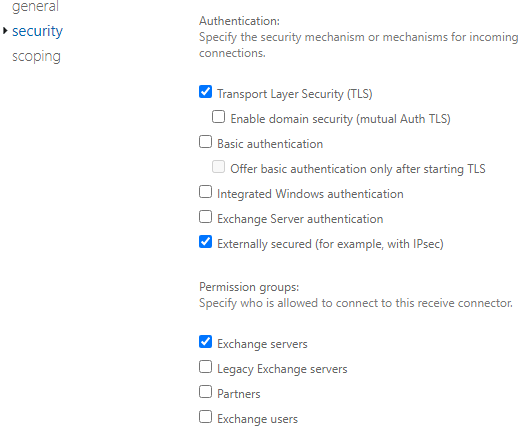
Before starting, you must be careful to not open the transport service to anyone outside as it could be easily spammed and abused by non-invited guests. So, when setting up new connectors, make sure that you limit its use to either an IP range or particular IP addresses. If this is not set, you will end up with ‘Open Relay’, where anyone can send emails from. Your public IP address could be blacklisted and abused. So, you need to be careful when setting this up.
You can create a relay connection in two different ways.
To create a receive connector using the Exchange Management Shell (EMS), you can use the New-ReceiveConnector command as given below.
New-ReceiveConnector -Name \relay name=""-Server \server name="" -TransportRole FrontendTransport -Custom -Bindings 0.0.0.0:25 -RemoteIpRanges /remote ip="" /remote>

The next step is to set the permission groups and authentication mechanisms. For this, use the Set-ReceiveConnector PowerShell command as given below.
Set-ReceiveConnector " \server name="" \relay name="" -authmechanism="" externalauthoritative="" -permissiongroups="" exchangeservers<="" relay=""

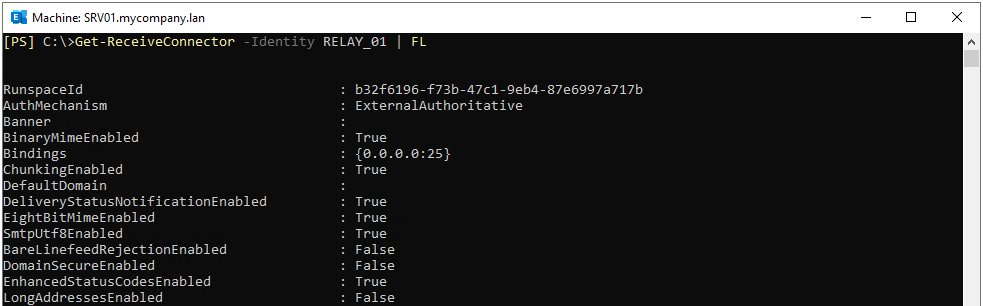
Once this is done, you can verify the connector settings by using the Get-ReceiveConnector PowerShell command (as given below). This will give all the details of the created connector.
Get-ReceiveConnector -Identity \relay name="" | FL
You can also use the Exchange Admin Center (EAC) to create connectors. Follow these steps:
Above, we have discussed how to create connectors using PowerShell and the Exchange Admin Center (EAC). Since you are playing with the server’s configuration, you must ensure that no configuration would cause issues with communication between Exchange Servers, and internal mail flow.
Once you have created SMTP relay connectors, the next step is to create user profiles and mailboxes on the new Exchange Server. You also need to grant users the necessary permissions to sign in and access their email accounts for sending and receiving messages. To migrate mailboxes quickly and efficiently to the new server, you can use a specialized Exchange migration tool such as Stellar Migrator for Exchange.
Stellar Migrator for Exchange allows you to seamlessly migrate mailboxes from one Exchange Server to another or to Office 365. It supports automatic mailbox mapping and parallel migration to speed up the process. The software enables migration of all mailbox types—including user mailboxes, archive mailboxes, shared mailboxes, disabled mailboxes, and public folders—with complete data integrity. It’s designed to handle large-scale migrations with minimal downtime and zero data loss.
Senior Content Writer
This article was written by Ravi Singh, a Content Writer at Stellar Data Recovery.
Curious about our content creation process? Take a look at our Editor Guidelines.
April 7, 2026| 6 min read
March 17, 2026| 6 min read
February 3, 2026| 6 min read


 6 min read