Imagine you just found an old USB stick in your table drawer. Maybe it holds your family photos,
important documents or those old software installers. But it is cluttered with your old files or worse… giving you errors when you try to use it. This tells it is the time for a fresh start!
In this guide, we’ll walk through all the ways to format a USB drive on Windows 11 and even latest macOS systems (from Sonoma to Tahoe) and also tell you how to check if the format was truly “clean”. The ways we’ll go about it is the quick route of File Explorer, the fallback through Disk Management, the advanced DiskPart method and Disk Utility on Mac as well. We shall also show what to do when formatting fails and how to check whether the drive is truly clean. One important warning before you actually begin… formatting erases data from the USB drive and anything important should be backed up first. Let’s dive in!
When Should You Format a USB Drive?
Formatting your USB drive is more than just clearing space. It erases all existing data and sets up a new file system in it. Here are common reasons to format a USB:
- Reusing or Repurposing: Before giving away or selling or just repurposing a USB drive, you need to format it to remove your private files.
- Changing File System: To switch your drive’s format, e.g., to exFAT for cross-platform use or maybe to NTFS for Windows.
- Fixing Errors: If the drive is actually not recognized, USB is not detected, it basically shows you wrong capacity or when Windows asks to reformat it… just like that.
- Removing Viruses/Malware: Formatting can wipe out those malicious files and reset your drive if it is acting strangely.
- Preparing for OS or Boot Media: When creating a recovery or installation USB… formatting is required to make it bootable.
- Resolving File System Corruption: If the USB drive shows errors like “Drive is not accessible,” or those frequent read/write failures, it can be your file system corruption. Formatting rebuilds those file structures from scratch and leads to restoring stability.
What are the Methods to Format a USB Drive?
There are many ways to format a USB stick and that depends on your operating system and how much control you shall need over it. Below, we are listing the main methods.
Method 1: Format through Windows File Explorer
The easiest way on Windows is via File Explorer and this one is suitable for most of the normal situations. You can use this one when the USB Drive is recognized normally (appears under “This PC”) and you just want a quick wipe.
- Insert the USB drive into a USB port.
- Open File Explorer (press Win + E) and click This PC.
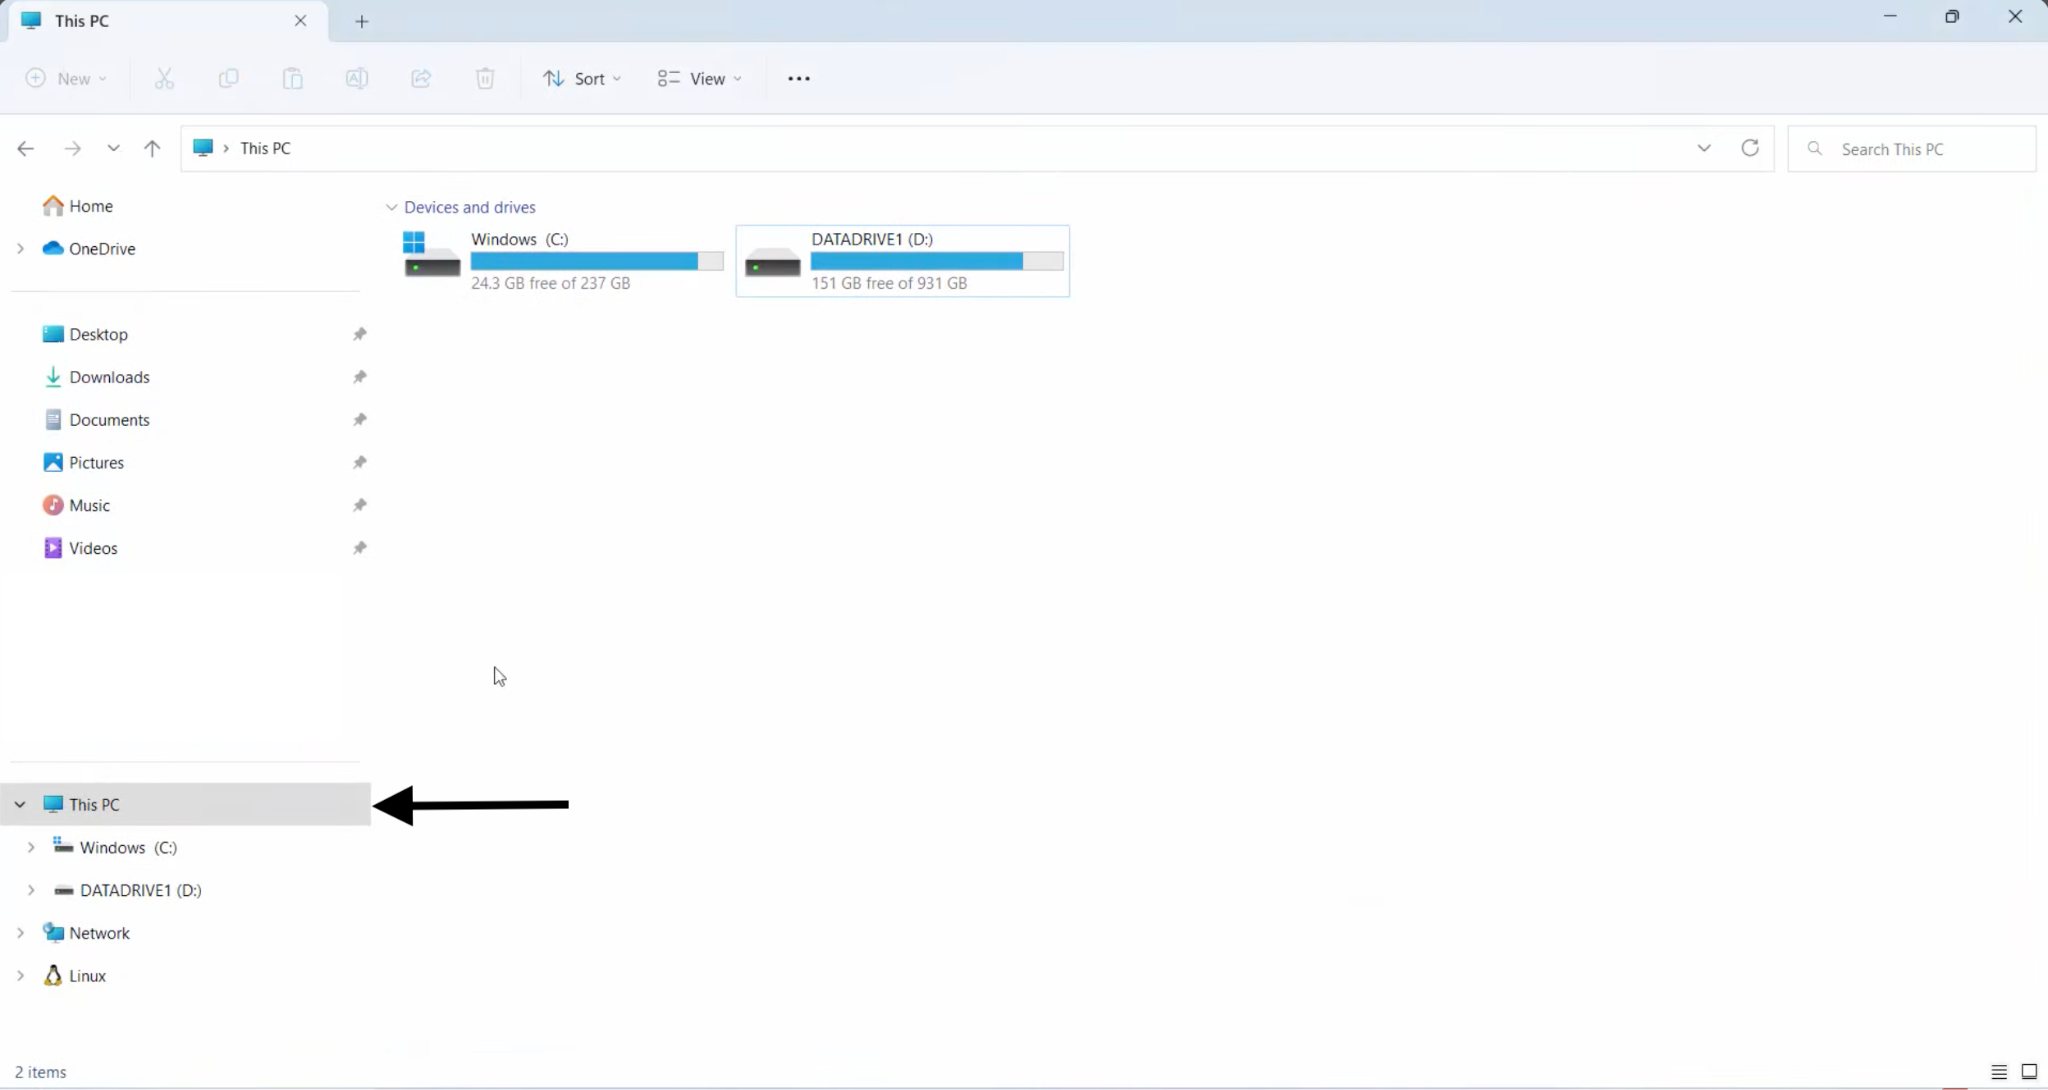
- Right-click the USB drive under “Devices and drives” and select Format…
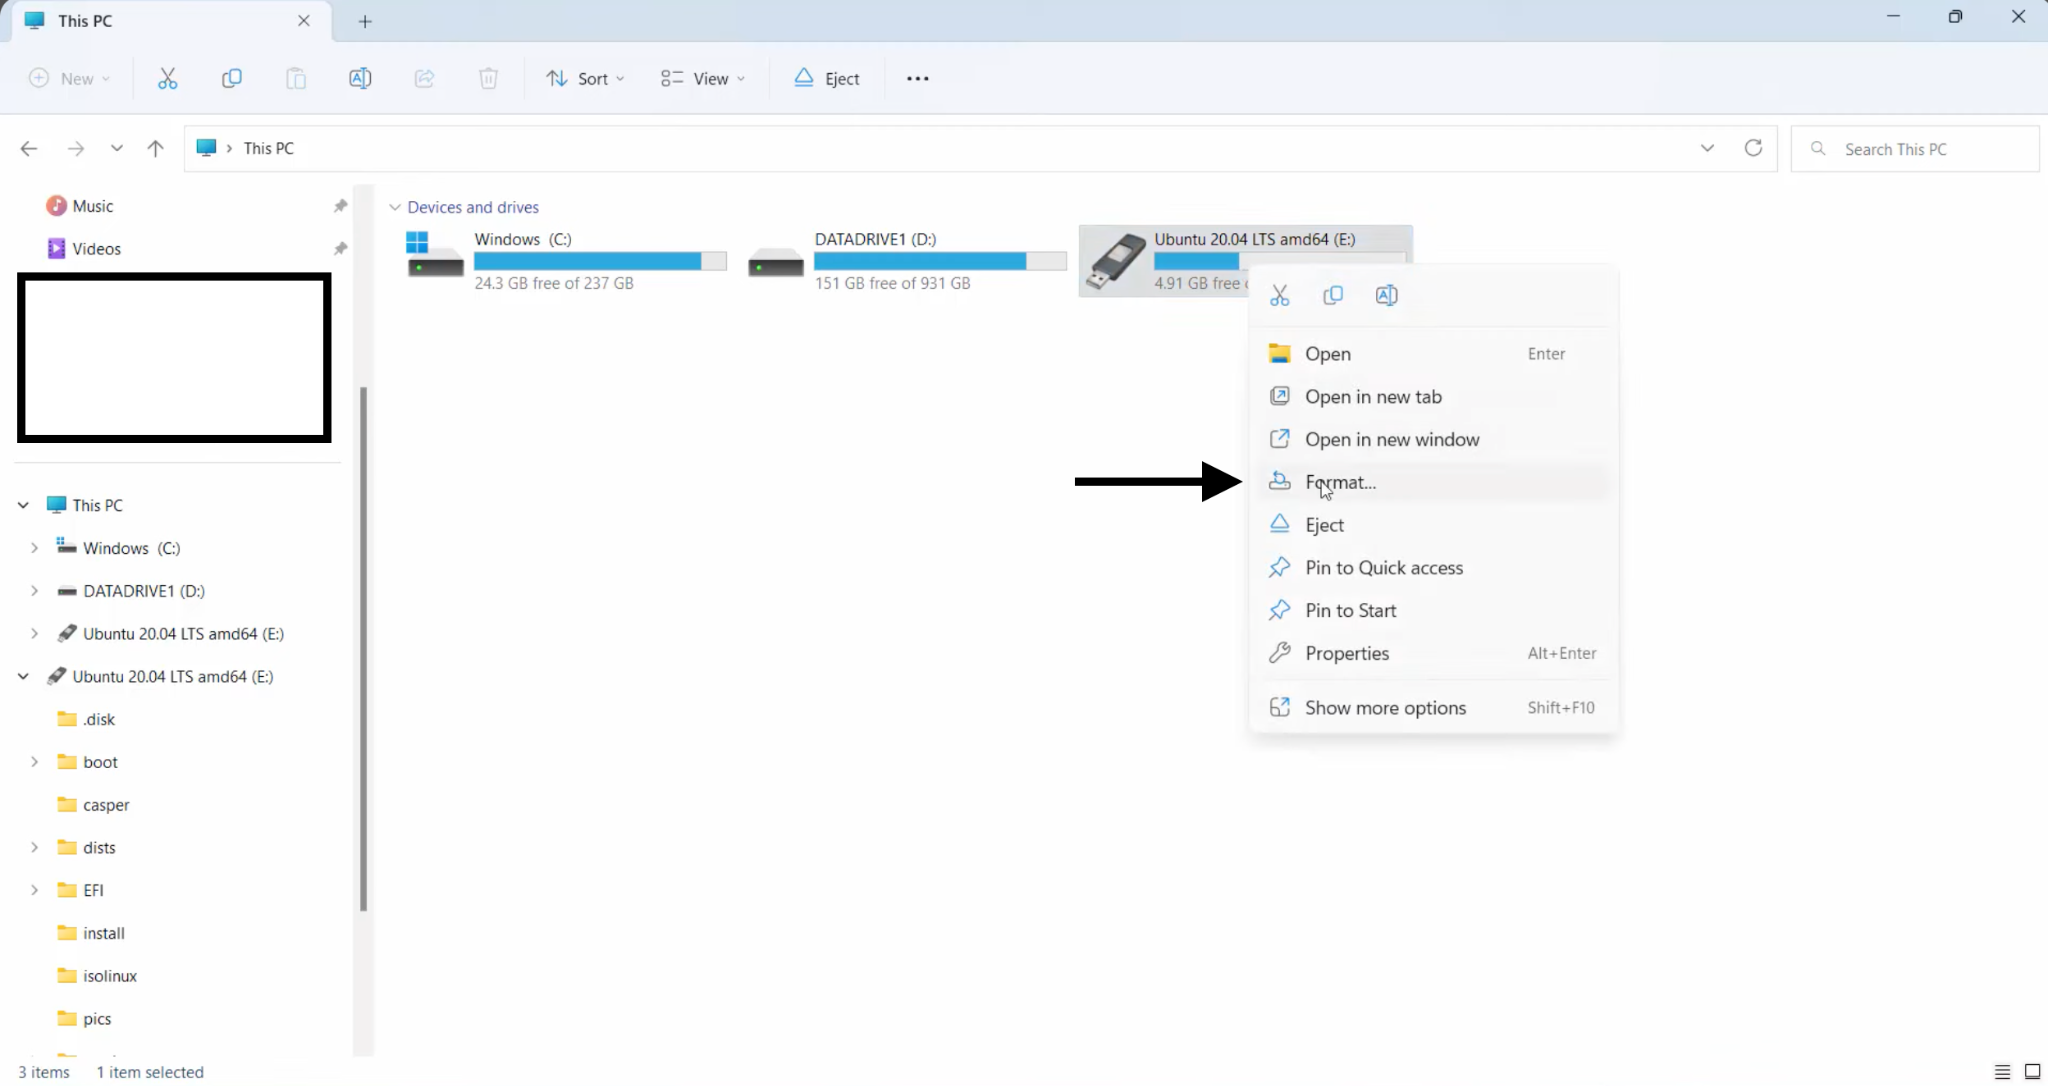
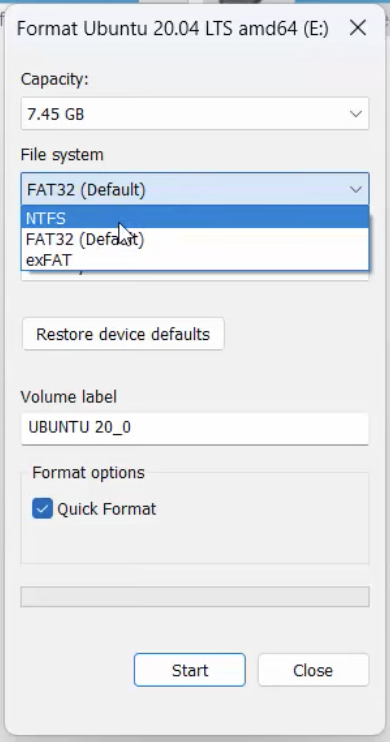
- In the Format dialog:
- File System: Choose FAT32, exFAT, or NTFS (exFAT is best for use on both Windows and Mac).
- Allocation unit size: Leave as Default.
- Volume Label: Enter a name.
- Format options: Check Quick Format if you’re confident (faster, but does not securely erase all data). Uncheck it for a Full Format (slower, but rebuilds the disk and checks for errors).
- Click Start, then OK to confirm. The process will erase and set up the drive.
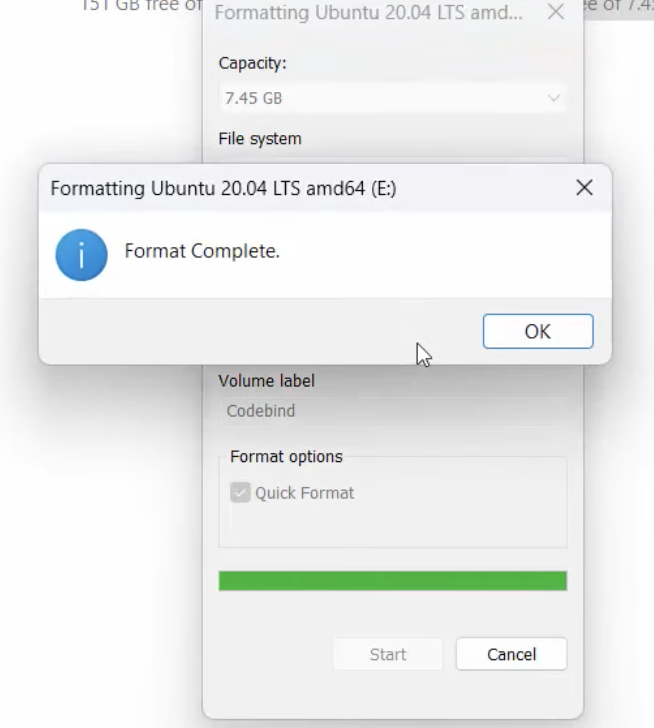
- When done, click Close. The drive is now formatted and ready to use.
That’s it! File Explorer’s format utility is user-friendly and works for basic needs.
Method 2: Format through Windows Disk Management
If File Explorer cannot see your drive or maybe it shows that it is blank or unallocated, Disk Management can initialize and format it. This can be used when your drive is unallocated or has no partition.
- Open Disk Management: Press Windows + X and choose Disk Management.
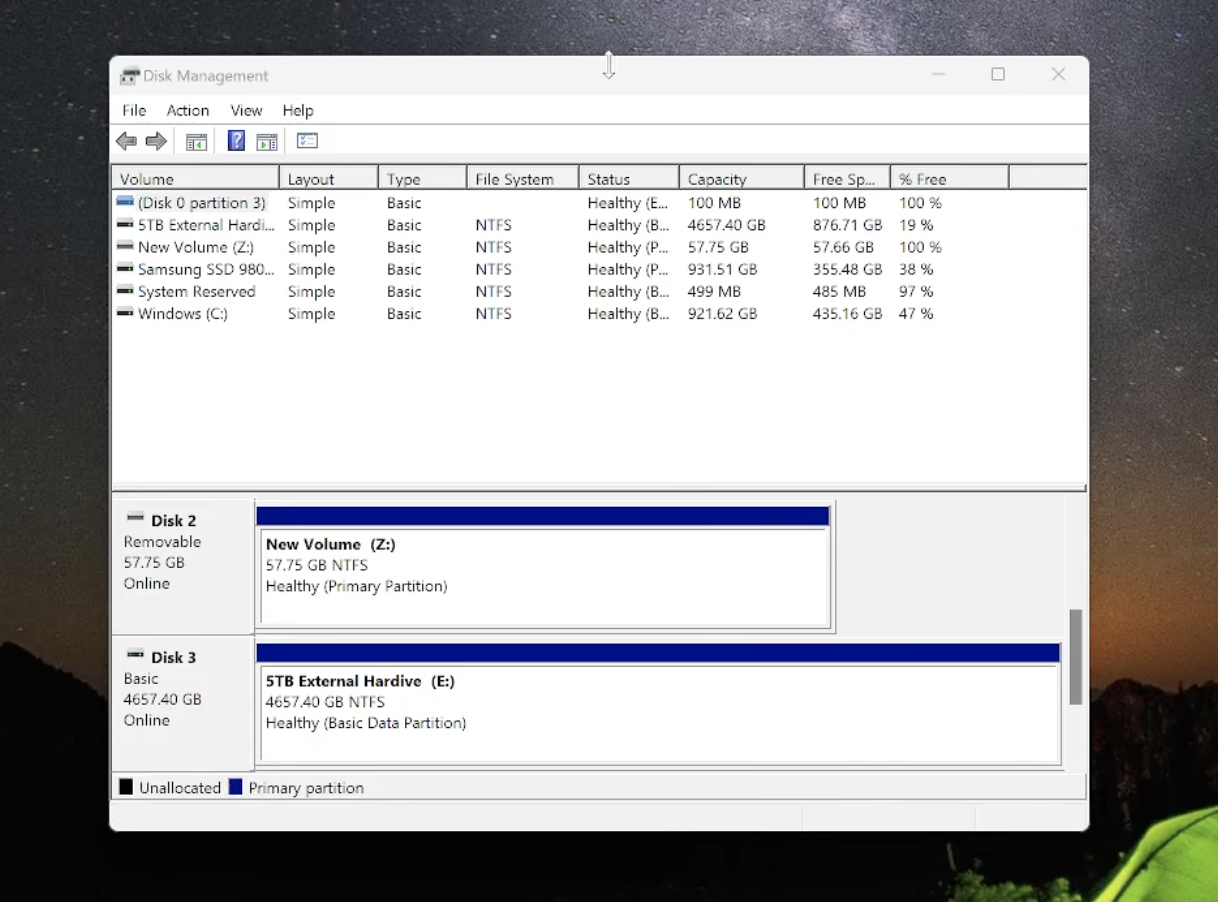
- Locate the USB drive: In the list of disks, find your USB by size.
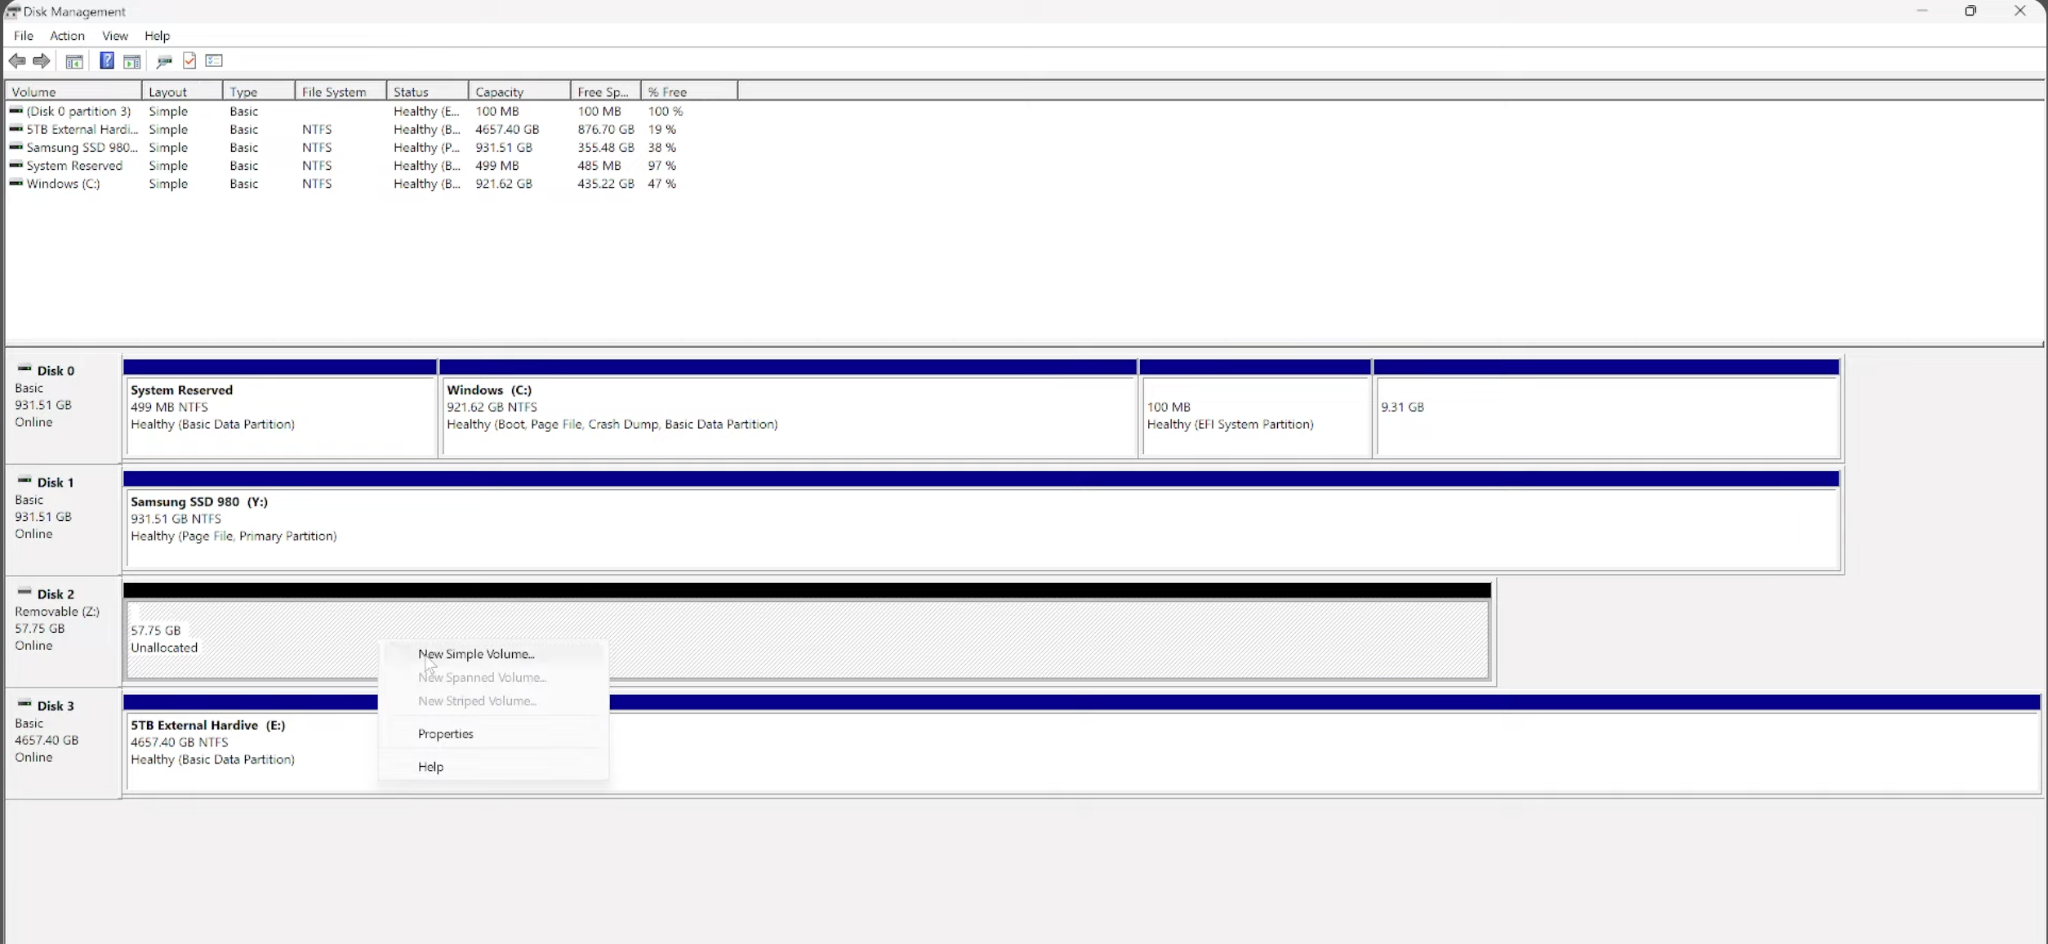
- When you see your drive, click Delete Volume. Format option in the drop-down here is the same as the one in Windows Explorer.

- Once the erasure is done, the space shall be shown as unallocated. Here, right-click the unallocated space and select New Simple Volume….
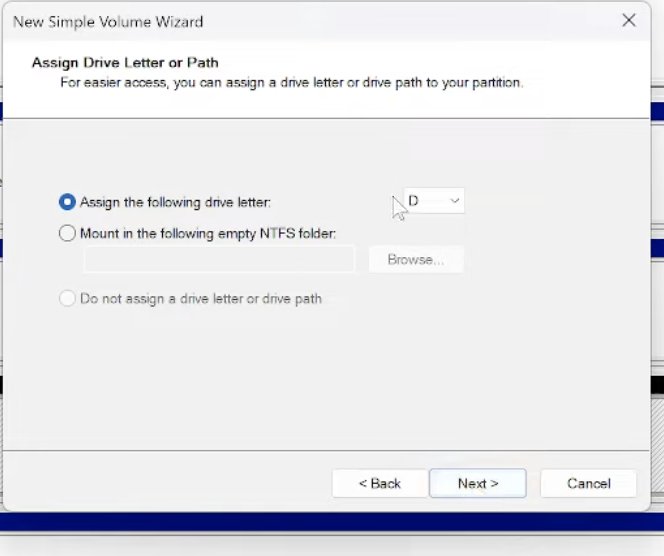
- In the wizard, click Next, assign a drive letter (or accept default) then Next.
- Choose NTFS or exFAT (NTFS for large files on Windows; exFAT for cross-platform), leave allocation size default.
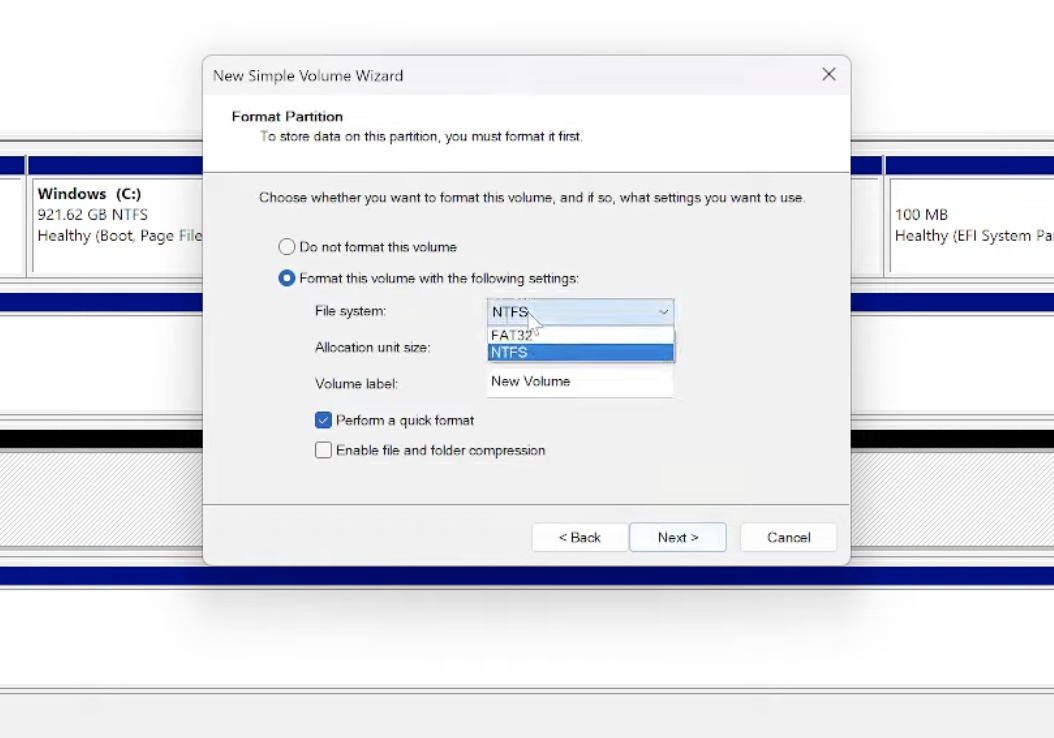
- Check Perform a quick format (or uncheck for full format).
- Click Finish. Disk Management will create and format the partition.
You shall have a fresh drive and you can use it as a new one after that.
Method 3: Format using Windows Command Prompt (DiskPart)
If you are an advanced user, you can use DiskPart, a command-line utility and just to do a deep format. Just use this method when the drive does not appear in File Explorer or if it has a corrupted partition.
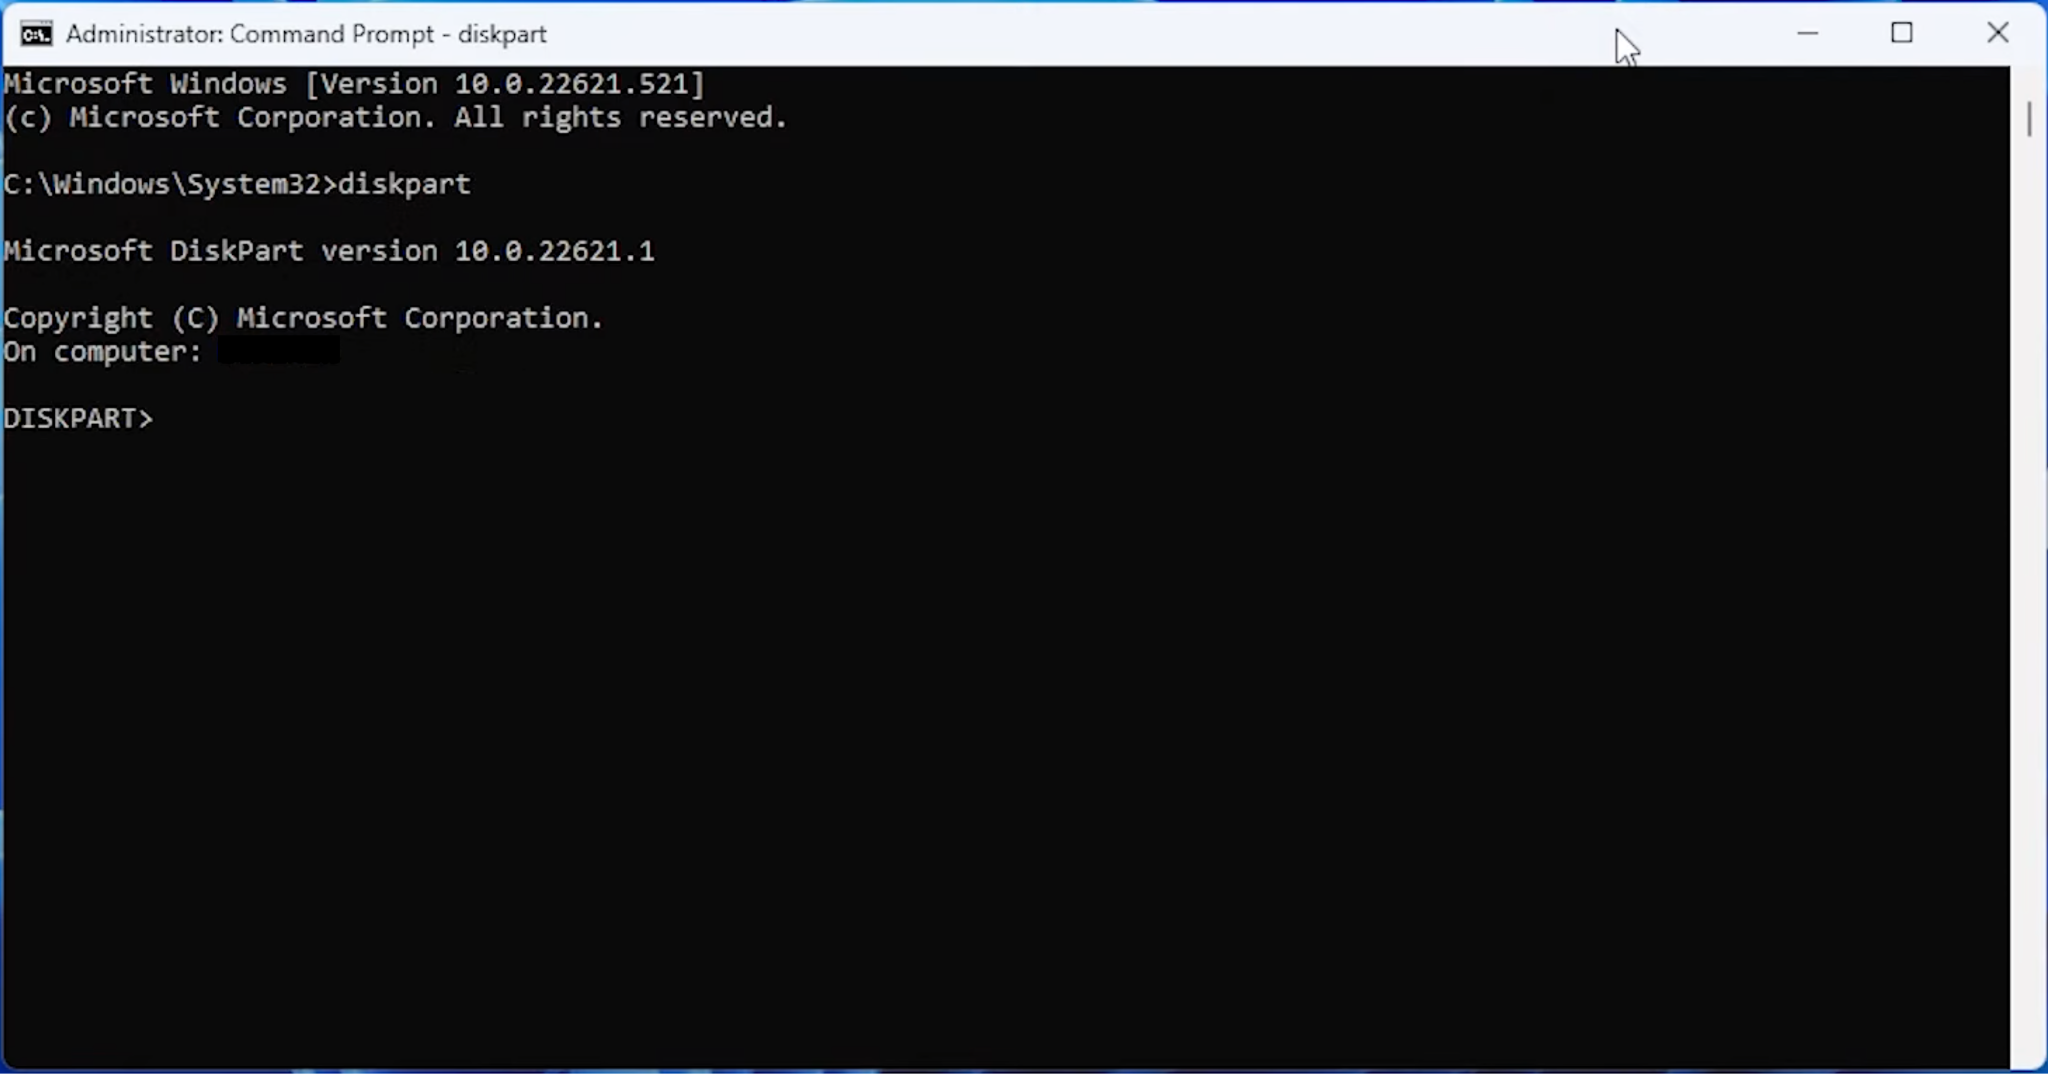
- Press Windows Key, type cmd and right-click Command Prompt. From options, choose Run as administrator.
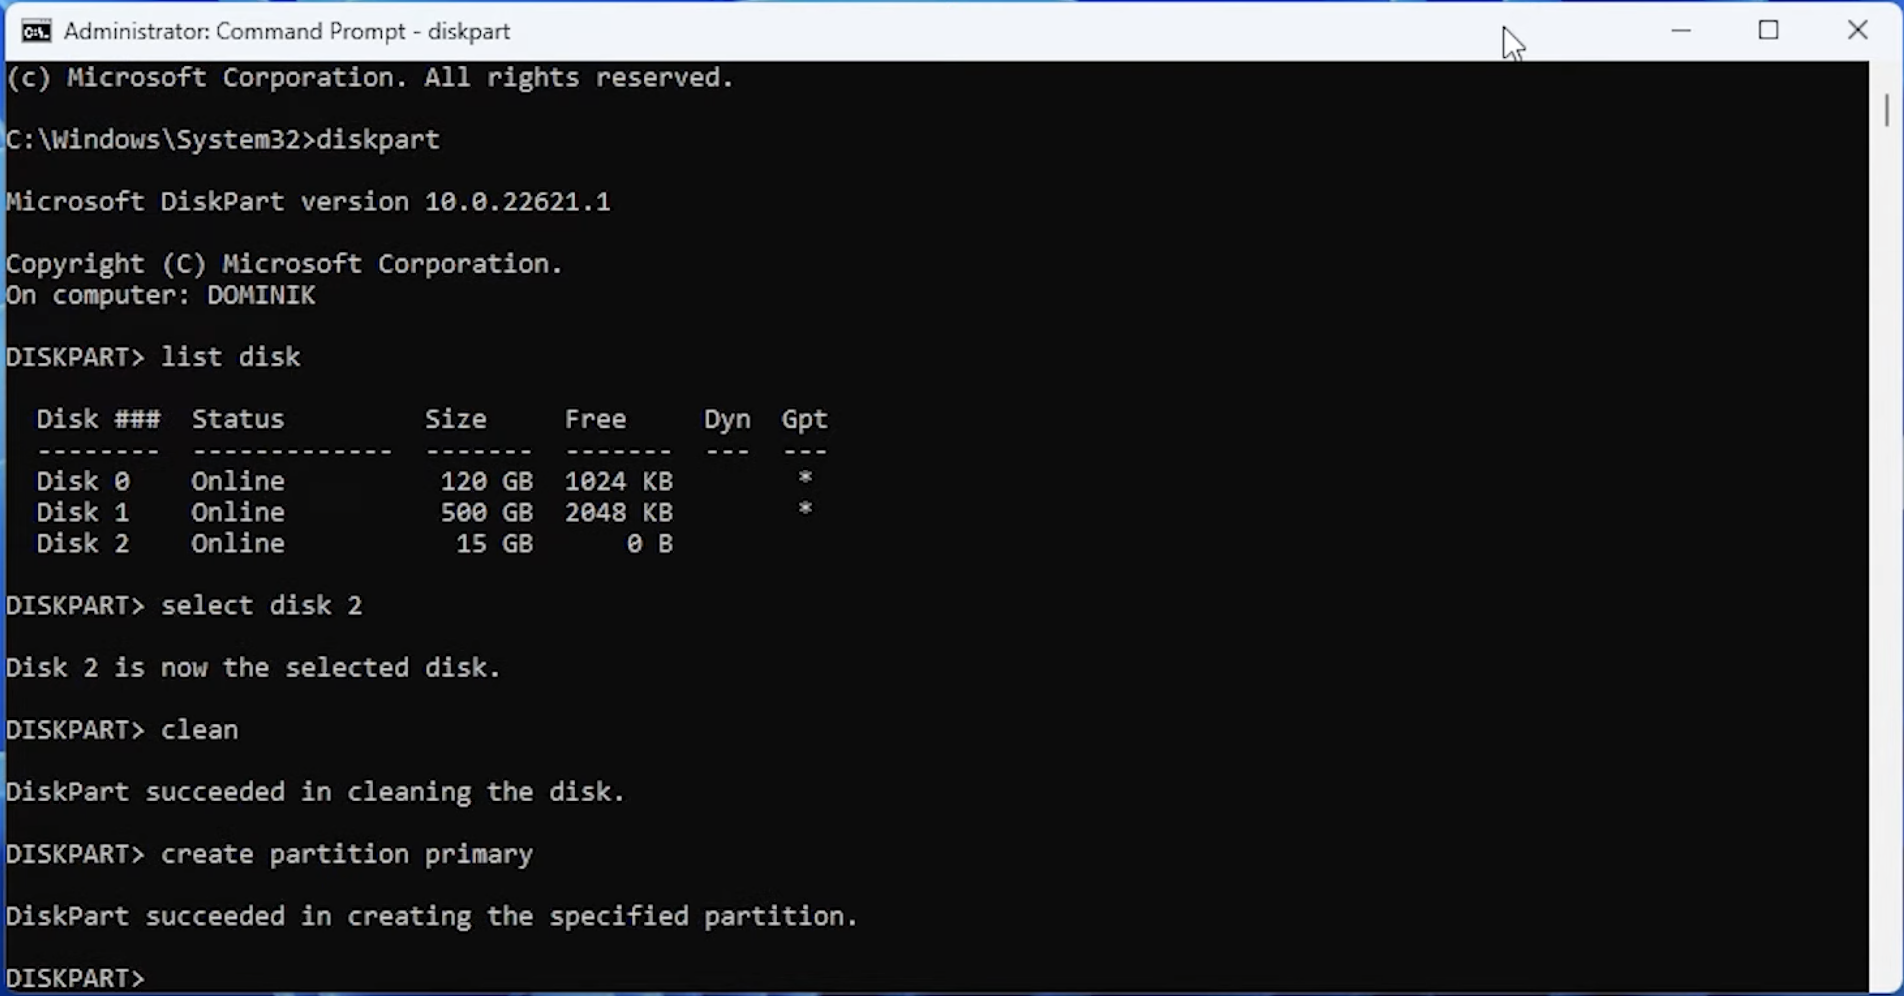
- In the command window, type diskpart and press Enter. The prompt shall get changed to DISKPART>.
- Identify the USB drive by typing list disk and press Enter. Note the disk number matching your USB size.
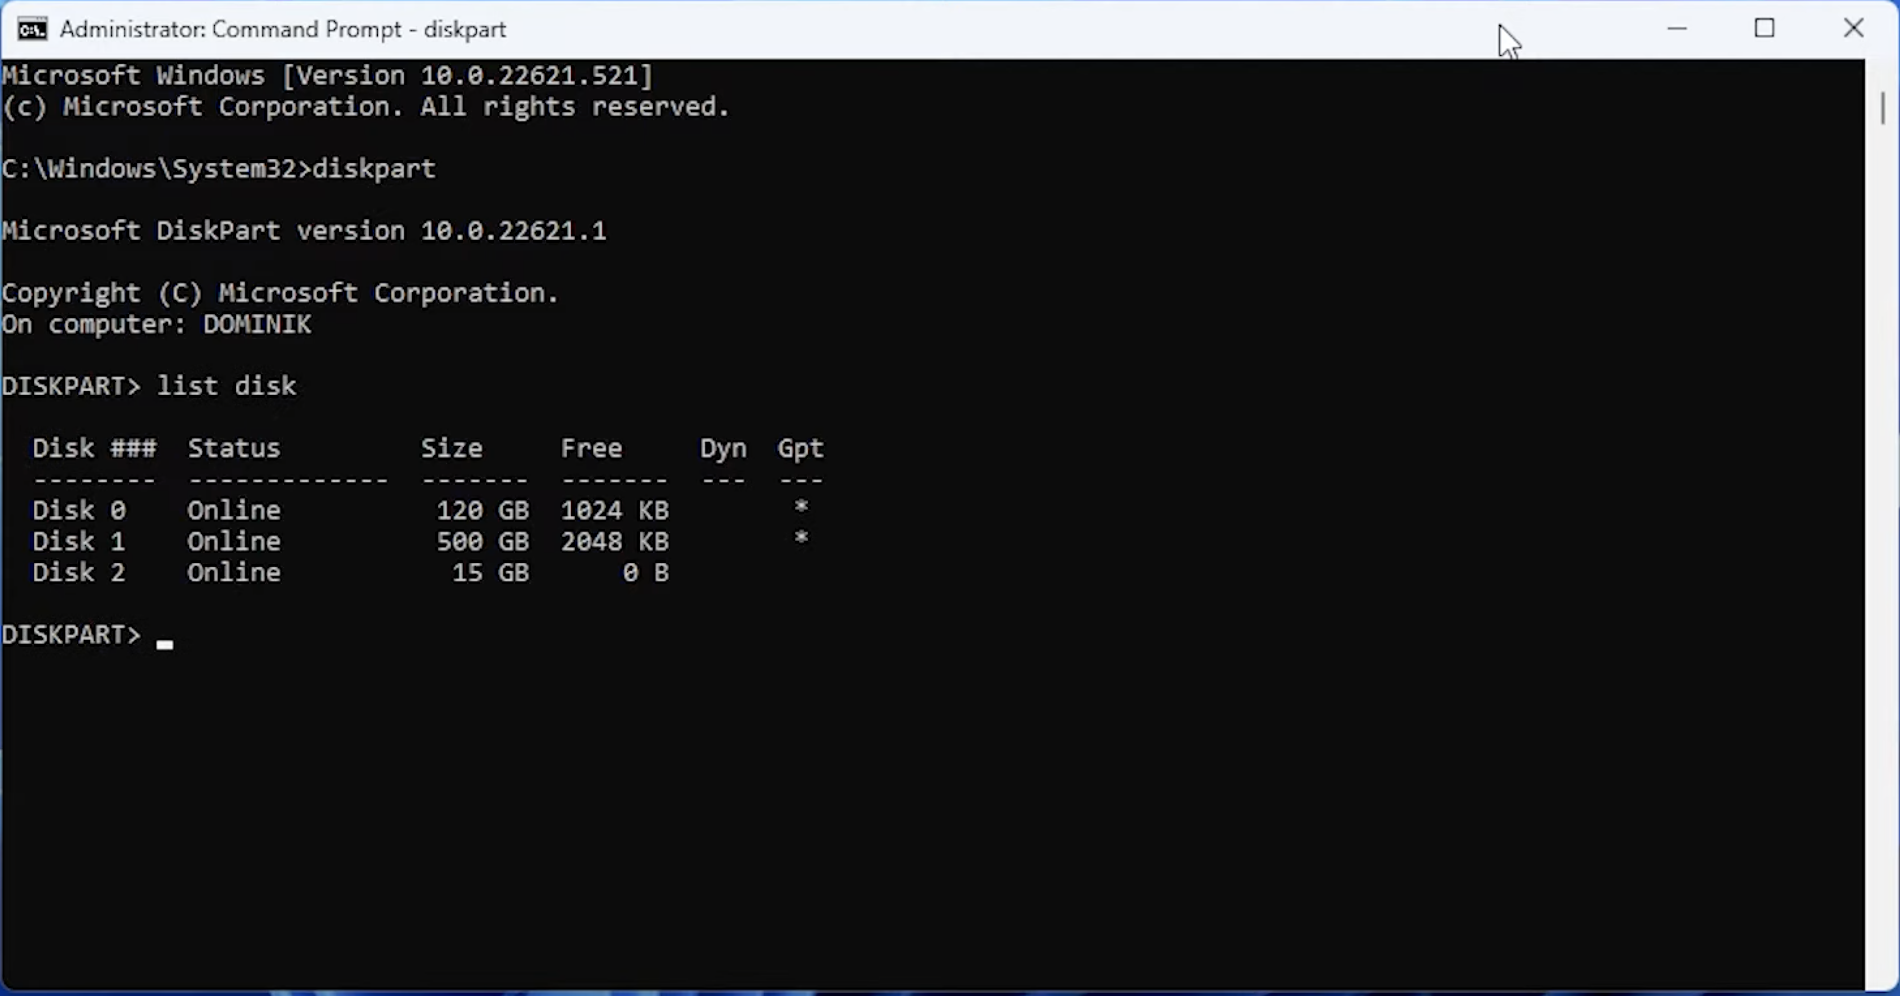
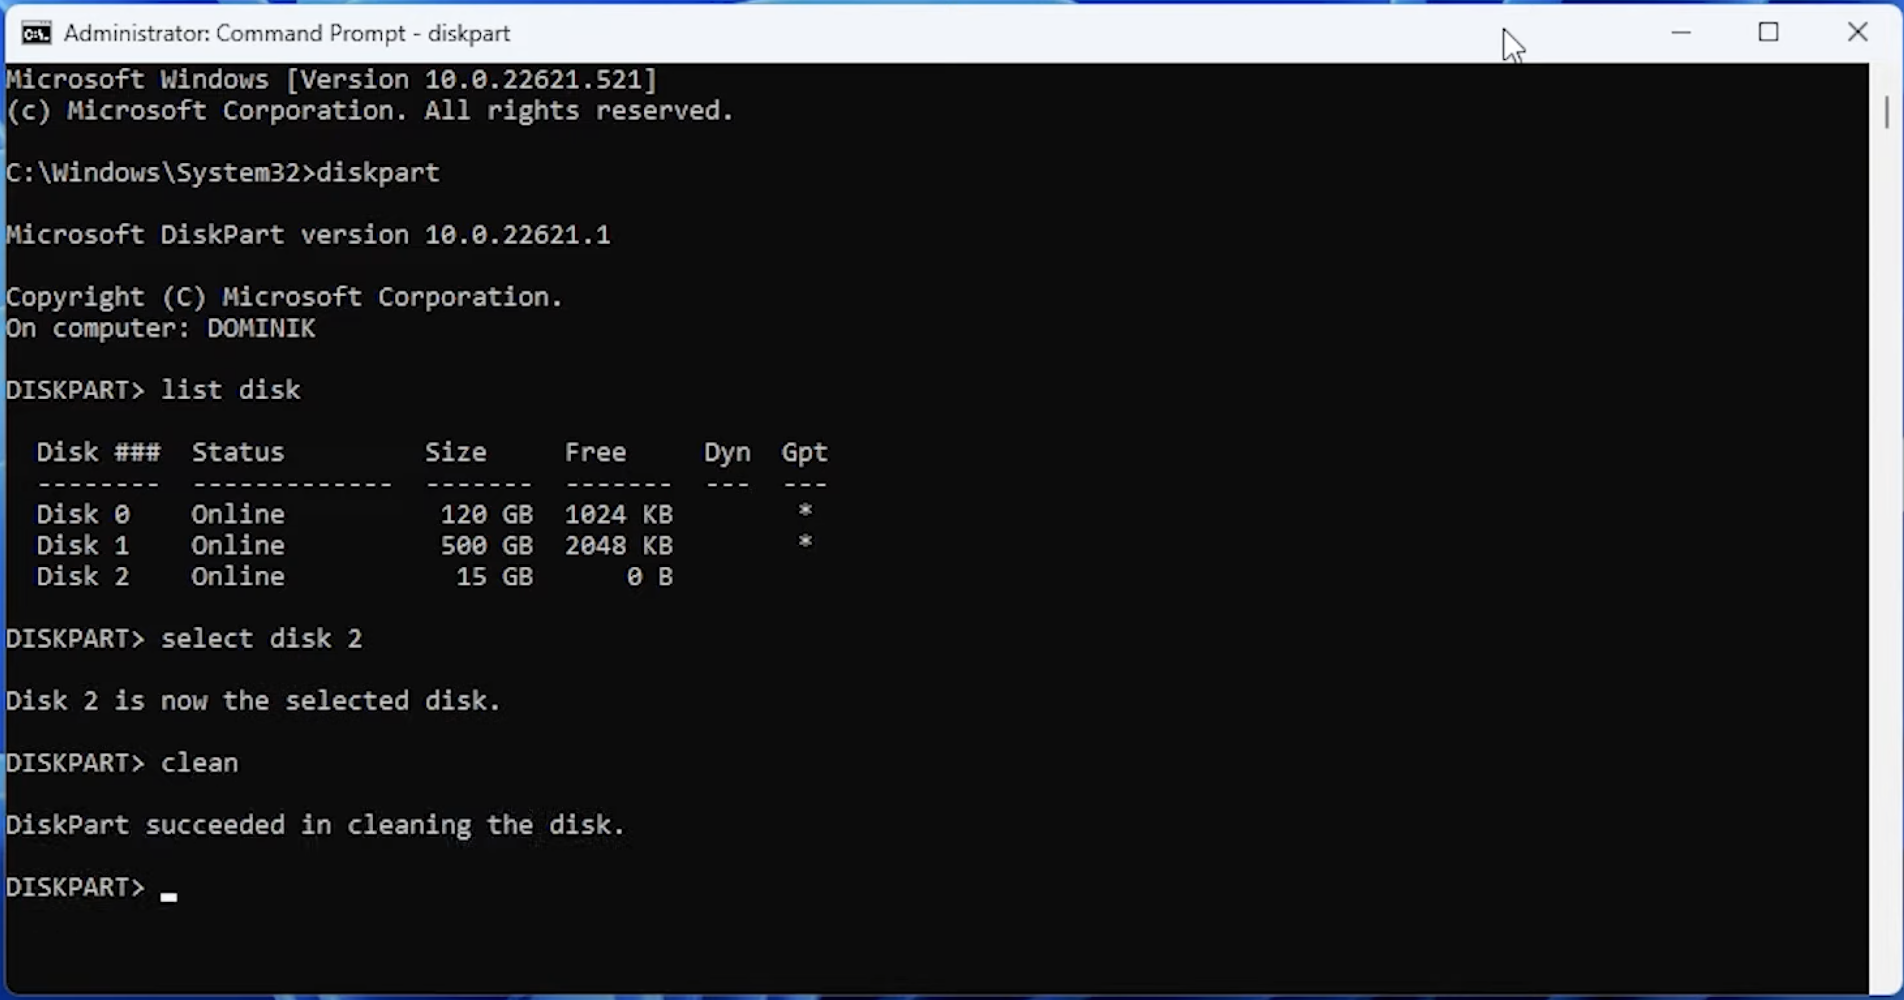
- Select the USB: Type select disk X (replace X with the number) and press Enter.

- Wipe the drive: Type clean and Enter. This removes all partitions and data structures.
- Create a new partition: Type create partition primary and press Enter.
- Format the partition: Type format fs=fat32 quick (for FAT32) or format fs=ntfs quick (if >32GB) and press Enter.
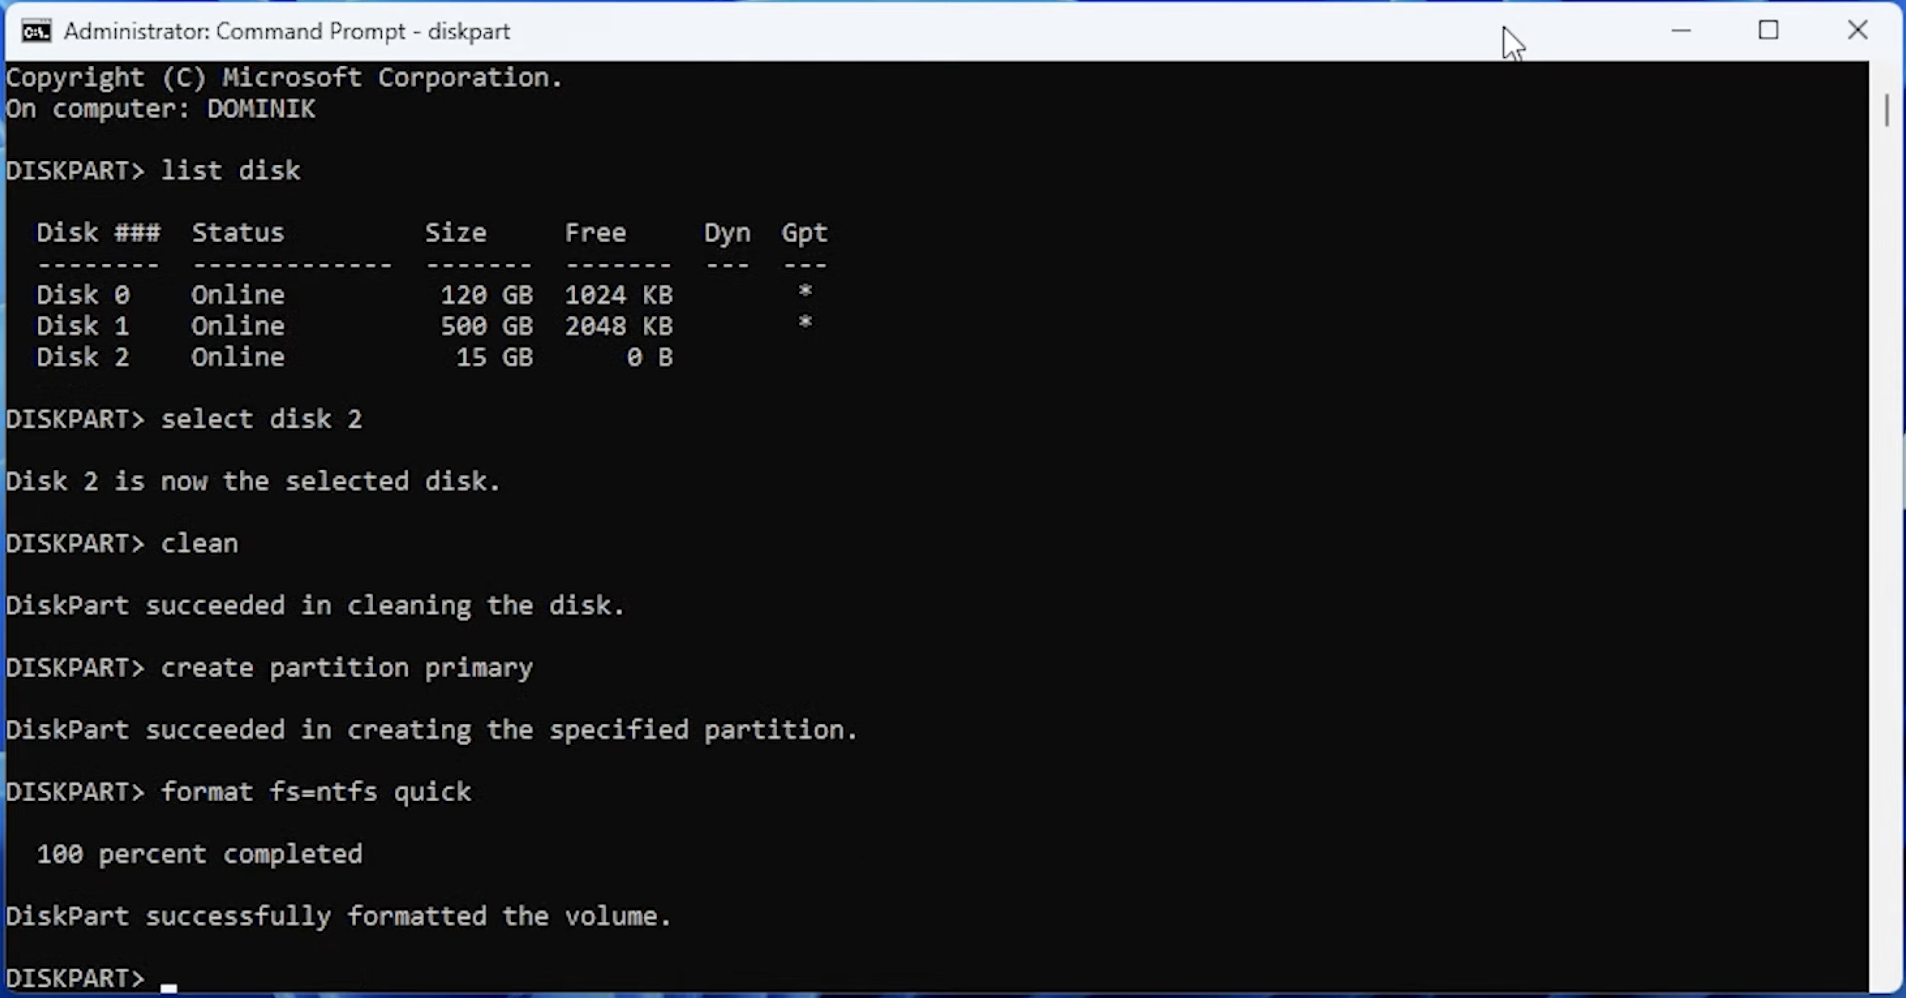
- Assign a drive letter: Type assign and press Enter.

- Type exit twice to leave DiskPart.
DiskPart’s clean command deep cleans the drive (erasing partition table) and then formats it. It’s great for “factory-resetting” a stubborn USB.
Method 4: Use a Professional File Eraser Software
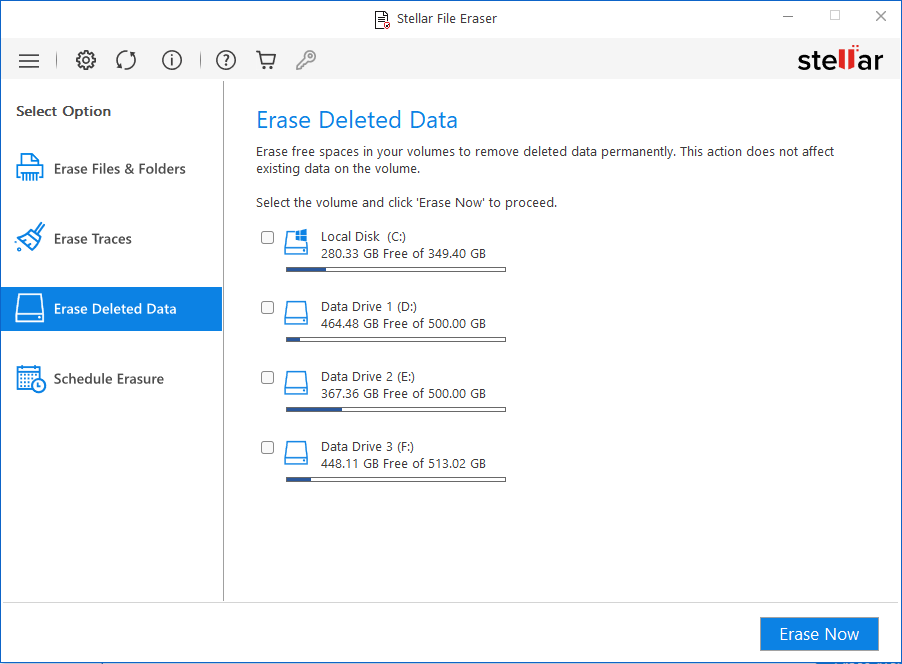
If Windows still can’t format the drive (for example due to extreme corruption or special needs), you can use free file eraser software like Stellar File Eraser. This program does multiple overwrite passes intentionally and makes recovery of the data very unlikely.
Here are the steps:
- Back up any data that is needed by you.
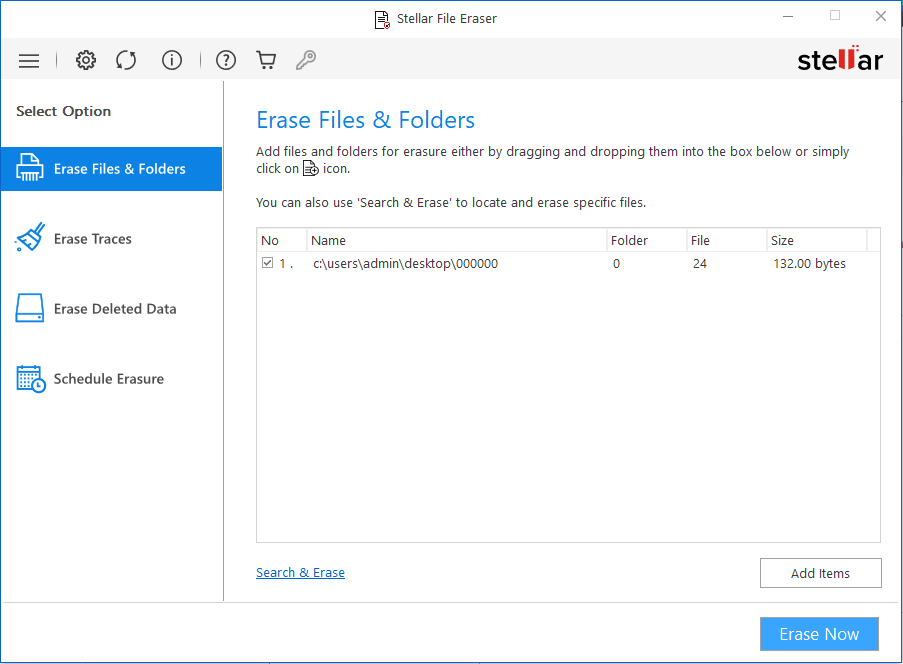
- Download/install Stellar File Eraser program.
- Select the USB drive and choose Erase Now.
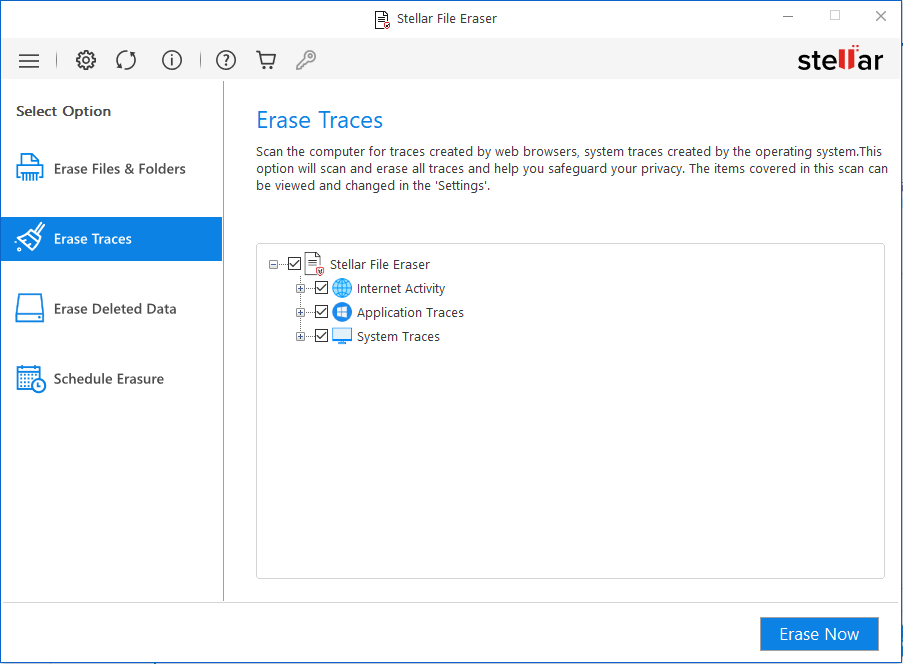
- Now click Erase Traces to erase any fragments of the files from the USB drive created anywhere else on your system.
- As a last check, go ahead and wipe the free space that is already there on your USB drive so that the deleted data is never recoverable.
Note: Double-check that you have selected the right USB drive before formatting as important data loss can happen
How to Format USB Drive on a Mac?
On a Mac, the built-in Disk Utility handles USB formatting with a GUI.
- Insert the USB drive into your Mac.
- Open Disk Utility: (Finder > Applications > Utilities > Disk Utility).
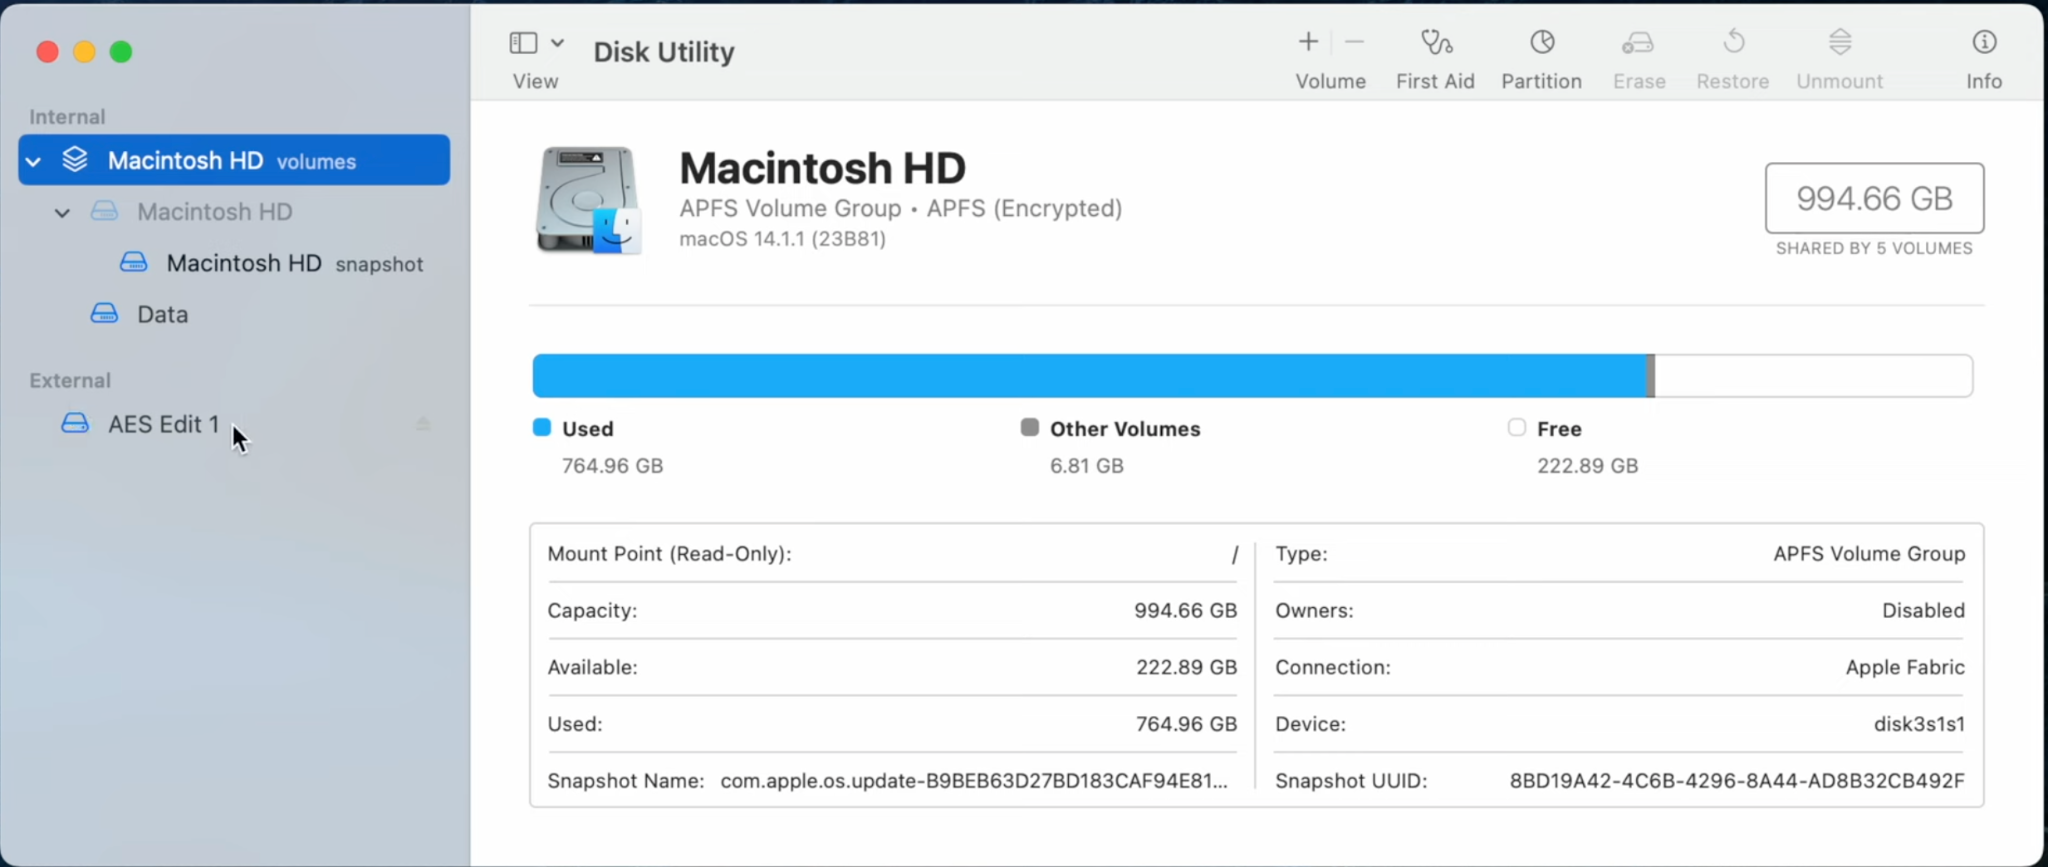
- View all devices: In Disk Utility’s top menu, click View > Show All Devices.
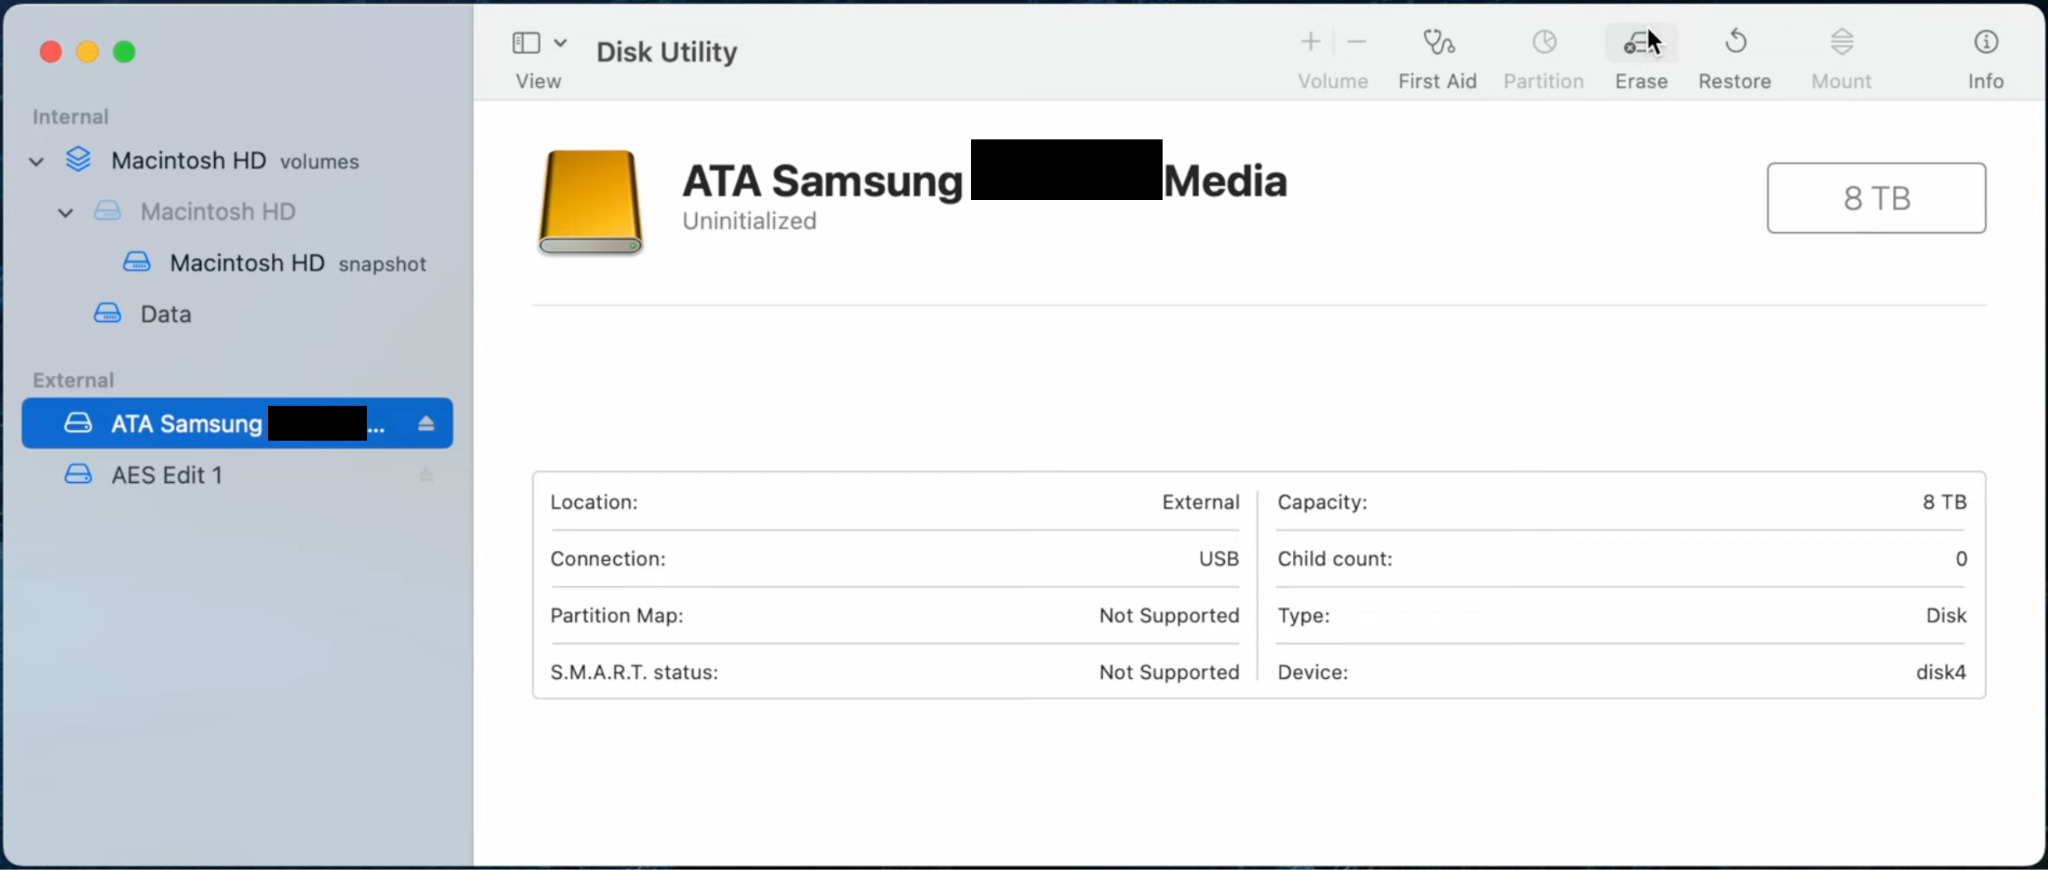
- Select the USB drive: In the sidebar, choose the top-level device (e.g. “Samsung”), not the indented volume.
- Click Erase in the toolbar.
- In the Erase dialog:
- Name: Give the drive a name (up to 11 chars for FAT32).
- Format: Just choose ExFAT (for drives >32GB) or MS-DOS (FAT) (aka FAT32, for drives ≤32GB). Mac OS Extended or APFS are options only for Mac-only use (Windows won’t read them without special drivers).
- Scheme: Choose GUID Partition Map (needed for most modern Macs and for FAT32/exFAT to be bootable on Intel Macs).
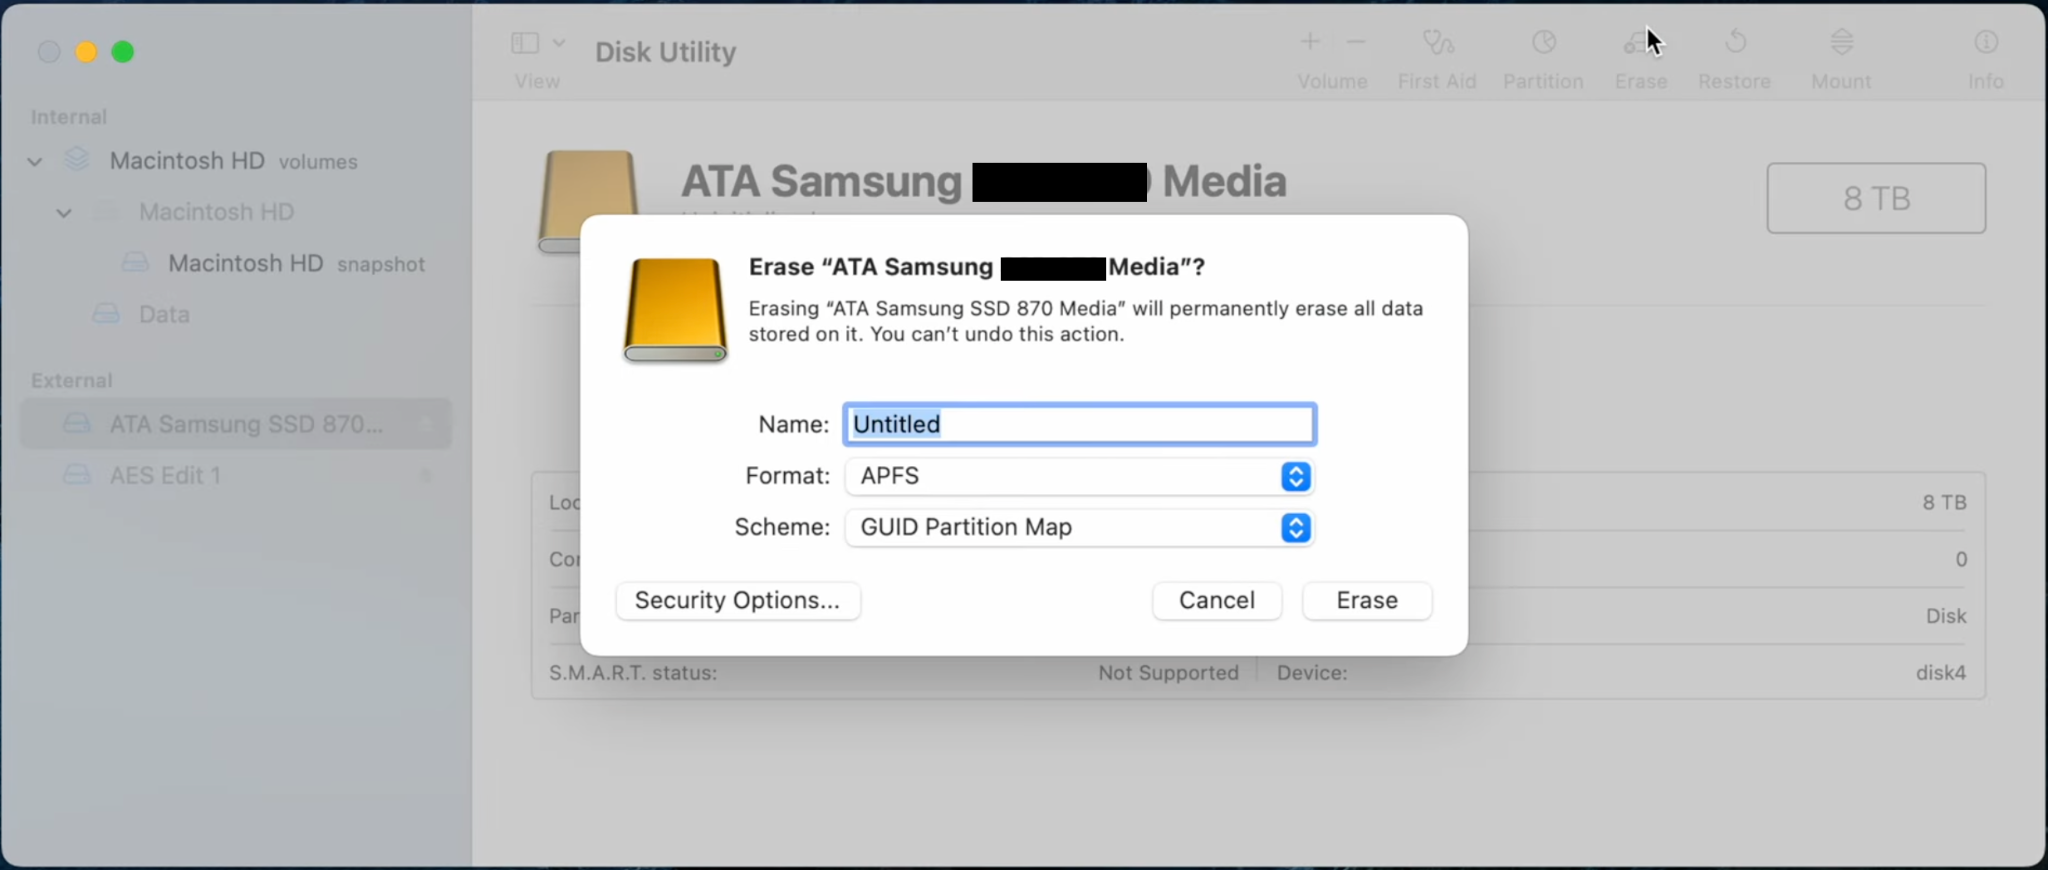
- Click Erase and then Done when finished.
Mac’s Disk Utility makes it easy for cross-OS use, just pick exFAT so both Mac and PC can read the drive. If you only need Mac usage, you can do APFS or Mac OS Extended (Journaled). Remember, FAT/exFAT is the recommended one for compatibility.
How to Check if the Drive is Actually Formatted?
After formatting, you can actually verify that your USB drive is truly wiped clean using formatted drive recovery tools. Sometimes a quick format may leave old data lingering there and recovery tools can find them.
- On Windows/Mac: Copy some files onto the USB drive, eject it safely and then re-insert to confirm it is read correctly. Check the drive properties to know that it is showing full capacity.
- Data Recovery Check: For your peace of mind, run a scan with a free data recovery tool like Stellar Data Recovery Free. If it finds your old files still, that means the format you did was quick or maybe incomplete and data exists. In this situation, format again with the full format option to wipe them files out.
Quick Comparison of Formatting Methods
| Method | OS | Quick/Full Options | Use Case | Pros/Cons |
| File Explorer | Windows | Both (checkbox) | Everyday formatting; most Windows PCs | Easy and fast. Limited to basic formats (FAT32/NTFS/exFAT). |
| Disk Management | Windows | Quick (default) / Full (no) | Drives not seen in File Explorer; partitioning | Can initialize/unallocate. Slightly more complex UI. |
| Command Prompt (DiskPart) | Windows | Quick (default) / Full (no) | Stubborn or corrupted drives; advanced users | Very powerful, can clean entire drive. CLI may be complex. |
| Disk Utility | Mac (macOS) | Quick (Erase) / Secure overwrite | Mac formatting (FAT/exFAT/HFS/APFS) | Easy GUI, can prepare Mac-specific file systems. |
| Professional Data Eraser Software | Windows and MacOS | Varies (usually quick or full) | Fix drives Windows can’t; special needs | Handles weird cases (recover lost space, >32GB FAT32). Needs download and care. |
Quick vs Full Format: A quick format clears the file index only, it is very fast and leaves your file data on the disk. A full format rebuilds that file system of the drive and checks it for bad sectors and overwrites data too. Quick formats are okay for reusing your USB by yourself but if you want to erase all the traces of data on it for selling or disposing or maybe giving it to a friend, go for a full format or a secure erase option.
What if the Formatting Fails?
- Write Protection Error: If Windows tells you that your disk is write-protected, you see if the USB has a physical lock switch… it is uncommon on small drives though. You can also use DiskPart to remove that software write-protect. On Mac, make sure that the drive isn’t locked in Finder.
- Format Fails / Device Inaccessible: Go for a different USB port or another computer. Use Disk Management to re-initialize that drive or use that clean command on DiskPart to remove errors.
- Drive Too Large for FAT32: Windows is not letting you create a FAT32 partition larger than 32GB for real. So you have to use exFAT instead or maybe a third-party tool. They can format >32GB as FAT32 if you need it instantly.
- Drive Keeps Appearing as RAW: This means that your file system is corrupt. Here you can go ahead and format your drive with DiskPart or maybe a bootable utility which can re-partition and format a RAW drive.
- Unusual Partition Layout: Sometimes, a recovery or multi-boot USB leaves extra partitions. In Disk Management or Disk Utility, delete all volumes on the USB and recreate a single new volume (choose “Show All Devices” on Mac to delete the device, not just volume).
If nothing works, the USB hardware may be failing. In that case, consider replacing the drive.
Conclusion
Formatting a USB drive need not be scary. Windows provides both easy and advanced tools that we just discussed. Mac’s Disk Utility is user-friendly too. By picking the right file system (FAT32/exFAT/NTFS) and format type as per your requirement, you can prepare the drive for any other purpose. If your USB does not cooperate, still there are other professional file eraser options like Stellar File Eraser to get the job done. After formatting, double-check those results using Stellar Data Recovery. If it finds out that there are still recoverable files, deep scan is the way. By following these methods and those tips we listed, you shall have a blank and healthy USB drive. Happy formatting!


Pallavi is a literature graduate turned content strategist, specializing in data recovery. She creates insightful, user-friendly content to help people rescue their data from hard drives, SSDs, memory cards, and more. When she’s not decoding tech for everyday users, she’s curled up with a book - or secretly planning her next adventure.

 4 min read