Disk Utility is a native macOS application that offers multiple storage disk management features, such as First Aid, Partition, Erase, Restore, Unmount, and Info.
The Erase feature of Disk Utility allows you to format your Mac hard drive with a new file system. You need to enter a few details such as name, format, and scheme before you erase the storage medium. Disk Utility provides the following three schemes:
GUID Partition Map: Select this scheme for all Macs that are based on Intel and Apple Silicon. Even, some latest Windows PCs use this scheme.
Master Boot Record: Prefer this scheme for compatibility with Windows-based PC.
Apple Partition Map: Use this scheme for compatibility with old PowerPC-based Mac.
The Erase operation replaces the old file system of the storage drive with a new one. So, you lose access to all your files from the drive. To avoid data loss, you must back up your Mac or the external storage device before performing the erase operation.
In case you have lost your files due to accidental erasure of storage drive, and you don't have a backup, you must stop using the drive immediately to avoid data overwriting. Subsequently, recover data by using a Mac data recovery software, as explained next.
Recover Accidentally Erased Drive
Accidental erasure of storage drive or volume due to human error is quite common. Don't worry! You can use a Mac data recovery software to recover your lost data. The steps are as follows:
a) Download and install *the free trial of Stellar Data Recovery Professional for Mac on your MacBook, iMac, or Mac mini.
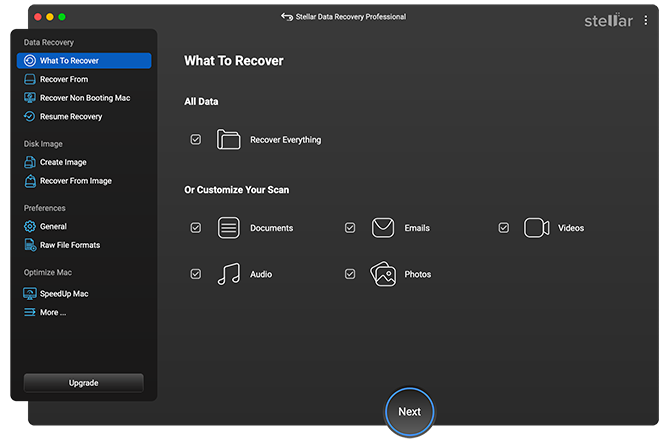
b) Launch the software and in the Select What to Recover screen, choose to Recover Everything or customize your scan by selecting the required file types, then click Next.
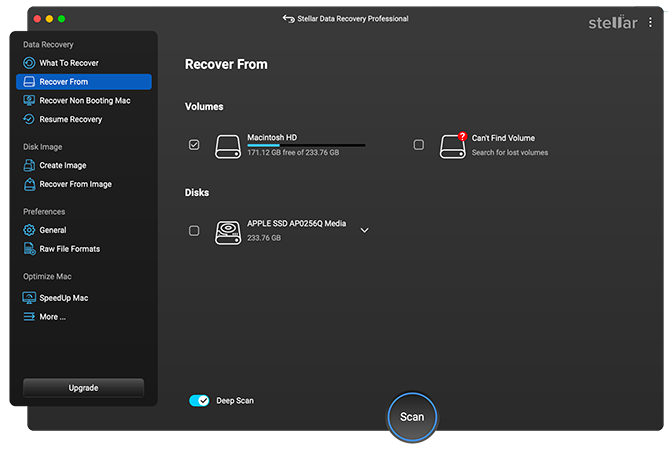
c) From the Select Location screen, choose the Mac internal or external hard drive, toggle on Deep Scan, and then click Scan. For start-up disk, you need to allows software extension.
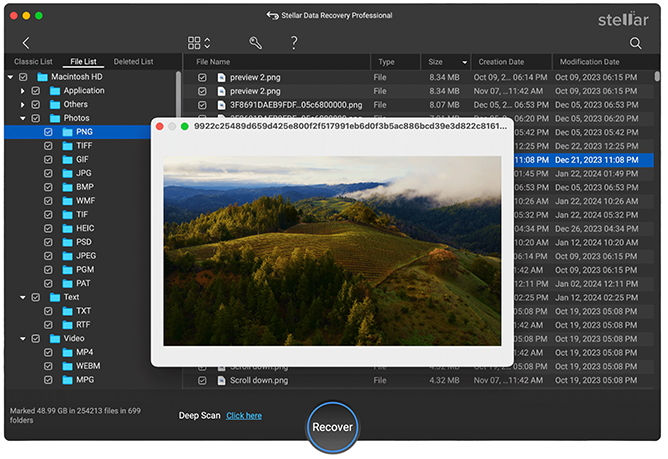
d) After the scan is over, click on the View tab, preview scanned files, and select the required files. Finally, click Recover.
e) Click Browse to specify a distinct volume or an external storage device as a recovery location, then click Save. After the file recovery is over, navigate to the save location to view your recovered files.
*The free trial of Stellar Data Recovery Professional for Mac is useful for scanning and previewing. For recovering files, you need to activate the software. Also, the software comes with a 30-day money-back guarantee, just in case.
Conclusion
When you need to erase your Mac internal or external hard drive in macOS using Disk Utility, you must specify an erasure scheme. There are three different schemes provided by Disk Utility—GUID Partition Map, Master Boot Record, and Apple Partition Map. The choice of one over the other depends on the Mac version and compatibility with Windows computer.
But if you forget to back up your Mac storage drive before erasing it, you lose all the stored data present on the drive. Consider using Stellar Data Recovery Professional for Mac software to get back your lost files in such a situation. The recommended software is compatible with macOS Ventura and earlier macOS versions.


 11 min read
