If you’re stuck with a non-booting Mac, you might have unfinished docs, or other important files that can’t be accessed anymore. In this situation, data recovery becomes challenging.
However, if the Mac turns on but fails to boot to the desktop, you can still recover your data.
DIY Methods to Recover Data from a Non-booting or Crashed Mac
Recovering data from a working Mac is easy as you can apply any available backup and recovery option on the system. However, when it comes to a crashed Mac, it's a different story.
You need to perform certain specialized procedures to secure the data saved on your non-bootable Macintosh HD. Here are 5 DIY methods to recover your data from a non-booting Mac.
Method 1: Use Target Disk Mode or Sharing Mode to Recover Data from Mac that Won’t Boot
You can use Target Disk Mode for Intel-based Macs and Sharing Mode for Apple Silicon Macs to recover data from a non-booting Mac. This feature enables you to connect two Macs with a cable, effectively turning one into an external hard drive for transferring data.
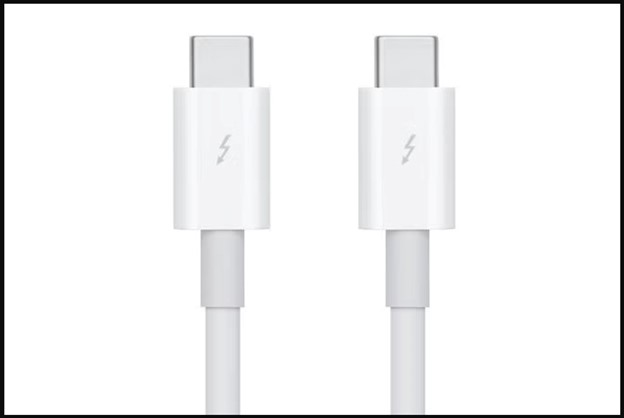
For Apple Silicon Macs, you need to use Share Disk along with Thunderbolt 2 to Thunderbolt 3 cable. Conversely, for Intel-based Macs, the Target Disk Mode requires a Thunderbolt cable.
For Intel-based Mac:
Step 1: Use a Thunderbolt cable to connect the non-booting Mac (the source) to the working Mac.
Step 2: On the non-booting Mac (the source), press the power button and hold the T key to boot into Target Disk Mode.
Step 3: Now check the other Mac. You can now access the source system’s drive via the desktop of another connected Mac and should be able to copy any files across the shared drive.
For Apple Silicon-based Mac:
Step 1: Connect the non-booting Mac to the working Mac using the appropriate cable.
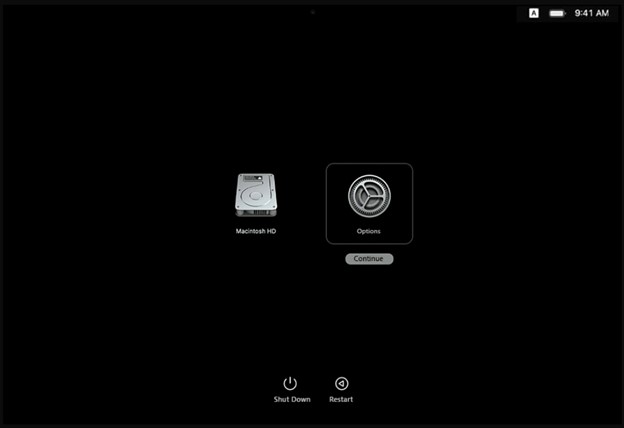
Step 2: On the non-booting Mac (the source), hold down the power button until Loading Startup Options appears on screen
Step 3: Next, select Options and click Continue. Enter admin password if required and your system will boot into Recovery Mode.

Step 4: Now click on Utilities > Share Disk from the Apple menu bar.

Step 5: Select the disk you want to share and hit Start Sharing.
Step 6: Boot up the other Mac (the one you’re transferring files to) and access the shared drive as a network volume from Finder.
Step 7: For this, go to Finder > Location > Network. You should now be able to see the source Mac’s drive appear on the other Mac.
Step 8: Double-click on the source Mac’s drive and select Connect > Guest > Connect. Transfer the files you want and eject safely.
Method 2: Easiest Procedure to Recover Data from a Non-booting or Crashed Mac
Avoid the hassle of complex manual recovery procedures by opting for specialized data recovery software for Mac. The software’s straightforward user interface and advanced features make it an excellent DIY tool for retrieving documents, photos, audio, and video files from a non-booting or crashed Mac.
Here’s how to configure the software on a non-booting Mac using Apple Silicon Chip:
Step 1: Press and hold the power button to boot into Recovery Mode.
Step 2: Select Options on the start screen and click Continue.
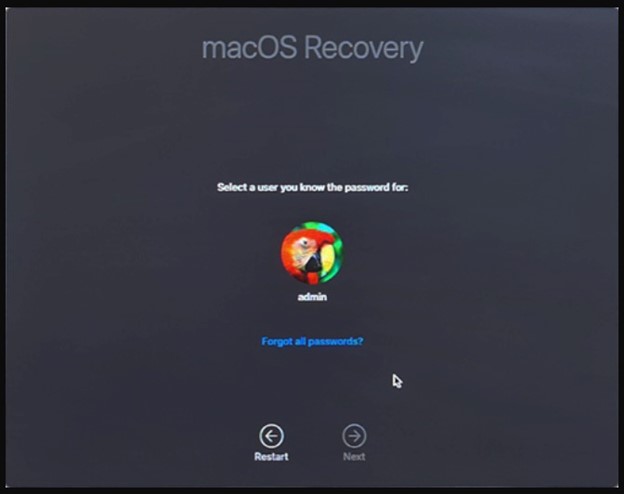
Step 3: macOS Recovery window appears, click Next to go to the login option.
Step 4: Type in your Admin Password and click Continue to proceed.
Step 5: On the Recovery Mode screen, click Utilities > Terminal.

Step 6: Enter the following command in the Terminal window and hit Return: sh <(curl http://www.stellardatarecovery.co.in/StellarDataRecovery.xml)
Step 7: Accept the License Agreement and launch the software.
Here’s how to configure the software for Mac non a non-booting Mac using T2 chip:
Step 1: Power on your Mac and press Command + R to boot it into Recovery Mode.

Step 2: Connect your Mac to an active Wi-Fi network and click Utilities > Terminal.

Step 3: Enter the following command into the Terminal window and hit Return: sh <(curl http://www.stellardatarecovery.co.in/StellarDataRecovery.xml)
Step 4: Accept the License Agreement and launch the software.
Once you have configured the software on your Mac, follow the steps below to recover your data:
Step 1: Select the type of files you want to recover and click Next.
Step 2: Select the storage volume you want to recover from and hit Scan.
Step 3: Once the scan is complete, preview and select the files you want to restore.
Step 4: Click Recover to move the recovered files to a desired location.
GIF Caption: The steps to recover data from a crashed or non-bootable Mac
Method 3: Use Time Machine Backup to Recover Data from a Non-booting or Crashed Mac
Time Machine is a built-in tool on Mac that enables you to create backups and restore data on your device when needed. If you have already backed up your non-booting Mac’s data, you can restore your Time Machine backup disk using macOS Recovery Mode.
Follow the steps below to restore your data from Time Machine:
Step 1: Plug the Time Machine backup drive to the non-booting Mac and boot into Recovery Mode.
Step 2: From the macOS Utilities window, select Restore from Time Machine Backup.
Step 3: From the list of available backups, select the ones you want to restore and click Continue.
Step 4: Next, select the destination drive where you want to save the restored data and click Continue.
Step 5: Finally, erase the destination drive and click Restore.
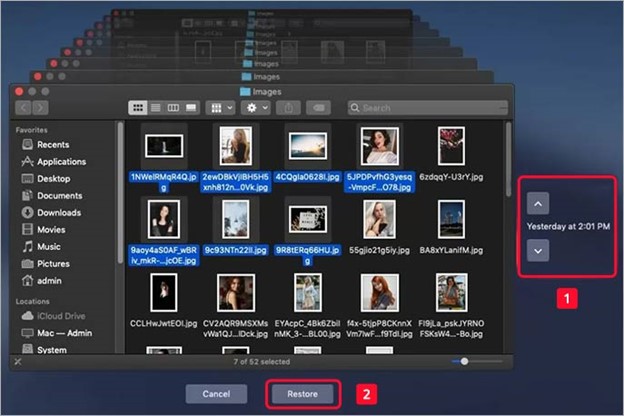
It may take some time to recover your files to the destination drive depending on the volume of data. So wait for the process to complete.
Method 4: Create Disk image to Recover Data from a Non-booting or Crashed Mac
Without Time Machine backup, you can recover your data by installing macOS on an external hard drive. Once installed, boot from this drive and transfer your files. To do this, use Disk Utility in Recovery Mode to create a disk image for backup. Afterward, connect this disk to another Mac and move your files over.
Step 1: Connect your non-booting Mac to the external drive and boot into Recovery Mode.
Step 2: Launch Disk Utility from the macOS Utilities window.
Step 3: Select the external drive and click Erase to format it using GUID Partition Map.
Step 4: Name your drive, select either APFS or Mac OS Extended (Journaled) as the Format, select GUID Partition Map as the Scheme and click Erase to confirm.
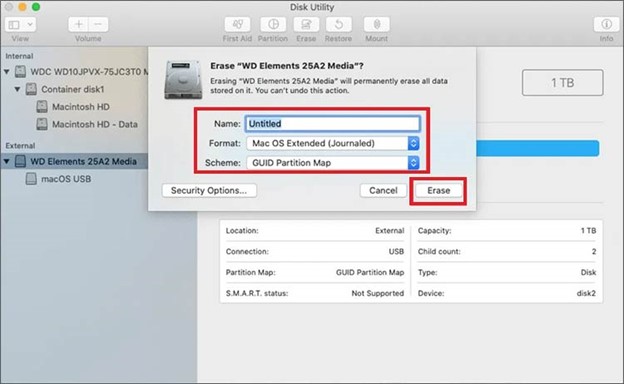
Step 5: Close Disk Utility.
Step 6: Next, select Reinstall macOS from the macOS Utilities window.
Step 7: Select your external drive as the destination and follow the prompts to install macOS to the external drive.
Step 8: After the installation completes, you can proceed with the setup and copy files from your Mac to the new external OS.
Note: If the internal drive fails to show up in Finder, you’ll need to mount and unlock it via Disk Utility.
How to Prevent Your Mac from Crashing?
Here are some steps that you can take to prevent your Mac from crashing and ensure it runs smoothly in the future:
- Regularly clear your system and application cache files.
- Regularly update the macOS and all installed apps to fix bugs and improve performance.
- Ensure you have enough free space on your Mac for smooth running of system processes.
- Use an anti-virus software to scan and remove any malicious software that could be causing the crash.
- Run Apple Diagnostics to check for hardware-related problems and try resetting the SMC and NVRAM (PRAM) to resolve the issue.
- Use Disk Utility to verify and repair disk permissions.
- Use Activity Monitor to track your Mac’s resource usage and limit the number of apps that launch at startup.
- Disconnect faulty external devices and make sure your device is properly ventilated to prevent overheating.
Conclusion
A crashed or non-booting Mac is indeed a cause for worry, and it may be disastrous if you don't know what to do next. If your Mac won't boot, it renders your stored data inaccessible. In this scenario, you must know the failsafe methods of Mac data recovery.
Although the methods outlined above are effective, each has its own limitations. We recommend using professional data recovery software for Mac as the easiest and most effective way to securely retrieve your data from a non-booting or crashed Mac.


Rishabh is a senior content specialist at Stellar Information Technology, where he writes about comprehensive data care solutions.
 10 min read
-1920.jpg)