

HCL Notes - The Server is Not Responding
March 26, 2025| 5 min read


Our content follows trusted Editorial Standards - accurate & unbiased.
Summary: Accessing legacy data from Lotus Notes is complex and entails multiple steps that may not be ideal for all users. If you want to access your legacy data, read through the article to know the complex process and a simple one that will take only a few minutes of your time
Free Download 100% SecureData is precious, regardless of when it was created. As organizations evolve, legacy data becomes essential to track their progress and ascertain key insights. Moreover, some standards like GDPR require organizations to store data for a certain period.
However, accessing this legacy data may not be easy. In particular, accessing legacy data from Lotus Notes or Domino applications can be challenging. This is why we show you two methods to access this legacy data. The first method uses a series of manual steps, while the second relies on third-party data extraction tools.
In this method, we will use ODBC to view the underlying tables and create a linked server in SQL to abstract the ODBC connection. Below are the steps.
As a first step, download and install the Domino server. You can start with a free trial if you don't want to use this tool for an extended time. Once downloaded, double-click and follow the wizard for installation. You will need an HCL account, so create one if you don't already have it. Keep the defaults and only select the "Domino Utility Server" when asked for a configuration. Finally, exit the wizard and complete the installation.
Double-click the Domino server to open it. When you run for the first time, you must configure the server, although you will not be using it.
To do this, simply follow the wizard and stick to the default values. You will be prompted to create a password for access. Once you exit the wizard, the configuration is done.
While not mandatory, disabling the server when the machine starts is common practice. This step is followed to prevent the Domino server from running in the background and consuming your resources.
To do this,
Next, download and install the ODBC driver for NotesSQL. Again, you will have to create a login and may have to accept the terms of a legal agreement. Follow the installation wizard and keep the default values.
The next step is to configure the authentication. To do this,
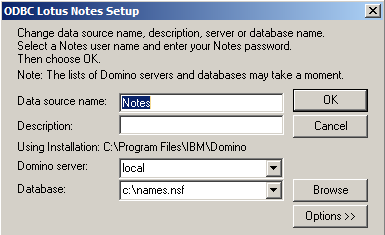
Once you have configured the user, change the system path variable. Here are the steps for the same:
Open the ODBC Data Source Administrator. Navigate to the System DSN tab and click the Add button. From the list of displayed drivers, select Lotus Notes SQL Driver and click Finish. This will open a dialog box. Depending on your connection properties, enter the appropriate values. For example, if you're connecting to a local file in the same location as the DB driver, follow the screenshot below.
Finally, link the Notes server in MS SQL. Open the SQL Server Management Studio and connect to your database. On the right-hand pane, navigate to Server Objects > Linked Servers. Right-click on Linked Server and select New Linked Server. Enter NOTES as the linked server.
With this, you're all set to access legacy data. Run the SQL query you want to get data from the Domino database.
In this method, we will see how you can use a tool called Stellar Converter for NSF to access legacy data. This DIY tool converts data from the NSF format of Lotus Notes to the PST format that can be opened in Outlook. You can also convert to other file formats like MSG, EML, RTF, PDF, and HTML.
Here are the steps to access this tool.
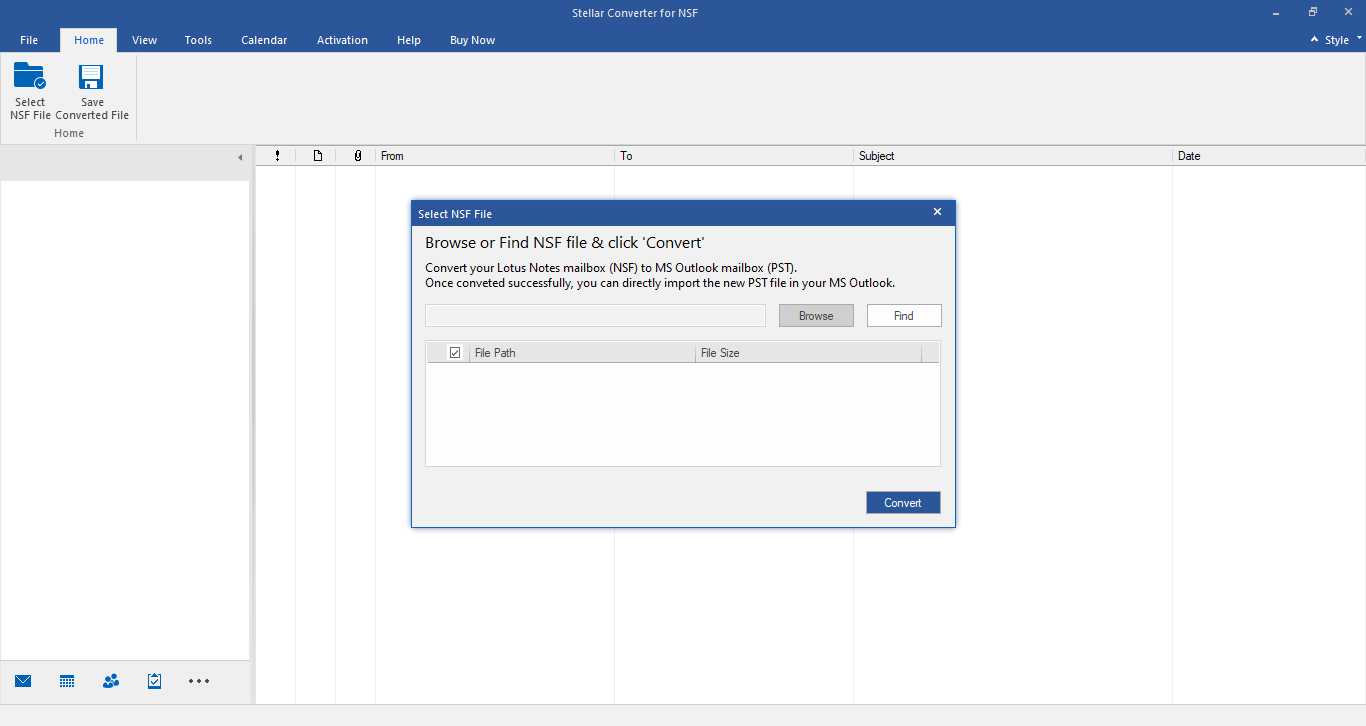
Download the tool and follow the wizard to install it. After the installation is done, double-click and open the tool.
When you open the file, you will be prompted to select an NSF file. If you don't know its exact location, “Browse” or “Find” the NSF file that contains your legacy data.
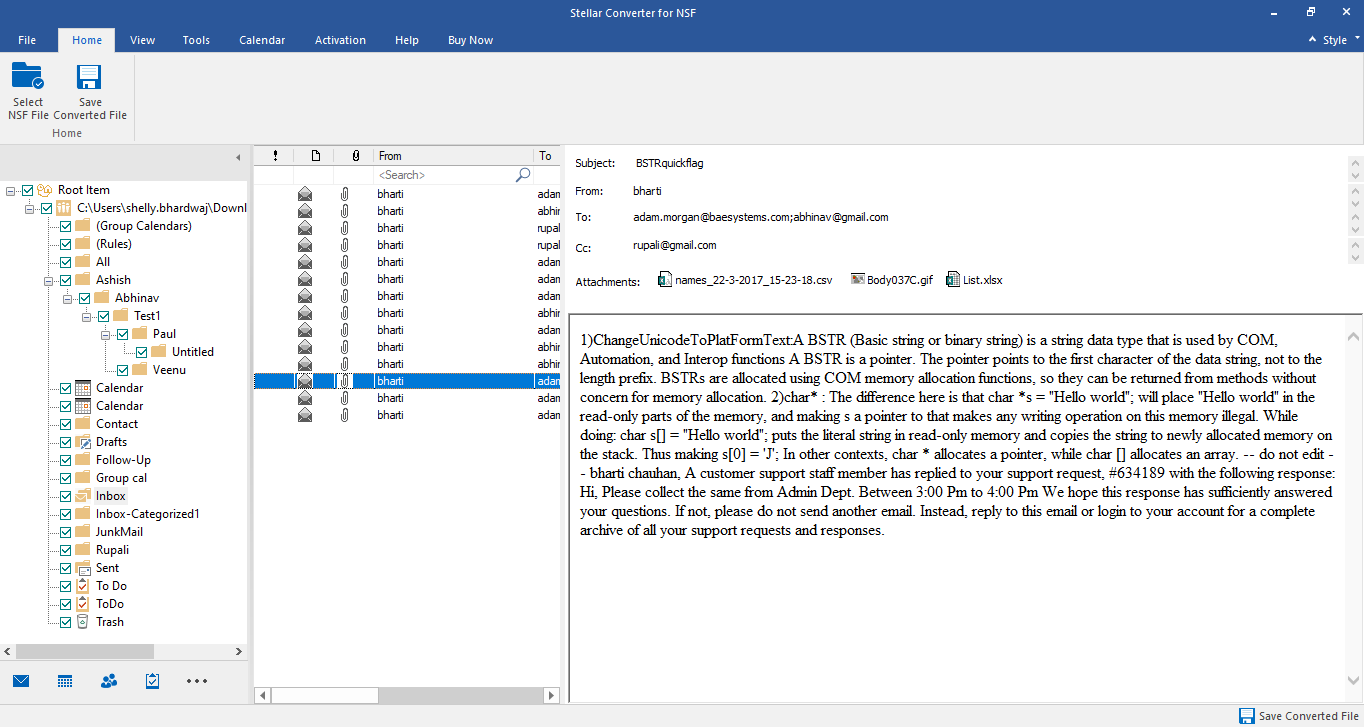
Stellar Converter for NSF will access the contents of the file and will display them for you. From this list, you can select the legacy data you want to see.
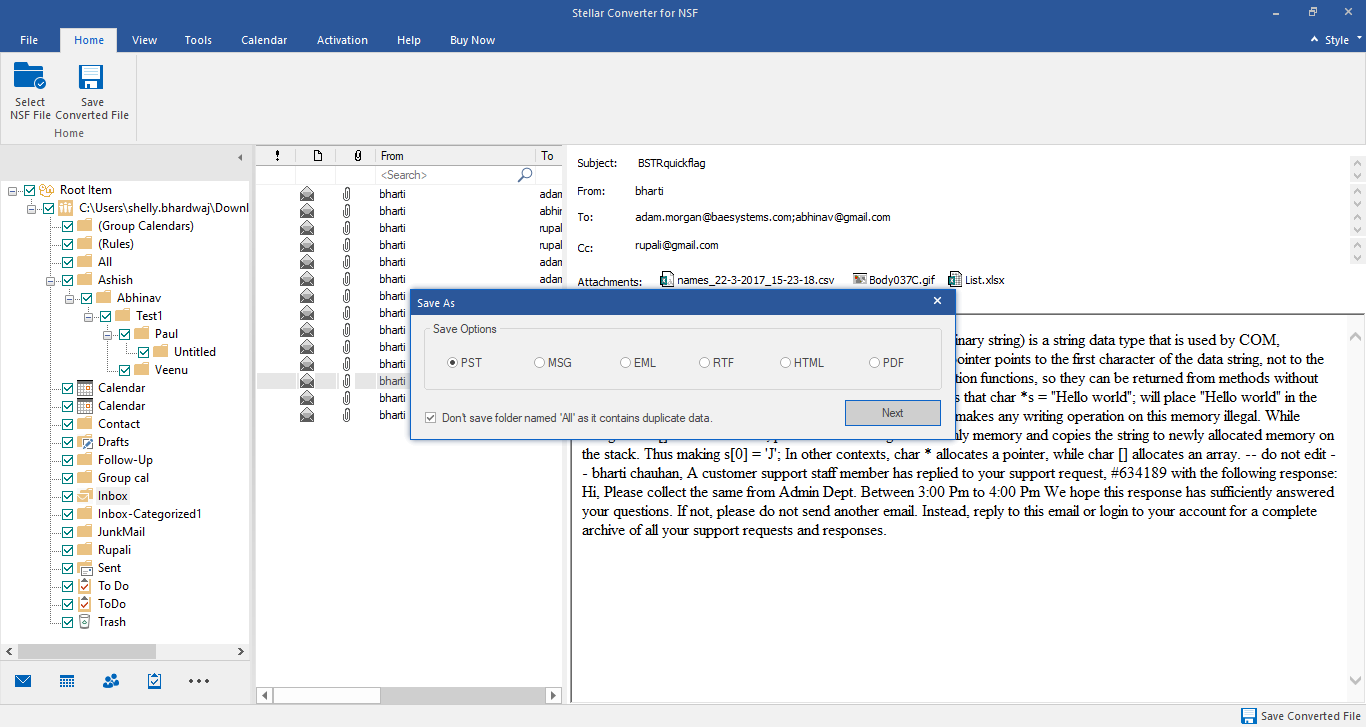
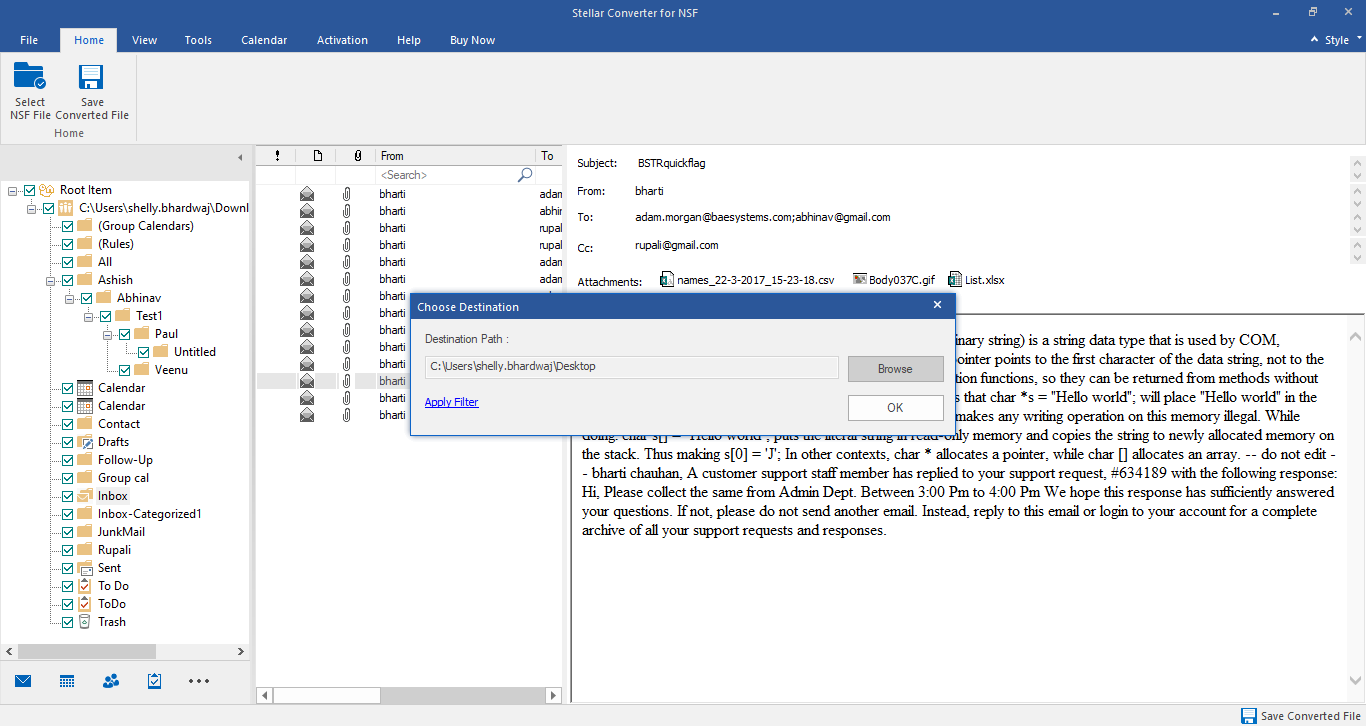
In the next step, select the format in which you want to save and the destination folder.
That's it! Once the tool completes extraction, you will get an on-screen notification.

To conclude, we discussed two ways to access legacy data from Notes. The first method is complex and cumbersome; even a single misstep can make the data inaccessible. The second method, using a third-party NSF to PST converter tool such as Stellar Converter for NSF, is much easier and works well for people of all technical levels. You also have greater control over choosing the data you want and the format you want.
Senior Content Writer
This article was written by Shelly Bhardwaj, a Content Writer at Stellar Data Recovery.
Curious about our content creation process? Take a look at our Editor Guidelines.
March 26, 2025| 5 min read
August 21, 2025| 5 min read
![[Solved] NSF File Does Not Exist Error](https://www.stellarinfo.com/public/image/article/how-to-decrypt-nsf-file-in-lotus-notes-1039.jpg)
August 21, 2025| 5 min read


 5 min read