You can simply check white space in Exchange Server by using the Get-MailboxDatabase PowerShell command. To reclaim this space, you can run the defragmentation process or move the mailboxes to a new database. In this article, we will be explaining how to check and reclaim white space in Exchange database in detail.
What is White Space in Exchange Server Database?
Exchange Server database tends to get large with continuous addition of emails and other mailbox data. To optimize storage and performance of Exchange Server, you can reduce the size of database by deleting mailboxes or other data. But after deletion of data, when you check the database size, you may find that the size is still the same. The reason why the size didn’t reduce is because Exchange Server makes this space available for storing new data. This free space is called White Space.
Let’s take an example. You have a database of 1.5 TB in size and you have removed mailboxes or other data of around 200 GB. This means that the database size should come down to 1.3 TB. However, you find out that the size is still the same, i.e., 1.5 TB. The 200 GB space, from where the data was deleted, is marked as White Space. So, when you add new data to this database, the size of the database will remain the same as new data will be stored in this space.
How to Check White Space in Exchange Server Database?
For checking White Space in Exchange database, open the Exchange Management Shell (EMS) and run the Get-MailboxDatabase command (see the example below). It will display all the information about database, such as database name, its current size, and AvailableNewMailboxSpace (White Space).
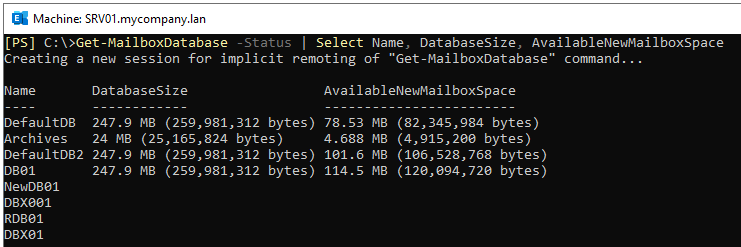
As you can see in the above image, the database named DefaultDB is of 247 MB in size and the AvailableNewMailboxSpace is 78 MB. This means you can reclaim 78 MB of space from the database.
How to Reclaim White Space in the Exchange Server Database?
To reclaim the White Space, you can either defragment the Exchange database or move the mailboxes to a new database. Let’s see how.
1. Defragment the Exchange Database
Defragmentation is a process that reduces the size of database by eliminating the unused space. However, Microsoft does not recommend defragmentation of Exchange databases. So, before performing defragmentation, make sure to:
- Take a full backup of the database.
- Perform the process in maintenance window as it requires you to dismount the database.
- Stop antivirus scans or backup jobs as they can interfere with the process.
Now, dismount the database using the Dismount-Database PowerShell commandin Exchange Management Shell (EMS) as given below.

Once the database is dismounted, ensure there is enough temporary storage available. It is suggested to have approximately 110% of the current Exchange database size available as free disk space for defragmentation to complete successfully.
After that, run the EseUtil /d PowerShell command as given below to start the defragmentation process.
In this command, /t is the temporary path where the temp file will be created.
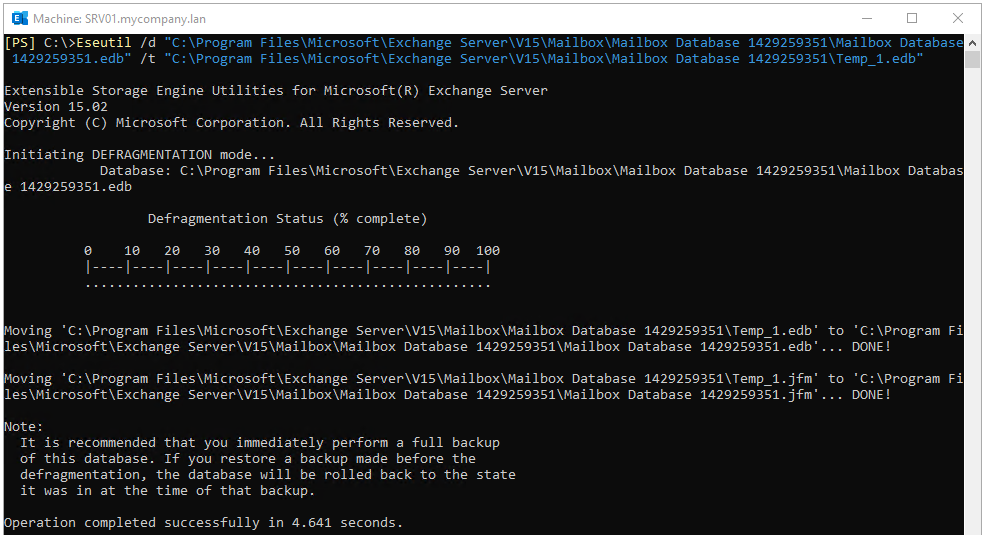
This process takes some time to complete, depending on the size of database and performance of the server. After it finishes, mount the database using the command mentioned below:
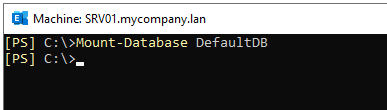
To confirm that the database size has gone down, execute the Get-MailboxDatabase command as mentioned below:
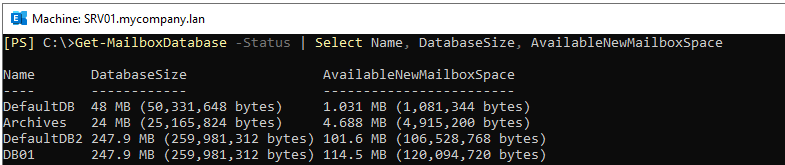
As you can see in the above image, the database size has been reduced from 247.9 MB to 48 MB and the white space has been cut down to 1.031 MB.
2. Move Mailboxes to a New Database
You can move the mailboxes from the database to a new database to reclaim the white space. For this, first create a new Exchange database by running the following command in the EMS:
This command creates the database object in Active Directory. After that, it initializes the empty EDB file at the given path and sets up the log folder. After this, you can mount the database by using the following command:
Next, move all the mailboxes from the old database to the new one by using the command given below:
To monitor the progress of move request, you can use this command:
When the status shows that mailbox move is finished, you can clear the completed move requests by using the below command:
After successful transfer of all the mailboxes to new database, you can now delete the old database. For this,
- Dismount the database by running this command:
- Then, remove mailbox database by using this command:
Conclusion
You can use the PowerShell commands, as mentioned above, to check White Space in Exchange Server database. You can defragment the database to reclaim the white space but it is not recommended by Microsoft as it can sometimes lead to data corruption. A better and safer option to reclaim white space is to move the mailboxes to a new database file.
In case of database corruption due to lack of storage space or any other issue, you can use Stellar Repair for Exchange - an Exchange database recovery application - to recover the data from corrupt database easily. After a quick or deep scan, you can save the EDB file data to PST or other file formats. You can also export the EDB data, including user mailboxes, user archives, shared mailboxes, disabled mailboxes, and public folders, directly to another live Exchange Server database or Office 365.


 6 min read