Cross Tenant Migration of Users and Mailboxes – A Complete Step-by-Step Guide

An Exchange Server administrator may face a scenario where there is a need to transfer mailboxes and users from one Office 365 (Microsoft 365) tenant to another. Carrying out such cross-tenant migration is not an easy task as it involves a lot of planning, preparation, and resources. But the ultimate goal of the admin is to seamlessly perform this task by keeping the data intact and ensuring continuous workflow at users’ end.

In this article, we will be explaining the complete process with stepwise instructions to perform cross-tenant migration. This will help transfer users and mailboxes from one Microsoft 365 tenant to another with complete data integrity and minimal downtime.

Why would one need to Perform Cross Tenant Migration?

There are multiple reasons why you would need to carry out a cross-tenant migration. Some of the main reasons are:

  • Restructuring of the organization where a group of companies needs to be merged under one Microsoft365 tenant.
  • Acquisition of a company would involve merging the data from the current into the new company.
  • Dispossession of a domain and users from a child company and transferring them to a new owner.

Stepwise Process to Perform Cross Tenant Migration

The process involves moving resources, such as mailboxes and users, from one Microsoft 365 tenant to another. Sometimes, in cases like merger or acquisition, this also involves migration of domain. Although Microsoft provides some built-in features to support such migrations, you should also look at alternative tools to facilitate and streamline the process. Below, we will be explaining the step-by-step process to migrate users and mailboxes from one Microsoft 365 tenant to another.  

Step 1: Consider the Prerequisites

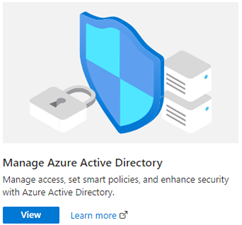
Before you start, you need to get the tenant ID of the source and target tenants. For this,

  • Sign in to the Microsoft 365 Admin Center.
  • Open the entra.micrososft.com and open the tenant overview.
  • Click on the copy icon of the Tenant ID property to copy the ID to clipboard.

You must also keep in mind that the target tenant must be created and all the users to be migrated must have a license assigned on both the source and target organizations.

It is also suggested to have at least one mail-enabled security group in the source tenant. This is needed to restrict or scope only the mailboxes to be moved and prevent any unintended transfers.

Step 2: Preparing the Target Tenant

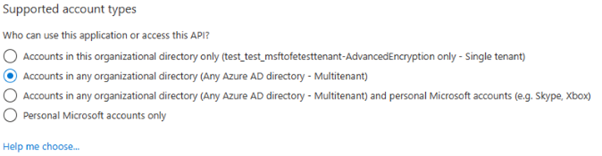
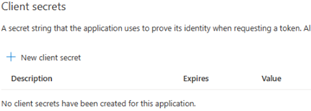
The next step is to create the migration application and client secret to prepare the destination (target) tenant. To do so, follow the given steps:

  • Open and sign in to the entra.microsoft.com. Under Manage Microsoft Entra ID, click on View.

Under Manage Microsoft Entra ID, click on View

  • On the navigation pane, click on App Registrations and click on New Registration.
  • Enter the name of the application. On the Register an application page, click on Accounts in any organizational directory (Any Microsoft Entra directory - Multi-tenant), under Supported account types.

click on Accounts in any organizational directory (Any Microsoft Entra directory - Multi-tenant)

  • In the Redirect URI, select Web and type https://office.com.
  • Once done, click on Register. This will create the application.
  • Now, go back to Home Page and open Microsoft Entra ID. Then, click on App Registrations.
  • Navigate to the Owned applications and click on the newly created application.
  • Under Essentials, copy the Application (client) ID as it will be needed later.
  • On the navigation pane, click on API Permissions.
  • The User.Read permission is assigned to the application by default. As it is not needed for migration of data, you can remove it.
  • Click on Add Permission. In the new window, under the APIs my organization uses, search and select Office 365 Exchange Online.

select Office 365 Exchange Online

  • Click on Application permissions. In the Select permissions section, expand Mailbox and select Mailbox.Migration, and click on Add Permissions.
  • In the navigation pane, click on Certificates & Secrets. Under the Client secrets, click on New Client Secret.

click on New Client Secret

  • Here, enter the description and the expiration settings. It is important to copy the password and any secrets in a secure vault.  

Step 3: Grant Consent to the Application

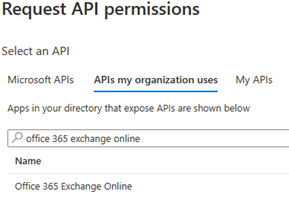
After successfully creating the migration application and client secret, you need to grant consent to the application. Here are the steps:

  • On the main page of the Entra ID, click on Enterprise Application and find the application you have created. Click on API Permission.
  • Click on Grant admin consent for and click Accept.
  • Go back and ensure that the acceptance is showing. Here is the URL which needs to be configured on the source tenant to accept the application:

https://login.microsoftonline.com/contoso.onmicrosoft.com/adminconsent?client_id=&redirect_uri=https://office.com

  • Replace the Application ID with the one you have just created.

Step 4: Create the Relationship and Migration Endpoint

You need to now create organization relationship and Exchange Online migration endpoint.

On the target Exchange Online tenant, connect with Exchange Online PowerShell for the creation of the migration endpoint.

C:Program FilesFSLogixApps
frx version$AppId = "[GUID copied from the migrations app]"
$name = "[Enter a name for the migration endpoint]"
$remote = " .onmicrosoft.com"
$secret = "[This is your secret password you saved in step 1]"
$dehydrated = Get-OrganizationConfig | select isdehydrated
if ($dehydrated.isdehydrated -eq $true) {Enable-OrganizationCustomization}

$Credential = New-Object -TypeName System.Management.Automation.PSCredential -ArgumentList $AppId, (ConvertTo-SecureString -String $secret -AsPlainText -Force)
New-MigrationEndpoint -RemoteServer outlook.office.com -RemoteTenant $remote -Credentials $Credential -ExchangeRemoteMove:$true -Name $name -ApplicationId $AppId

Next, you need to create a new organization relationship object by using the following script:

$sourceTenantId = "[Tenant ID of the source tenant]"
$orgrelname = "[Name of your new organization relationship]"
$orgrels = Get-OrganizationRelationship
$existingOrgRel = $orgrels | ?{$_.DomainNames -like $sourceTenantId}
If ($null -ne $existingOrgRel) {Set-OrganizationRelationship $existingOrgRel.Name -Enabled:$true -MailboxMoveEnabled:$true -MailboxMoveCapability Inbound}
If ($null -eq $existingOrgRel) {New-OrganizationRelationship $orgrelname -Enabled:$true -MailboxMoveEnabled:$true -MailboxMoveCapability Inbound -DomainNames $sourceTenantId}

Step 5: Prepare the Source Tenant

Now, you need to accept the migration application and configure the organization relationship to prepare the source tenant. For this,

  • Log into the Office 365 portal using global admin credential.
  • Go to the Application URL to consent to the mailbox migration application (created earlier).

https://login.microsoftonline.com/contoso.onmicrosoft.com/adminconsent?client_id=&redirect_uri=https://office.com

  • Accept the consent. The application will appear in the Microsoft Entra admin Center.
  • Now, you need to create the organization relationship on the source tenant using the below script.
$targetTenantId = "[Tenant ID of the target tenant]"
$appId = "[Application ID created on the target tenant]"
$scope = "[The name of the security group that has the migration mailboxes members]"
$orgrelname = "[name of your new organization relationship]"
$dehydrated = Get-OrganizationConfig | select isdehydrated
if ($dehydrated.isdehydrated -eq $true) {Enable-OrganizationCustomization}
if (!(New-DistributionGroup -Type Security -Name $scope)) { Write-Host "Group already exists."
$orgrels=Get-OrganizationRelationship
$existingOrgRel = $orgrels | ?{$_.DomainNames -like $targetTenantId}
If ($null -ne $existingOrgRel) {Set-OrganizationRelationship $existingOrgRel.Name -Enabled:$true -MailboxMoveEnabled:$true -MailboxMoveCapability RemoteOutbound -OAuthApplicationId $appId -MailboxMovePublishedScopes $scope}
If ($null -eq $existingOrgRel) {New-OrganizationRelationship $orgrelname -Enabled:$true -MailboxMoveEnabled:$true -MailboxMoveCapability RemoteOutbound -DomainNames $targetTenantId -OAuthApplicationId $appId -MailboxMovePublishedScopes $scope}

Step 6: Test the Migration Configuration

To verify the configuration of cross tenant mailbox migration, you can run the following command from the target tenant:

Test-MigrationServerAvailability -EndPoint "[the name of your migration endpoint]" -TestMailbox "[Primary SMTP of MailUser object in target tenant]"

Step 7: Migrate the Mailboxes

To start the cross tenant mailboxes migration, you can create migration batches by using the New-MigrationBatch command. Here is an example:

New-MigrationBatch -Name -SourceEndpoint -CSVData ([System.IO.File]::ReadAllBytes('')) -Autostart -TargetDeliveryDomain .onmicrosoft.com

Here is an example of the CSV file format:

EmailAddress
User1@mydomain.onmicrosoft.com
User2@mydomain.onmicrosoft.com
User3@mydomain.onmicrosoft.com

To monitor the status of migration batch, you can use the below commands:

  • Get-MigrationBatch
  • Get-MigrationUser
  • Get-MoveRequestStatistics

Alternative Solution for Cross Tenant Mailboxes Migration

As you have seen above, there are a number of steps involved when it comes migrating mailboxes from one tenant to another. To simplify the cross tenant mailboxes migration and mitigate the challenges, you can use Stellar Migrator for Exchange. This tool is not limited to migrating mailboxes, but can also migrate public folders. Using this Exchange migration tool has the following benefits:

  • Zero-downtime migration
  • Minimal or no configuration required
  • Maximum compatibility
  • Incremental (Delta) migration
  • Automated mailbox matching

Apart from tenant to tenant migration, the tool also supports migration from local Exchange Server to Office 365, on-premises Exchange to on-premises Exchange, and Exchange Online to local Exchange Server.

Conclusion

Above, we have explained the entire procedure of moving mailboxes and users from one Microsoft 365 tenant to a new (another) tenant. We have also seen the complexity that you need to endure when performing the process using the in-built tools. As an alternative, you can use Stellar Migrator for Exchange to migrate mailboxes and other items from one Microsoft 365 tenant to another.  With this tool, you can have the assurance of hassle-free configuration, stability, and functionality. This tool helps save a lot of time and gives peace of mind.


Was this article helpful?
About The Author
author image
Shelly Bhardwaj linkdin Icon

Shelly is technology expert and core knowledge of Exchange Server, Outlook.

Table of Contents

WHY STELLAR® IS GLOBAL LEADER

Why Choose Stellar?
  • 0M+

    Customers

  • 0+

    Years of Excellence

  • 0+

    R&D Engineers

  • 0+

    Countries

  • 0+

    PARTNERS

  • 0+

    Awards Received

×