

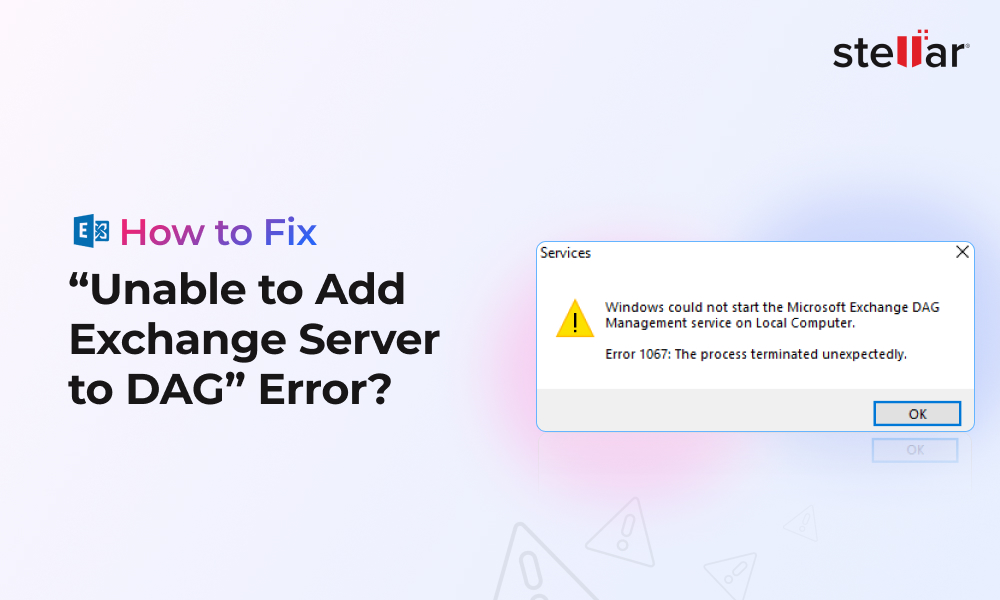
How to Fix “Unable to Add Exchange Server to DAG” Error?
June 27, 2025| 6 min read


Our content follows trusted Editorial Standards - accurate & unbiased.
Summary: Database Availability Group (DAG) is an Exchange Server feature that helps achieve site resilience, high availability, and automatic recovery against database-level failure due to network, database, or server issues. This article covers the overview of the Exchange Server Database Availability Group with step-by-step processes to set up the Exchange Database Availability Group in Exchange 2013, 2016, and 2019.
Free Download 100% SecureSetting up an Exchange Database Availability Group (DAG) is not an easy task. However, having a fault tolerant Exchange Server setup is the only way to keep your mind at rest. If you have a standalone server and it dies on you, you will need to do a whole recovery plan which could take hours. In the meantime, your business will be isolated with no email service. This could result in a large amount of data loss and impact the business, apart from exhausting your resources to restore the services.
Exchange Database availability group does come with a cost. You would need two servers for the Exchange Server Failover Group, two Windows Server licenses, and a third server, which can be the Active Directory Server to act as the File Share Witness for cluster service.
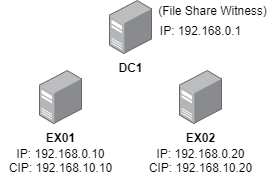
In this guide, we will be using the following setup:
DC1 – Hosting the Active Directory, DNS and used as the File Share Witness with the IP address 192.168.0.1.
EX01 – Hosting the main Exchange Server 2019 installation, with the primary IP address as 192.168.0.10 and the cluster IP - 192.168.10.10, which is in a different subnet.
EX02 – Hosting the second Exchange Server 2019 installation, with the primary IP address as 192.168.0.20 and the cluster IP for the heartbeat and replication - 192.168.10.20, which is in a different subnet.
Both EX01 and EX02 must have two network cards which must be in the internal network on the 192.168.0.XXX subnet and the other network card, for the heartbeat and for replication, using the subnet 192.168.10.XXX.
It is important to have the cluster/replication networks on separate network cards and separate subnets, as per Microsoft’s recommendation.
Next, we are taking into consideration that you already have the domain controller in place - installed and configured with DNS and other related services. Also, we are taking into consideration that Windows Server 2019 is installed, with Exchange Server 2019 Standard or Enterprise already installed on both servers and they are fully patched.
The only difference between the Exchange Server 2019 Standard and Enterprise is that in the Enterprise version, you can have more than five Mailbox databases configured at the same time.
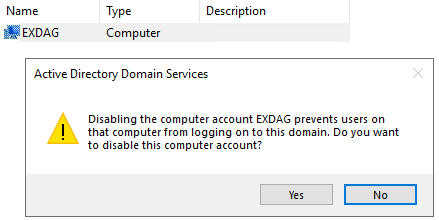
Firstly, create the computer account to be used as cluster computer for the Exchange Server Database Availability Group (DAG). Now, follow the given steps:

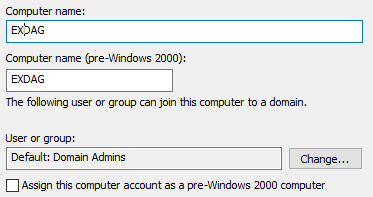

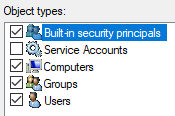
Note: Since we are using the server DC1 which is a domain controller, we cannot update the local groups. So, we need to change the Exchange Trusted Subsystem group to also be a member in the Administrators security group.
With the above steps, we have pre-configured the infrastructure to allow the server to create the DAG (Exchange Database Availability Group) in our Active Directory schema.
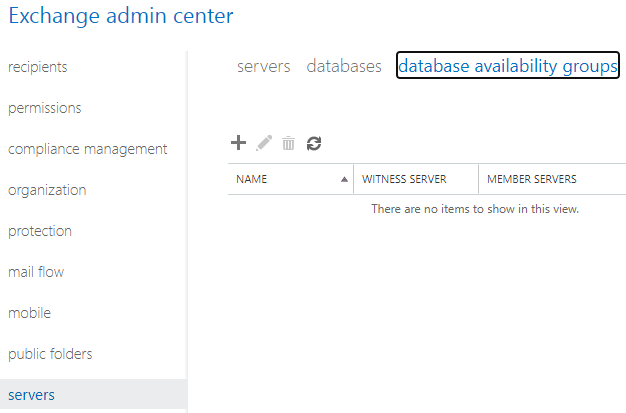
Now, open and log in to the Exchange Admin Center (EAC) with administrator credentials or a user having the highest privileges on the Exchange Server. Then, follow these steps:
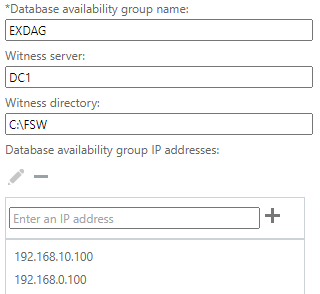
This will create the DAG for our setup.
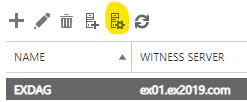
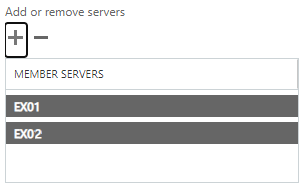
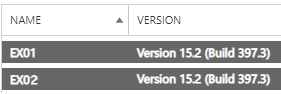
Note: While adding the servers, you need to make sure that the version is same for both servers. If not, it is highly recommended that both Exchange Servers are updated to match the same version.
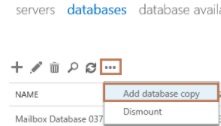
Once the server is set up and all is saved with no issues, the last step is to create the copies of your databases. For this,
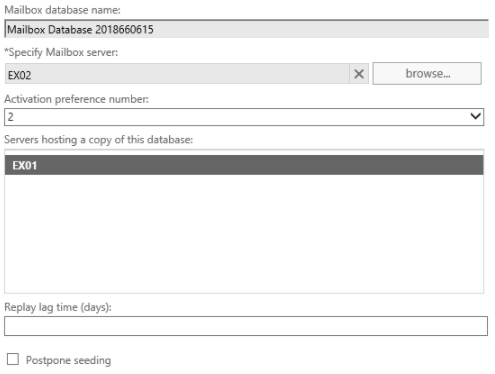
Once this is saved and the primary copy is seeded, you will be able to continue using the database with no issues.
In this guide, we’ve successfully set up an Exchange Database Availability Group with no issues. However, issues may arise or disasters may strike, leaving your databases unable to mount. Due to such issues, you can end up with the databases not seeding the copies. In such situations, you can use Stellar Repair for Exchange software that can open the corrupted database & extract the data to PST or other formats. It can also export directly from a corrupted EDB file to a live Exchange Server database. So, you can create a new database and use Stellar Repair for Exchange to export the damaged database directly to the new fresh copy. This really reduced the time of recovery of the server and services.
Senior Content Writer
This article was written by Ravi Singh, a Content Writer at Stellar Data Recovery.
Curious about our content creation process? Take a look at our Editor Guidelines.
June 27, 2025| 6 min read
May 23, 2025| 6 min read
April 30, 2025| 6 min read


 6 min read
