In a Windows Server, when you add a new drive, you add it as a volume and then assign a drive letter while creating the partition for it. However, there is a limitation of 26 letters when assigning letters to the drives/volumes. Mount points are actual drives, which are mounted as folder in your drive, instead of a drive letter. For example, you could have a folder in your ‘C:’ drive, called “Exchange_Data,” pointing to a 2 TB drive.
Why Mount Points are Suggested?
When you copy a file from one drive letter to another, Windows sees it as a copy and behave accordingly when you drag a file. If you assign a folder path (mount point), Windows will see it as the same drive letter. So, the default behaviour is moved.
If you need to have a clean server with less drive letters, it would be easier to move and attach to another system in case of failure of the operating system.
How to Create Mount Points for an Exchange Server Setup?
Here are the steps to create mount points for Exchange Server:
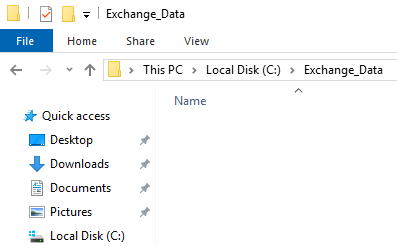
Create the Holding Folder:
- First, you need to create the holding folder. For example, C:\Exchange_Data.
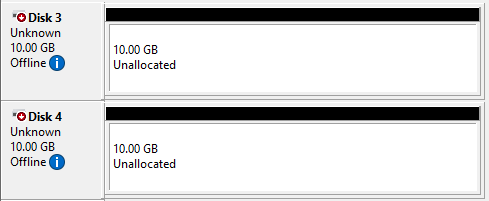
Initialize the Disks:
- Add the drives. The ideal scenario would be to have the data volume and log volume separate. Apart from being logically separate, it would be best to have them physically separate in the SAN on separate datastores. The log files should be on a LUN with RAID 1+0 and the data files should be on a separate LUN on different set of disks.
- Right-click on the disks and click on Online.
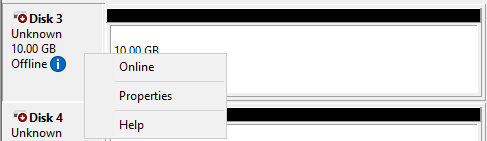
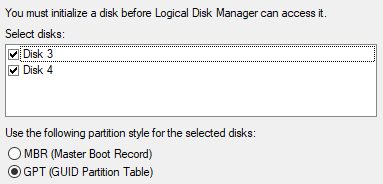
- Then, right-click on the disks and click on Initialize Disk. Check the GPT partition table option and select both disks.
Volume Creation:
- Create volume on each disk. On the first screen, click Next.
- Select the size of the volume and click Next.
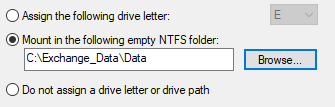
- On the drive letter screen, select Mount in the following empty NTFS folder, click Browse, and specify the location.
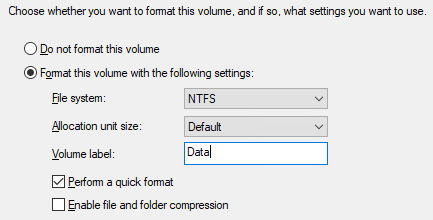
Format the Drive:
- On the next screen, choose the formatting option and drive name.
- The same thing needs to be done on the log drive as well. Once these are ready, you will see the folder in the C drive. The icons of the mount points are different from a normal folder. You can identify them easily.

Verification and Monitoring:
- You need to also check the disk space. The C drive will show the disk space, excluding the mount points. From the Computer Management console, you will not be able to see the free space on the mount points. It’s important to monitor the storage as there could be consequences if the log location or the data location is out of disk space. You can check this by running the following PowerShell command.
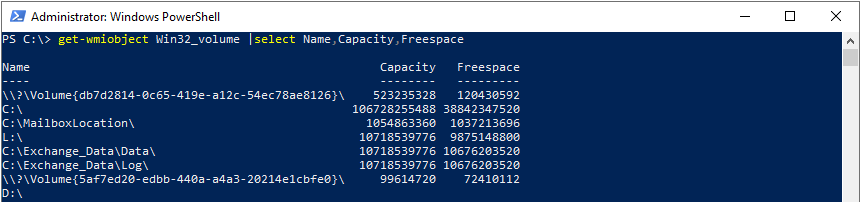
- You can then tweak the space. You can also use the monitoring tools to get alerts when there is 20% disk space left on the respective volumes.
Verify Exchange Mailbox Databases:
- Verify the Exchange mailbox databases. To do so, sign in to EAC and go to servers > databases. Here, verify that all the databases are mounted.
Conclusion
Incorporating mount points into an Exchange Server setup is considered a best practice for achieving efficient storage management. The adoption of this clean and organized structure not only streamlines day-to-day operations but also plays a crucial role in simplifying the Exchange recovery process in the event of database or log file corruption. Continuous monitoring, particularly of disk space, is imperative to proactively address potential complications related to log or database locations due to lack of space.
In case of an Exchange Server failure due to issues like bad configuration, storage problems, or database/log file corruption, a robust application is essential for swift and data-loss-free recovery. To deal with such scenarios, Stellar Repair for Exchange is a reliable solution that enables users to open dismounted EDB files from any Exchange Server version, without file size limitations. Whether executing a full server/data recovery or engaging in a migration process, Stellar Repair for Exchange facilitates direct export of recovered databases to a live Exchange Server or Office 365.


 6 min read