Exchange 2010 reached its end of life on January 14, 2020. But the support has been extended till October 13, 2020. This means no more updates and support for Exchange 2010. Thus, the demand for Exchange migration has risen recently. Now organizations have more reasons to migrate from their existing Exchange server to a newer Exchange version or Exchange online, hybrid deployment, or Office 365.
However, Exchange migration is a rigorous process that requires several hours of preparation and effort to execute it successfully. Even then, sometimes, errors occur that can further delay the migration process and cause unnecessary downtime.
But with this guide, you can easily migrate Exchange as you don't need any PowerShell skills or much technical knowledge to execute these steps.
Steps to Migrate Exchange Server to Another
Assuming that you have already configured a new Exchange server where you want to migrate your old Exchange server mailbox databases, ensure the following:
- The new Exchange server's client access namespaces should match with the current Exchange server's. To do so, refer to this guide
- Create user accounts on the new server. This will be required to match mailboxes during export. You can create accounts manually or by using the Active Directory Migration Tool (ADMT)
- You must have admin access to both servers and valid credentials available
That's it. Unlike other methods, you don't require any other permission or to change any settings. Also, whether you have configured an Exchange On-Premise, Online, Office 365, or hybrid, by following these steps, you can migrate your current Exchange to any new or existing Exchange server.
- If there are several mailboxes that you want to migrate, you can export all the mailboxes from offline Exchange database to Live Exchange server directly
- If you have a smaller number of mailboxes to migrate, you can convert the mailboxes in EDB file to PST and import the PST to new server via EAC or PowerShell
The steps are as follows:
Setup and Configure the Stellar Converter for EDB
Stellar Converter for EDB is a professional tool that is highly recommended by MVPs and IT admins to convert the EDB file to PST for quick and easy migration of Exchange mailbox databases from one server to another.
It also has dedicated options to export the Exchange mailbox database from your current Exchange Server to a new Exchange server or Office 365 directly with a few clicks. So, download and install the Stellar Converter for EDB software on the current Exchange server machine or a Windows PC. You can follow these instructions to setup the software. It's free to download.
FREE DOWNLOAD BUTTON
NOTE: Make sure MS Outlook 64-bit version is installed on the system where you are installing the software.
Convert Offline Exchange Database to PST for Migration
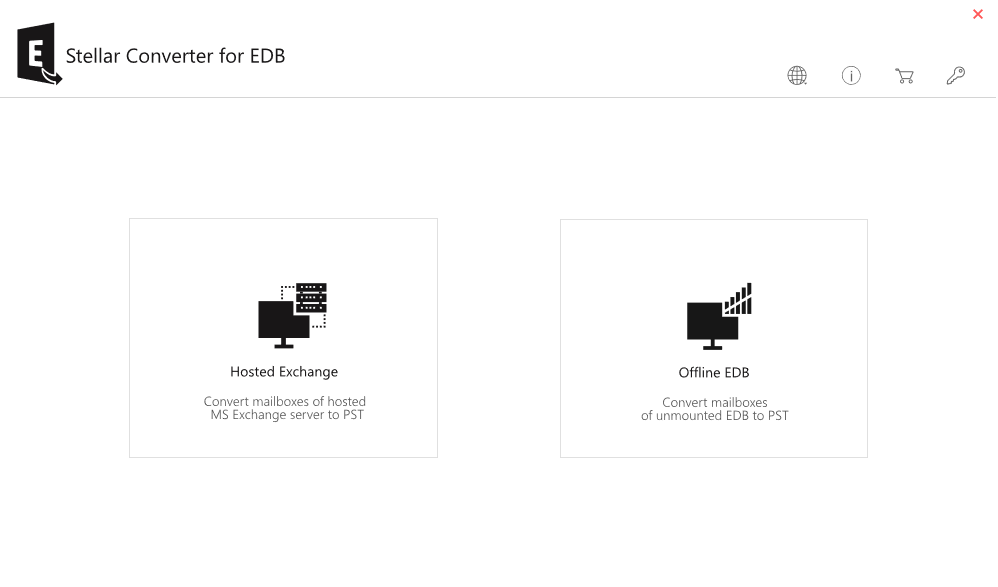
In case your current Exchange server is offline or database is dismounted, you can either convert the mailboxes from offline EDB to PST or export them directly to your new Live Exchange server. You can also use dial tone database option to migrate your Exchange server.
The steps are as follows,
- Click on Browse and select the EDB file that needs to be migrated. You may also click Find to search the EDB file, if its location is not known
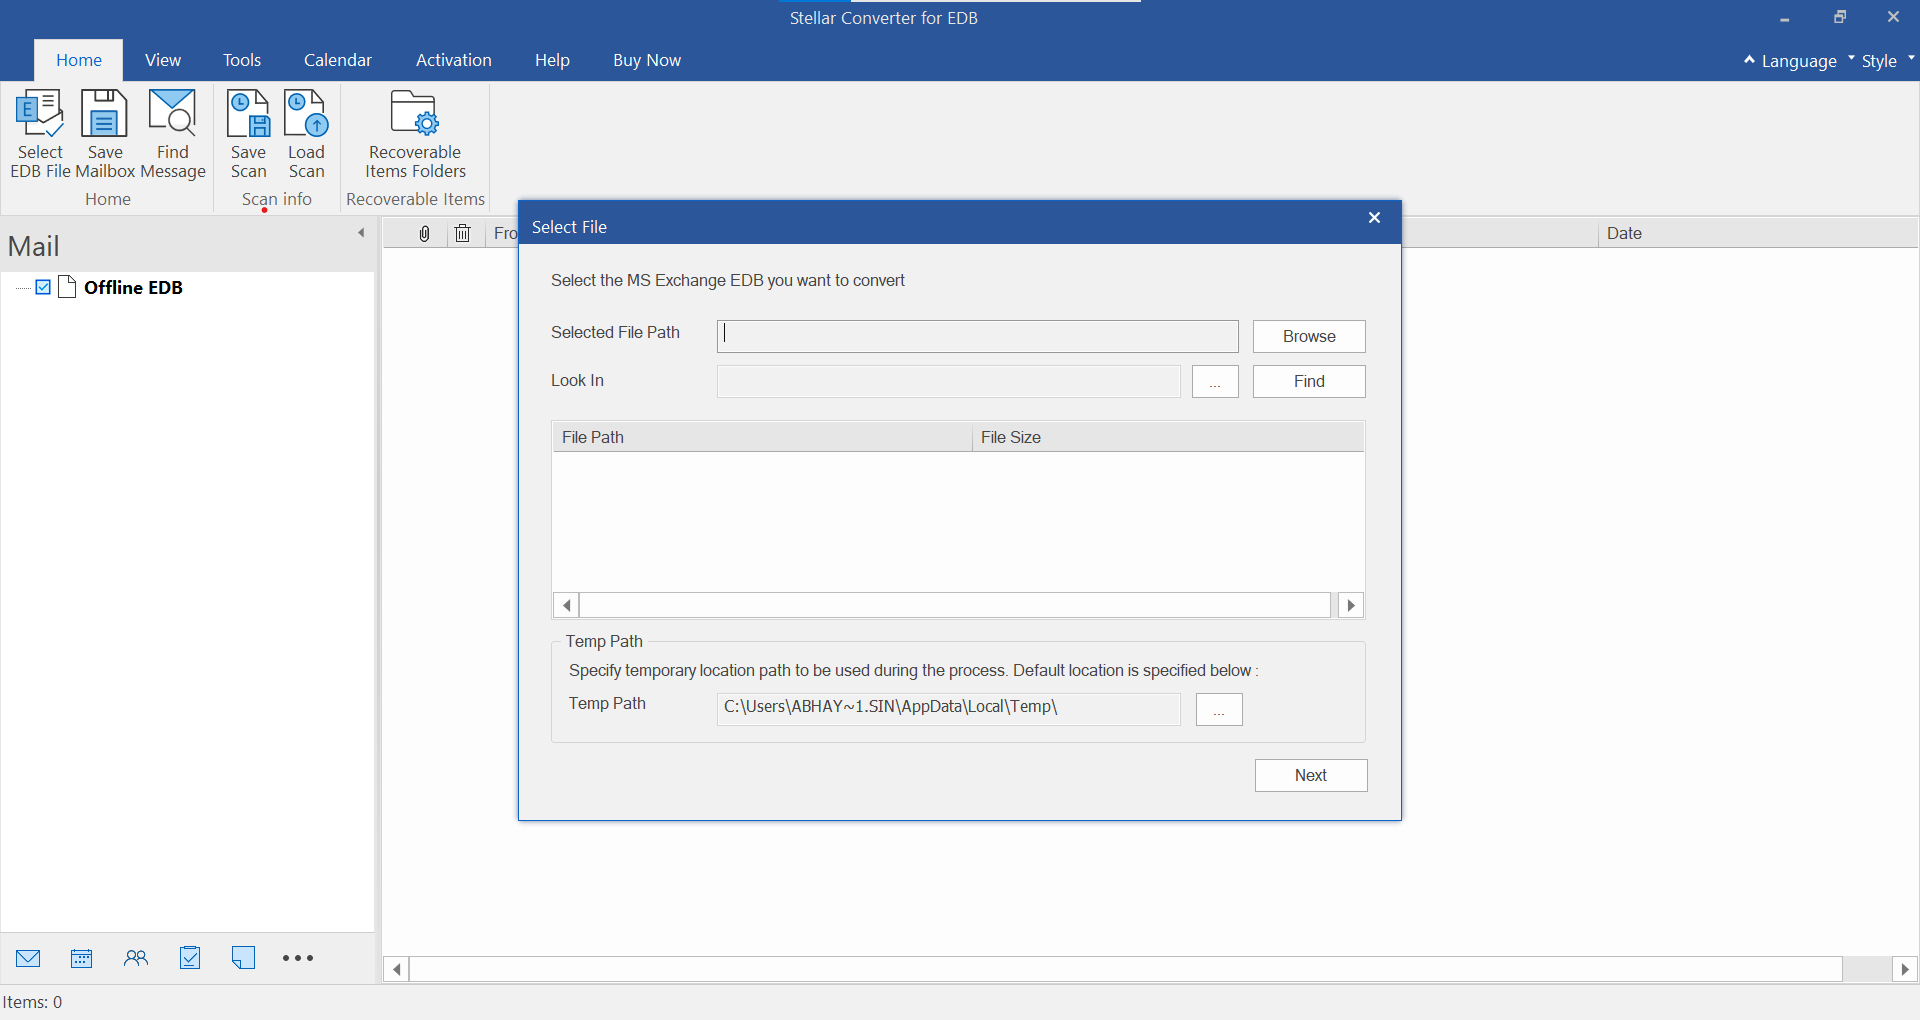
- Click Next to begin the EDB to PST file conversion process
- After the scan, software displays a preview of all the items in EDB file
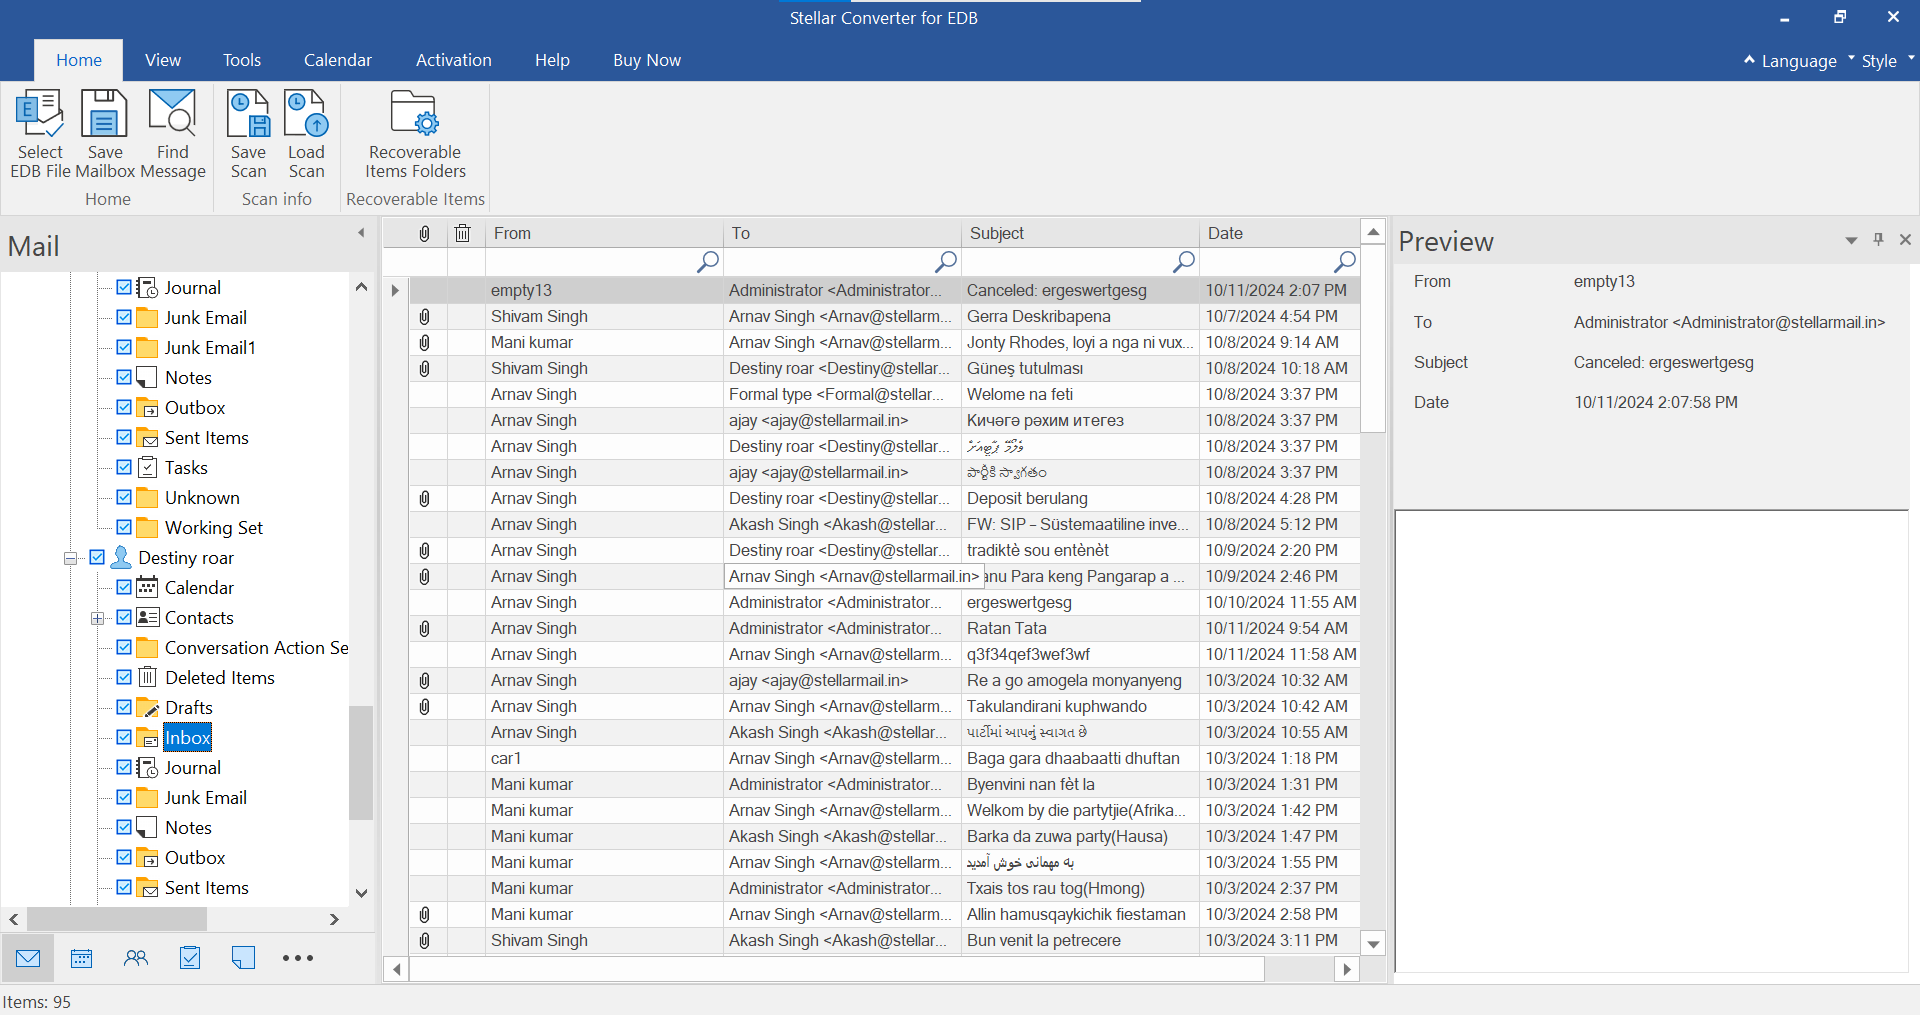
- Select all EDB and mailboxes that you want to migrate and click on 'Save' button at the top under 'Home' tab
Now you have two options to migrate all or the selected EDB files to your new Live Exchange by using Stellar Converter for EDB.
- Export and Save EDB to PST and then import the PST to new Live Exchange server via EAC import wizard
- Export the EDB files and mailboxes directly to your new Live Exchange server
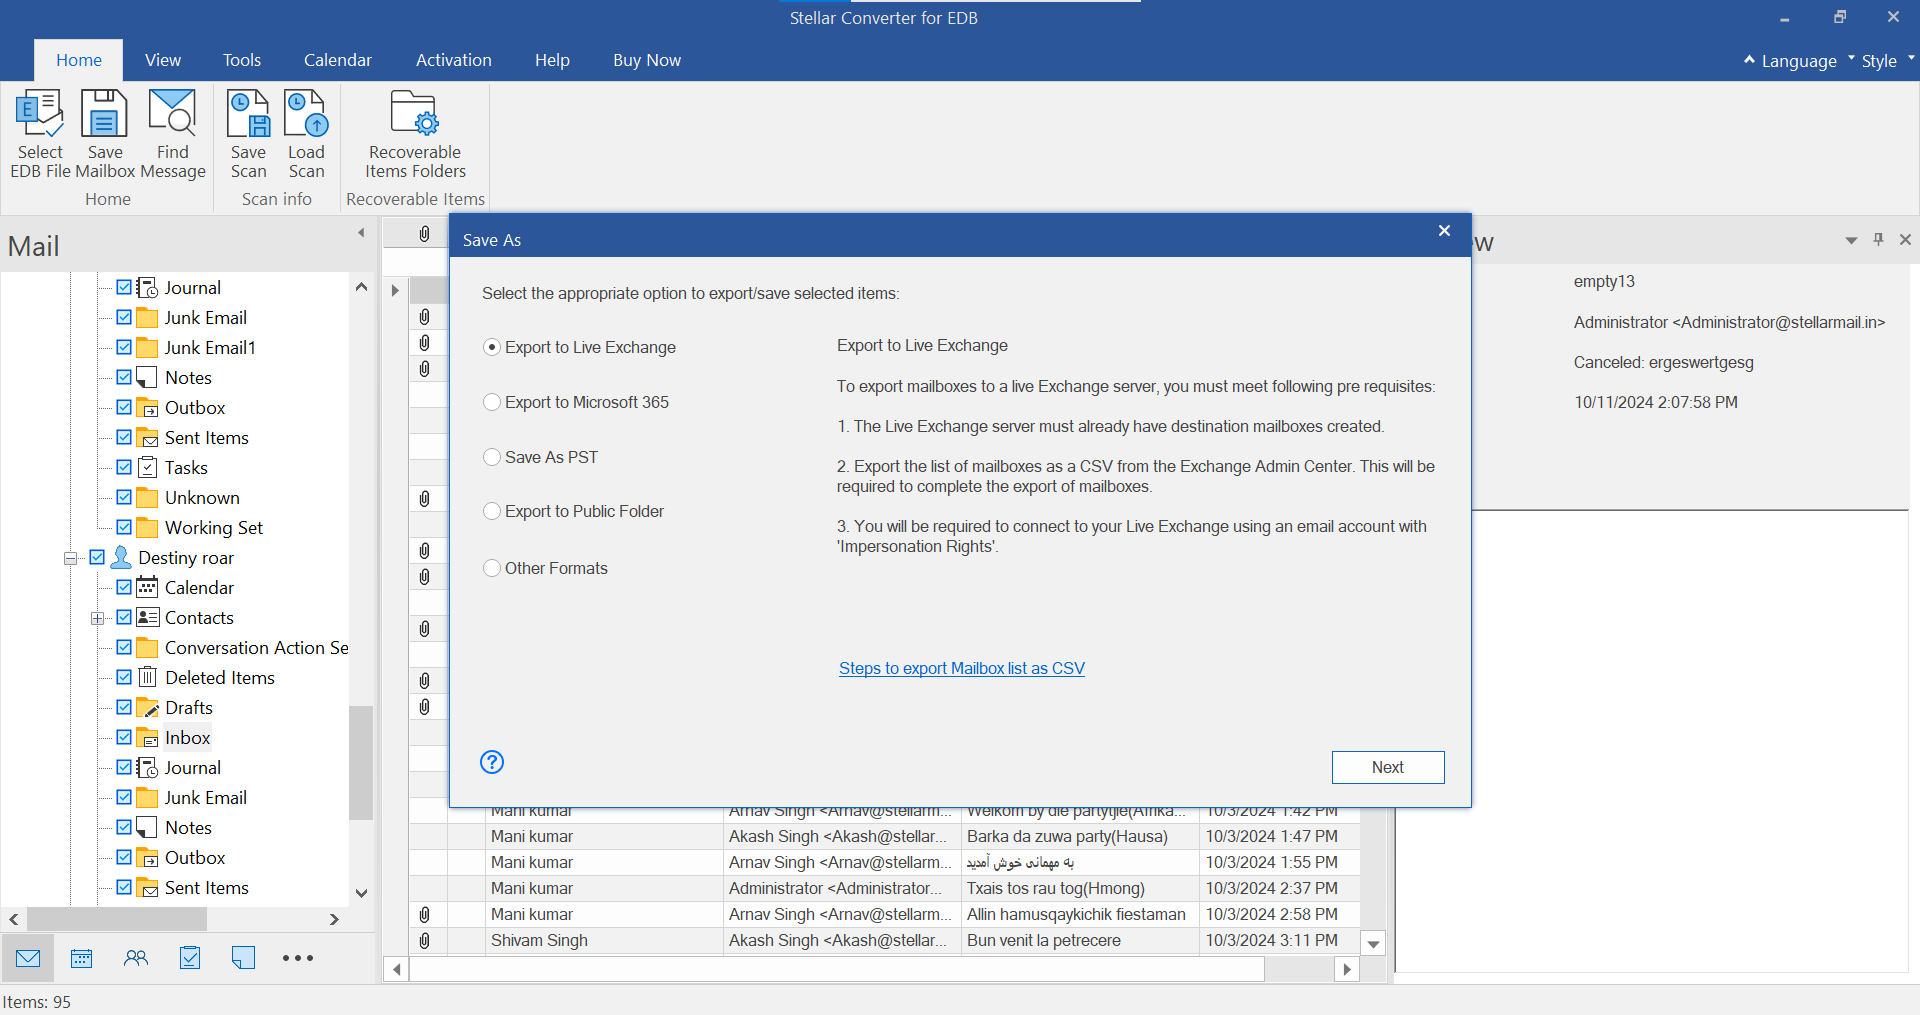
If you choose Export to PST, click 'Next' and browse a save location. Click 'Export' to save the EDB files to PST file.
If you select the option Export to Live Exchange, then follow these steps,
- Enter the details of your new Live Exchange Server
- Then click the 'Auto Map' option. The Auto Map option automatically connects the specified mailboxes to respective user accounts on Live Exchange server
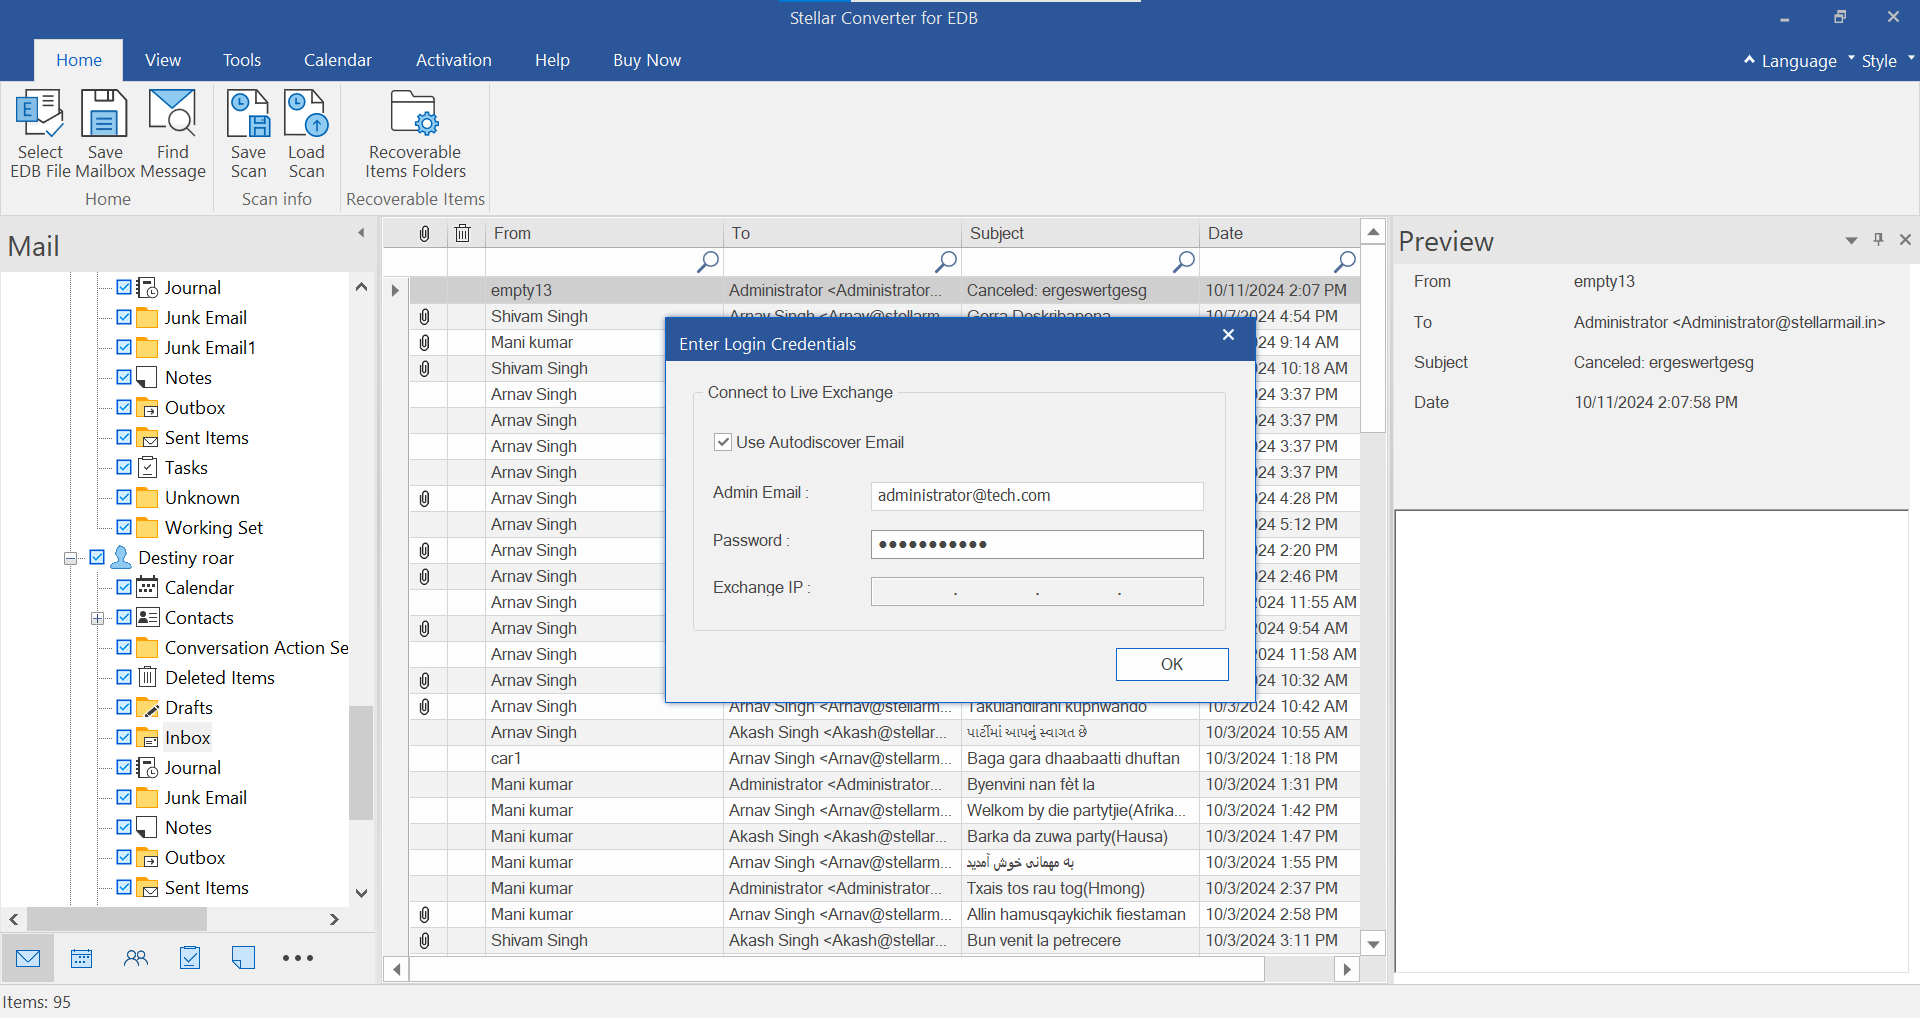
- Click 'OK' to begin the migration process of mailboxes from current server to new Live Exchange server
In Map Mailbox screen, you will see three columns,
- Source Mailbox: Displays mailboxes available on current Exchange server's database files
- Destination Mailbox: Displays mailboxes/user accounts available on Target or new Exchange Server where you want to migrate the Exchange
- Map Mailbox: This option is used to map Source and Destination mailboxes. Use this to link Source Mailbox with Destination Mailbox correctly if you find any discrepancy after automap. Further, you can,
- Apply Filter option by clicking on the Advance button to exclude or include specific mailbox or items
- Exclude Junk Mails and Deleted Mails from migration
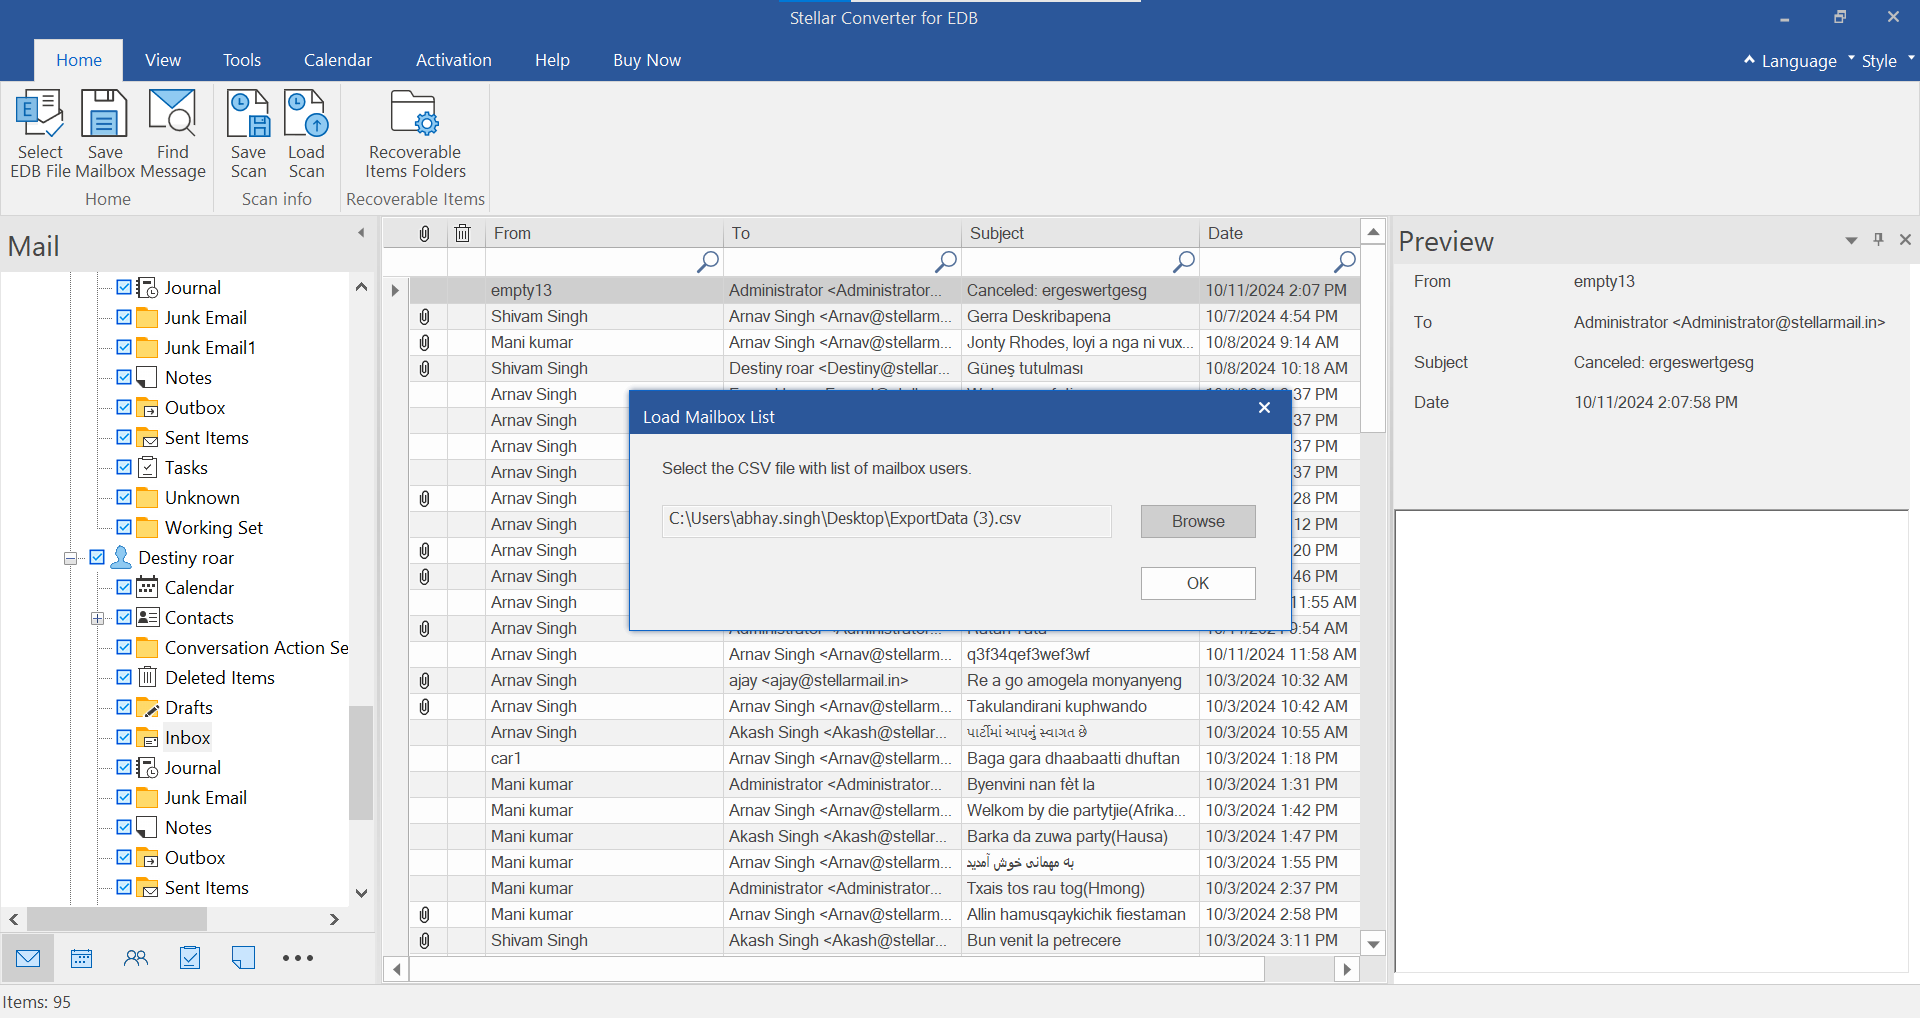
- Once everything is done, click on Export button to start exporting the selected EDB mailboxes to new Exchange Server
- Once the migration of EDB mailboxes to the new Live Exchange Server is completed, the software displays a message, 'Export process completed successfully'
Check Destination Exchange Server for Migrated EDB and Mailboxes
To check and verify if migration was successful, login to your new Exchange server and login to Exchange Admin Center (EAC). Then go to recipients>mailboxes. You will see all the users' details and mailboxes that you migrated from your old server.

Convert Hosted/Online Exchange Server Mailboxes to PST for Migration
After installation, launch the Stellar Converter for EDB software and follow these further steps to connect to your current server and convert the EDB mailboxes to PST.
- Click on the 'Hosted Exchange' option. This opens a new software window where you need to enter login credentials

- Select Connect to all mailboxes on server and click on 'MS Exchange Server 2010 and higher' checkbox
- Then enter the credentials, i.e. Admin Email, your current Server Name, and password. Click 'OK' to connect to your current Exchange Server

- Once connected, the software will scan and list all the mailboxes in the database including connected and disconnected. Select all and click on Save at the top right under the 'Home' tab.
- Then choose Export to PST from the option
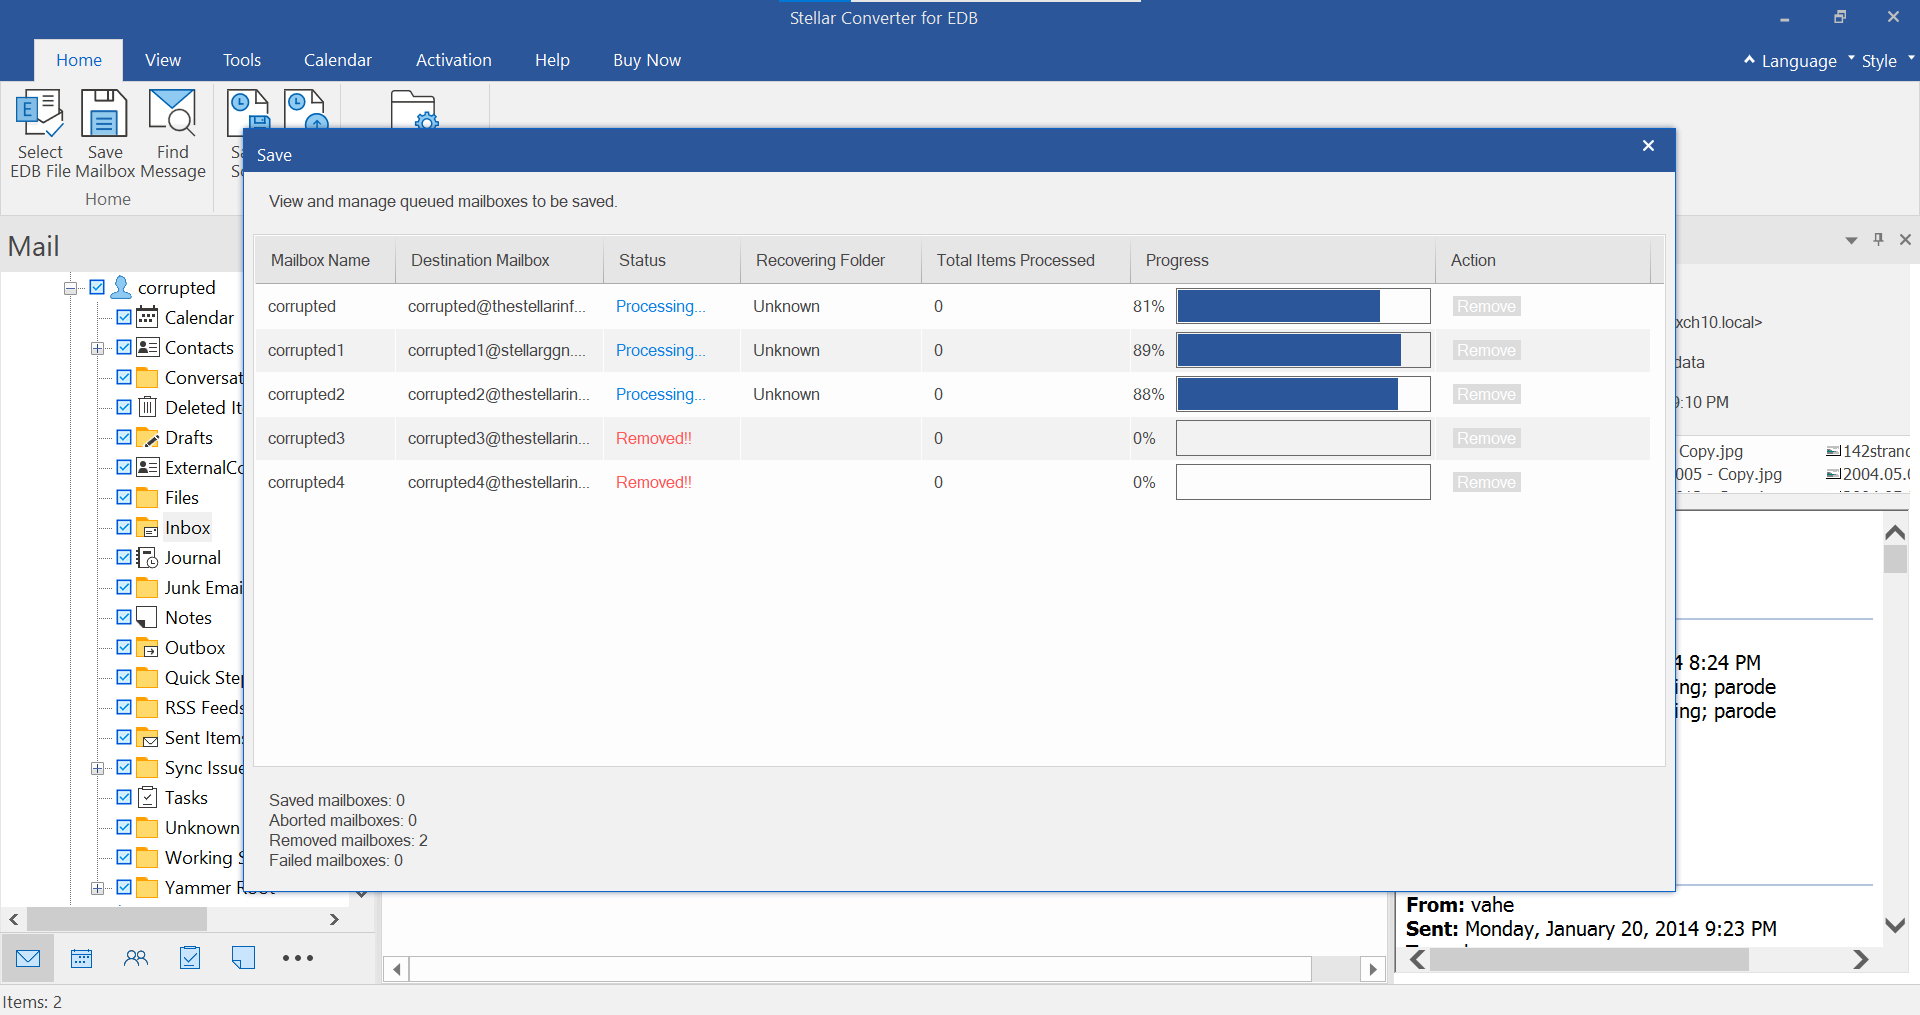
- Browse the location where you want to save the PST and click 'Export'
Steps to Import the PST File in Live Exchange via EAC
Copy the PST file that you exported on your new Live Exchange server's UNC network shared path. Ensure that Exchange has read/write permission to that UNC path. Then login to Exchange Admin Center (EAC) and follow these steps,
- Go to recipients and click on three dots to see more options
- Click 'Import PST'

- In Import from a .pst file window, specify the .PST file path and click 'Next'

- Then select the target mailbox and choose appropriate option. Click 'Next'

- Then click the checkbox 'Send email to the mailbox below when the .pst file has been exported' and then click 'Browse' to add the recipient
- Click 'Finish'
Alternatively, you can use New-MailboxImportRequest PowerShell cmdlets to create PST import request. You can also create a batch import request to import all PSTs.
Post Migration Step
Change the MX records and set up the new server for email flow. You can follow this guide on Microsoft to configure the new server for mail flow and client access.
Also, once the new server is configured, decommission the older Exchange server.
Conclusion
While you can also follow manual ways to migrate Exchange, using an Exchange migration tool such as Stellar Converter for EDB makes this arduous task easier and quicker. By using this software, you can migrate all mailboxes from your current Exchange server to a new Online (Office 365) or Hybrid Exchange server in a few clicks. That too without using PowerShell, which is a powerful tool but not everyone can use it.
To use PowerShell and its commands for Exchange Migration, you must go through large documentations, understand all ins and outs of the PowerShell commands for migration and risks involved.
On the other hand, the GUI-based software can be used by anyone with admin credentials to migrate the Exchange. It's free to download for evaluation.
Some other important resources:



 4 min read