


How to Fix Outlook Profile Hangs or Freezes after Windows 11 Update (KB5074109)?
July 22, 2026| 6 min read


Our content follows trusted Editorial Standards - accurate & unbiased.
Summary: The "Mailbox size limit exceeded" error message in Microsoft Outlook indicates that your mailbox has reached its maximum allotted storage capacity limit. This is a comprehensive guide to help you reduce the mailbox size and resolve this issue. This also mentions an advanced toolkit for Outlook that can help in reducing and managing Outlook data file size.
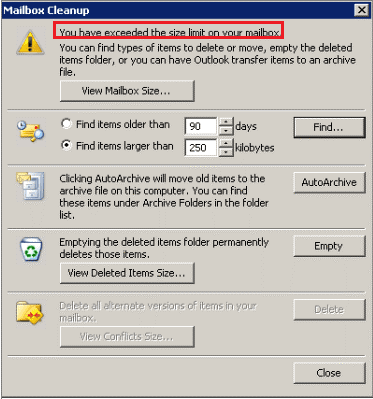
Free Download 100% SecureIt is common for Outlook users to encounter the error message, ‘You have exceeded the size limit on your mailbox’. The message is displayed as a warning to inform the users that they have exceeded the storage limit for their mailbox, i.e., their Outlook mailbox is full.
As a result, users may encounter Outlook performance issues and fail to send or receive new emails. In this guide, we will look into the reasons that can inflate Outlook mailbox or data file and provide solutions to overcome such situation and resolve the error.
| Note: Even if you don’t receive a warning, your Outlook PST file might become so large that it slows down Outlook’s performance. Also, as PST file exceeds the maximum size limit, the propensity for data corruption increases exponentially. If your PST file gets corrupt, use Stellar Repair for Outlook to repair the PST file with precision and speed. |
Following are some factors that may inflate the Outlook mailbox size beyond its permissible limit, resulting in this error:
As the error is the result of inflated mailbox/data file size, you need to reduce the mailbox/data file size to resolve the error. You can follow the below solutions to troubleshoot and resolve the error in Outlook 2010, 2013, 2016, 2019, and 2021.
But before proceeding, you should know the Outlook data file size limit in different Outlook versions.
| Outlook Versions | Outlook Data File Size Limit |
| Outlook 2002 and older version | 2 GB |
| Outlook 2007 | 20 GB |
| Outlook 2010 and later versions | 50 GB |
You can reduce the size of your mailbox by using the built-in Outlook Mailbox Cleanup utility. The utility provides options to de-clutter and organize your Outlook Inbox in a hassle-free manner. Follow these steps to use the cleanup utility:
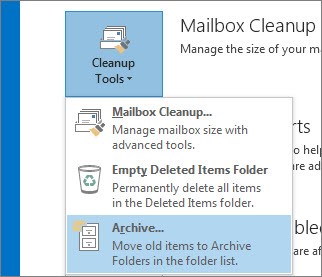
For Outlook 2010 and later:
For Outlook 2007:
In the Mailbox Cleanup dialog box, choose any of the following options to manage your mailbox size:
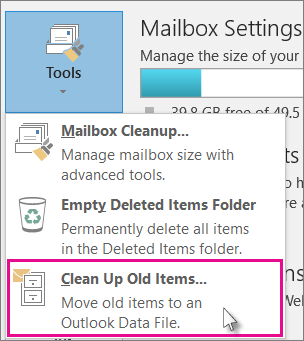
You can reduce the PST file size by using Outlook’s ‘Archive’ or ‘Import/Export’ option. These options help move mailbox data from one PST file to another or a new one.
To archive mailbox items and reduce the PST file size, follow these steps:
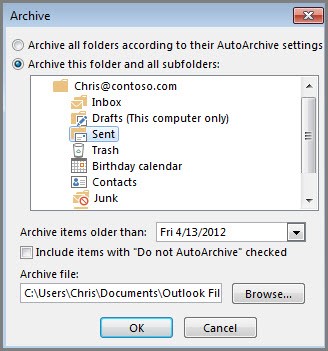
Similarly, you can create multiple .pst files of smaller size and reduce the size of original PST file.
To prevent the PST file from getting large again, you can enable AutoArchive by following these steps:
Large number of duplicate emails also results in oversized PST file. There are various reasons that can lead to duplication of emails, such as incorrectly configured rules, short Send/Receive intervals, improper Mailbox settings, incorrect Account setup, third-party anti-virus scanner, etc. So, you need to address the actual cause behind the problem to remove duplicate email messages.
In Outlook 2013 and above versions, you can use the ‘Compact Now’ feature to remove deleted data (white) space. This helps reduce the PST file size. Outlook automatically compacts its data file, if it contains more than 20% of unused space. You can also manually compact the PST file by following these steps:
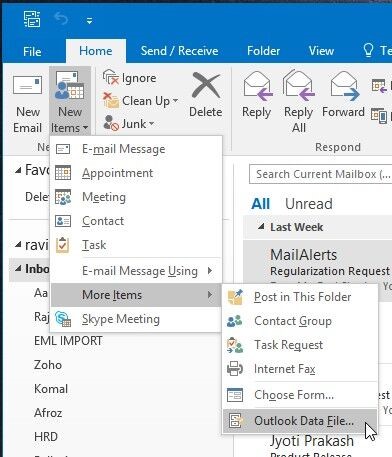
You can also create a local PST file and then move mail items, especially the large and older ones, to this local PST file. Here are the steps:
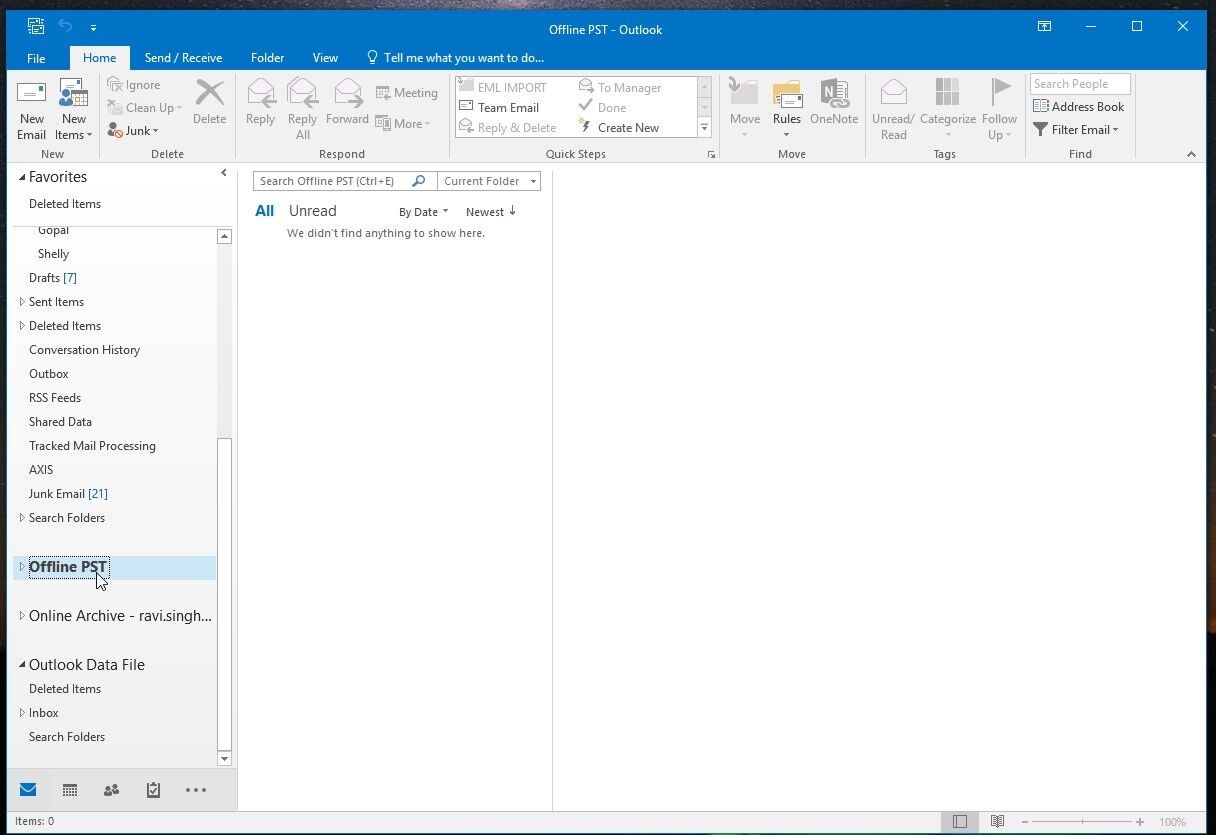
These mails will be stored offline on local storage and help you reduce the mailbox size.
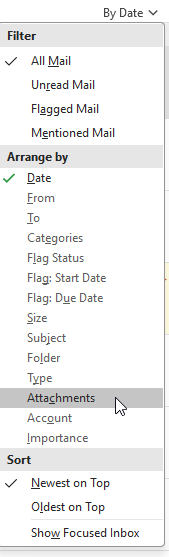
You can also consider removing the emails with large attachments or simply remove the attachments from those emails to reduce and manage the PST file size. However, this will require manual efforts. The steps are as follows:
To automate this process, you can use the Compact or Split option in Stellar Toolkit for Outlook tool. The tool automatically removes and saves all the attachments in a separate folder and links the attachments to the respective emails. This allows users to continue access to the attachments while significantly reducing the PST file size.
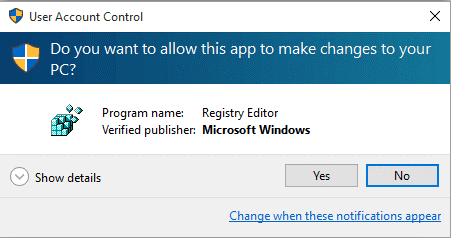
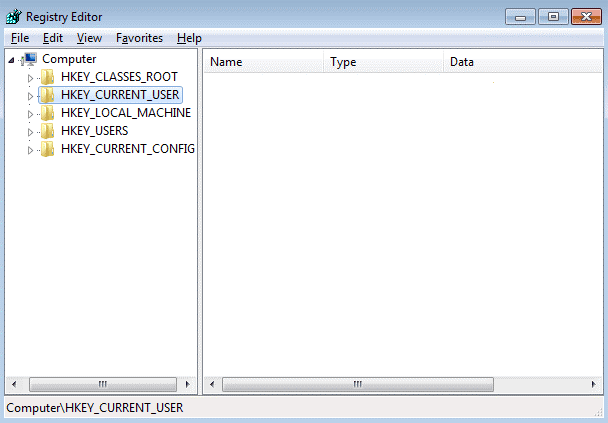
You can increase your inbox size limit in Outlook by making changes to the registry entries in the Registry Editor. To do so, follow these steps:
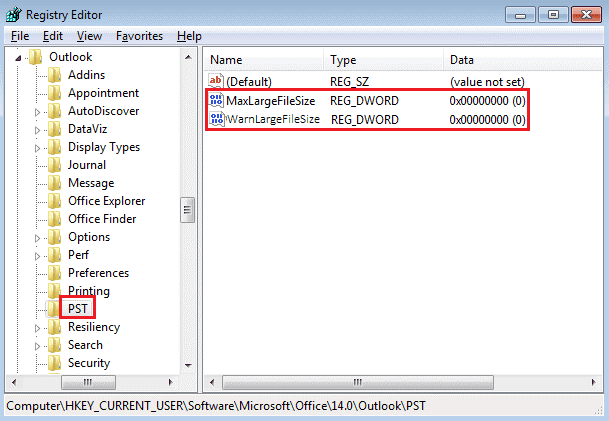
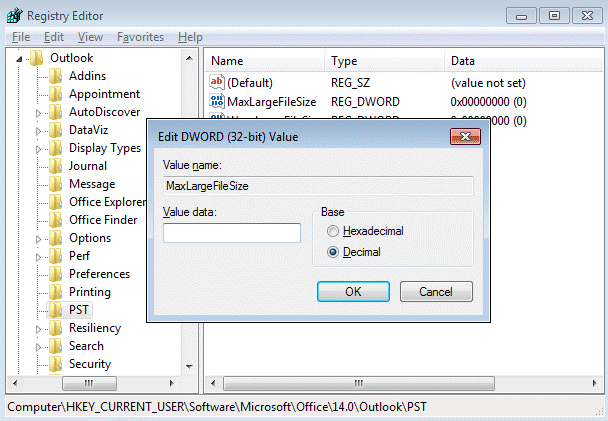
Right-click the blank space in the right pane. Click New and select QWORD (64-bit) Value. If you’re using 32-bit Outlook, choose DWORD (32-bit) Value. Assign ‘MaxLargeFileSize’ as the filename.
Right-click the blank space in the right pane. Click New and select QWORD (64-bit) Value. In case you’re using 32-bit Outlook, choose DWORD (32-bit) Value. Assign ‘WarnLargeFileSize’ as your filename.
To effectively manage your Outlook mailbox, you can use Stellar Toolkit for Outlook. This software comes bundled with tools that help automate the Outlook mailbox management tasks. For instance, the PST Splitter tool in the toolkit helps in managing Outlook mailbox by splitting large-sized PST files into smaller PSTs. Also, you can choose to compress a large Outlook data file by using the PST Compacter tool.
This post outlined the possible reasons for the Outlook error message ‘Mailbox size limit exceeded.’ It also discussed various solutions to reduce and manage Outlook mailbox size, and resolve the error. However, the manual solutions have certain limitations. To overcome these limitations, you can use Stellar Toolkit for Outlook software to efficiently manage your mailbox in a fast, reliable, and risk-free manner.
Senior Content Writer
This article was written by Ravi Singh, a Content Writer at Stellar Data Recovery.
Curious about our content creation process? Take a look at our Editor Guidelines.
July 22, 2026| 6 min read
July 28, 2026| 6 min read
July 28, 2026| 6 min read


 6 min read