-366.jpg&url=https://www.stellarinfo.com/article/macintosh-hd-free-space-not-increasing-after-emptying-trash.php)


“My Macintosh HD was running short of free storage space. So, I deleted a few inessential files from the drive and then emptied the Trash. To my surprise, the Finder window didn’t show the increased free space in Macintosh HD. Please help resolve the issue.”
Sometimes, after you delete some files from your Macintosh HD, and then empty your Trash, you don’t see the increased storage space on the startup disk. This issue can be due to any macOS error. But don’t worry; you can fix the issue by performing the troubleshooting procedures presented next.
Open Storage Tab from About This Mac
When you don’t see increased storage space on Macintosh HD even after Trash's emptying, you should perform the following steps:
Go to Apple Menu > About This Mac.
Click the Storage tab to find storage disk usage according to file types.
On opening the Storage tab, macOS performs a renewed calculation on Macintosh HD and displays the used and available space accordingly. Hopefully, the Finder window will now show the increased space on your Macintosh HD. If the issue isn’t fixed, perform the next solution.
Restart Your Mac in Safe Mode
Try booting your Mac in Safe Mode to fix any errors. The steps are as follows:
Restart your Mac, then immediately press and hold the Shift key.
Release the key when you see the Apple logo. Mac now boots into Safe Mode.
macOS fixes all errors during booting. Restart your Mac, then boot normally.
Now, you’ll find the increased free space on your Macintosh HD in the Finder window.
Run First Aid in macOS Recovery Mode
If the issue persists, you can run First Aid from Disk Utility to force TRIM operation on your Mac SSD. The steps are as follows:
Restart your Mac, then immediately press and hold Command + R keys.
Release the keys when the Apple logo appears. Mac boots into macOS Recovery mode.
From macOS Utilities, select Disk Utility, then click Continue.
From the sidebar, select Macintosh HD and click the First Aid tab.
Click Run to initiate the storage drive repair task.
The issue will be fixed from your Mac solid-state drive.
Your Mac will function properly without any errors or slowdown if you clean up your Macintosh HD time and again. This cleanup task will help regain free space and optimize your Mac performance. The next section describes how to increase free space on your startup disk.
Manual Method to Increase Free Space in Startup Disk
Perform the following to increase the free space on your Mac startup disk.
Use About This Mac > Storage > Manage to know what all items can be cleaned up.
From Recommendations, click Store In iCloud button to move files, photos, and messages to iCloud and free up startup disk space. Click the Optimise button to remove watched iTunes films and TV programs from Mac. Click the Turn On button beside Empty Trash Automatically to remove items that have been in Trash for more than 30 days. Click the Review Files button to sort files on your Mac and delete unneeded files.
Select Applications, then trash the unused applications on your Mac.
Select Documents, then move required large files, downloads, and file browser data from Mac to an external hard drive. Trash the rest of the documents to increase free space.
Select iOS Files, iTunes, and Mail options, one at a time, then remove unneeded items to free up Macintosh HD space.
Select the Trash option, browse the Trash items for any essential files, restore the required one, and finally click the Empty Trash button to free up Macintosh HD space.
Read More: Resolved: "Startup Disk Full" issue on MacBook Pro
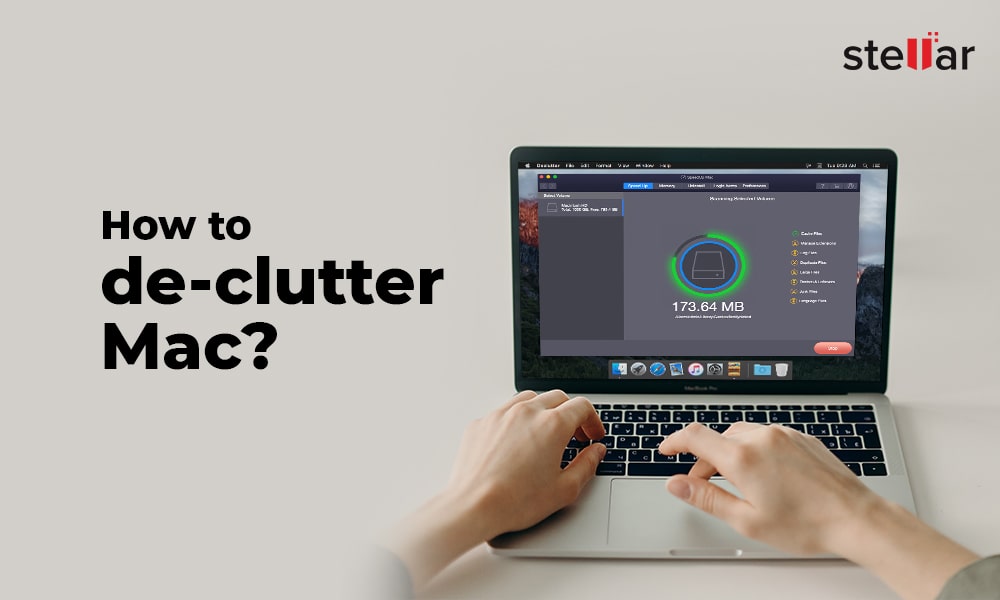
Clean Macintosh HD Using a Clean Up Software
You can clean up your Macintosh HD with a click of a button. The steps are explained next.
Download and install the *free Speedup Mac software on your Mac.
Launch the software and select Macintosh HD from the left panel.
Click the Scan button to know what all files can be cleaned up from Macintosh HD.
Check the total space used by junks and other items. Select the files that you want to delete.
Click the SpeedUp Now button to delete all the dispensable files from Macintosh HD.
Let the software execute the cleanup task on the Macintosh HD.
When the scan completes, click OK on the Process Completed dialog window.
*The SpeedUp Mac software is free for 30 days. In case you wish to perform the cleanup task after the 30 days free trial period, activate the software any time for a minor annual charge.
Conclusion
To resolve the issue of not increasing free space on Macintosh HD even after emptying Trash, open Storage from About This Mac, restart your Mac in Safe Mode, or run First Aid in Disk Utility. To increase free space on your Macintosh HD, go to the Storage tab, and click Manage. Now perform the clean-up task manually. You can even automate the clean-up task by scheduling it at a specific interval through the free SpeedUp Mac software.


Data recovery expert on Mac & Windows platforms, with 10-year experience in writing
 5 min read