Do you keep your important files and folders on your desktop so that you can access them easily and quickly? Well, you are not the only one. Many users have complained that their photos disappeared from Macbook Pro suddenly. It can be pretty frightening to lose access to your important files and photos, especially the ones for which you don’t have a backup.
No matter how careful you are, accidents tend to happen. But the good thing is that the disappeared Mac photos album can be recovered in no time using some methods we have listed in this blog post. Before that, let us first deep dive into the reasons which resulted in the disappearance of the Mac photos album.
Why Mac Photos album disappeared?
There can be a number of reasons which can result in your photos getting disappeared suddenly from your Mac. Some of the common issues which users have reported are given below:
- While updating macOS, it deleted all of your important files and photos
- Abrupt power failure which resulted in data loss
- Unintentionally or accidentally sending your desktop files to another such location as Trash and forgetting all about it
- Desktop files and photos are hidden
- Your Mac files and photos are synced with iCloud Drive then it can result in making them disappear from the desktop screen
- Some kind of virus or malware entered the system and has caused disappearance or formatting of photos on Mac
At times, you might not even know the exact reason behind the disappearance of photos from Mac but the important thing is to know how to recover those files. In this blog, we will discuss several effective methods to resolve this issue.
Method 1: Search photos on Mac using Spotlight Search
Using Spotlight, the inbuilt search tool of Mac, you can locate files and folders on your system. It is highly likely that you might have accidentally moved your photos on your desktop to another location or folder, therefore Spotlight will be the best option to search within your Mac.
Here is how you can use Spotlight on Mac:
- At the top right side of your screen, you can see a 'magnifying glass' shaped icon. Click on that to launch Spotlight.
- If you don't remember the exact name of the file, then you can also search for it using some keywords or text associated with it.
- Once you search for that particular file, Spotlight will show you multiple file suggestions corresponding to your searched text. If you can find the file you were looking for, just open it, drag it, and then drop it onto the desktop. In case, you accidentally deleted the files then also Spotlight will show it in the Trash or Bin folder.
If your photos on Mac have disappeared because of misplacing the files, then you can surely find them using the Spotlight tool.
Method 2: Discover hidden Mac photos through Finder
MacOS by default hides some files and folders from its users. So this can be one of the reasons for photos disappearing from your Macbook Pro. For those who don’t know, Finder is the default file manager for Mac. Follow the steps to retrieve hidden files using Finder:
- In the Dock, you will see the option 'Finder'. Select that to open a new window.
- Then select the 'Macintosh HD' folder and open it.
- Press 'Command' + 'Shift' + '.' keys. By doing this, you will see all the hidden files. Now you can locate the disappeared photos on Mac and unhide them as well.
- Once you can locate the photos you were looking for, you can press the 'Command' + 'Shift' + ‘.’ keys once again to hide the remaining files.
Method 3: Unhide Mac photos through Terminal
Another way using which you can view hidden photos and files on Mac is the Terminal command-line interface. Here is how you can use Terminal:
- Launch Terminal (located at /Applications/Utilities) > Applications > Utilities.
- Write in the following command: 'defaults write com.apple.Finder AppleShowAllFiles TRUE'. Now select the 'Return' key.
- Then enter the following command: 'killall Finder'. Again press the 'Return' key.
Let us break down all the commands which we gave in the above-mentioned instructions. On entering the first command, the Finder will show all the files. Then the second command will stop Finder and restart it to make rectifications.
This way you will see all hidden photos and files in Finder. If you want to hide these files, later on, you just need to redo the second step and replace 'TRUE' with 'FALSE' in the command.
Method 4: Disable iCloud Drive
With iCloud Drive, you can sync all your Mac data and access it anywhere on Apple devices and platforms. Not many people know that if you have enabled synchronization of 'Desktop & Documents' folder, then these two folders will automatically move to the iCloud section in the Finder. That's why you might not be able to access your Desktop photos and files. In order to resolve this issue, first disable the iCloud Drive from syncing with your Desktop and Documents folder. This is how you can do this in 3 simple steps:
- Go to the Apple menu and click 'System Preferences'.
- Select 'iCloud' and then press "Options" which is given next to "iCloud Drive".
- Untick the 'Desktop & Documents Folders' checkbox and press on 'Done'.
Method 5: Using Data Recovery Software
We have already shared 4 methods which can help you fix the photos which disappeared from your Mac. However, if still you are unable to access them then it means that you have lost those files or deleted them accidentally. And this is where Stellar Photo Recovery Software will come to your rescue.
Within a few clicks, you can recover your lost photos and files that you have on your Mac system. Its user-friendly interface makes it more convenient for you to recover your photos. It is available for both Windows and Mac OS. Here is how you can recover your lost photos using Stellar Photo Recovery Software on Mac:
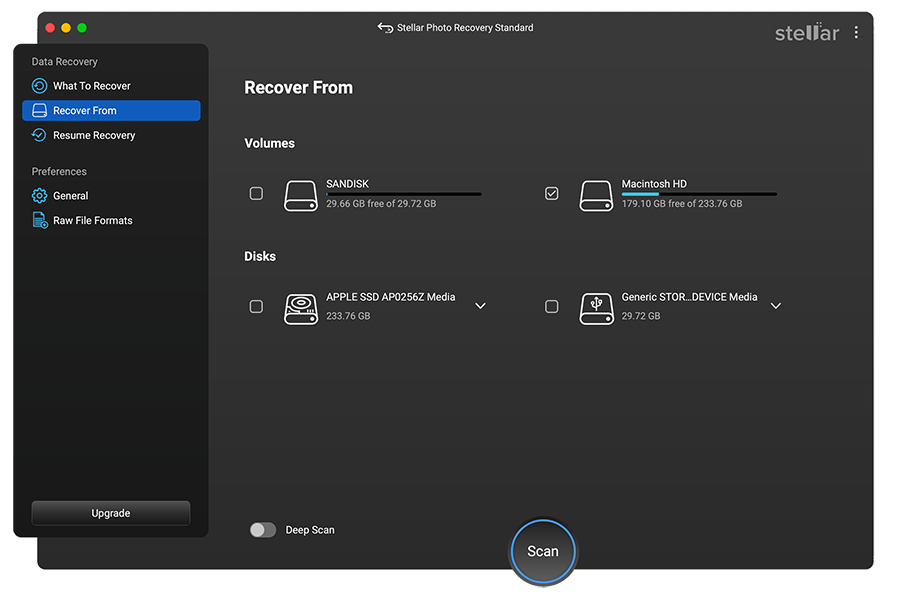
- Install Stellar Photo Recovery Software for Mac.

- Select 'Desktop' or any other location on your Mac from which you want to restore media files. Click Scan.
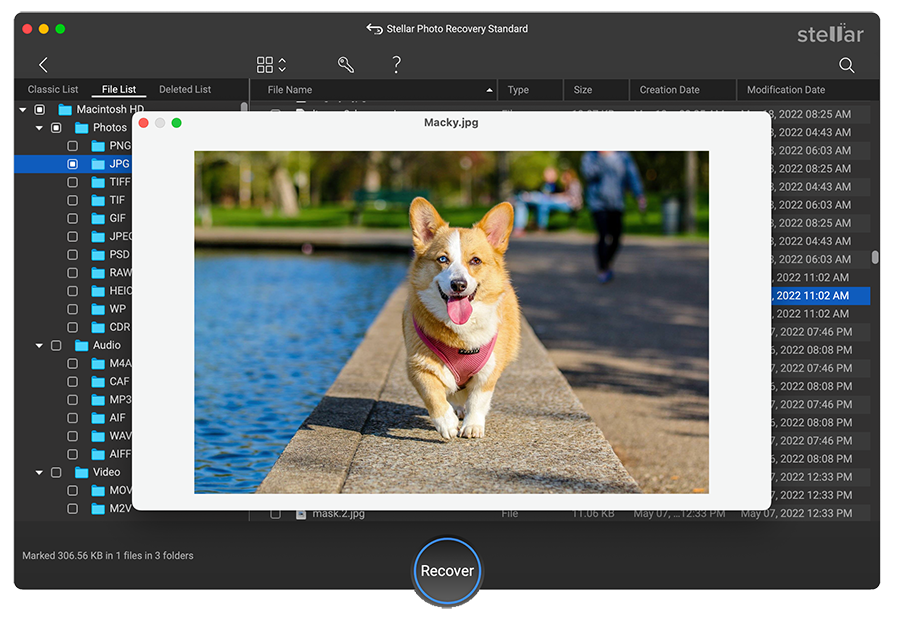
- Preview the recoverable files once the process of scanning is complete.
- Select the required photos or files and then click 'Recover' to save them to a safe and secure location.
Summing it up...
Photos and files on your Mac can disappear without any warning or specific reason. No matter how it happened and the reason, we have summed up various ways you can retrieve those photos in no time. Try out one of the 5 methods which we have mentioned in this blog post. However, Stellar Photo Recovery Software is your best bet if you want to try out the most effective and safe method. This easy-to-use software will help you retrieve photos which disappeared suddenly from your Mac.


 9 min read