-809.jpg&url=https://www.stellarinfo.com/article/use-new-moverequest-cmdlet.php)


Moving or migrating mailboxes from one Exchange Server to another is a fairly common task that administrators need to perform often. In on-premises Exchange Server 2010 SP1 and later versions, administrators can use the New-MoveRequest PowerShell cmdlet to create local move requests for moving user mailboxes, archives, and other mailboxes from one database to another within the same organization. The cmdlet can also be used for moving mailboxes from on-premises Exchange organization to Exchange Online or Microsoft 365 and vice-versa.
In this article, you will learn how to use the New-MoveRequest cmdlet to perform mailbox moves or migrate mailboxes between on-premises Exchange databases or to and from Exchange Online (Office 365).
Before You Begin
You must know the following before using the New-MoveRequest cmdlet in on-premises Exchange and Exchange Online.
- You must have the Move Mailboxes role assigned to use the New-MoveRequest
- You can use the cmdlet to move mailboxes within an on-premises Exchange organization in the same Active Directory forest.
- You should not use the cmdlet to move the mailboxes within an Exchange Online organization.
- You can use the cmdlet to move single or multiple mailboxes at once.
- You must use a CSV file to migrate multiple mailboxes to the destination database within the same forest or Exchange Online.
- The cmdlet works in Exchange Server 2010 SP1, Exchange Server 2013, Exchange Server 2016, and Exchange Server 2019.
Using New-MoveRequest Cmdlet in Exchange Server
Here’s how you can use the New-MoveRequest cmdlet to move mailboxes in the same forest and to or from Exchange Online.
Assign the Required Roles and Permissions
Open Exchange Management Shell (EMS) and run the following commands to display the required roles and permissions for running the cmdlet.
$Perms = Get-ManagementRole -Cmdlet New-MoveRequest
$Perms | foreach {Get-ManagementRoleAssignment -Role $_.Name -Delegating $false | Format-Table -Auto Role,RoleAssigneeType,RoleAssigneeName}

Then use the New-ManagementRoleAssignment cmdlet or Exchange Admin Center (EAC) to assign the required role to the user account that you will be using for moving the mailboxes.
New-ManagementRoleAssignment –Role "Move Mailboxes" –User yourusername /yourusername

Once the required roles and permissions are assigned, you can run and use the New-MoveRequest to create a mailbox move request for moving or migrating user mailboxes or other mailboxes to another database or Exchange Online.
Move Mailboxes to Another Database in the Same Forest
Using the following New-MoveRequest PowerShell command, you can create a new mailbox move request by mentioning the source mailbox name (identity) and target mailbox database in the same forest.
New-MoveRequest -Identity /useridentity -TargetDatabase targetdatabase -TargetMailboxDatabase /targetmailboxdatabase /targetmailboxdatabase /targetdatabase /useridentity
For instance,
New-MoveRequest -Identity 'ravi@test.local' -TargetDatabase "MBXDB03" –WhatIf

By using the –WhatIf parameter, you can test the cmdlet before actually creating the move request. The parameter helps you verify the command action—if it’s valid and what it will do.
New-MoveRequest -Identity 'ravi@test.local' -TargetDatabase "MBXDB03"

This will move the mailbox ‘ravi’ (stored in the MBXDB01 database) to MBXDB03.
To move multiple mailboxes at once, you can use the Get-Mailbox PowerShell cmdlet with the New-MoveRequest cmdlet. For instance,
Get-Mailbox -Database MBXDB01 | New-MoveRequest -TargetDatabase MBXDB03 -BatchName "MBXDB01toMBXDB03"
Move Mailboxes to Exchange Online (Microsoft 365)
To move the mailboxes from on-premises to Exchange Online, you need the following details:
- -Identity: Mailbox name or email address.
- -RemoteHostName: You can get this by using the Get-MigrationEndpoint
- -TargetDeliveryDomain: The primary SMTP domain used in your organization for the Exchange Online mailboxes.
- -RemoteCredential: Global administrator credentials or credentials of a user with the “Move Mailboxes” role assigned.
Follow these steps to move mailboxes from the on-premises mailbox database to Microsoft 365 or Exchange Online.
- In the Exchange Management Shell, run the following command to change the execution policy.
Set-ExecutionPolicy RemoteSigned
Press Y and hit Enter to confirm. - Install the Exchange Online Management module.
Install-Module -Name ExchangeOnlineManagement - Press Y and Enter keys to proceed, if prompted.
- Connect to the Exchange Online.
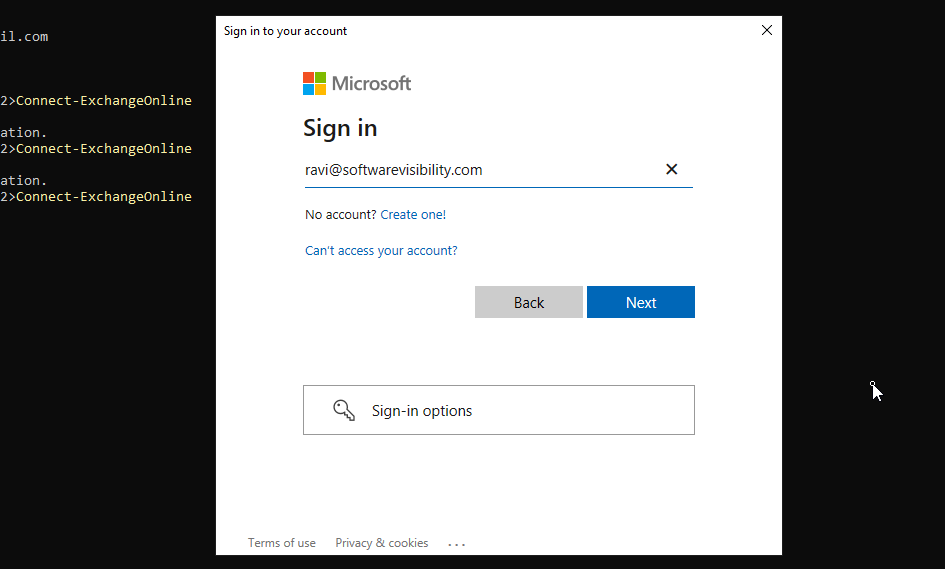
Connect-ExchangeOnline

- A new pop will appear. Enter the credentials to log in.
- Then run the following command to move the mailbox to Exchange Online (Microsoft 365).
New-MoveRequest -Identity "ravi@abc.com" -Remote -RemoteHostName "dh57faz6shw1-f2b3-4e51g.resource.mailboxmigration.his.msappproxy.net" -TargetDeliveryDomain "domain.mail.onmicrosoft.com" -TargetDeliveryDomain "domain.mail.onmicrosoft.com" -RemoteCredential (Get-Credential domain\administrator)
How to Check If Mailbox is Moved Successfully?
To check if the move request was successful and the mailbox is moved to the desired mailbox database, run the following command:
Get-MoveRequestStatistics –Identity ravi

It will show the StatusDetail and PercentComplete.
You may also use the Get-MoveRequest cmdlet to check the move status or progress.
Get-MoveRequest
To check the multiple mailboxes move request status, run the following command:
Get-MoveRequest –BatchName “MBXDB01toMBXDB03”
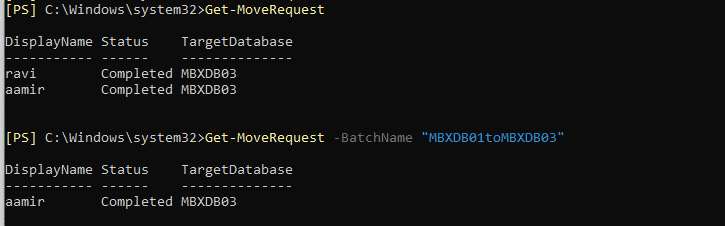
If you see the status as completed, it indicates that the mailbox has been successfully moved to the desired database or Exchange Online.
Conclusion
In this article, you have learned how to use the New-MoveRequest PowerShell cmdlet to move or migrate the mailboxes from one database to another mailbox database in the same forest and to Exchange Online. In case there are issues or the command fails with an exception or error, you may refer to the Microsoft documentation for the solution. This may require administrative efforts and take some time to complete the migration. However, you can avoid the hassle by using an EDB to PST converter software, such as Stellar Converter for EDB. The software can extract all mailboxes from an online or offline mailbox and save them to PST format, which you can import into Office 365. You may also directly export the mailboxes from an offline mailbox database on your on-premises Exchange Server to another database on the same or different server in the same forest. The software can also export single or multiple mailboxes from on-premises Exchange to Office 365 or Exchange Online (Microsoft 365) directly in a few clicks.


 4 min read