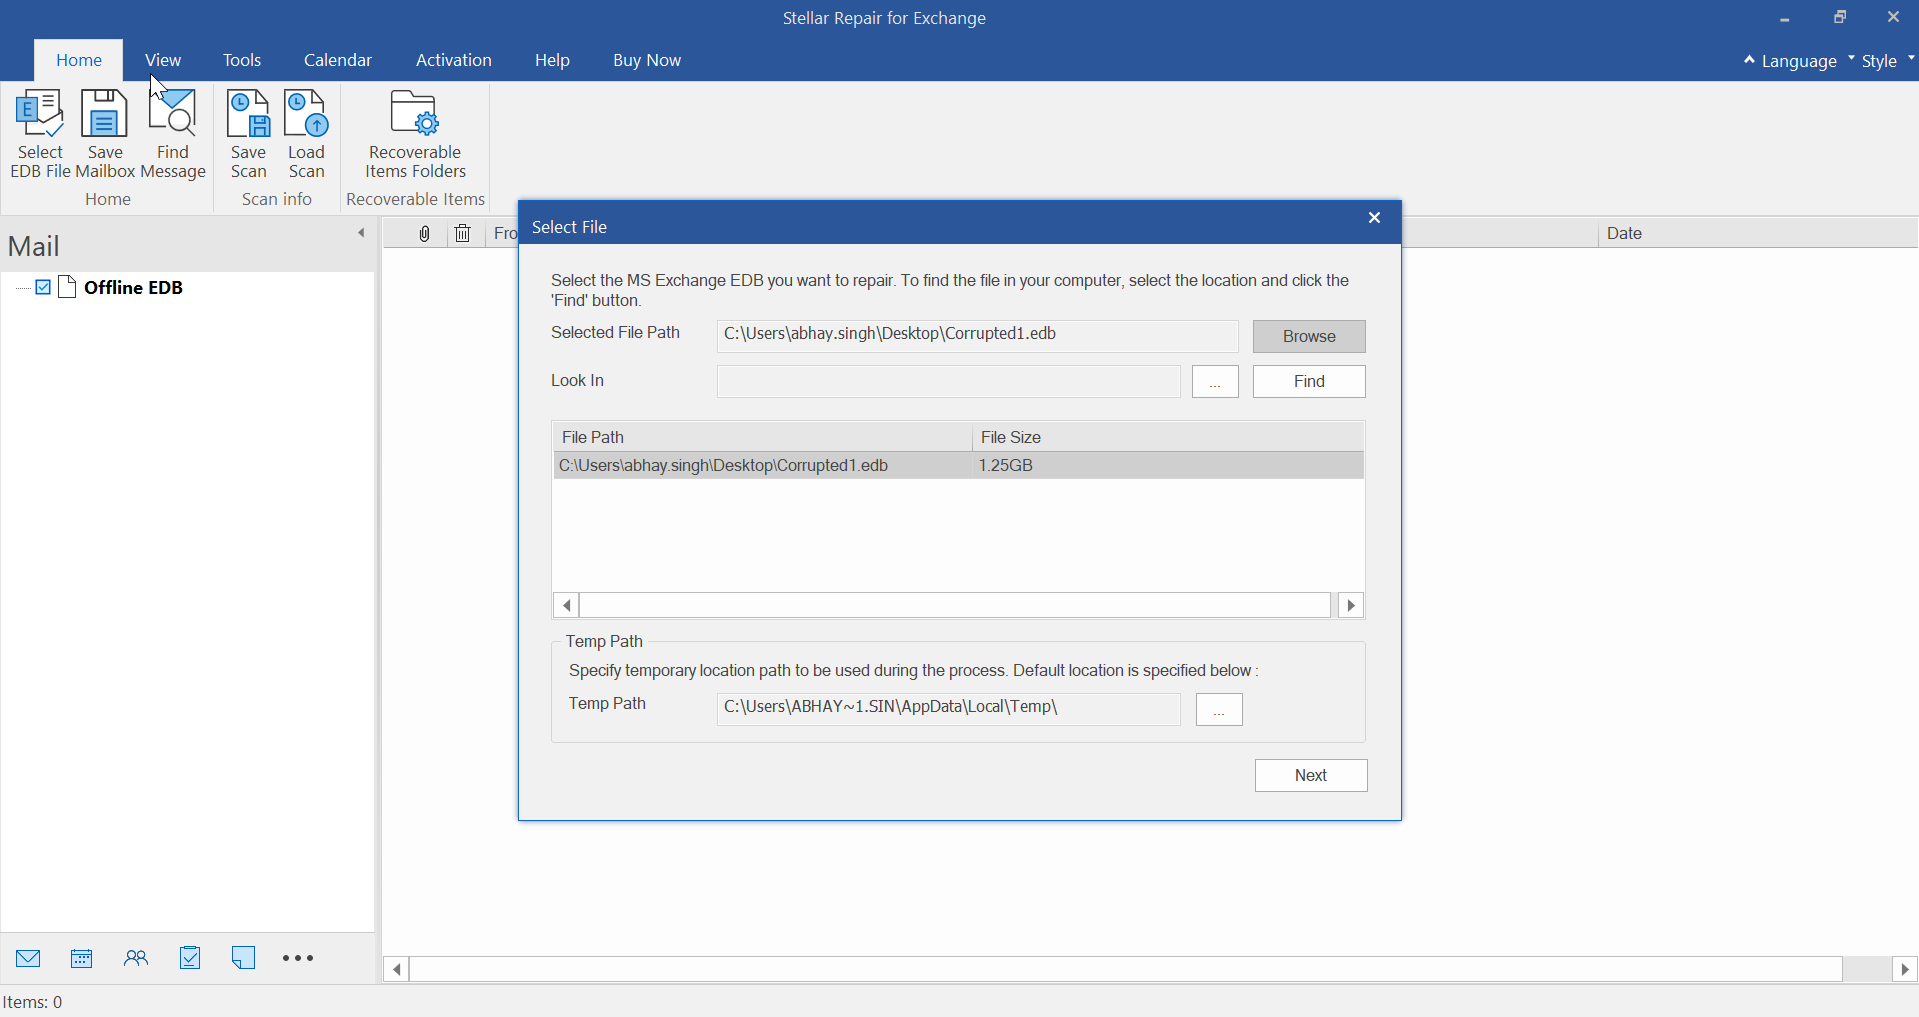
This is the home screen of Stellar Repair for Exchange software. Click Browse to select the EDB file, if you know the file location. Click the Find button if you don't know the location of the EDB file. The software will automatically find and show all the EDB files stored in the selected volume, folder, or sub-folder. You can also change the 'Temp Path', if the database is large.

In the Select File window, select the EDB file that you want to repair and click Next.
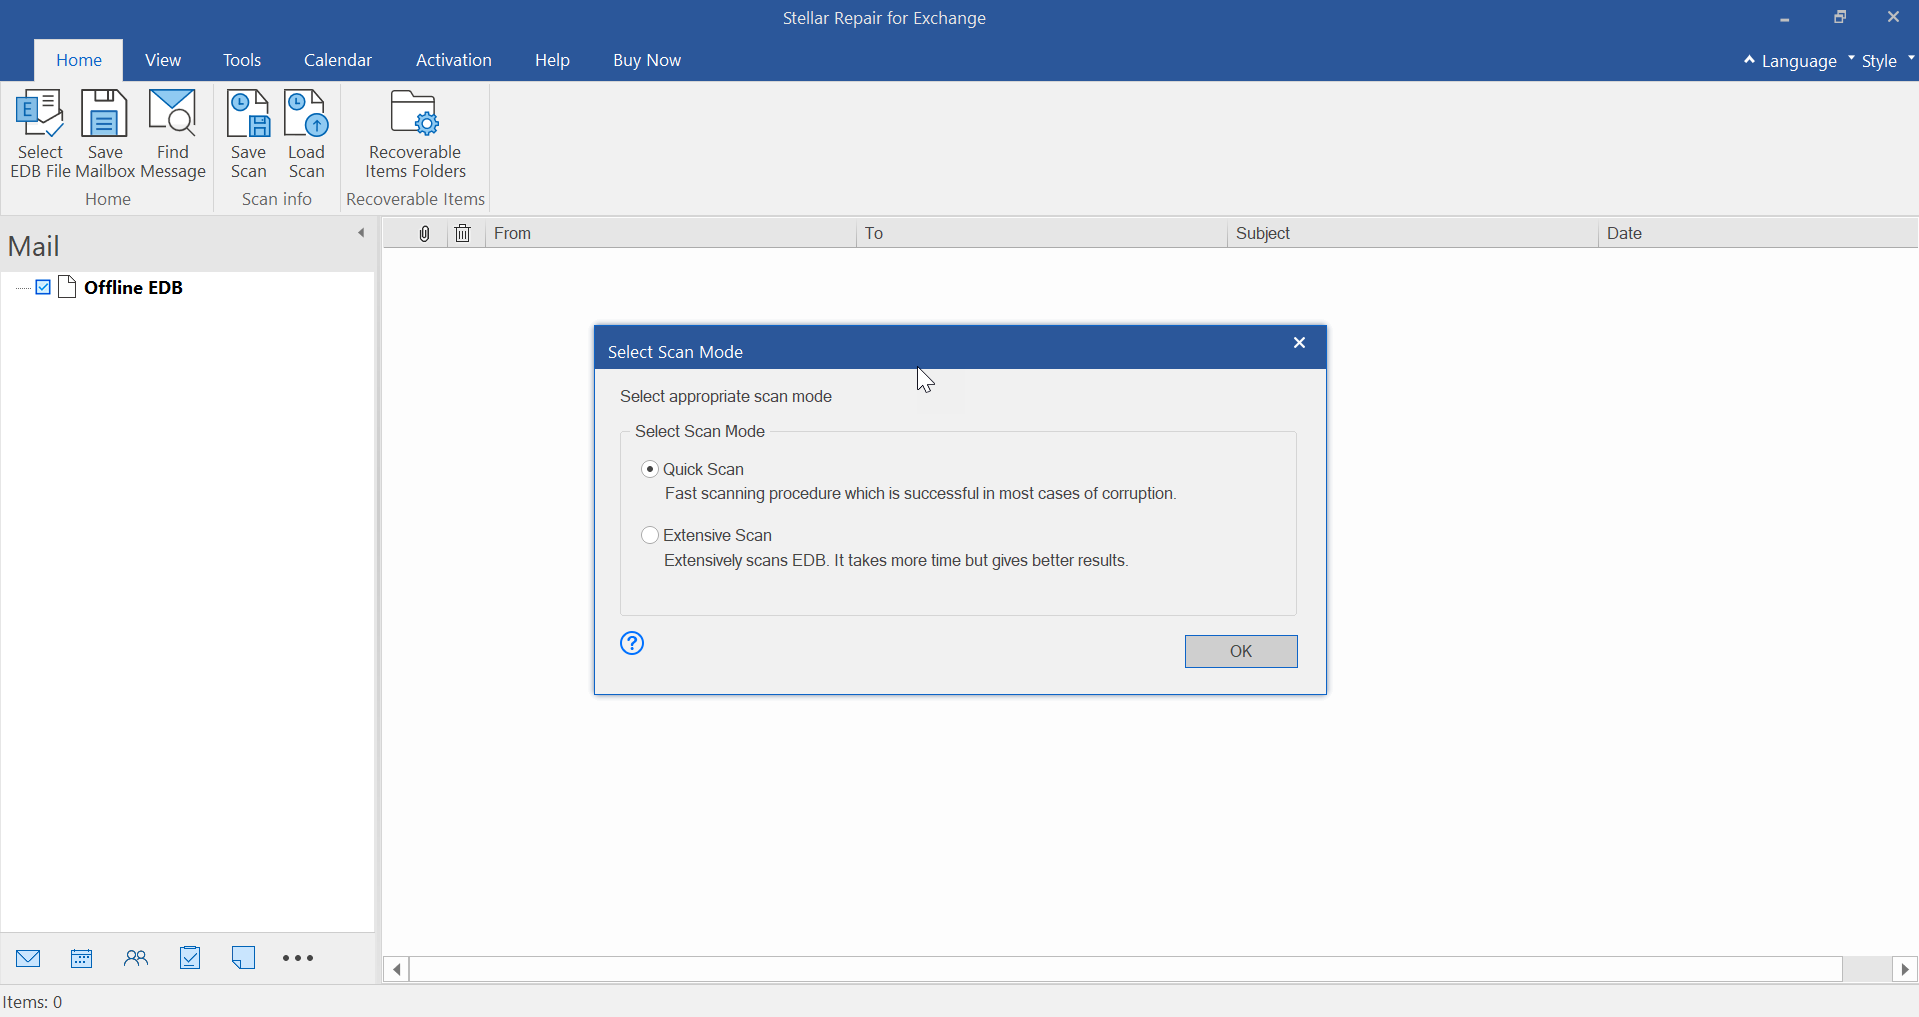
On the next screen, you will see two options for scanning - Quick Scan and Extensive Scan. The Quick Scan option is fast and is successful in most cases of corruption. The Extensive Scan option extensively scans the EDB file and gives better results. Choose the scan option as per your needs and click OK.
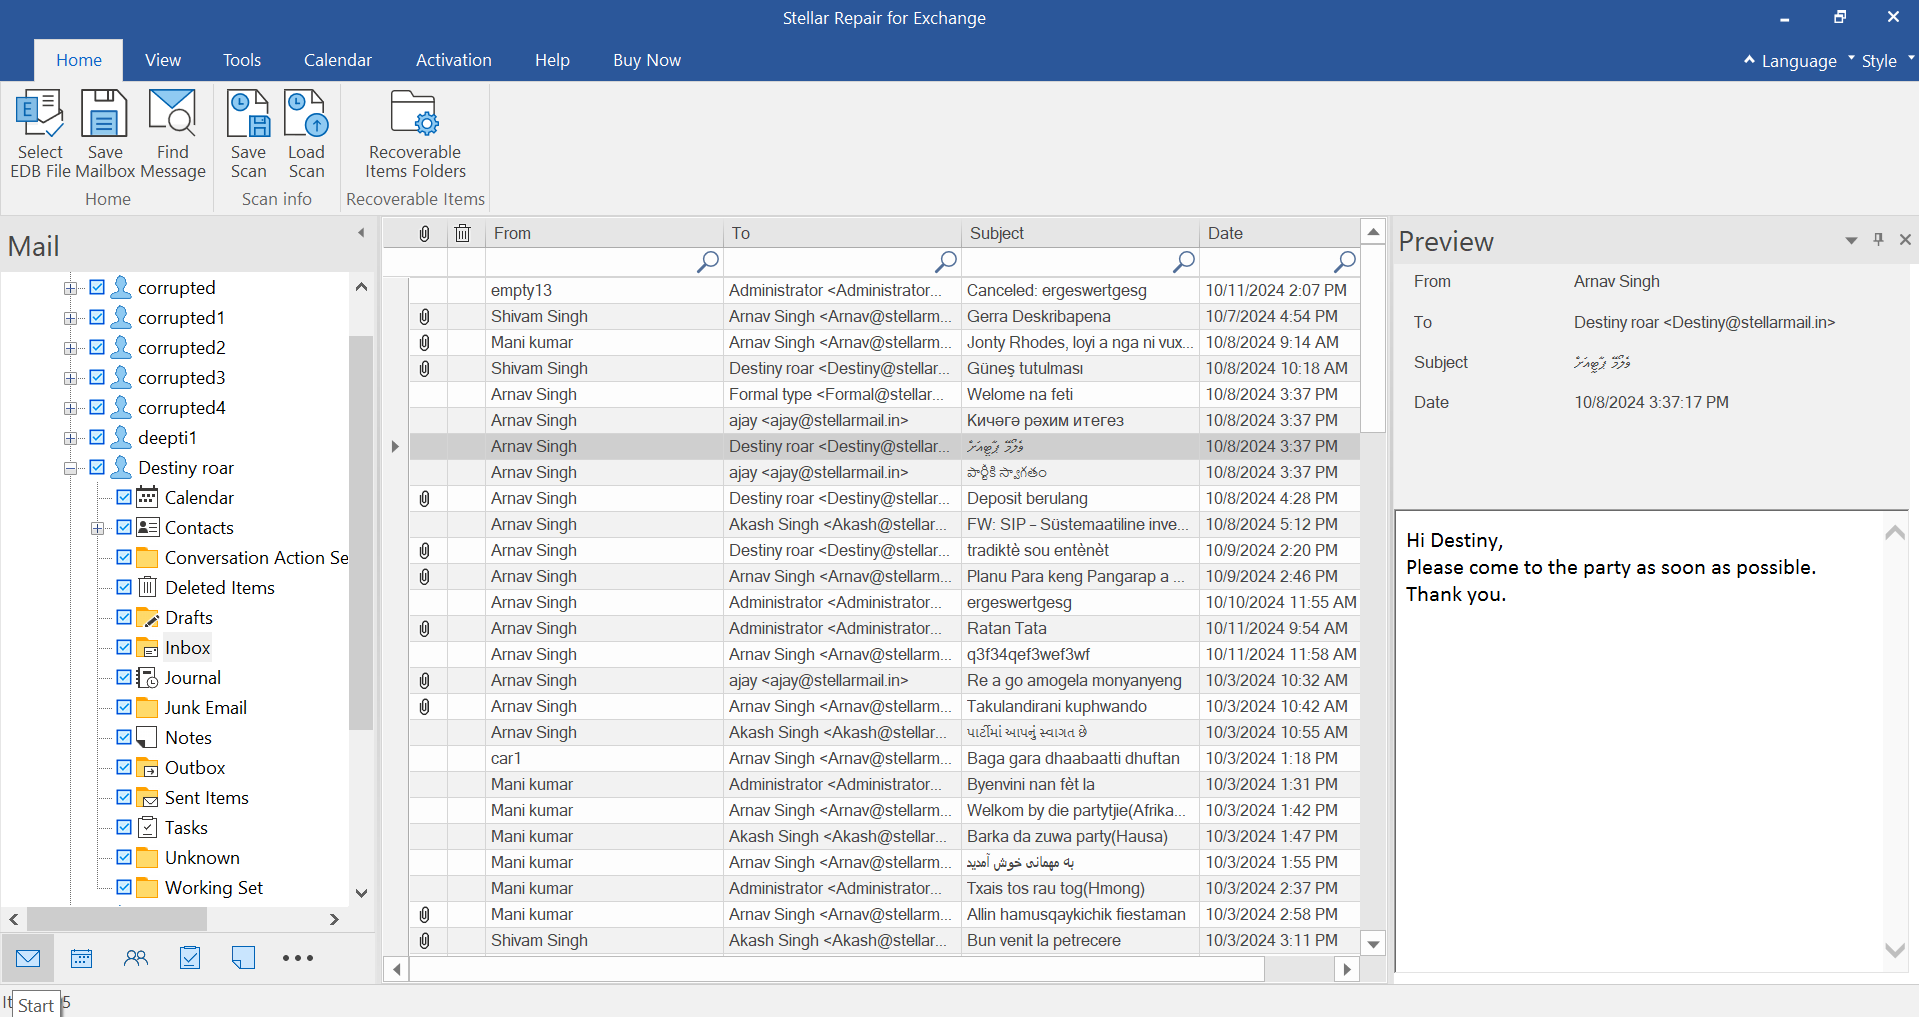
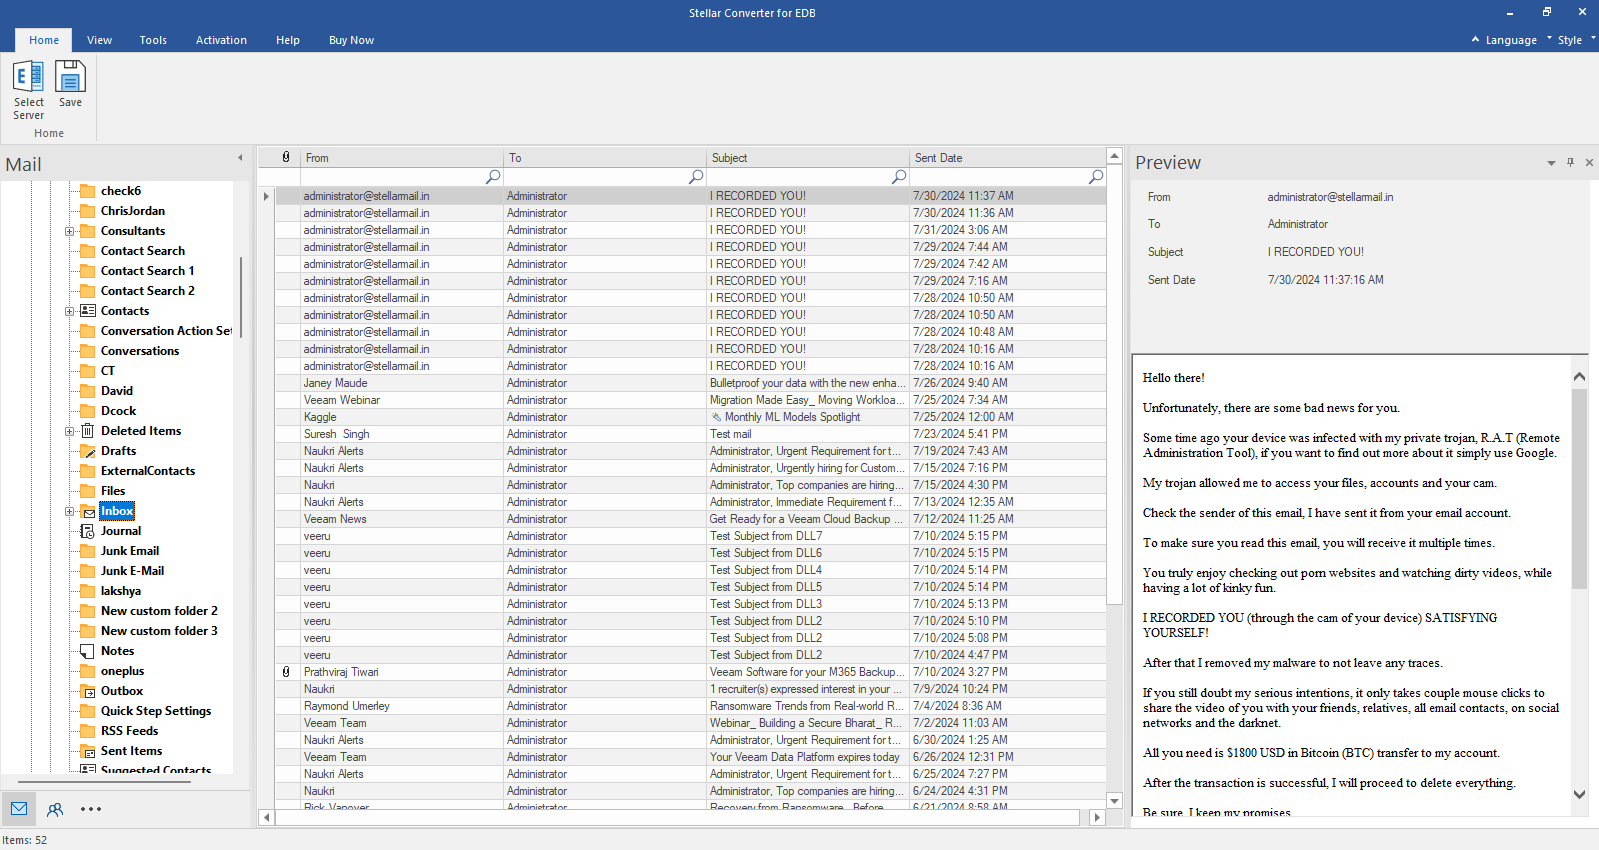
When the scanning process is finished, the software will list all the recoverable mailboxes in the left pane. You can preview the recoverable data. Then, select all or specific mailbox items that you want to recover and click Save Mailbox under the Home tab.
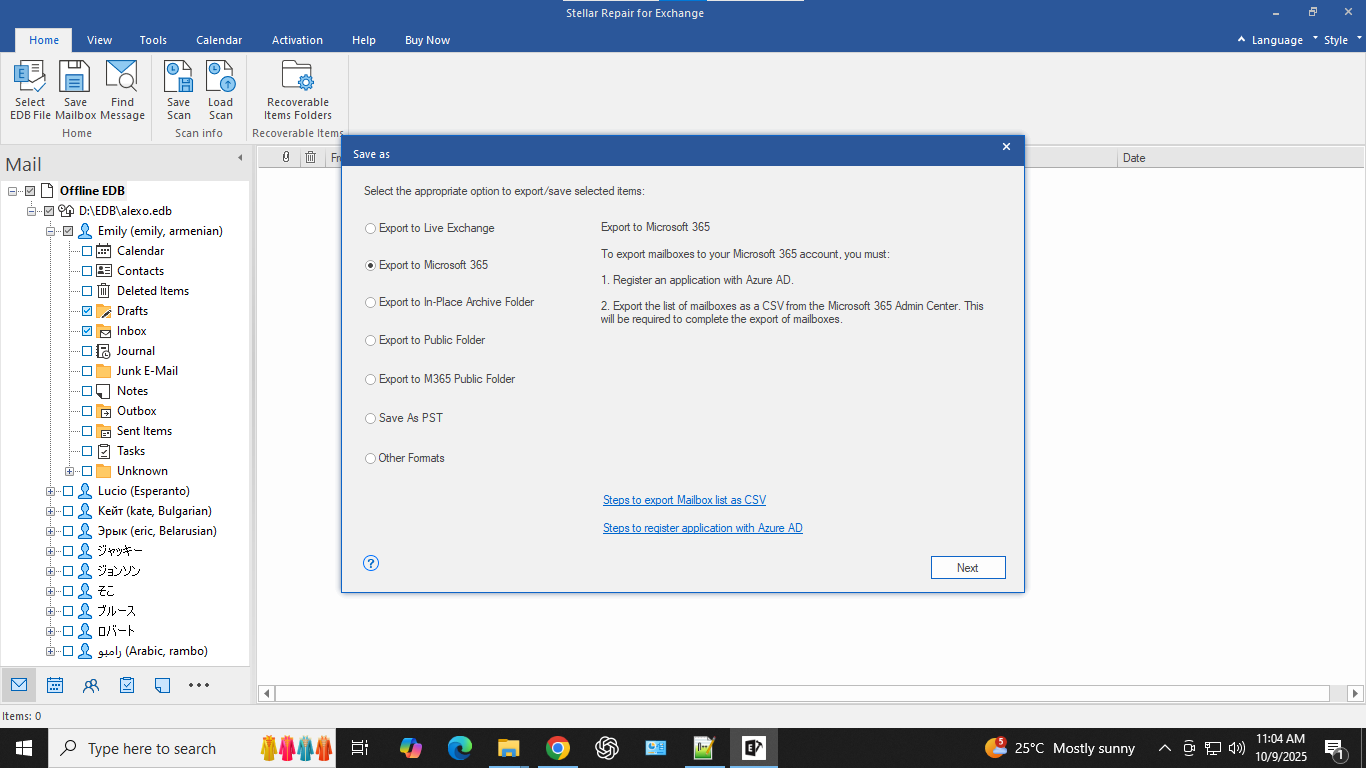
To export the recovered mailboxes to live Exchange Server, select the Export to Live Exchange option on the Save As window and click Next.

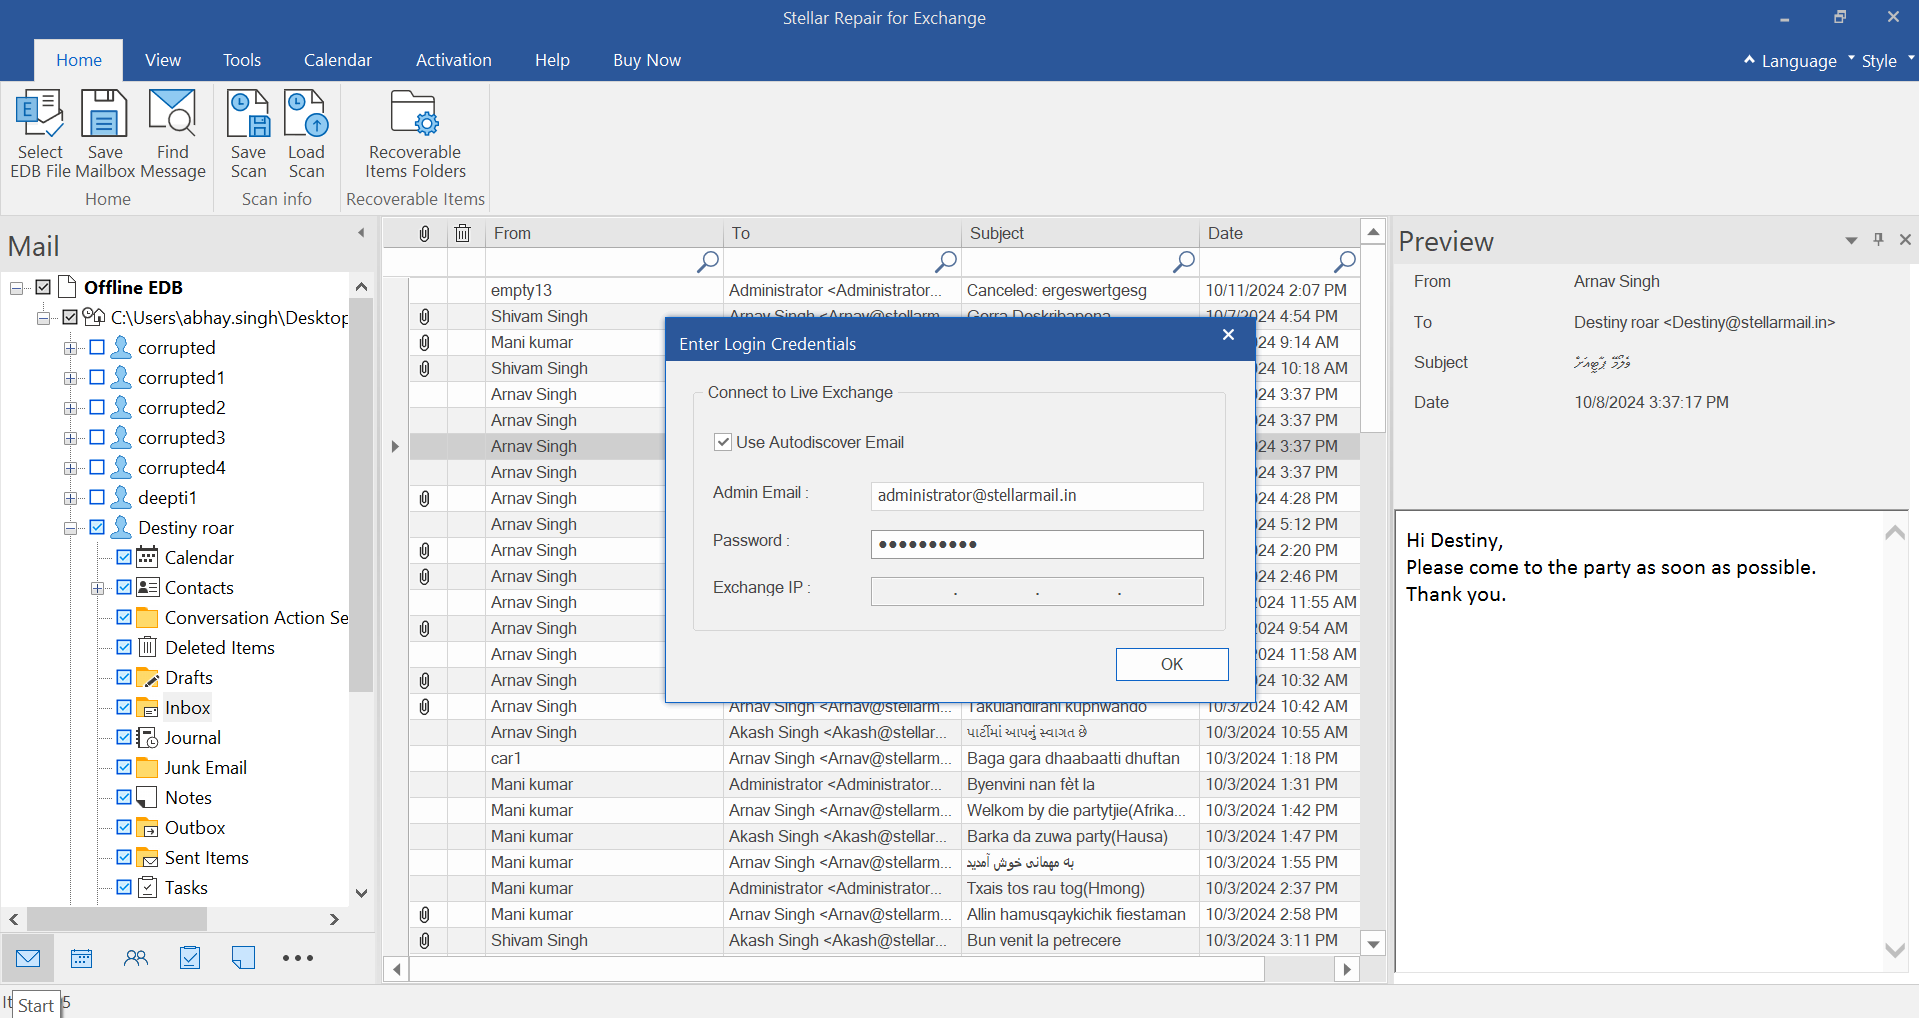
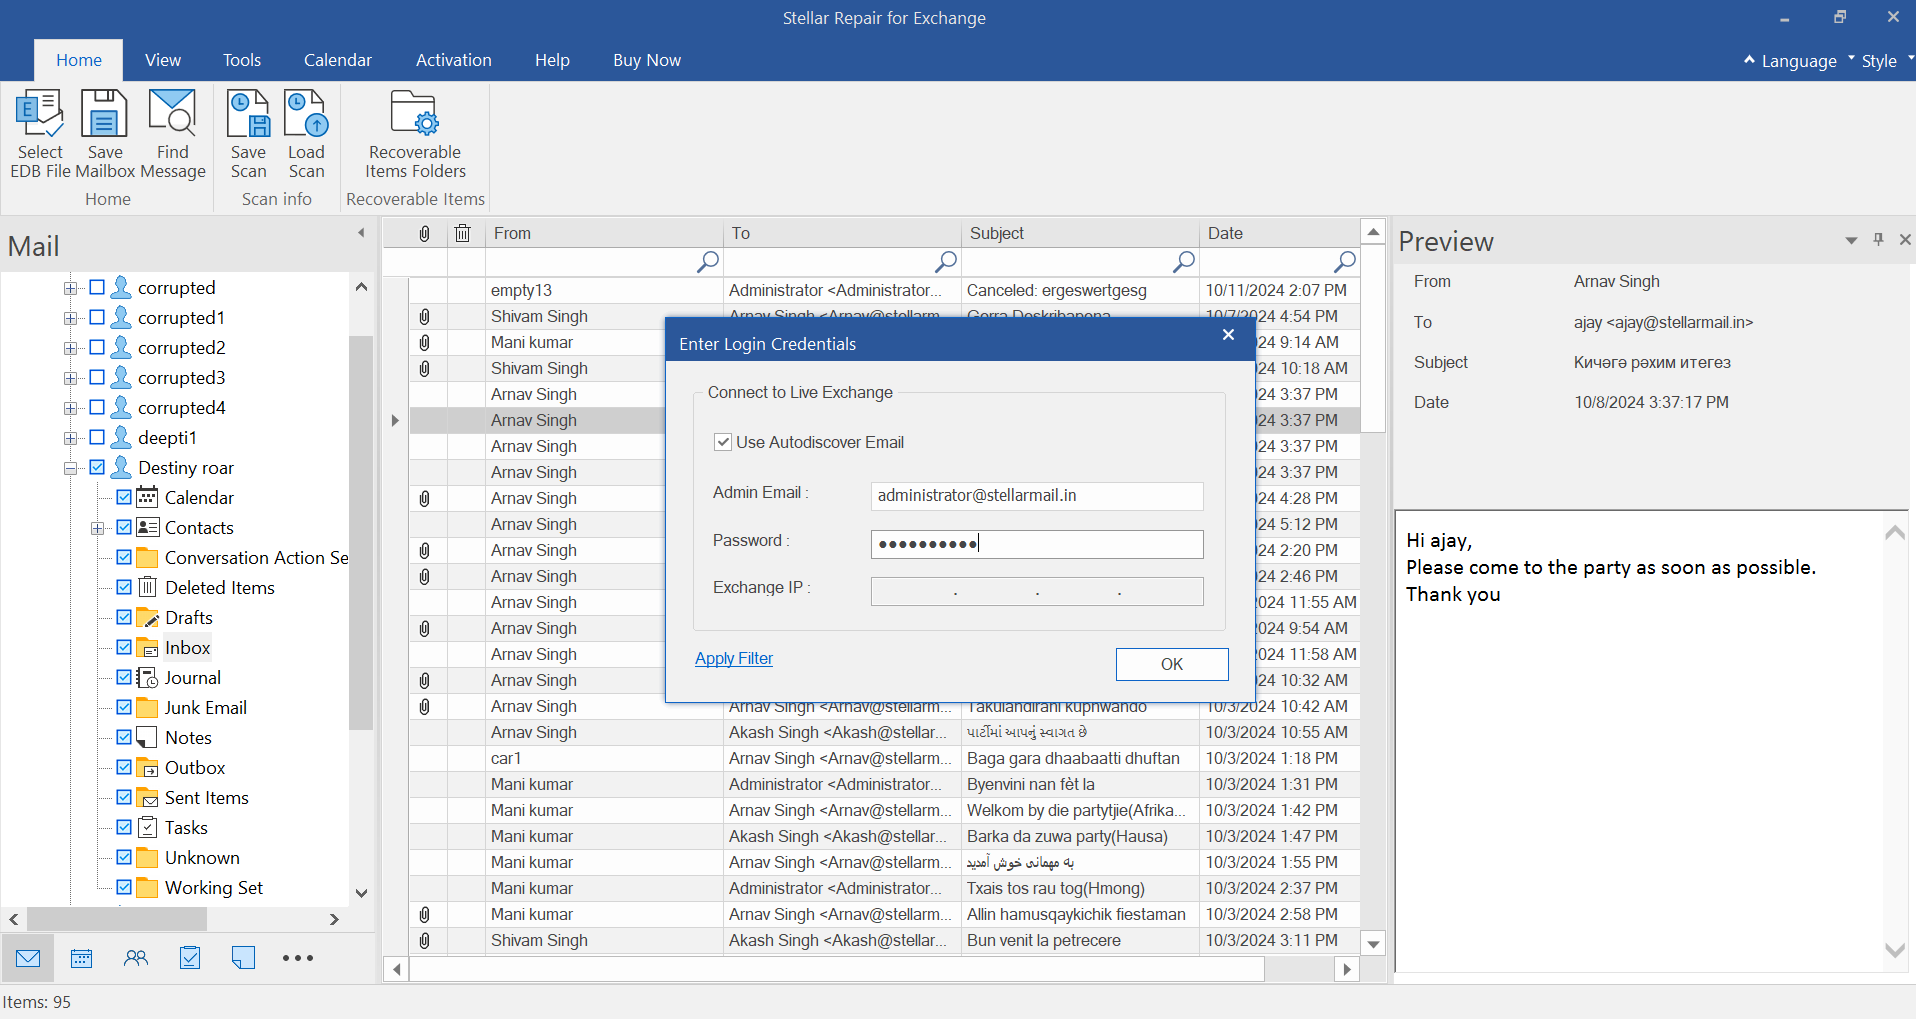
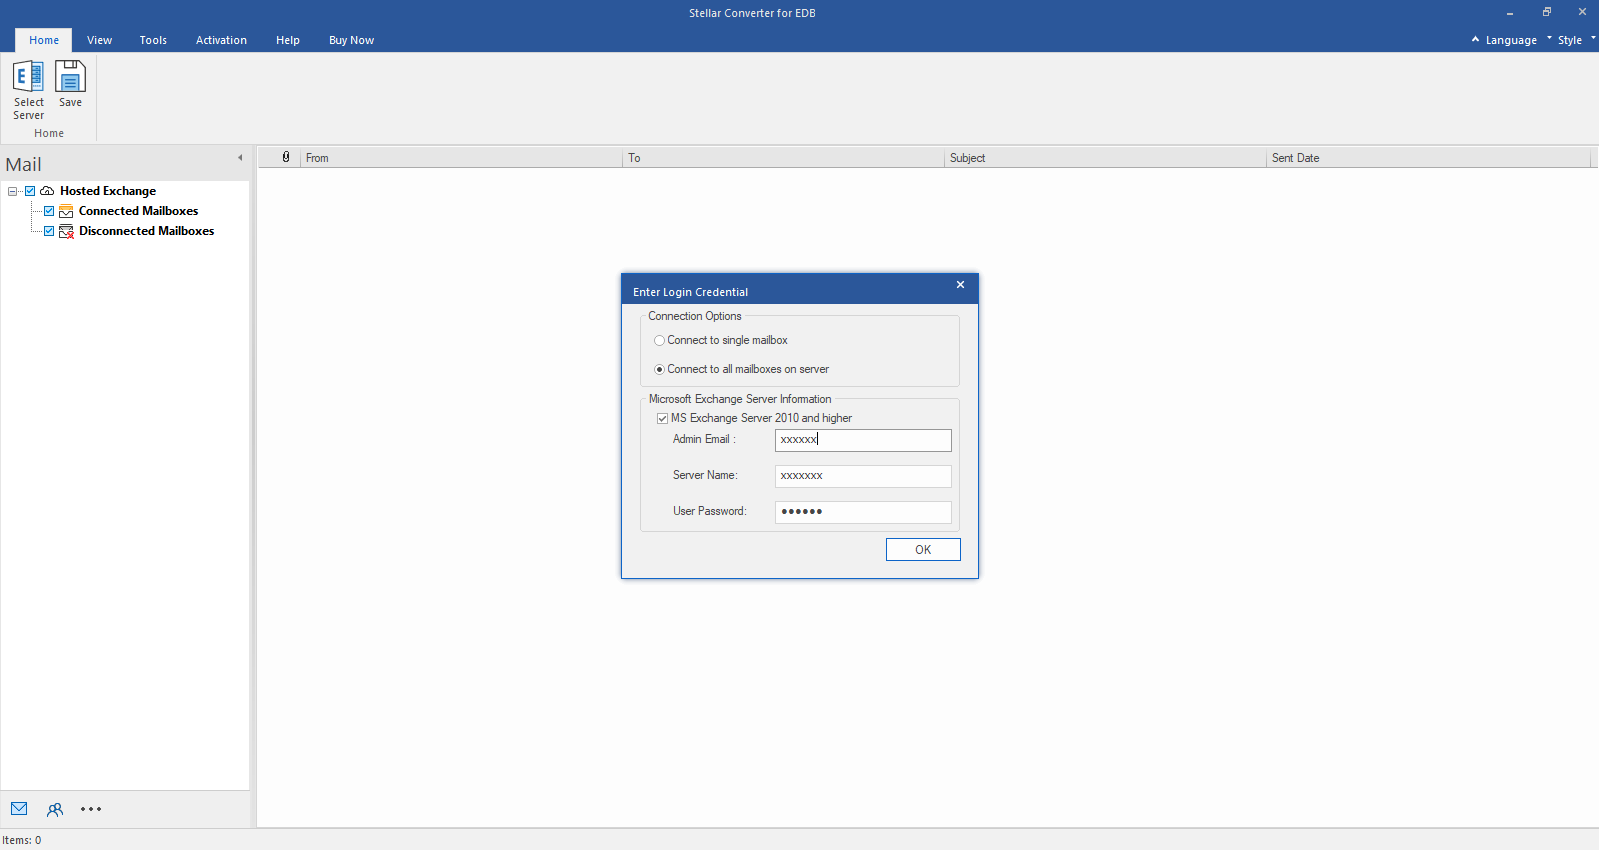
On the next screen, you need to connect to the live Exchange Server. For this, you can check the Use Autodiscover Email checkbox, and enter the Admin Email and password. The software will automatically connect to the Exchange Server associated with the Email ID. If you want to manually enter the login credentials and IP address of the target server, you can uncheck the Use Autodiscover Email checkbox. After entering the details, click OK.
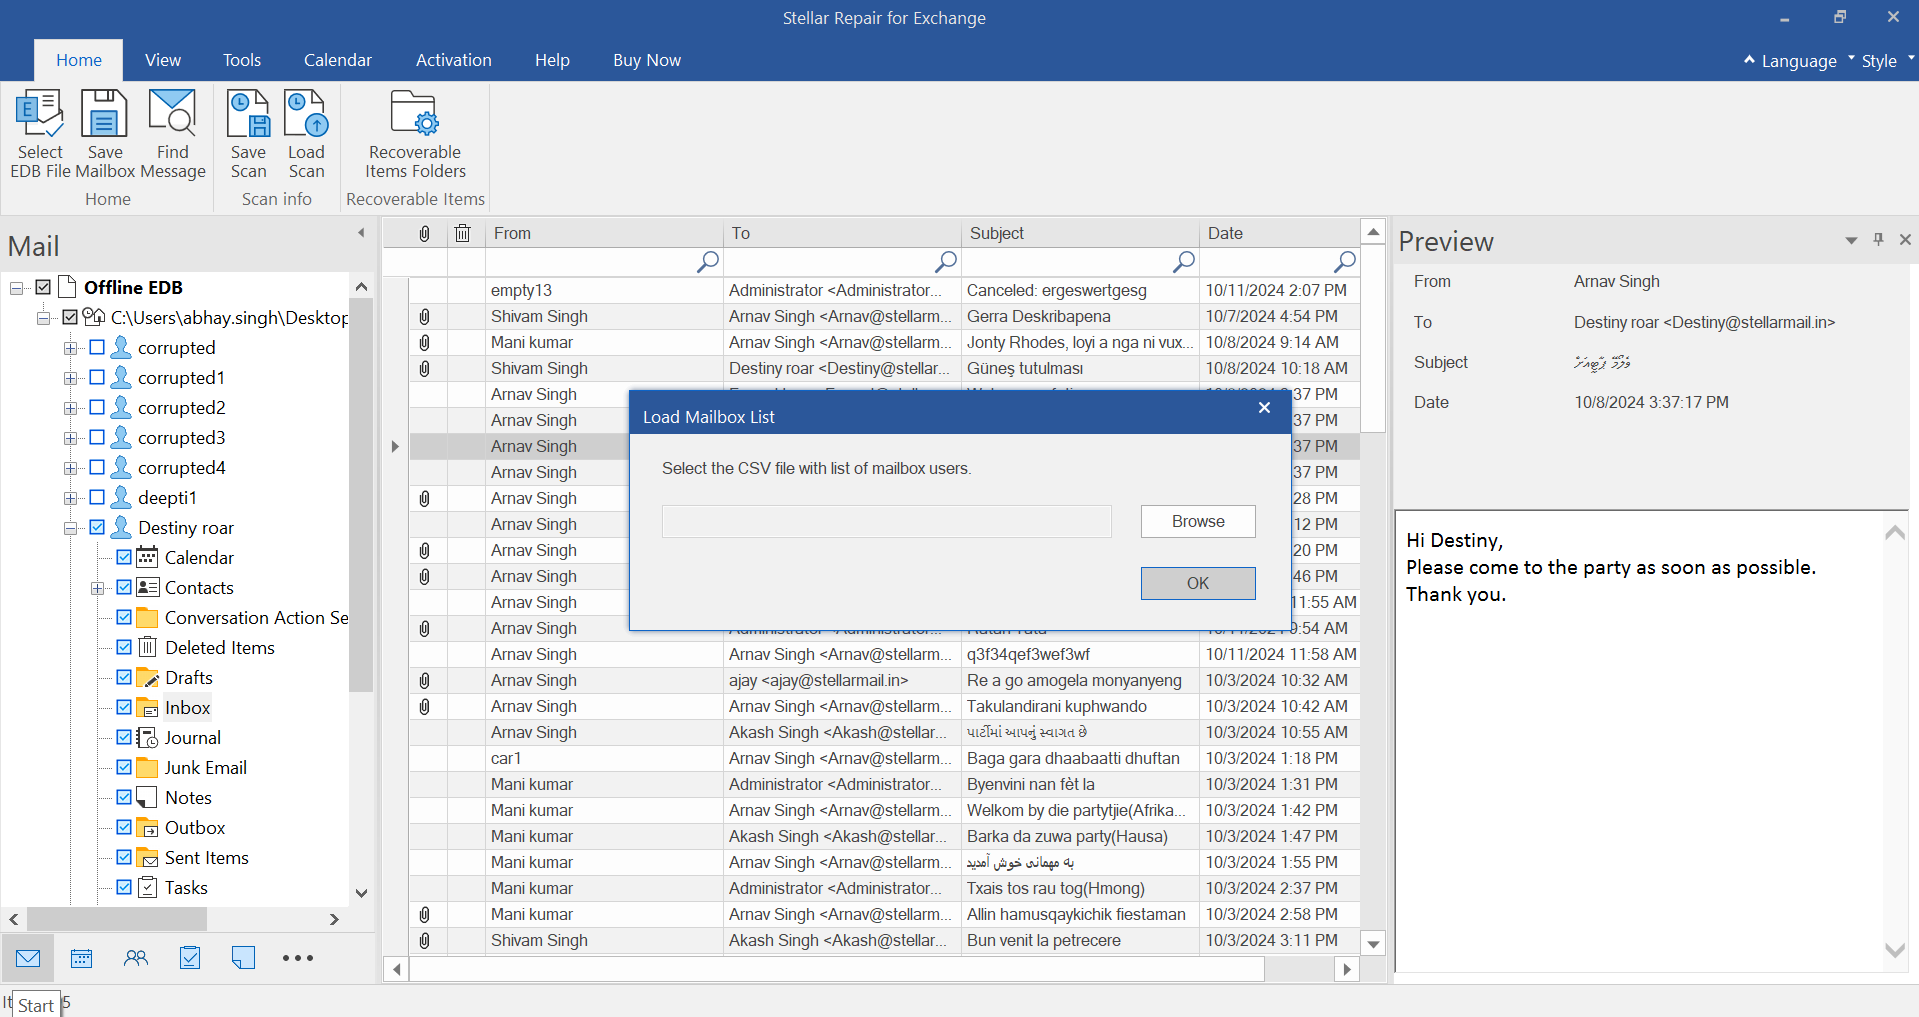
The Load Mailbox List dialog box will appear. Here, you need to select the CSV file containing the list of mailbox users of the destination server. Click the Browse button to select the CSV file and then click OK.
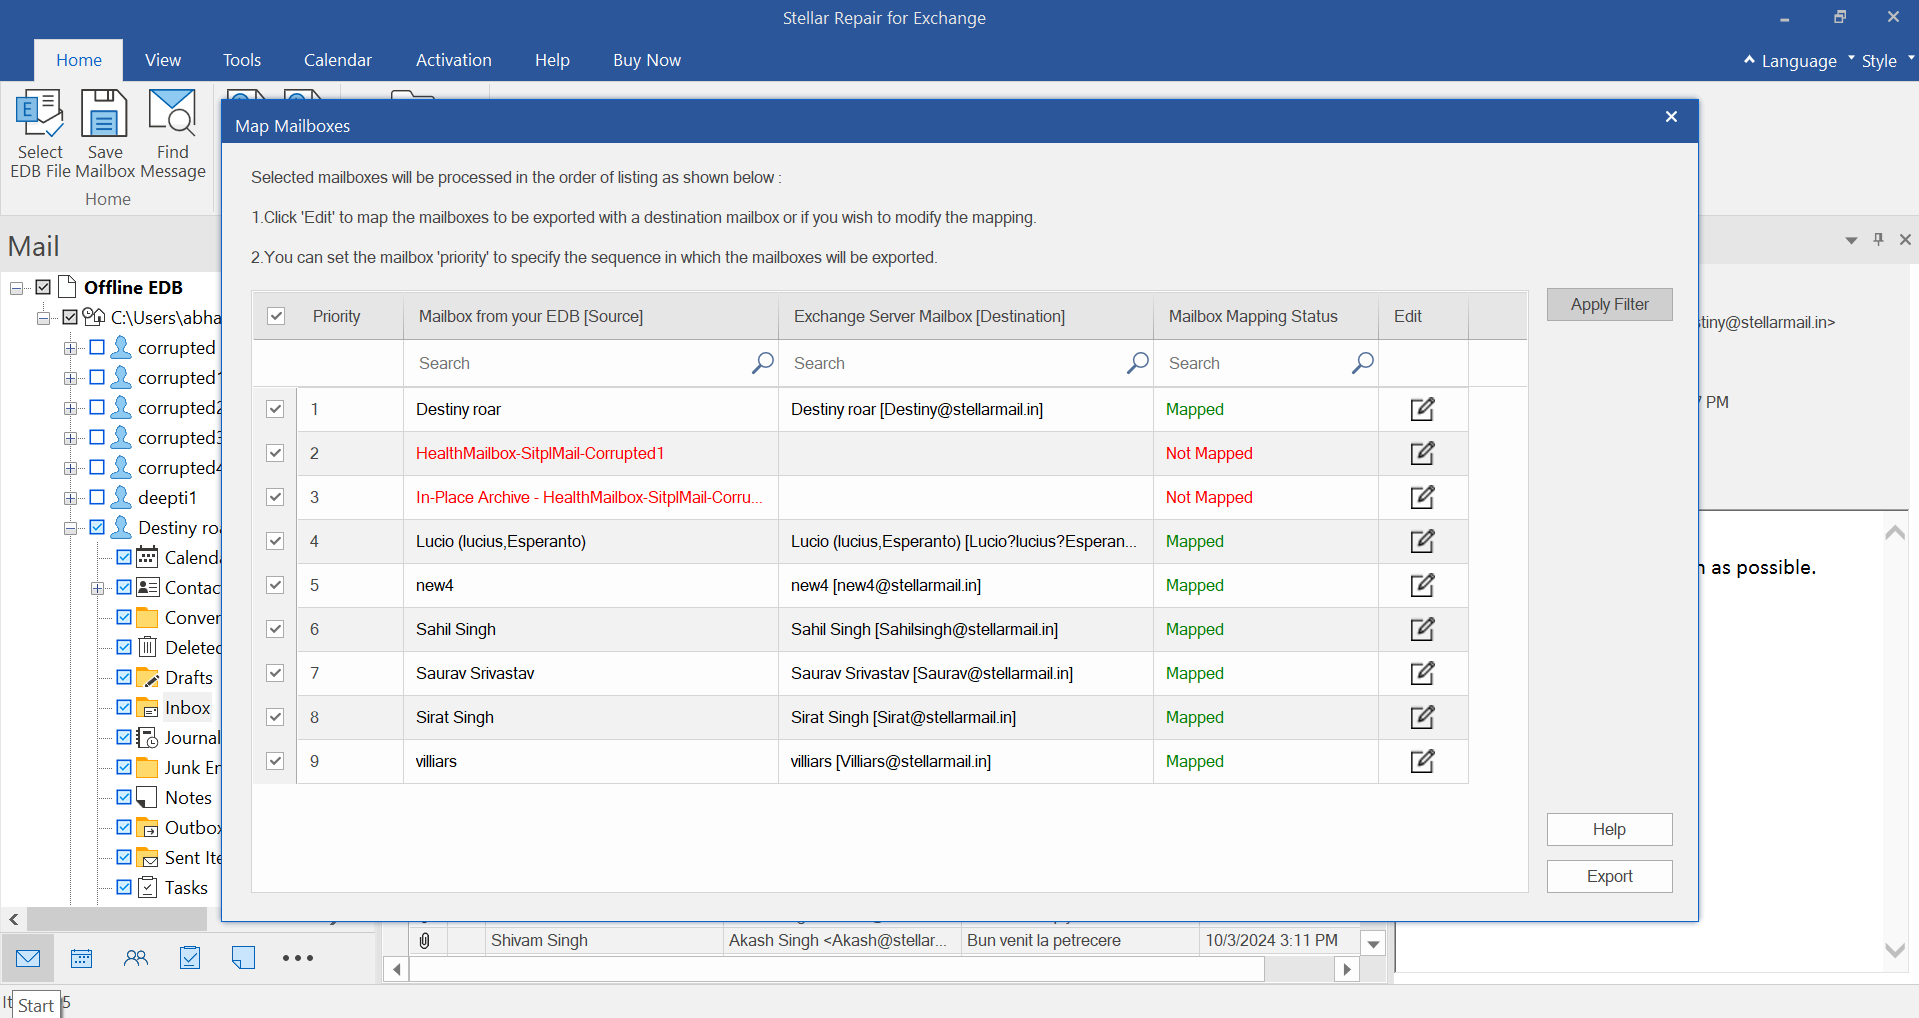
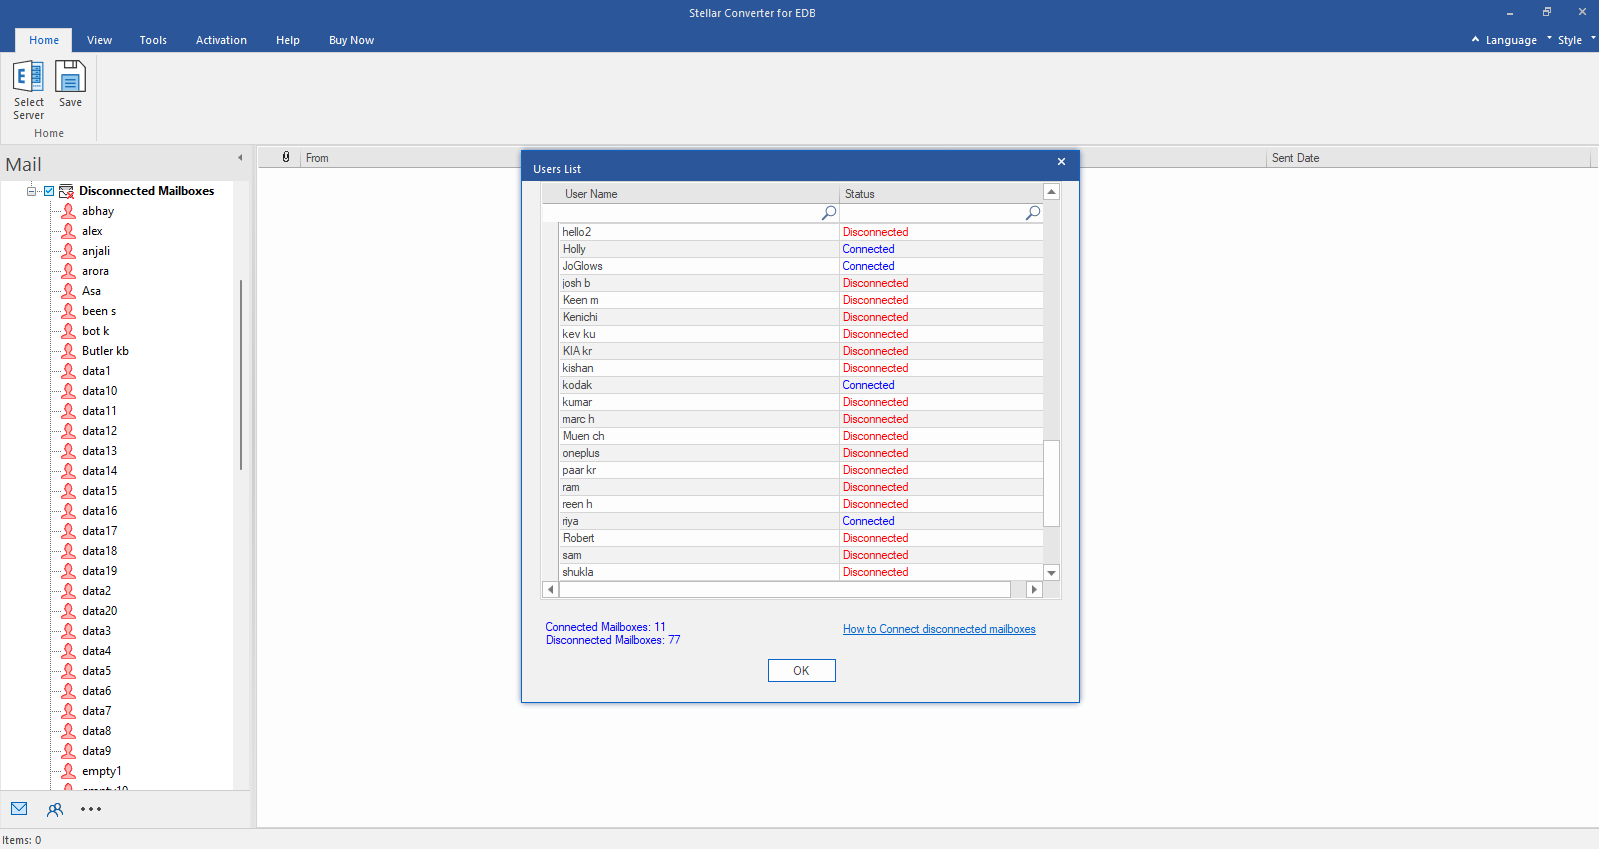
The software automatically maps the users' mailboxes on the destination Exchange Server. You can also manually map the mailboxes using the Edit icon. If you want to export some mailboxes first, then you can change the order in the Priority column.
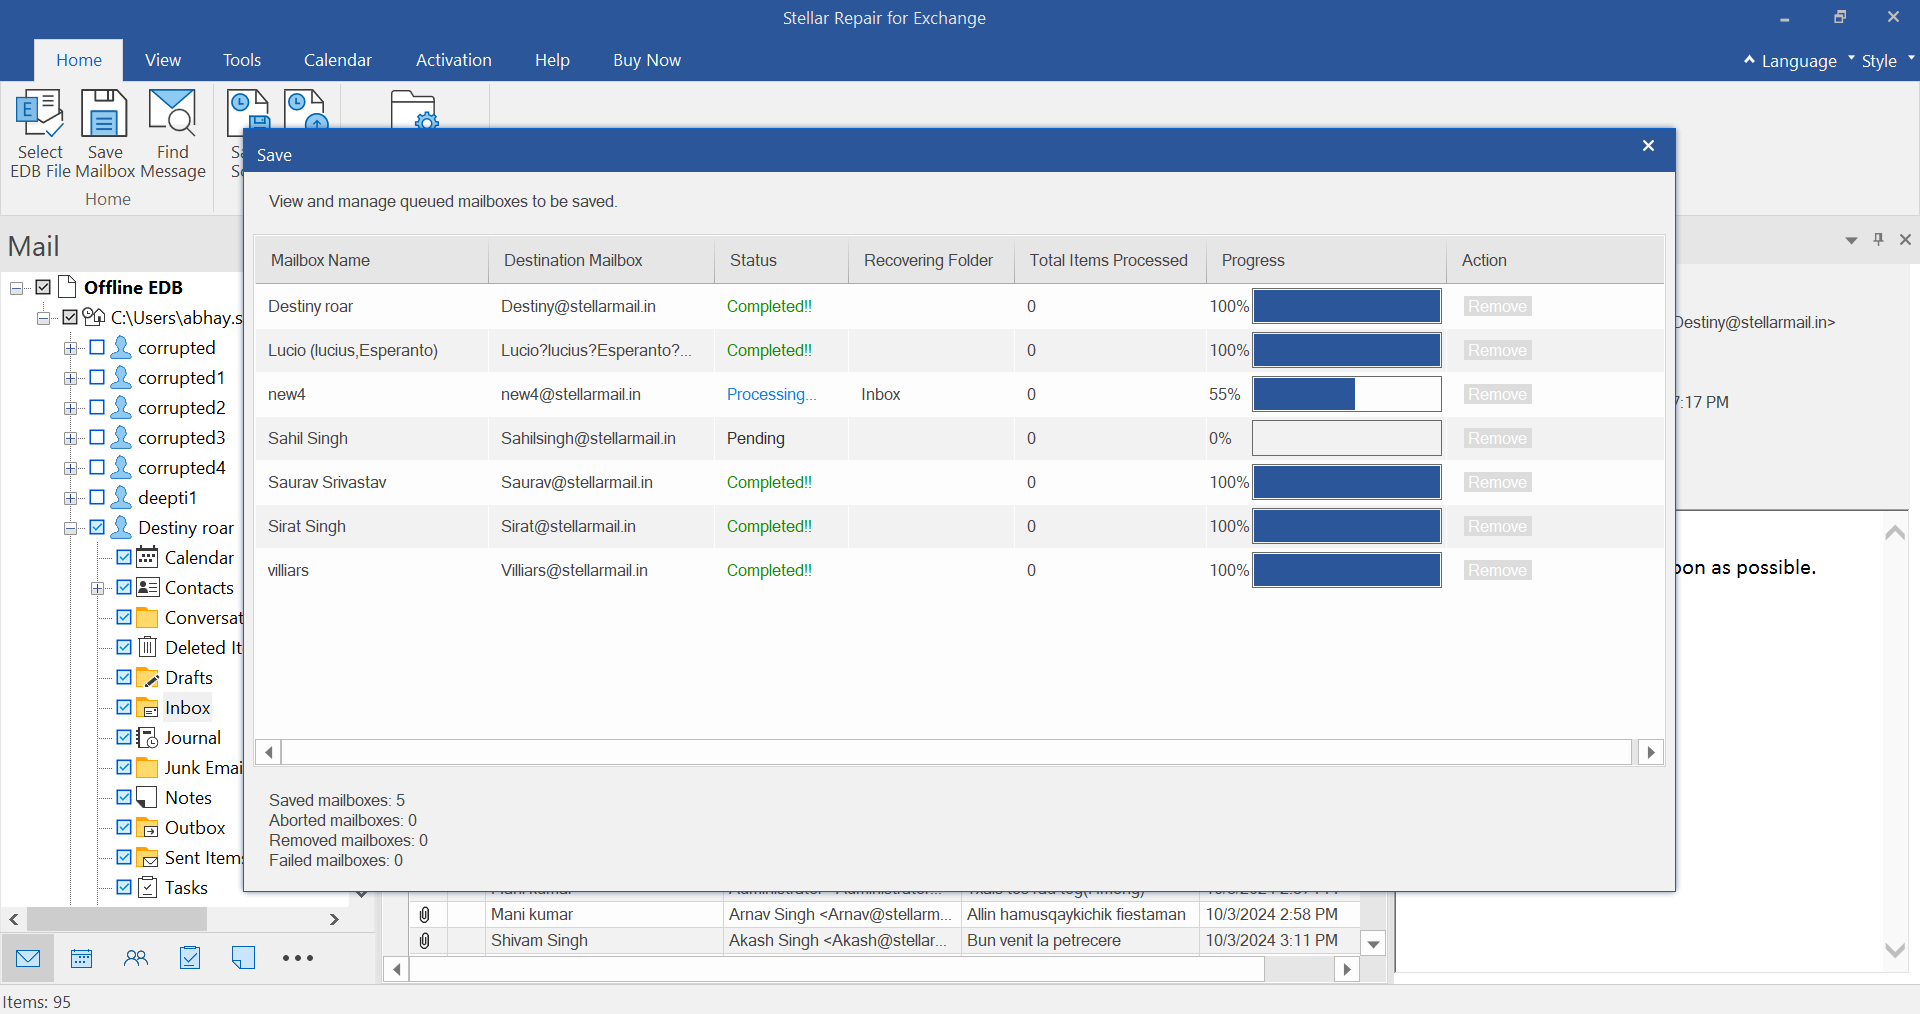
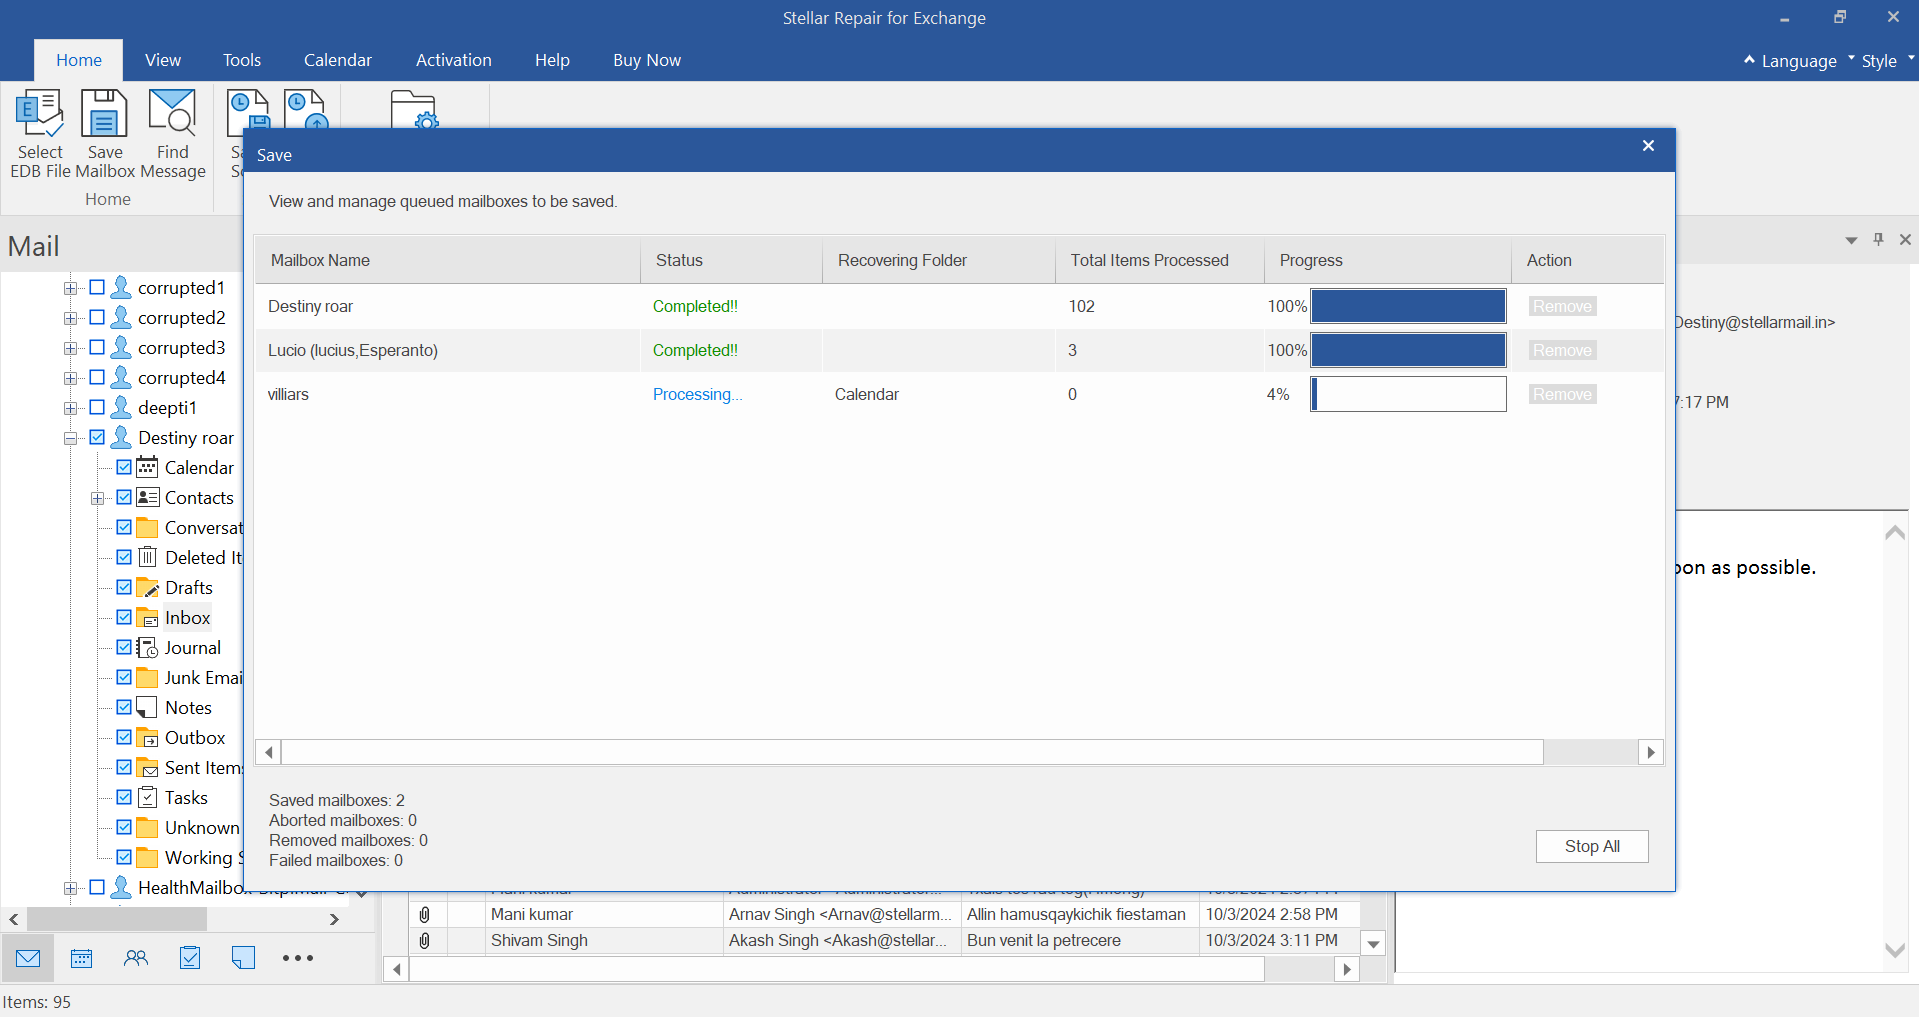
In the Save dialog box, you can view and manage the queued mailboxes. You can click on the Remove button, if you want to stop exporting any pending mailboxes.
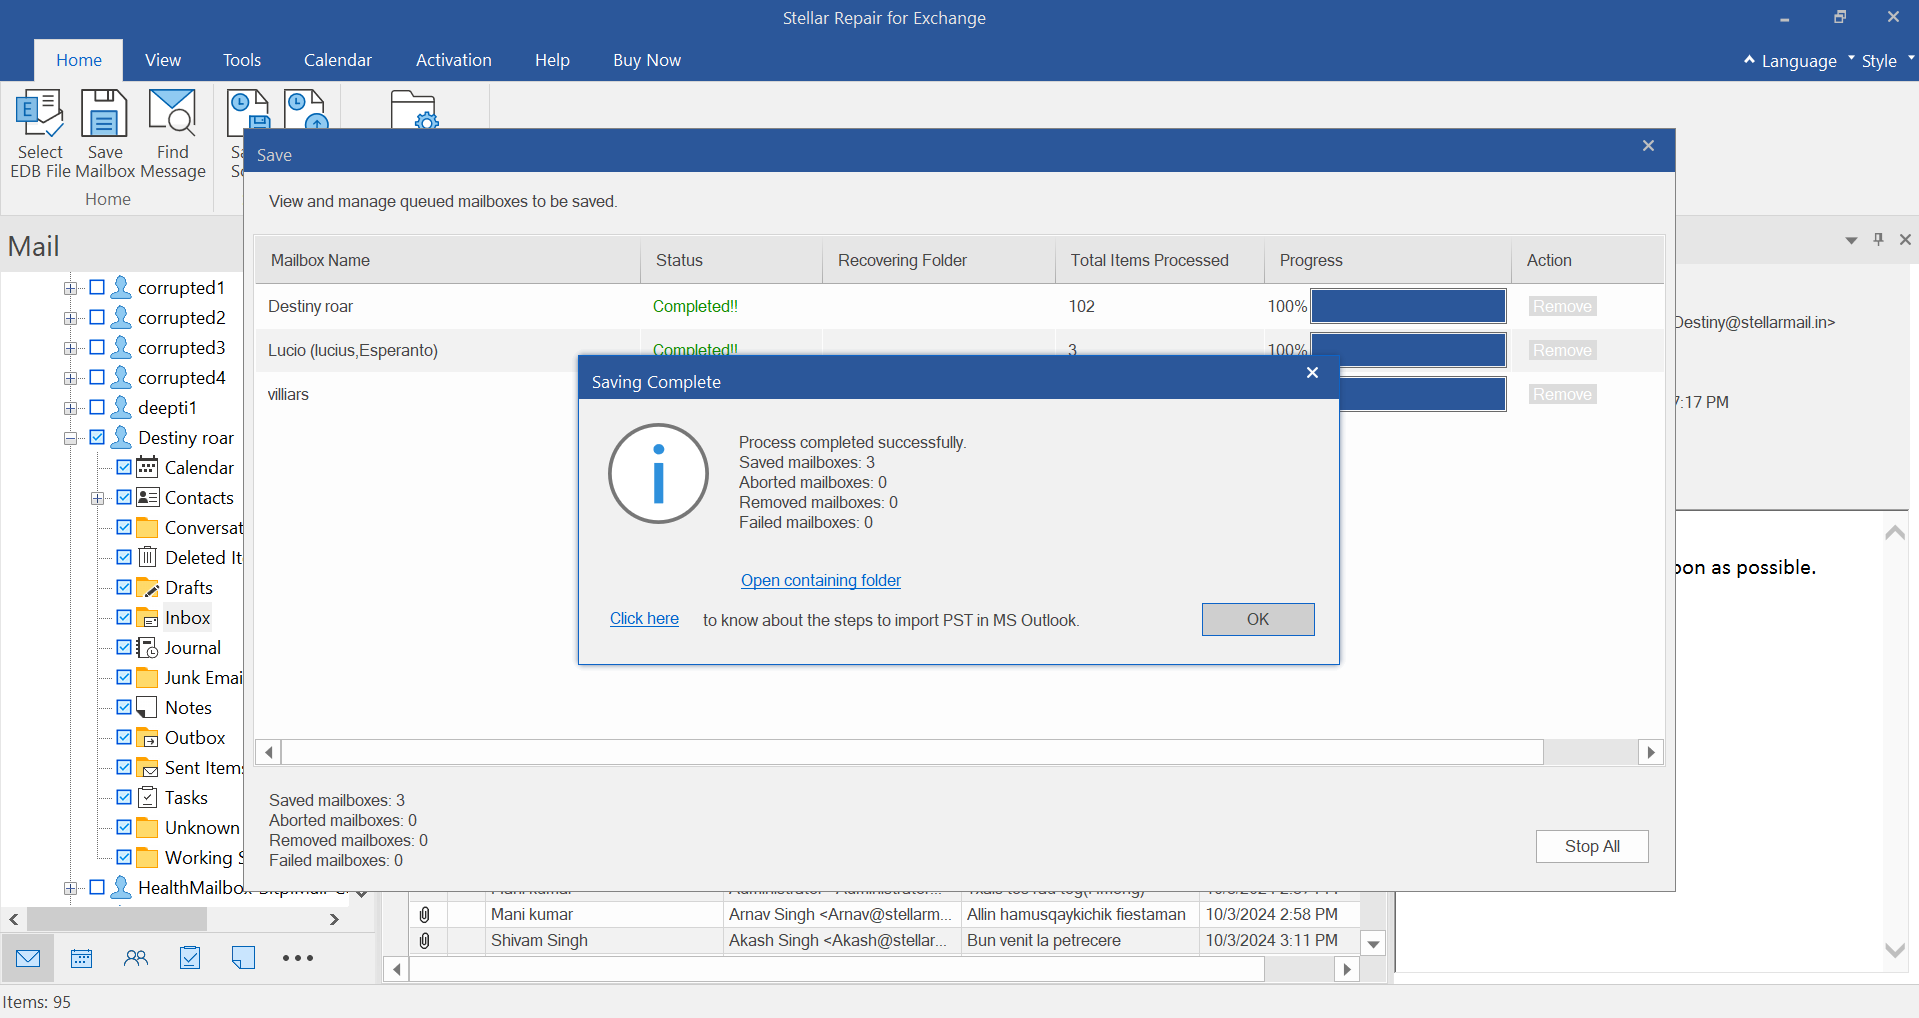
When all the mailboxes are saved successfully, a Saving Complete dialog box will open, displaying the number of saved mailboxes, aborted mailboxes, removed mailboxes, and failed mailboxes. Click OK.

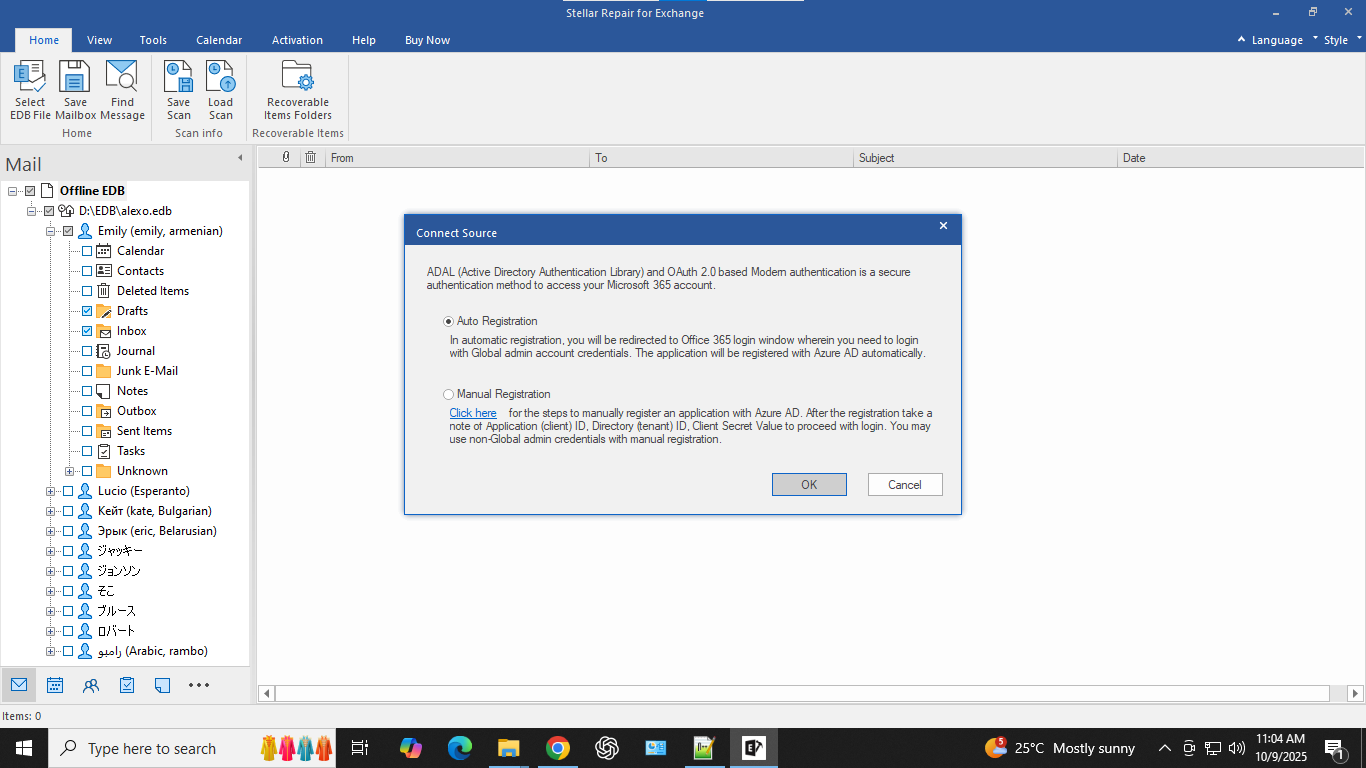
If you want to export the recovered mailboxes to Microsoft 365, select the Export to Microsoft 365 option on the Save As window and click Next.
On the Connect Target window, you will see two options - Auto Registration and Manual Registration. Select Auto registration to automatically connect to the target Microsoft 365. On the Microsoft Azure login screen, enter global admin email ID and click Next. If you select Manual registration, you need to register the application with Azure AD and enter the Microsoft 365 login credentials.
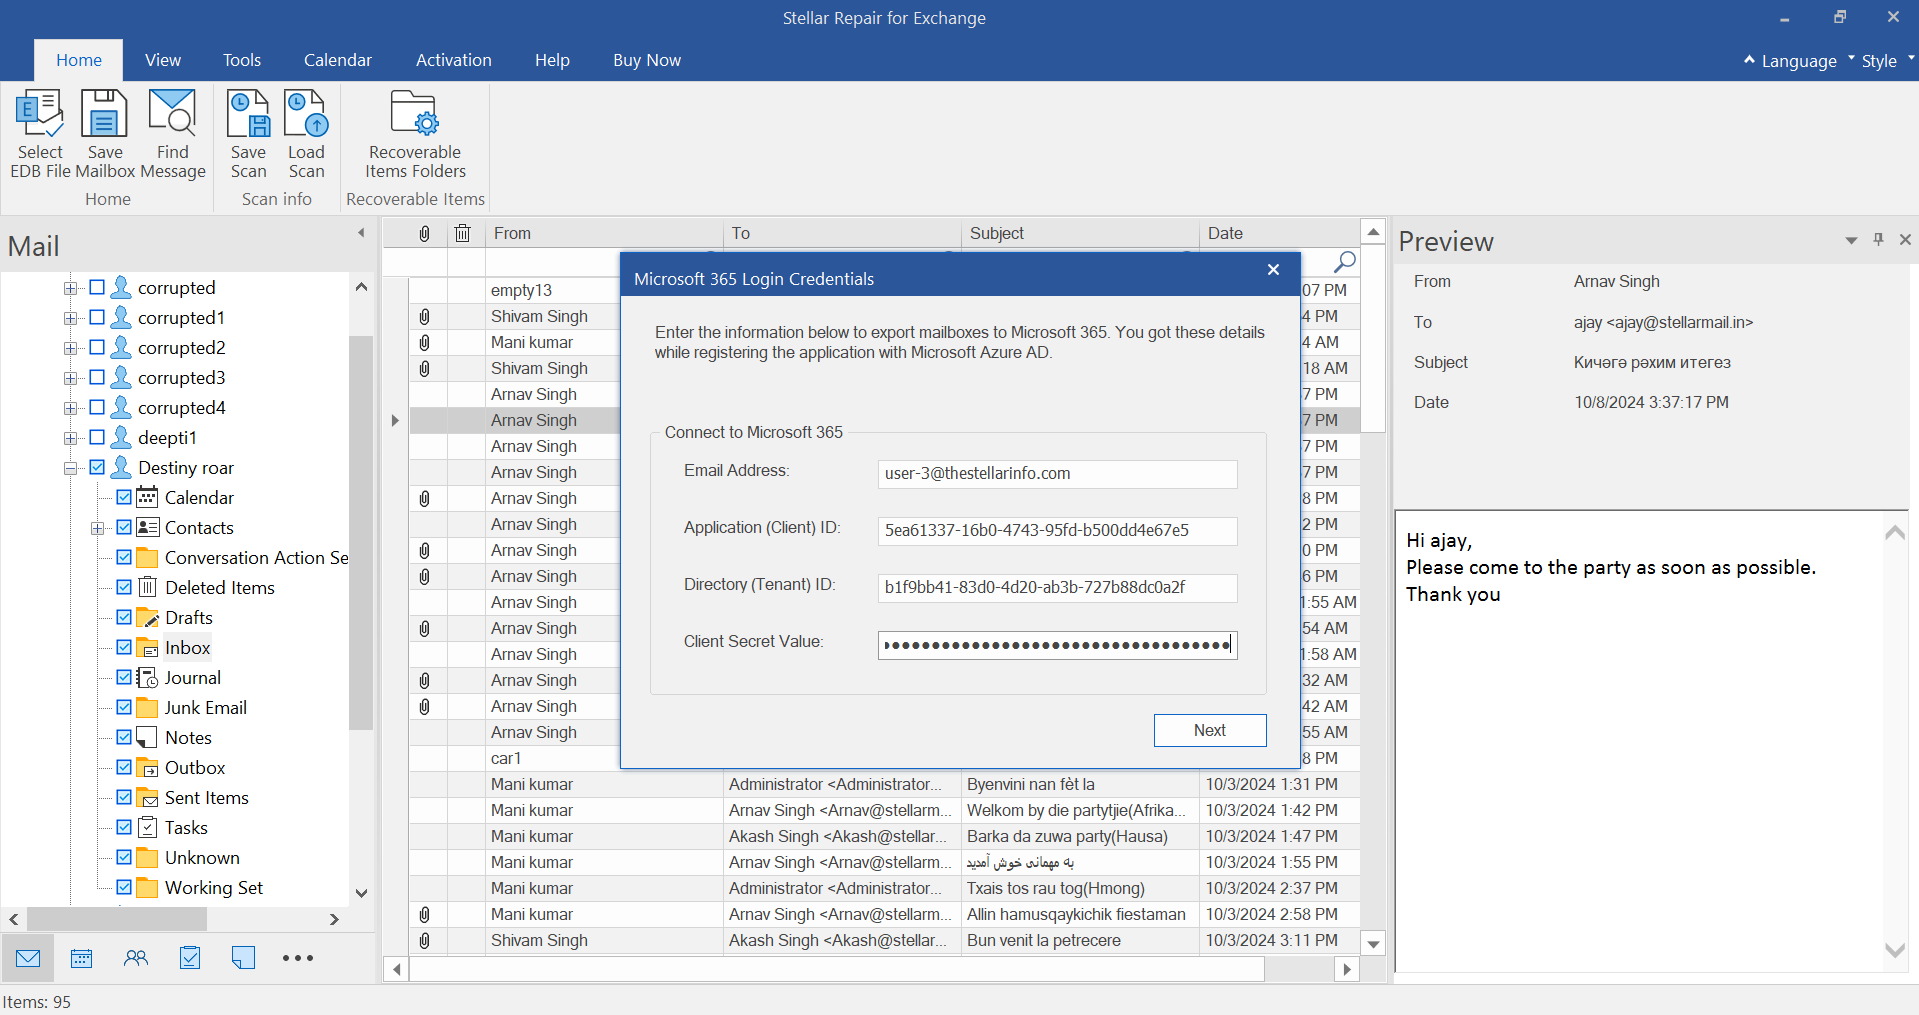
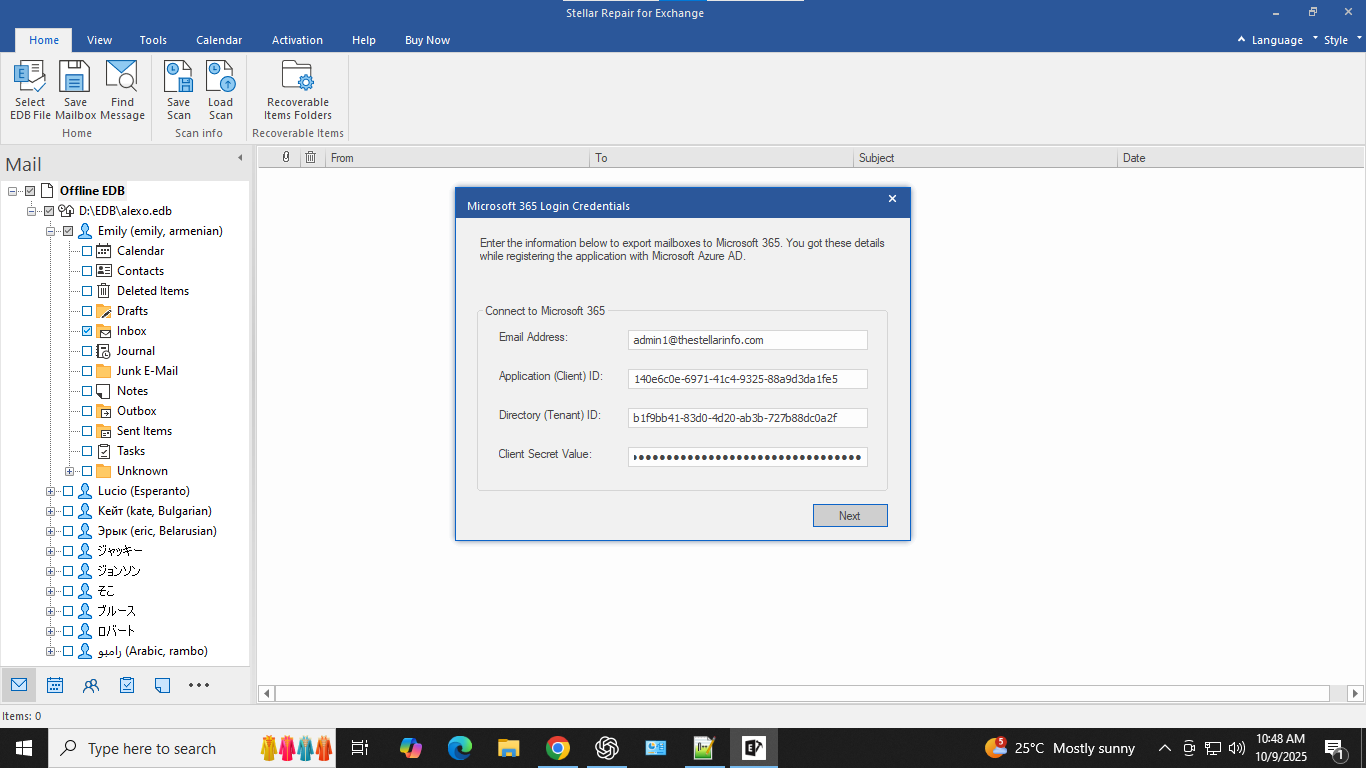
On the Microsoft 365 Login Credentials dialog box, enter the Email Address, Application (Client) ID, Directory (Tenant) ID, and Client Secret Value. Click Next to continue.
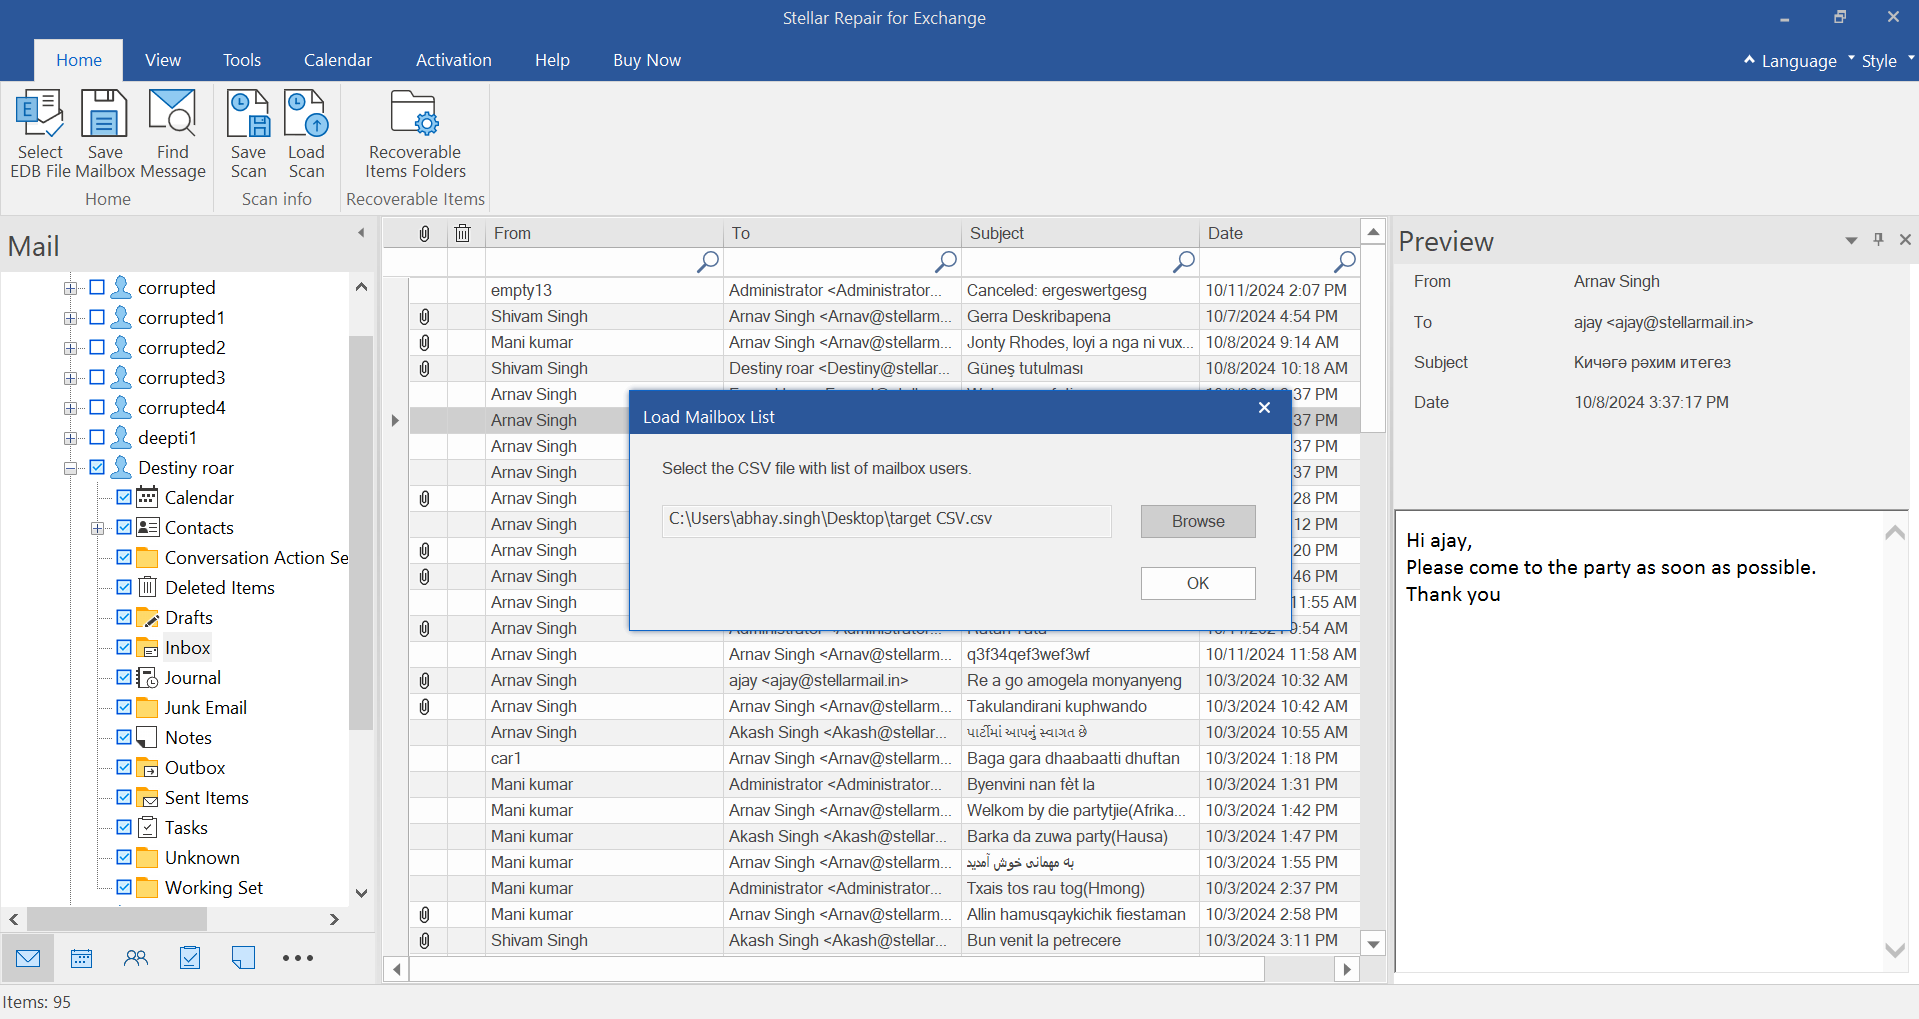
Select the CSV file containing the list of mailbox users of the destination server. Click the Browse button to select the CSV file and then click OK.
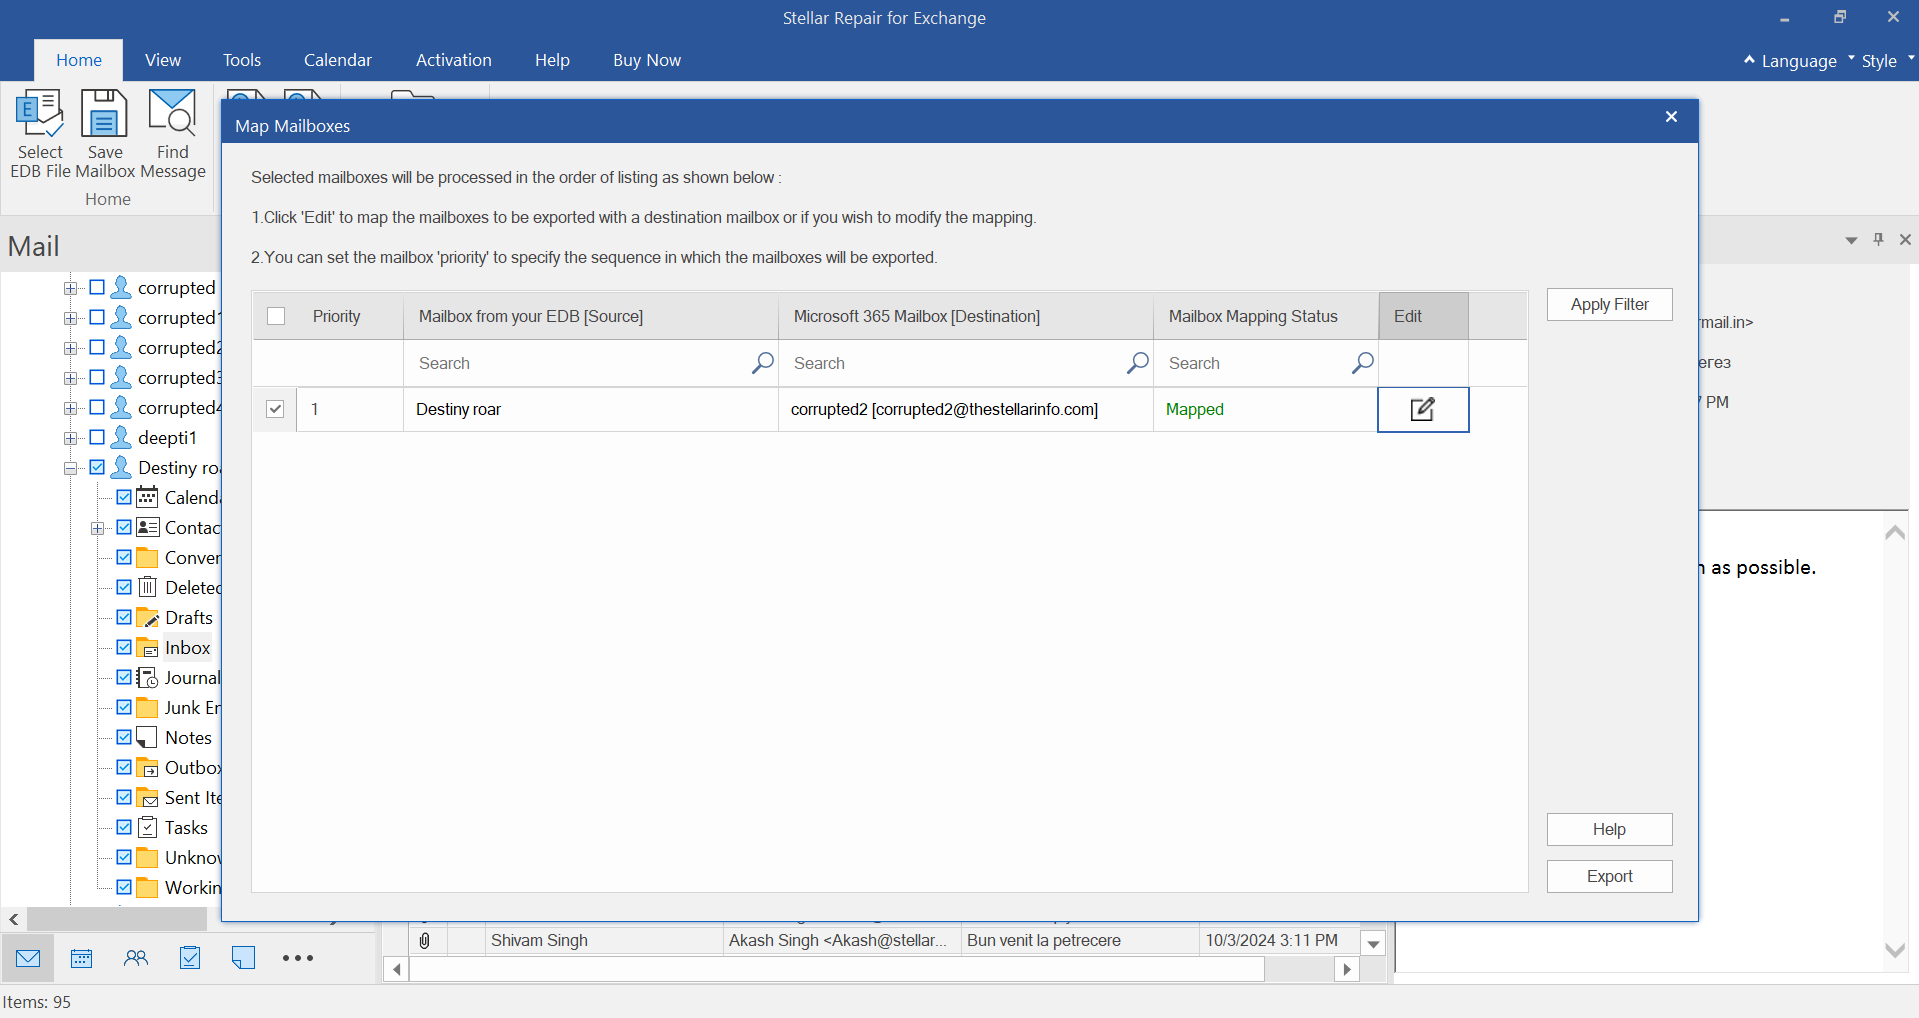
The software automatically maps users' mailboxes on the Microsoft 365 Server. You can also manually map the mailboxes using the Edit icon. If you want to export some mailboxes first, then you can change the order in the Priority column. If you want to include or exclude some specific items, you can use the Apply Filter option. When done, click Export.
On the Save dialog box, you can view and manage the queued mailboxes. You can click on the Remove button to stop exporting the pending mailboxes.
.png)
A Saving Complete dialog box opens, when the process is completed successfully. It will also display the number of saved mailboxes, aborted mailboxes, removed mailboxes, and failed mailboxes.
.png)
If you want to export the mailboxes to the in-place archive mailbox folder on the destination Exchange Server, choose the Export to In-Place Archive Folder radio button and click Next. Then, Connect to the Exchange Server and click OK.
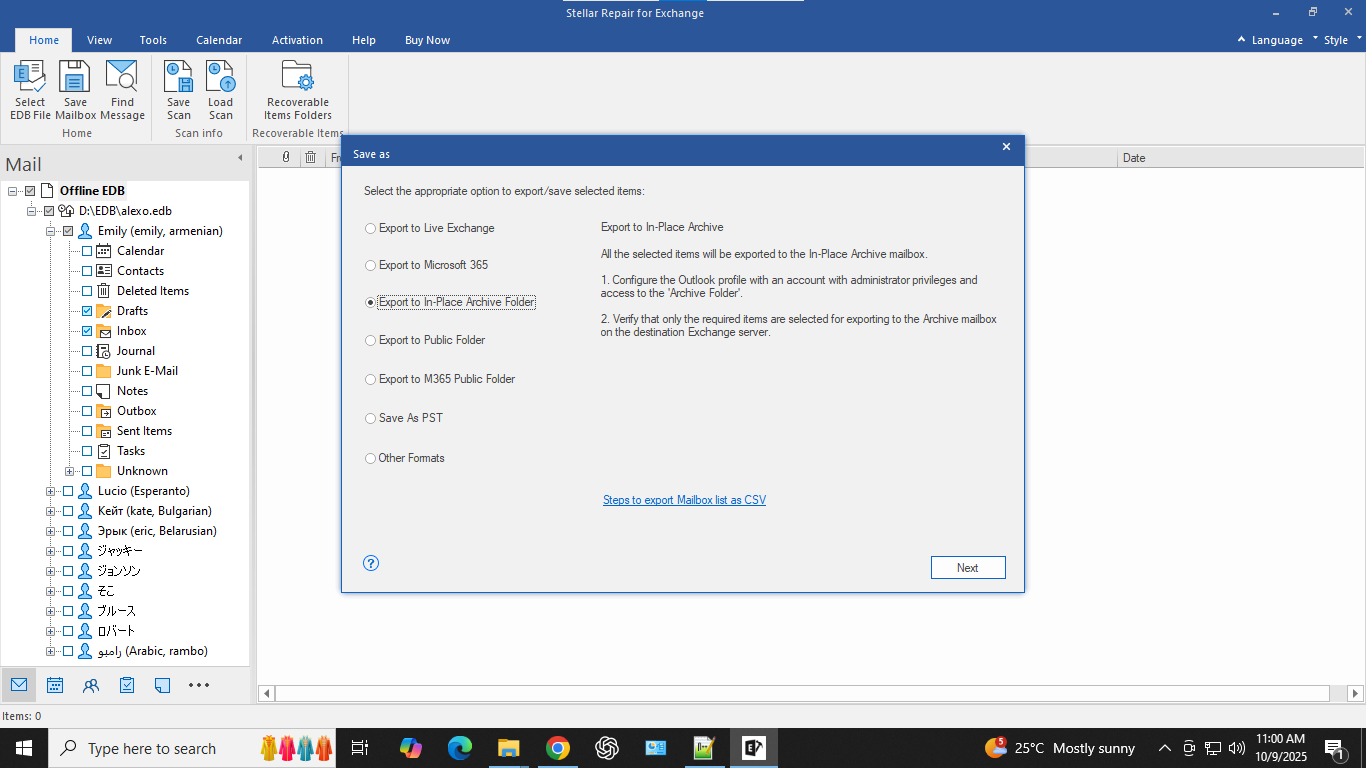
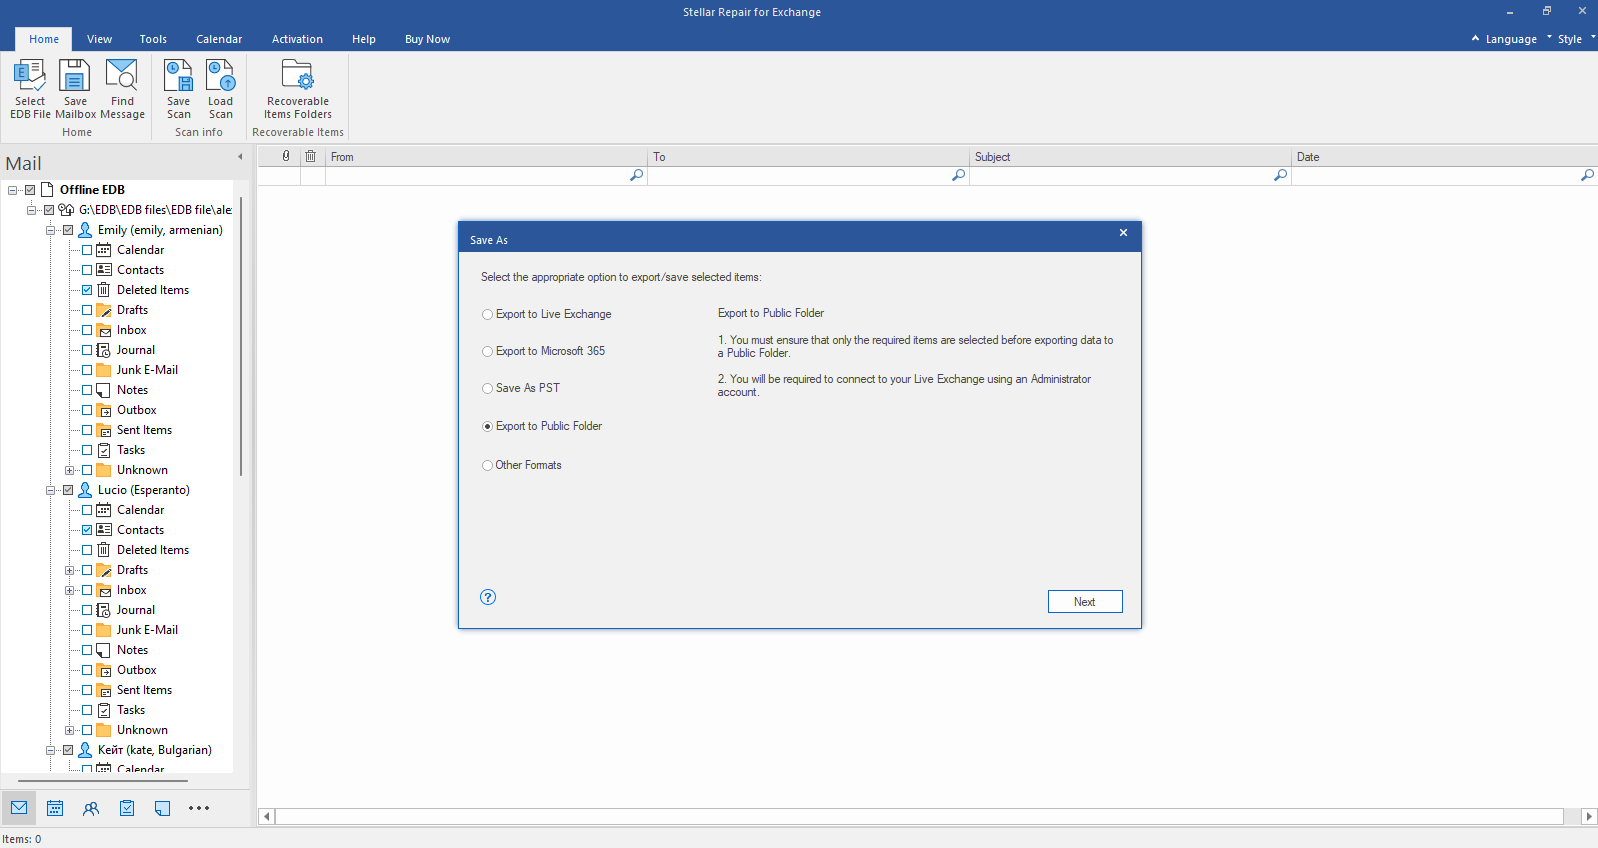
If you want to save the recovered mailboxes to public folders on the destination Exchange Server, select Export to Public Folder on the Save As window and click Next.
On the next window, you need to connect to the live Exchange Server. For this, you can check the Use Autodiscover Email checkbox, and enter the Admin Email and password. The software will automatically connect to the Exchange Server associated with the Email ID. If you want to manually enter the login credentials and IP address of the target server, you can uncheck the Use Autodiscover Email checkbox. After entering the details, click OK.
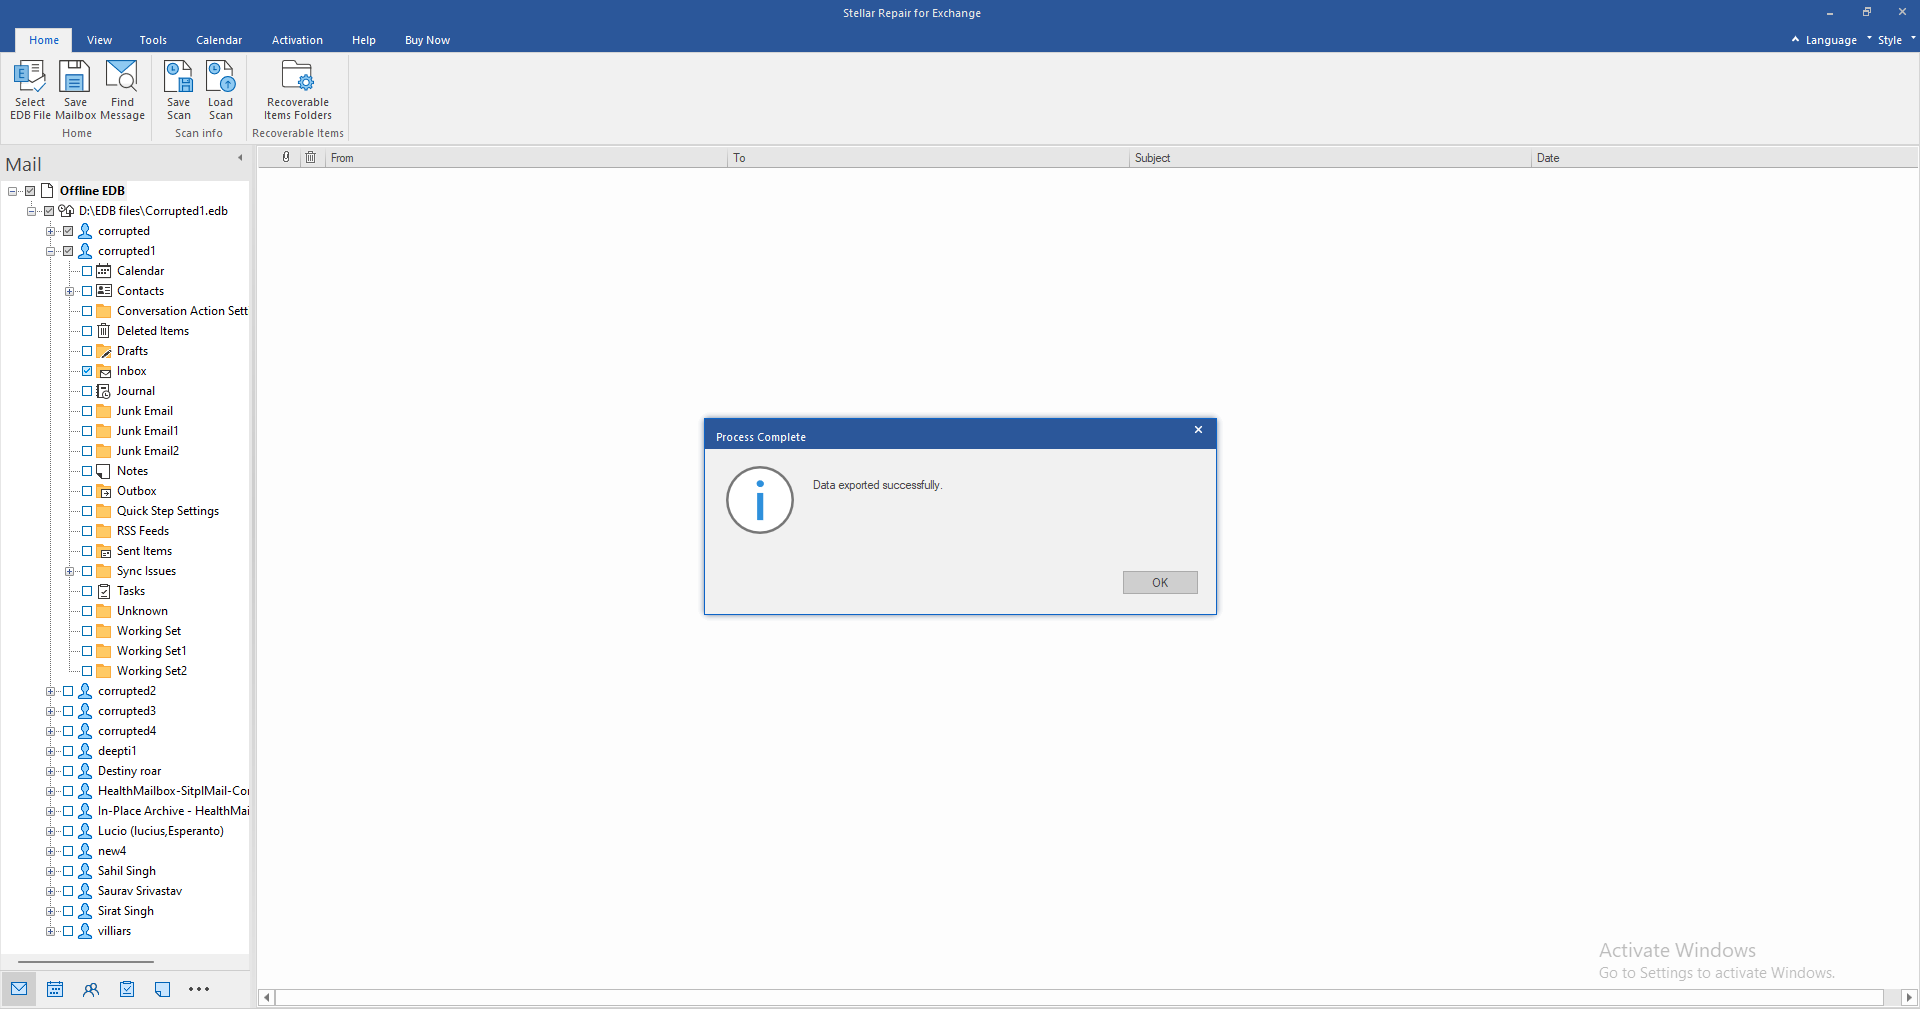
On the Process Complete dialog box, click OK.
If you want to save the recovered mailboxes to Microsoft 365 public folders, select Export to M365 Public Folder on the Save As window and click Next.
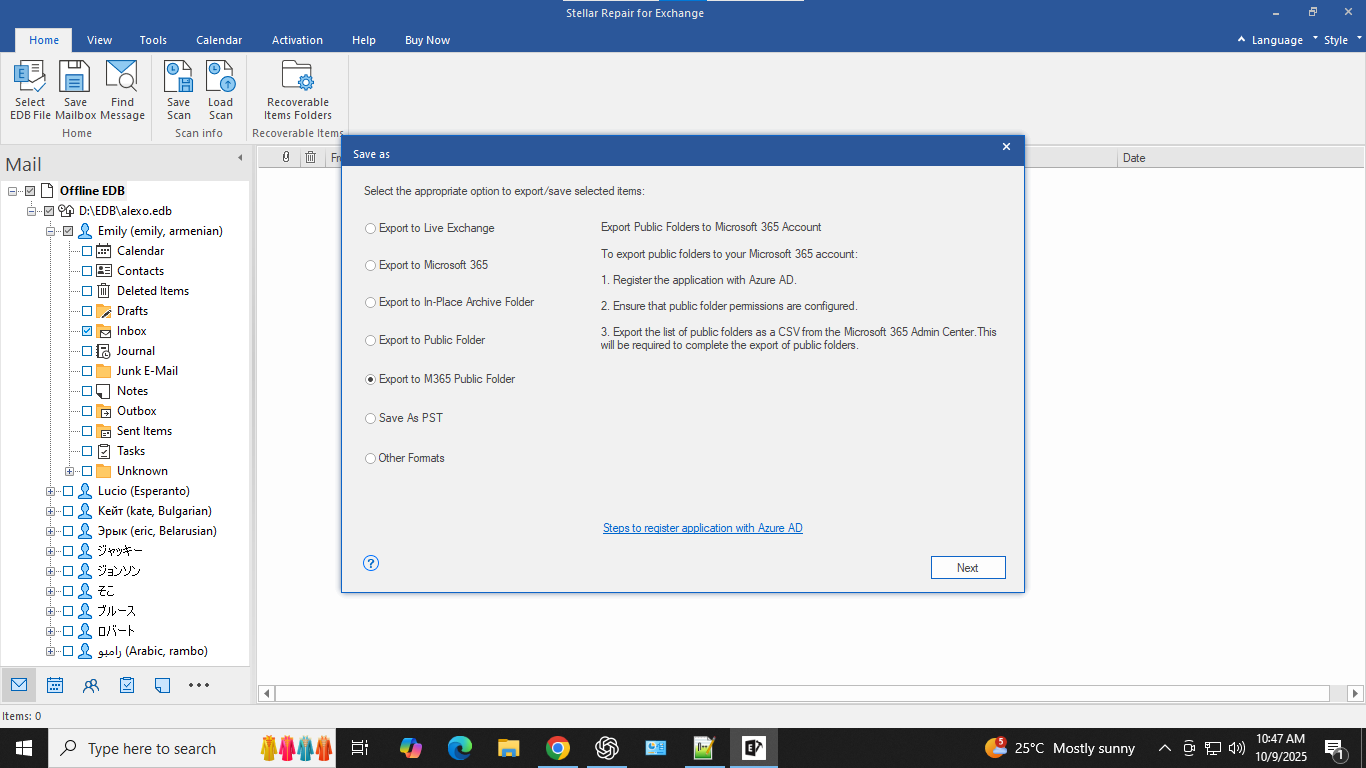
Enter the Microsoft 365 login credentials to connect to Microsoft 365.
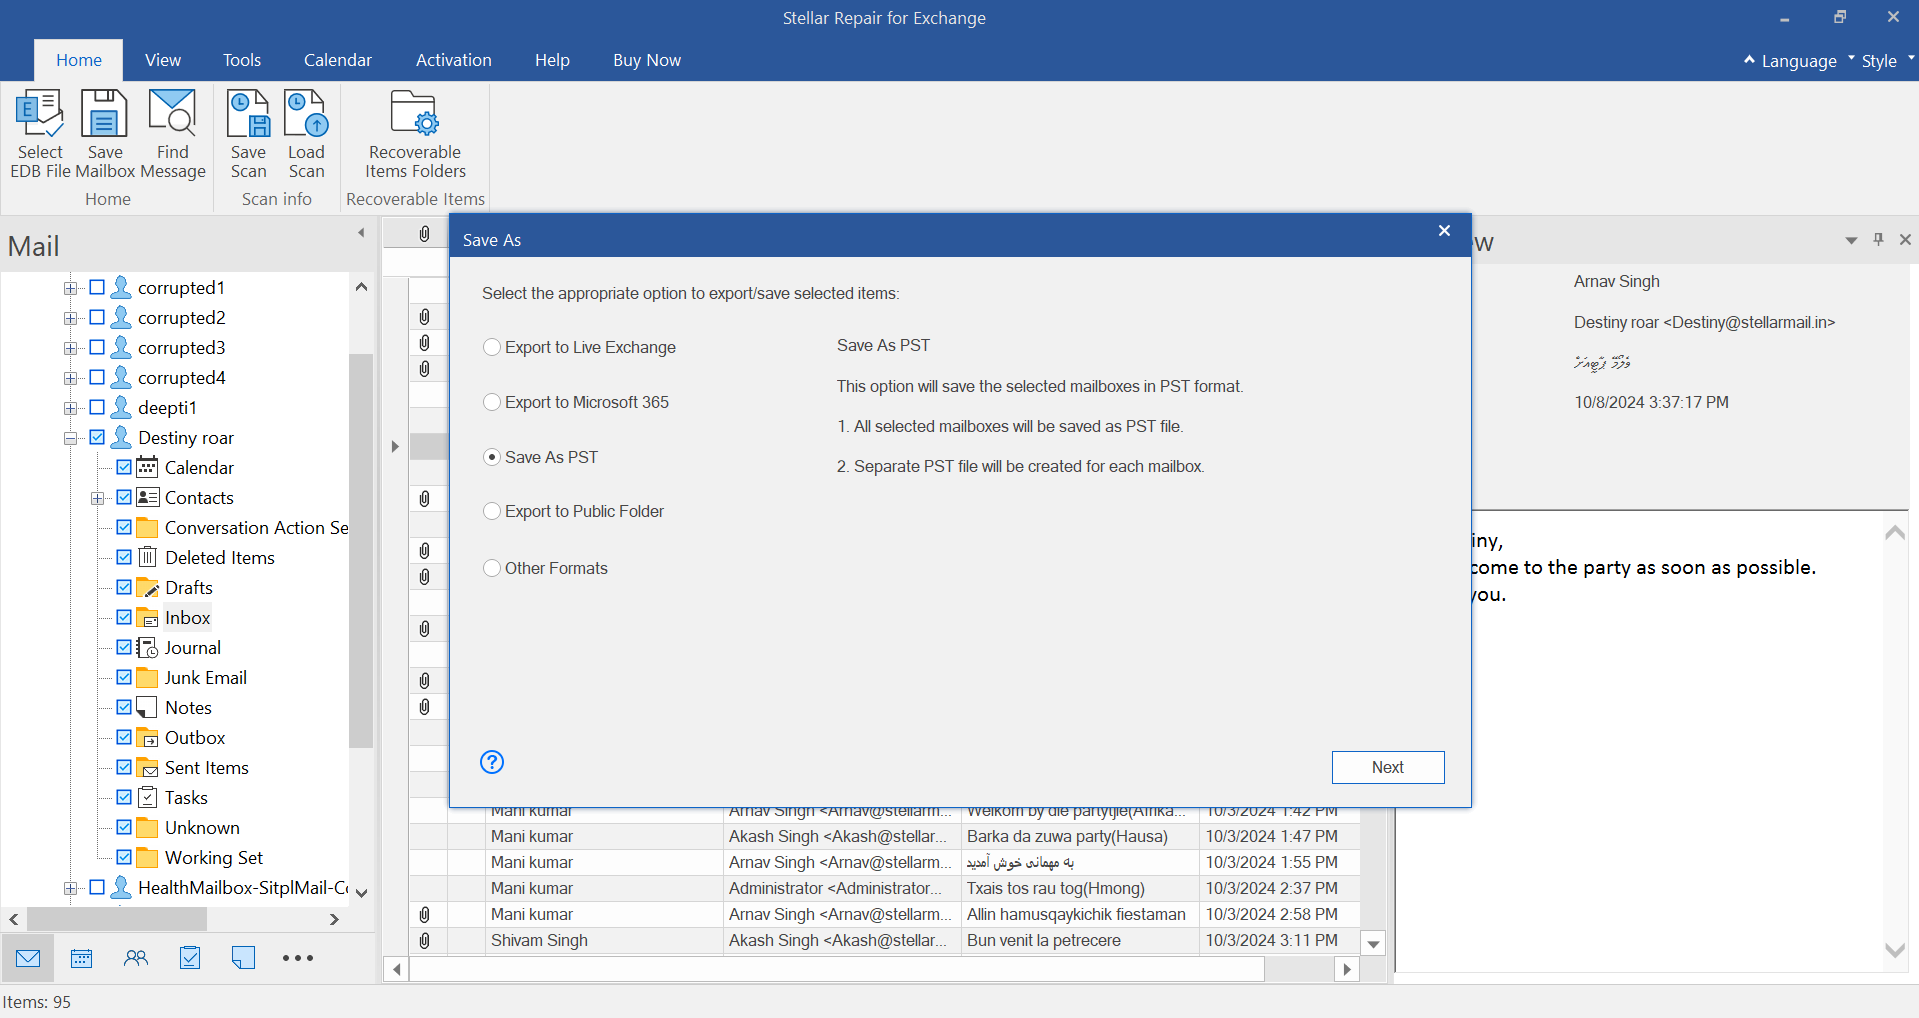
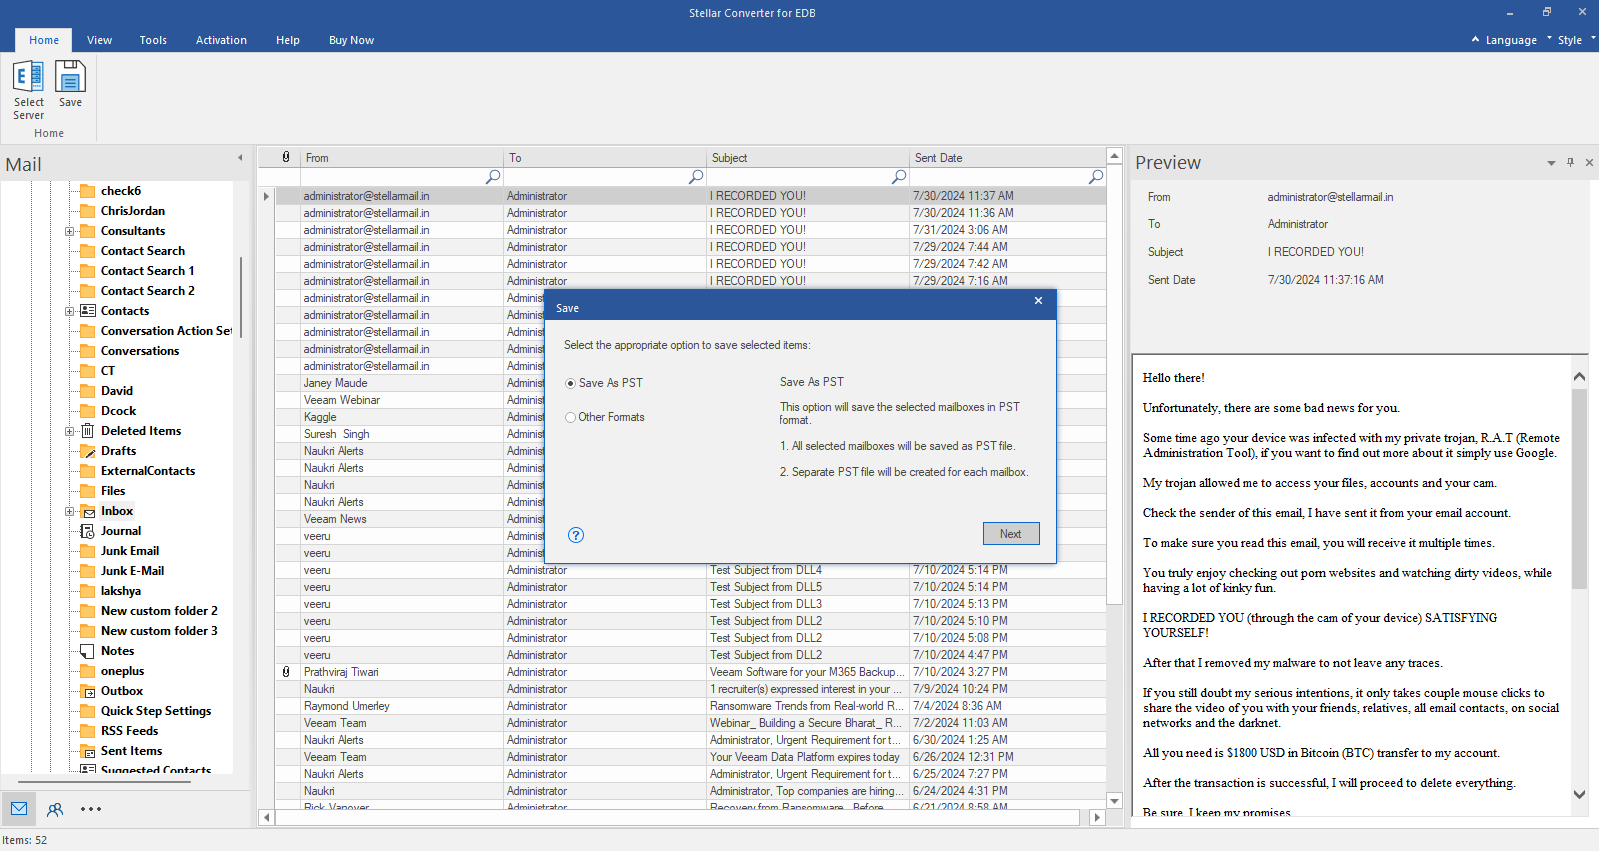
If you want to export the recovered mailboxes to PST, select the Save as PST option on the Save As window and click Next.
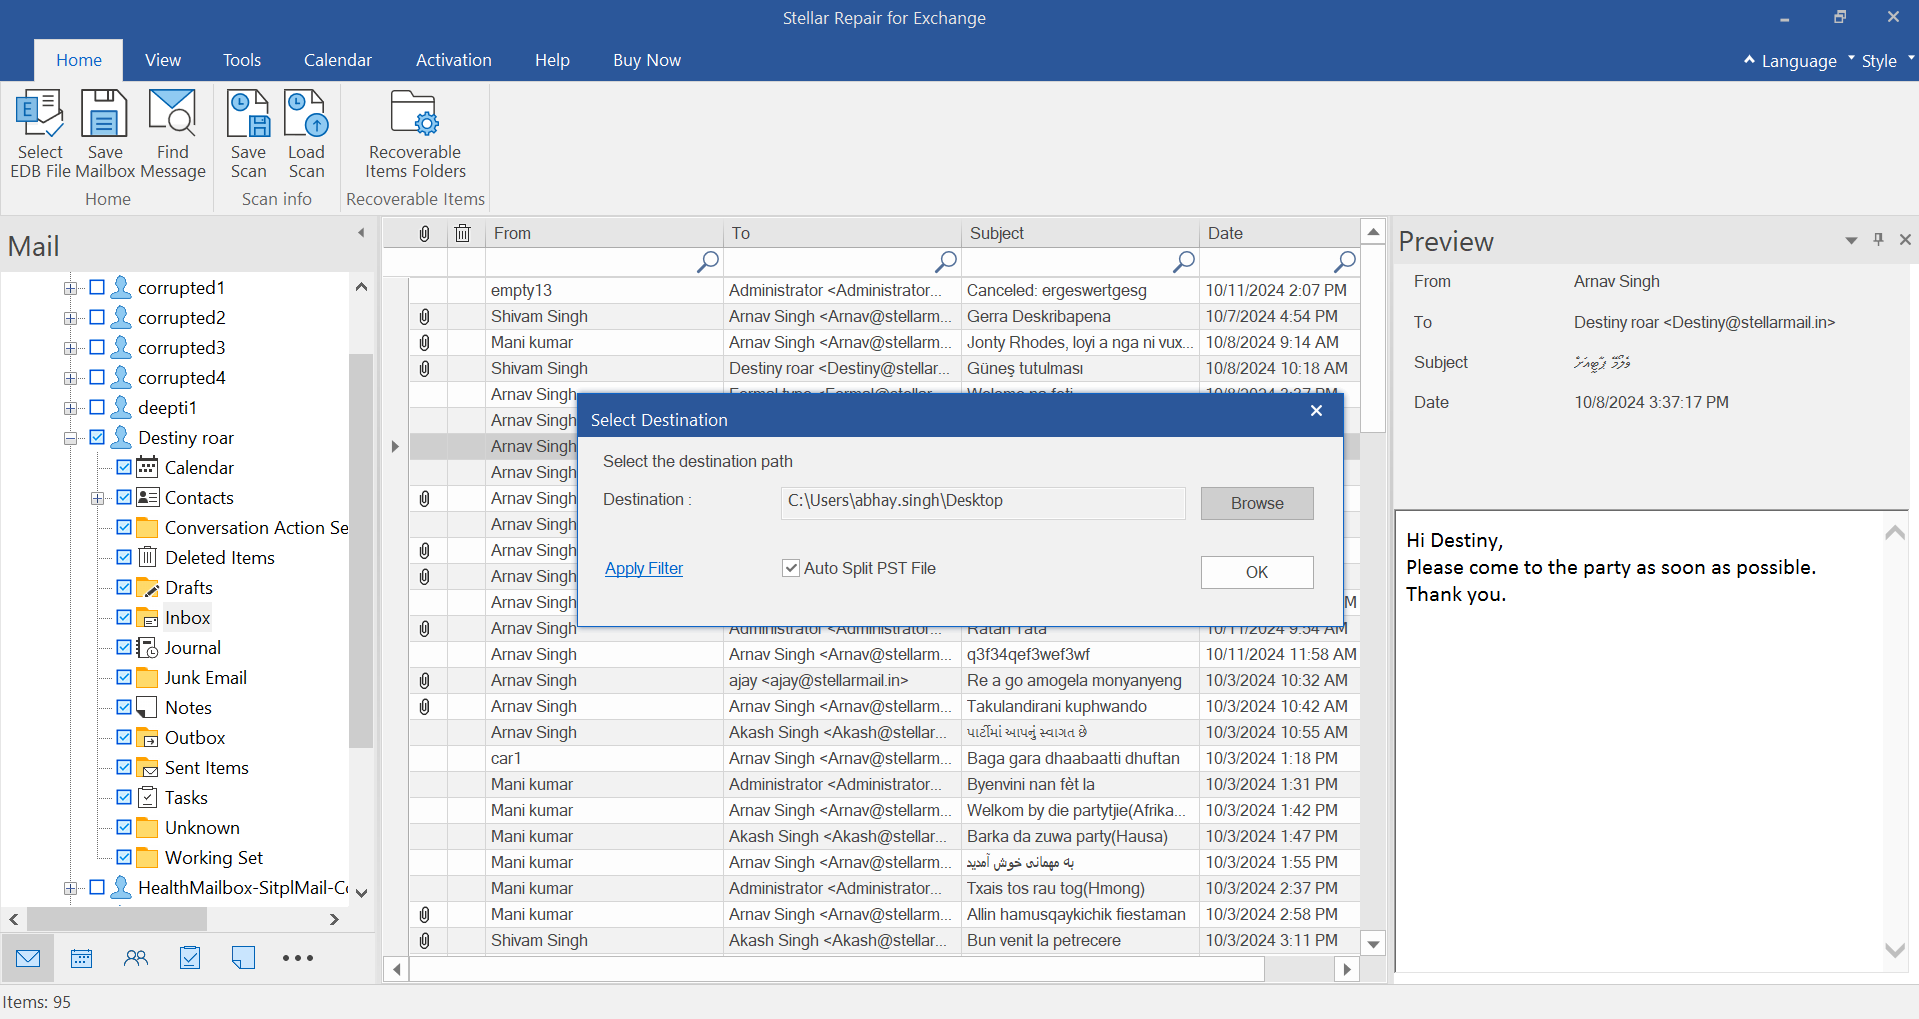
Click Browse to select the location where you want to save the PST files. Then, click OK. If you want to split the converted PST file into smaller segments, select Auto Split PST File. You can also use the Apply Filter option to exclude or include the email items.
On the Save Mailboxes window, you can set or change the priority of mailboxes. By default, the mailboxes are listed in alphabetical order.
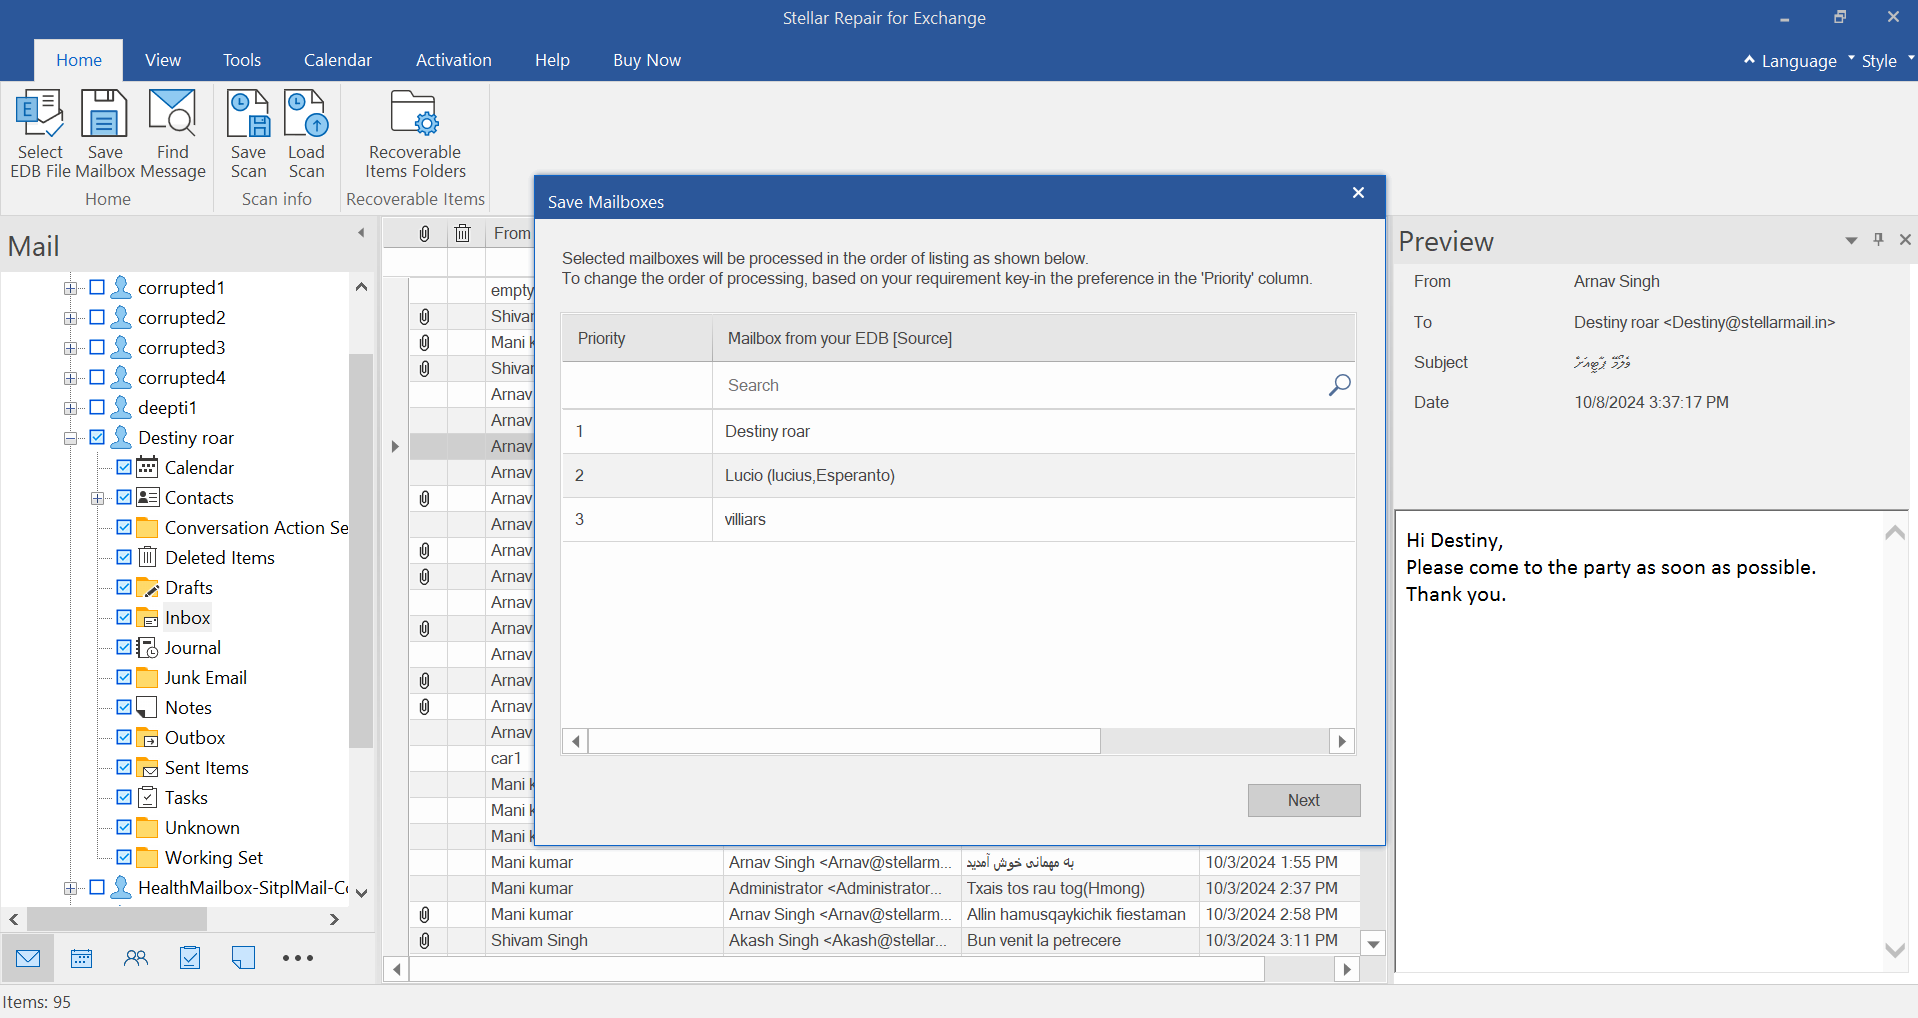
A Save window with 6 columns is displayed. Here, you can remove the mailboxes in pending status from the list by clicking the Remove button or stop the entire mailbox saving process by clicking on Stop All button.
A Saving Complete dialog box opens, displaying the summary of saved mailboxes. To open the folder containing the PST files, click on Open Containing Folder. Click OK to complete the saving process.
 For IndividualsBack to main menu
 Data Recovery
 File Repair
 Data Erasure
  For BusinessBack to main menu
 Email Repair
 Email Converter
 Email Migration
 File & Database Repair
  Toolkit
 Forensic
 Lab Services
  Our Partners
  About
About Resources
 Support
  Contact us
 Installation