


How to Copy all Emails from One Shared Mailbox to Another Shared Mailbox?
October 9, 2025| 4 min read


Our content follows trusted Editorial Standards - accurate & unbiased.
Summary: In this guide, we will discuss various methods that can help you migrate SBS 2011 to Microsoft 365 with minimal downtime and without disrupting the email services. You will also learn about an advanced Exchange migration tool that can safely move mailboxes and data from Exchange 2010 running on Small Business Server 2011 (SBS 2011) to Microsoft 365 in just a few simple steps.
Free Trial 2 Mailboxes FreeAlthough Small Business Server (SBS 2011) is essentially an Exchange Server 2010 installed on a Windows Server 2008 R2 operating system, the process to migrate SBS 2011 to Microsoft 365 is completely different and complex than migrating Exchange 2010 to Microsoft 365.
Since Exchange 2010 has already reached its end of life on October 13, 2020, organizations running on SBS 2011 want to move to either the latest on-premises Exchange Server or Microsoft 365 (also referred to as Office 365). Below, we will discuss the methods that you can use to migrate the SBS 2011 to Microsoft 365.
There are three different methods that you can use to migrate from SBS 2011 to Microsoft 365.
Cutover Migration method is suitable for small organizations having fewer than 2000 mailboxes. However, it is recommended to migrate 150 mailboxes at one go as it takes time to create and migrate the users. So, this method causes significant downtime. To know more about this method, read our guide on: Cutover Migration – Migrate Exchange Mailboxes to Exchange Online.
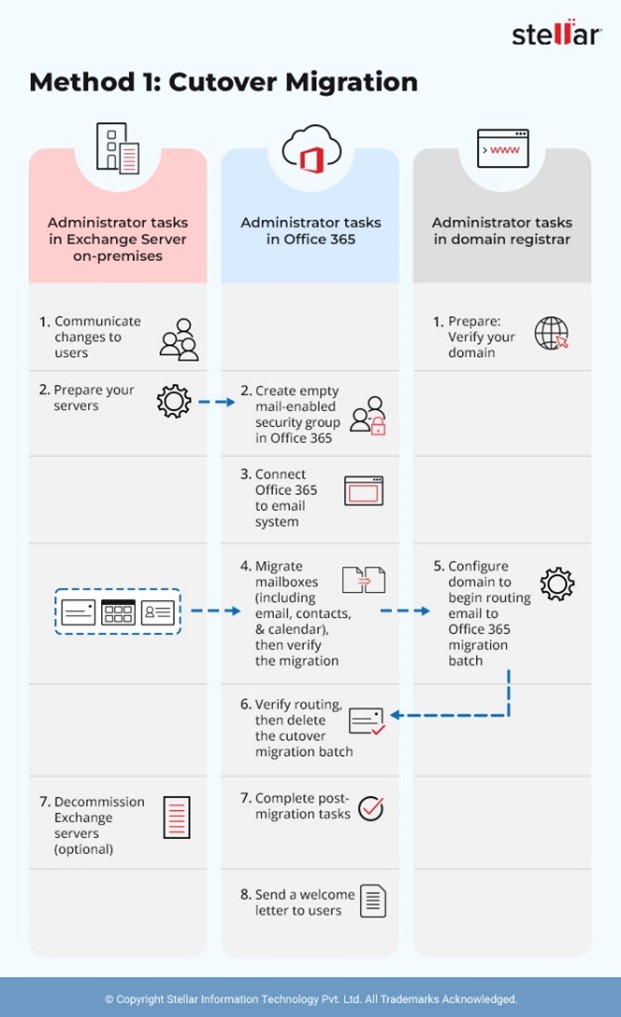
However, this method has the following drawbacks:
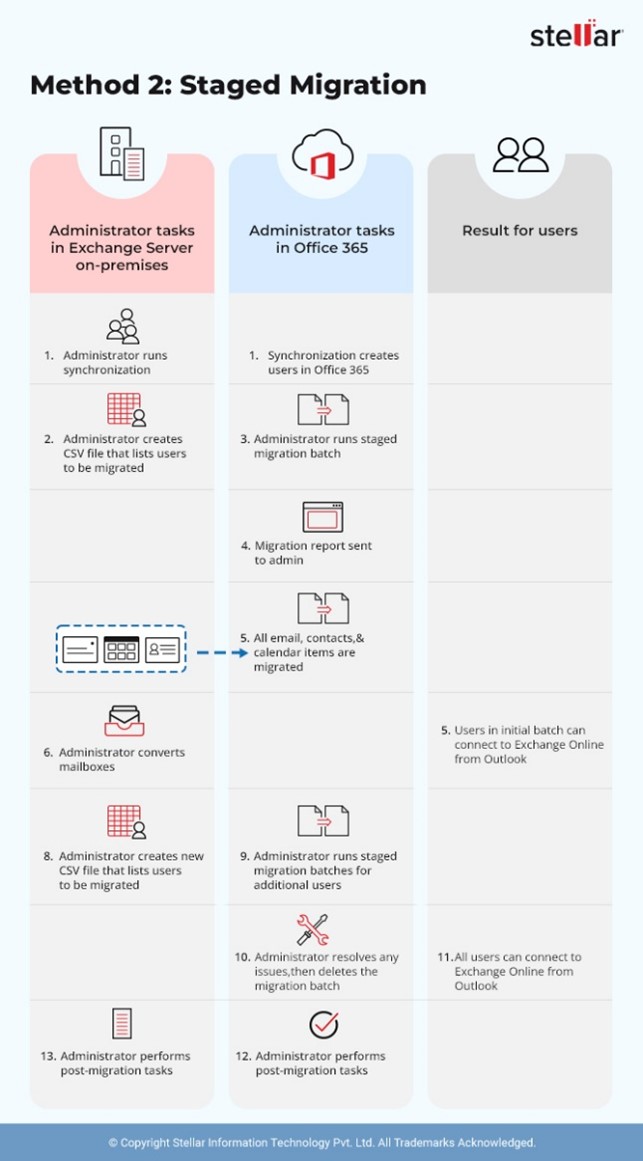
In Staged Migration, mailboxes and user data are moved to Office 365 in two or more phases. In the first phase, user mailboxes and their content are migrated over a period. In the second phase, the remaining data is transferred to the destination server. To know the detailed process of staged migration, read our article on: Staged Migration - Migrate Exchange Mailboxes to Office 365.
This method has the following drawbacks:
In Hybrid Migration, a hybrid Exchange environment is created where both Office 365 and on-premises servers can coexist. It enables you to move entire mailboxes—including emails, contacts, and calendar items—to Office 365, rather than just copying the data. To know more details about this method, refer to our article on Hybrid Migration – Migrate Exchange Mailboxes to Office 365.
This method has the following drawbacks:
The Hybrid migration method is of two types:
Full Hybrid Migration method
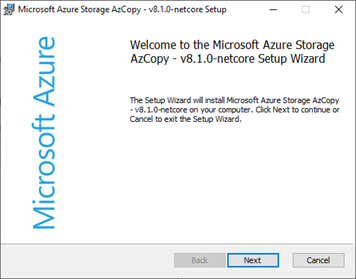
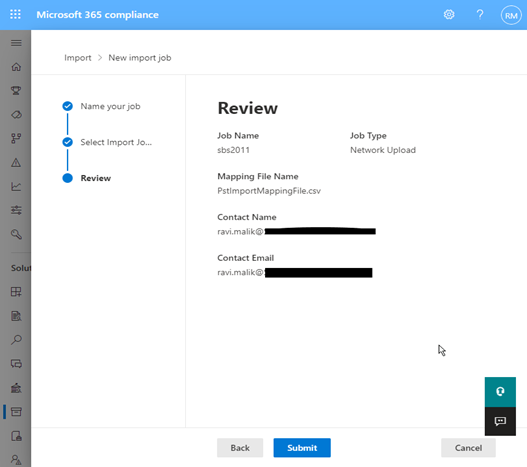
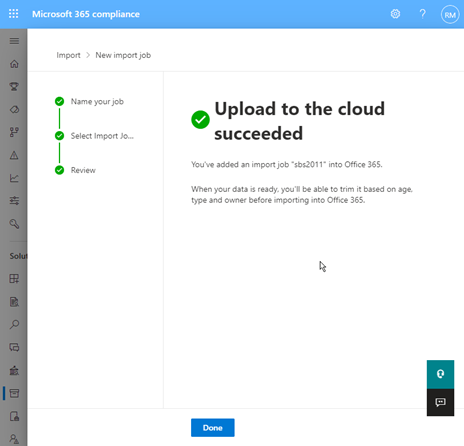
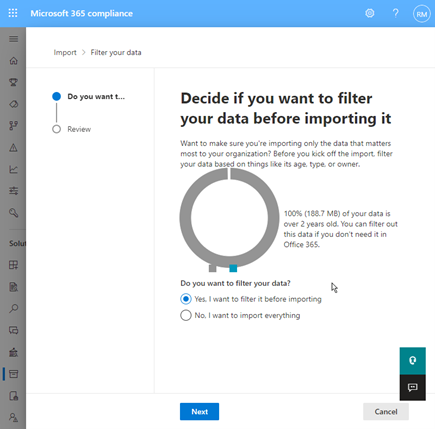
Azure AzCopy is a command-line utility for moving or copying data to Azure Storage from a storage account. To migrate the mailboxes from SBS to Office 365 using Azure AzCopy, you need to first export the mailboxes to PST files and then upload them to Azure storage using the AzCopy’s command line utility. Then, you need to create a CSV file with mapped mailboxes and submit it to Microsoft 365 Compliance Centre. After that, an import job will be created and the PST file will be imported into Microsoft 365.
For quick and easy migration of mailboxes, you can use a specialized Exchange migration tool, such as Stellar Migrator for Exchange. This tool allows you to create a connection between Exchange Server and Office 365. Then, the tool migrates the mailboxes from the server to Office 365. The software supports cutover, staged, and hybrid migrations without downtime. You can select the type of migration suitable for your business.
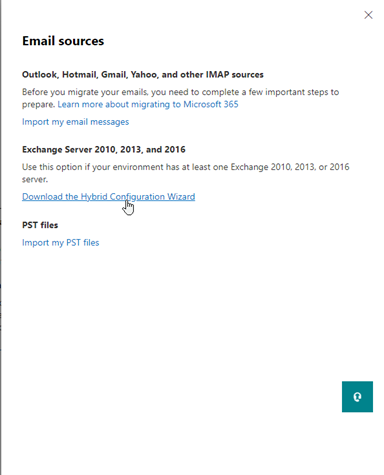
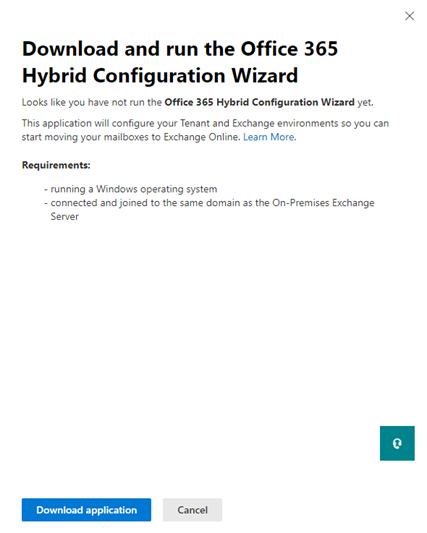
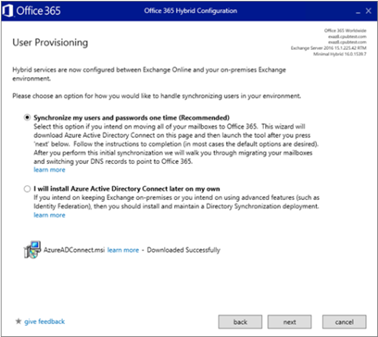
Minimal Hybrid or Express Migration is an option in Exchange Hybrid Configuration Wizard to migrate mailboxes and data from SBS 2011 to Office 365.
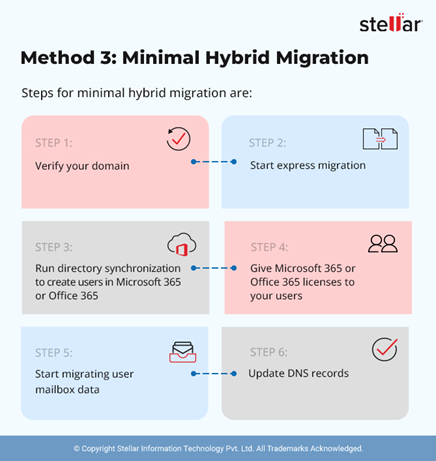
The steps to migrate from Exchange 2010 on SBS 2011 to Microsoft 365 using minimal hybrid migration method are as follows:
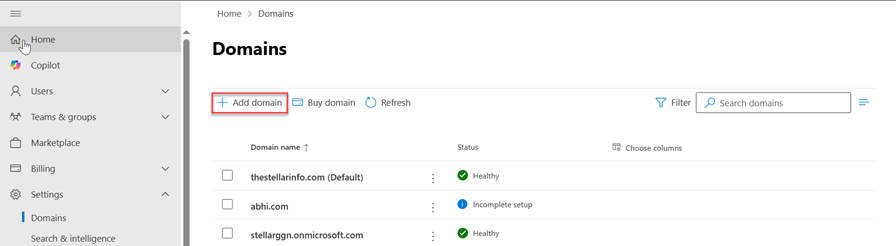
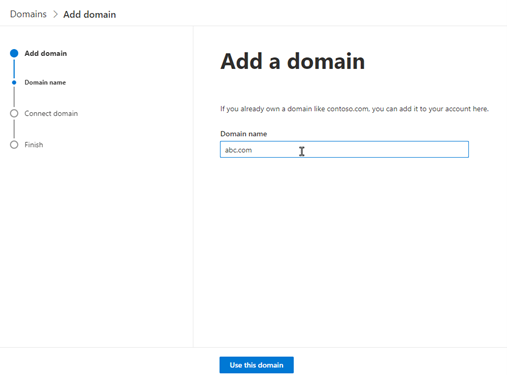
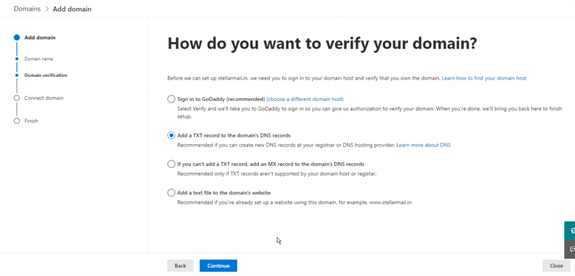
During Express or Minimal Hybrid migration, the SMTP address of each mailbox on SBS 2011 is used to create a new account and Office 365 mailbox. However, you need to verify the domain before you can run the migration. The steps are as follows:
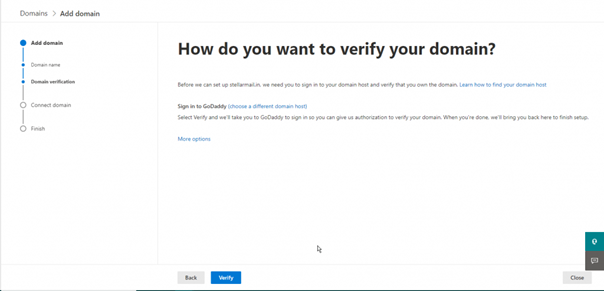
Now that you have verified that you own the domain, you can start the migration.
Sign in to a system connected to your SBS 2011 domain and log in to Microsoft 365 or Office 365 account as Global Administrator. Then, follow these steps:

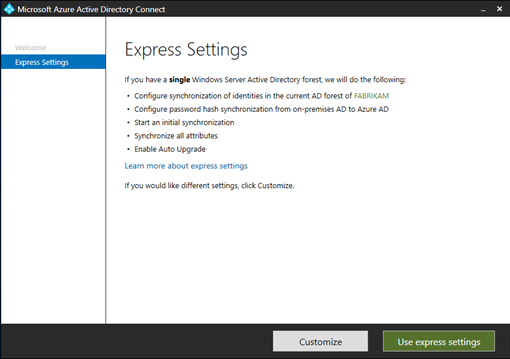
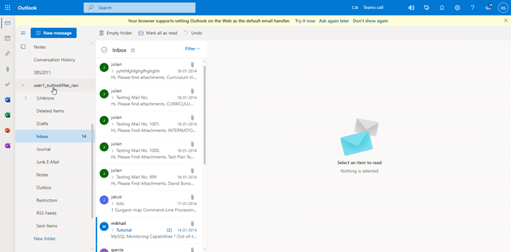
After the synchronization, you will see all your users synchronized from SBS 2011 to Microsoft 365.
Once the mailboxes are migrated successfully from SBS 2011 to Office 365, you can update the MX records in DNS records in your Domain name provider website, such as Godaddy, and point them from SBS 2011 to Office 365.
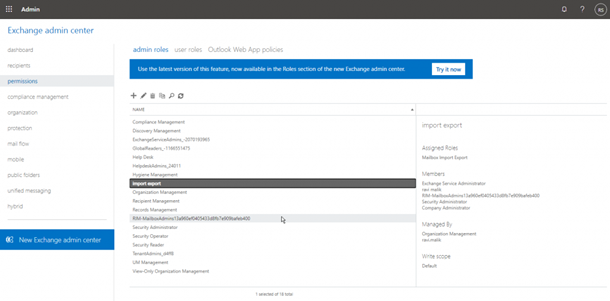
Now, go to Settings > Domains to update the domain name in Office 365. Follow and complete the domain update wizard. Once done, click Okay, I’ve added the records.
From now on, the emails will be delivered to Office 365.
At this stage, you have successfully migrated from SBS 2011 to Microsoft 365 or Office 365. You can decommission the SBS 2011 after verifying email flow and ensure all data is moved to Microsoft 365.
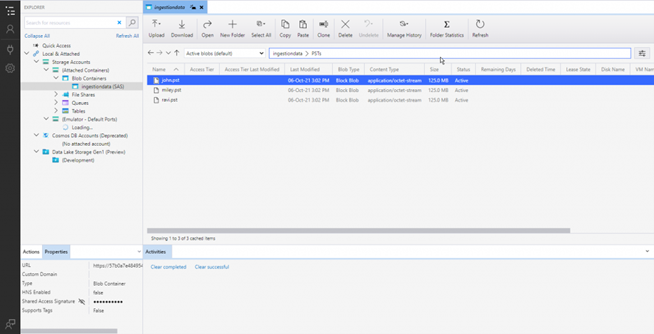
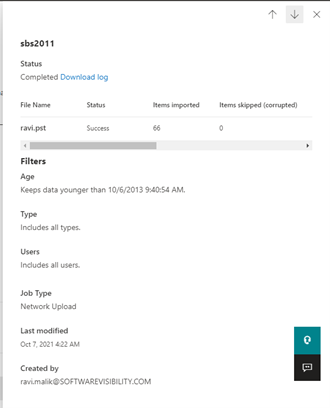
In Exchange 2010 SP1 and later, you can use the New-MailboxExportRequest cmdlet to export mailboxes to PSTs. Then, you can either upload the PSTs via Azure AzCopy (network upload method) or copy the PST files to a hard drive and ship it to Microsoft (drive shipping method). Microsoft will upload the PSTs to Azure storage on Microsoft Cloud within 5-7 days after receiving the hard drive. The shipping method will cost you $2 per GB, and each PST should be >= 20 GB. For detailed information on drive shipping to import PSTs, refer to this guide.
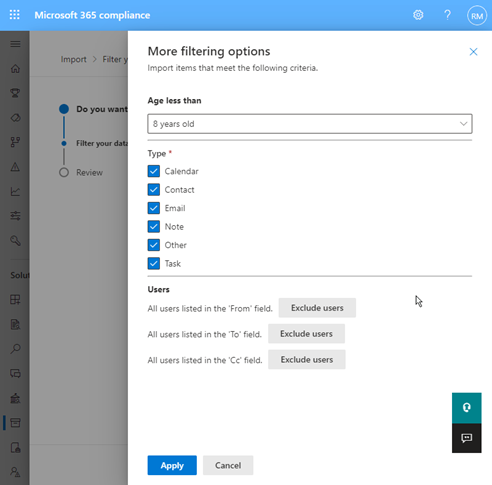
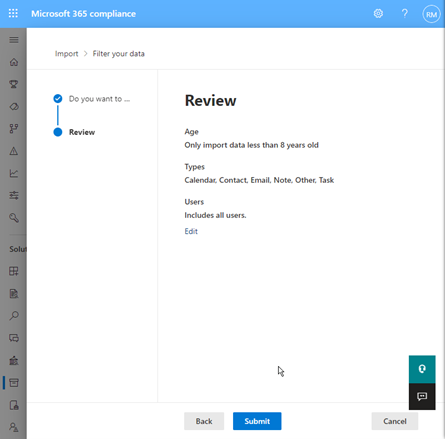
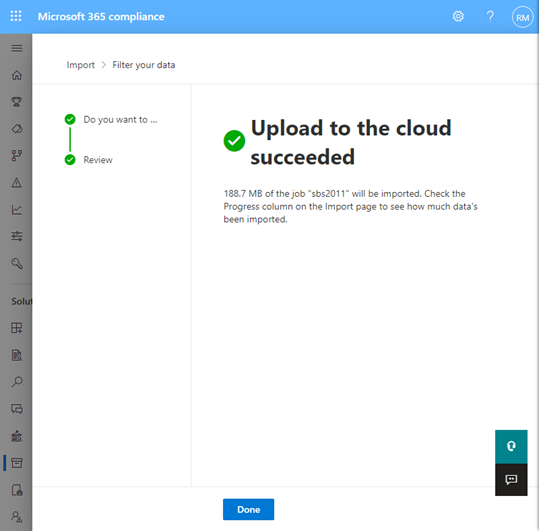
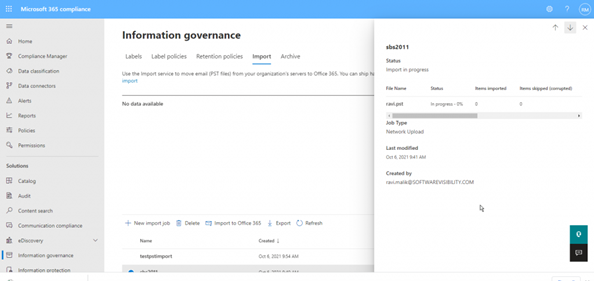
Here are the detailed steps to import the mailbox PSTs into Office 365 via the Network Upload method:
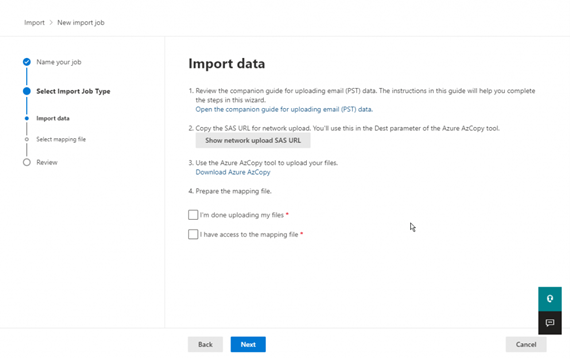
Tip: You can also download the portable version of Azure AzCopy and run command prompt to execute Azcopy commands.
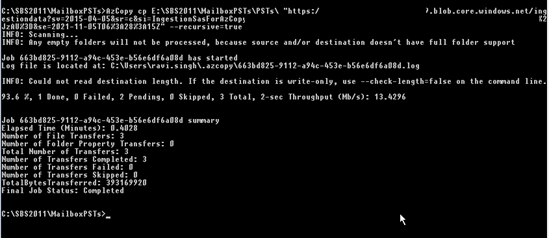
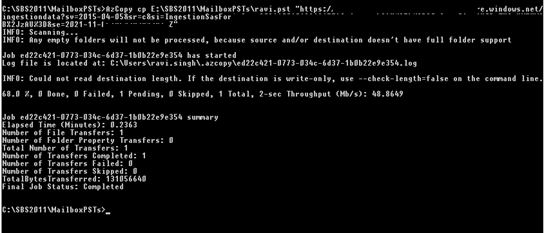
The –recursive switch ensures all PSTs from folder and subfolders are uploaded to Azure Storage.
For instance,
AzCopy copy E:\SBS2011\MailboxPSTs\PSTs\ “https://xxxxx.blob.core.windows.net/ingestiondata?sv=2015-04-05&sr=c&si=IngestionSasForAzCopyxxxxx” --recursive=tru


If you need to migrate mailboxes from SBS 2011 to Microsoft 365 you can follow the methods mentioned in this article. However, there are some drawbacks associated with these methods. For instance, the cutover migration method only allows you to migrate up to 2000 mailboxes and causes downtime.
To avoid the drawbacks of manual methods, you can use Stellar Migrator for Exchange – a specialized Exchange migration software. This software simplifies the migration process and minimizes the downtime. It can directly migrate the mailboxes from on-premises Exchange Server (2010 and later versions) to Office 365 by maintaining data integrity. You only need to connect to the source server (Exchange 2010 on SBS 2011) and the destination server (Office 365), and then follow some simple steps to finish the migration. You can also use this software for Exchange Server to Exchange Server migration, Office 365 to Office 365 migration, and Office 365 to Exchange Server migration.
Senior Content Writer
This article was written by Anubhuti Sinha, a Content Writer at Stellar Data Recovery.
Curious about our content creation process? Take a look at our Editor Guidelines.
October 9, 2025| 4 min read
October 9, 2025| 4 min read
October 9, 2025| 4 min read


Get 2 Credits FREE to Experience Seamless Mailbox Migration
 4 min read
