First things first – What is Booting?
The process of starting up a computer is known as booting. It can either be triggered directly with the help of hardware like a button press, or through a system command. When the computer boots up, its operating system (OS) is loaded into its primary memory, and several other necessary tasks are completed to make it ready and workable. Once the laptop has completely booted, you can see the home screen of the respective OS and kick-start your work with the help of different pre-installed applications.
Evidently, booting is the very first step that needs to be executed successfully to make a computer functional. Problems arising in this step need to be resolved at the earliest.
Frequent macOS Booting Problems?
Since the official version of macOS 11.0 was released, many Mac users are looking to upgrade to this version. While it has been a smooth transition for most users, some have reported that ever since they’ve installed upgraded macOS versions like Big Sur and Catalina, their machines are having trouble booting. If you’ve been facing this too, you should know that it could be due to a system crash.
When a Mac system crashes, it often fails to boot or start up properly. The best solution is to find alternative ways to boot into the system and recover important data from it. However, forcefully booting into the system without proper technical know-how can result in overwriting of new data over the previous data, making it unrecoverable. Therefore, you should apply tried and tested macOS boot options demonstrated in this post.
How to boot your Mac?
You can use one of the multiple Mac boot options listed below to start-up an unbootable Mac.
1. Safe Mode for Intel & M1 Macs
Safe Mode is a stripped-down version of macOS. It allows you to safely boot your Mac if you’re troubleshooting certain issues on it. Using this mode is recommended only if you’re facing issues like:
- Freezing Mac while booting up
- If you believe an app is creating issues with the startup.
- If your Mac is sluggish (booting in Safe Mode will delete the cache and could speed things up).
Here’s how to boot an Intel Processor Mac in safe mode:
- Turn on your Mac and press the shift key simultaneously. The Apple logo will appear on the screen.

- Release the shift key when the login window appears and log in.
- If FileVault is enabled, you may need to log in twice.
Here’s how to boot an M1 processor Mac in safe mode:
- Power on your Mac.
- Press the power button and hold it until the startup disks and options appear.
- Press the shift key and hold it. Then click “Continue in Safe Mode”.
2. Recovery Mode
macOS Recovery (also known as Mac Recovery Mode) was first launched with OS X 10.7 Lion in 2010. It's a feature that a majority of Mac users generally don’t use to boot unless one of the following scenarios occurs:
- You need to clean your Mac before selling it or giving it to someone else
- You need to troubleshoot issues like failing start-up disk on Mac
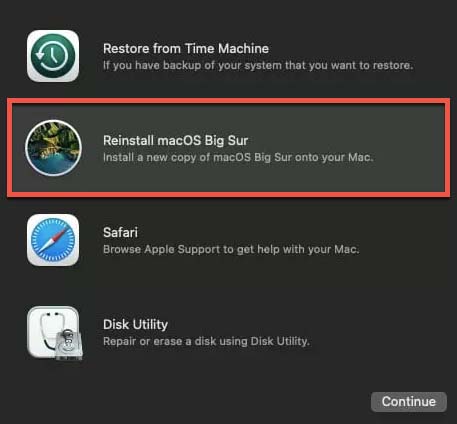
- Your OS has a problem, and you want to restore a new copy of macOS
The most common approach to enter Recovery Mode on an Intel Mac is:
- At the top left corner of the screen, click the Apple logo.
- Click the Restart option.
- Press the Command and R keys simultaneously till you see an Apple icon or a rotating globe.
- You will see the Mac Recovery Mode Utilities panel, which contains the options you can use to boot your Mac.
Video Guide – Watch the below video to learn the steps to boot into macOS Recovery mode and repair corrupt startup disk.
The most common approach for entering the recovery mode on an M1 Mac is:
- Press the power button and hold on your Mac till you see “Loading startup options”
- Click Options icon, and then click Continue.

- Enter the password of the administrator account if requested. This will take you to the macOS Utilities screen, from where you can choose any one of the boot options.
3. Single-user mode (or FSCK)
Mac gives signals when it encounters problems needing the use of FSCK to fix them. If you notice the following symptoms when your Mac starts up, it means the file system is corrupted and needs replacing using FSCK:
- If your Mac only partially boots up before prompting you to perform FSCK.
- If you can't get to the login screen after booting up your Mac.
- If the Mac gets to the login screen, but doesn't load the desktop after the user logs in.
Steps to implement the FSCK mode in both Intel and M1 Macs:
- Turn on your Mac, and hold down the Command + S keys at startup to start your Mac in single-user mode.

- The command prompt will appear on the screen. Type the following in it:
sbin/fsck -fy
- If no problems are encountered, the following message will appear:
** The volume [volume name] appears to be OK.
- If problems are discovered, the following message will appear:
***** FILE SYSTEM WAS MODIFIED *****
If the system detects problems, execute the command shown in step ‘b’ above until FSCK states that your volume appears to be in good condition. Once you receive the ‘OK’ message, simply type ‘reboot' and then press ‘Enter’ to restart the computer.
4. Verbose mode
Verbose mode is a way of booting the Mac from the command line, showing all running processes on the screen. If everything goes well on the command line, the booting continues into the graphical frontend of macOS normally. If you're not a developer, there are a few reasons you might wish to utilize the verbose mode:
- Your Mac is having difficulties booting up
- You have a number of peripherals attached, and you want to make sure that the drivers for each of them are properly loaded
Steps to implement verbose mode in both Intel and M1 Macs:
- Turn on your Mac and press Command-V as soon as it boots up.

- Release the keys after you see white text on the screen.
Your Mac will continue to boot, displaying all running tasks as text until the login window comes up. You'll need to keep a close eye here and note anything that appears to be producing an issue.
5. Windows mode
Windows is quite versatile compared to macOS, which is why many users prefer to use Windows OS for their multimedia projects. If you need to use Windows in macOS, you can do so via Boot Camp Assistant. You can also choose a default OS for your Mac, which can either be Windows or macOS. If you’ve set the choice, the Mac will boot into that default OS at start up.
After installing Windows on your Mac with Boot Camp Assistant, you can boot into it with the following steps:
- Restart your Mac using Startup Manager.
- Press and hold the Option key for a few seconds.
- Release the Option key when the Launch Manager box appears.
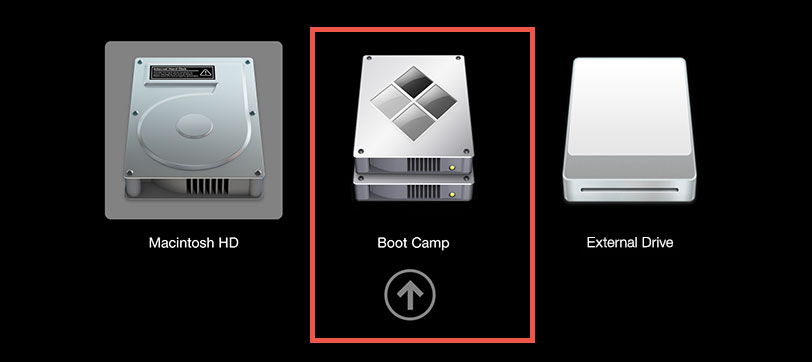
- Both Windows and macOS startup discs will appear. Select the Boot Camp one to boot into.
What to do if the Mac stops booting completely?
If you’ve tried all the above-mentioned methods but your Mac is not booting, these are some more ways to do it and recover data.
1. Target Disk Mode
Target Disk Mode is an exclusive feature in Mac, which transforms the unbootable Mac into an external hard drive for another computer. To use this feature, you first need to make sure that:
- Both the Macs support the same internal hardware
- Both machines are running the same version of macOS
Once you’ve confirmed this, follow these steps to boot from the target Mac:
- Connect the target and host machines together with a cable.
- Power on the host Mac.
- Power on the target Mac and hold T until you see a thunderbolt sign.
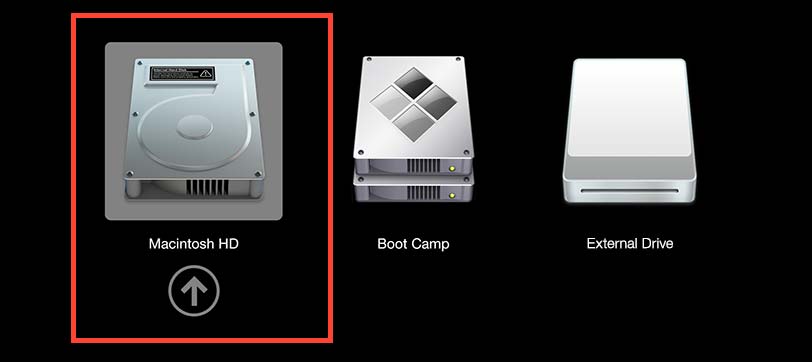
- Hold down the Option key on the host Mac until the associated bootable volumes appear on the host Mac.
- To boot, choose the target Mac as the bootable device.
- After a few moments, the host Mac will boot into the target Mac's operating system.
You can now recover the lost data on Mac or install new macOS on the host Mac to give it a fresh start.
2. Create macOS Rescue Media
When your Mac doesn’t boot up, a bootable USB device with a copy of the OS can come to your rescue. This will allow you to inspect your startup disk for faults, restore Time Machine backup, and reinstall the operating system. To use this, you first need to have:
- A USB flash drive with a capacity of 14 GB
- A macOS Big Sur installer, or an earlier version of macOS
Once you have these, follow the below-mentioned steps:
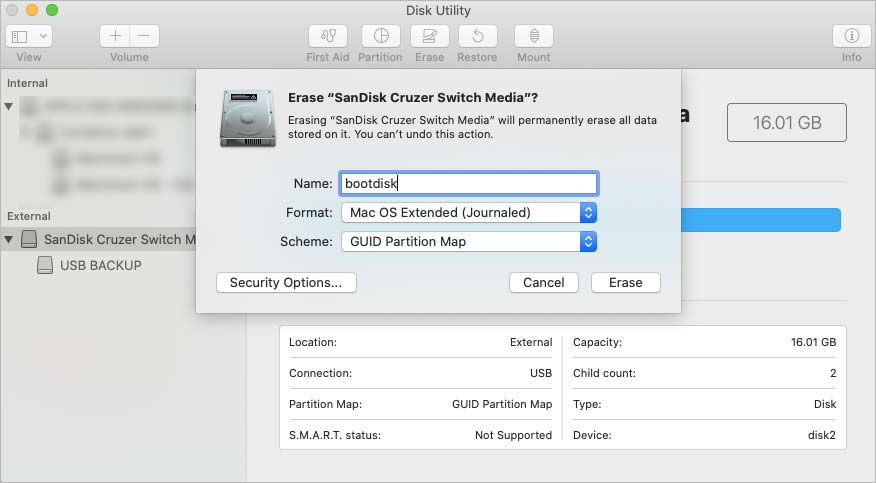
- Format the USB flash drive to “Mac OS Extended (Journaled).” This will erase all the data on the USB.
- Download the macOS of your choice from the app store and install it.
- Next, create a bootable device by going to the terminal and typing the following commands:
sudo/Applications/Install\macOS\Big\Sur.app/Contents/Resources/createinstallmedia—volume /Volumes/MyVolume
(In the above command, replace MyVolume with the name of your Flash drive)
- Press Return after you type the command.
- Here you will be asked to type a password. Type the root password instead of the user password. Please be aware that the terminal will not show any character of the password.
- After you’ve entered the password, type ‘y’ and press return.
- The terminal will show the message “Install media now available at: XYZ volume.” This shows that your volume is successfully created.
- Close the terminal and eject the flash drive.
- Now plug it in the non-booting Mac and press the power button.
- Hold the option key till the dark screen shows different volumes.
- Choose the volume with macOS installer and press return.
Your Mac will then reboot. Post this, you can either install a new version of macOS or restore an earlier version using time machine backups.
If none of the above-mentioned techniques work, the best solution would be to create a bootable recovery drive for your Mac.
3. Boot your Mac with Stellar’s Recovery Drive
Stellar Data Recovery Professional for Mac is specialized data recovery software that helps you combat data loss on a variety of Mac file systems. It can restore lost or deleted files due to a number of reasons, including crashed or unbootable Mac. This software can be used to create a bootable recovery drive that can boot into the impacted Mac and recover the data.
Before you can use the software, you need to make sure that your Mac has at least 4 GB (Recommended is 8 GB) of RAM and 250MB of free space. You will also need a USB flash drive with at least 8GB of space.
Useful Resource for Recovery Drive Creation
- Download the trial version of Stellar Data Recovery Professional software here.
- To create the rescue media with Stellar, you need to activate the demo version.
- Learn the steps to create the recovery drive or watch the below video.
2.How to resolve ‘No bootable device’ error on Mac?
Conclusion
We hope this article helped you overcome booting issues on your Mac. Remember, like all machines, Macs also run into problems sooner or later, a common one being the inability to boot up. In such a case, you can opt for manual fixes like:
- Booting in Safe, Recovery, FSCK, Verbose, or Windows mode
- Using the Target Disk mode
- Creating macOS recovery media
- Using Stellar Data Recovery Professional software recovery drive feature
For more clarity, don’t hesitate to address your queries to the author.


 10 min read
-1920.jpg)