Stellar Repair for Exchange repairs Exchange database and exports mailboxes to PST, live Exchange, or Office 365. The software offers an advanced filter option for more precise recovery of mailboxes from damaged EDB files. This allows users to exclude redundant or unwanted mailboxes or mail items and export the relevant mailbox data.
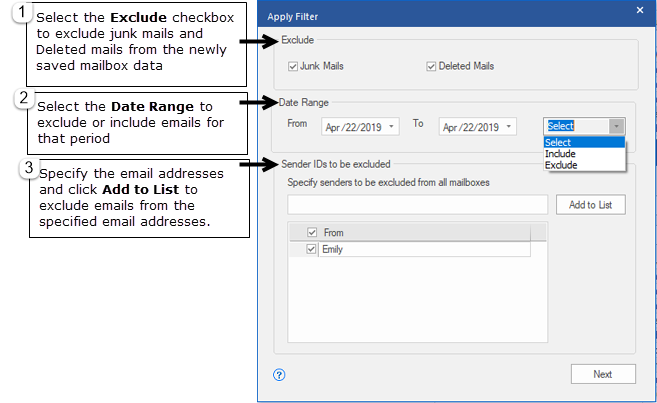
By using Apply Filter option before export, users can choose to include or exclude Junk Mails and Deleted Mails, and set the filters to save mailboxes and items of a specified date range. By using Apply Filter option, users can also choose to exclude mail items from one or more email addresses.
Here are the steps to use the Advanced Filter option in Stellar Repair for Exchange, while exporting mailboxes from EDB to PST, live Exchange, or Office 365.
Export Mailboxes to Live Exchange Server with Advanced Filter Option
- Once you have repaired the Exchange database and verified the mailbox content, the next step is to select the checkboxes for mailboxes to be exported and then click the Save button.
- From the Save window, select the option Export to Live Exchange and click ‘Next’ (see the screen below).

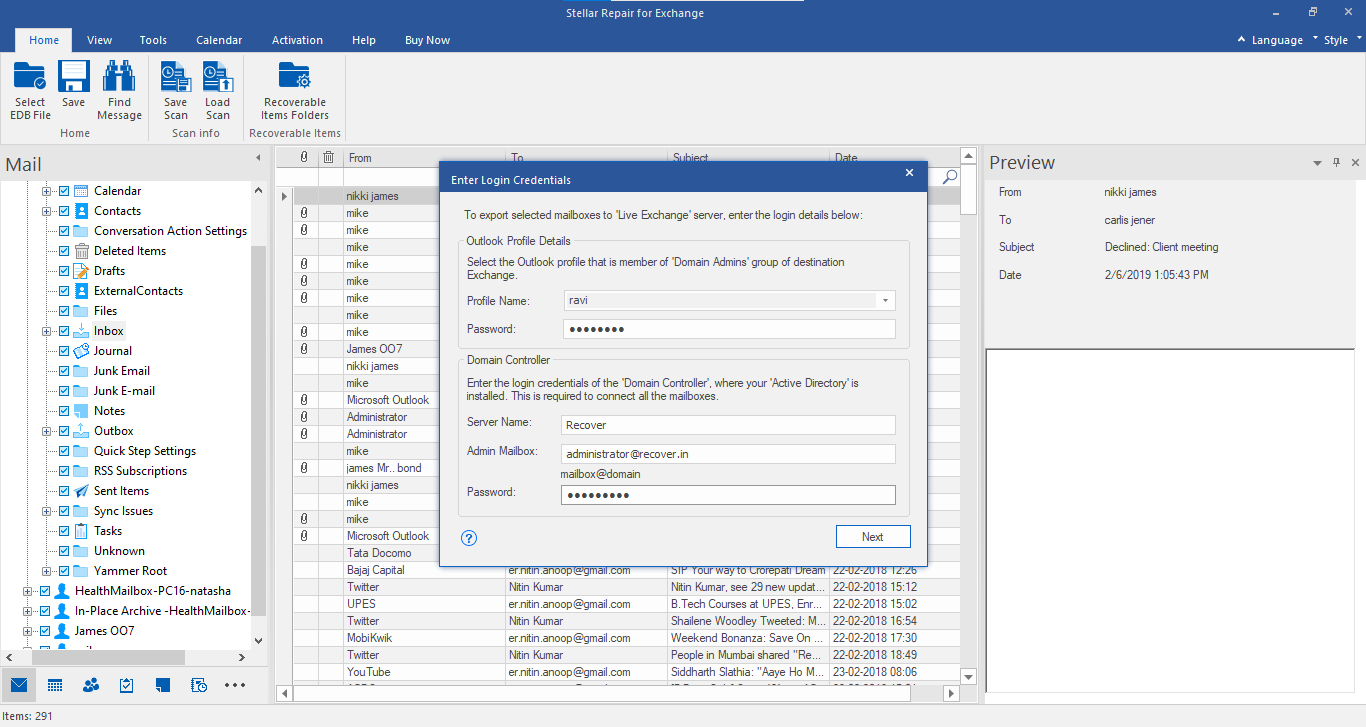
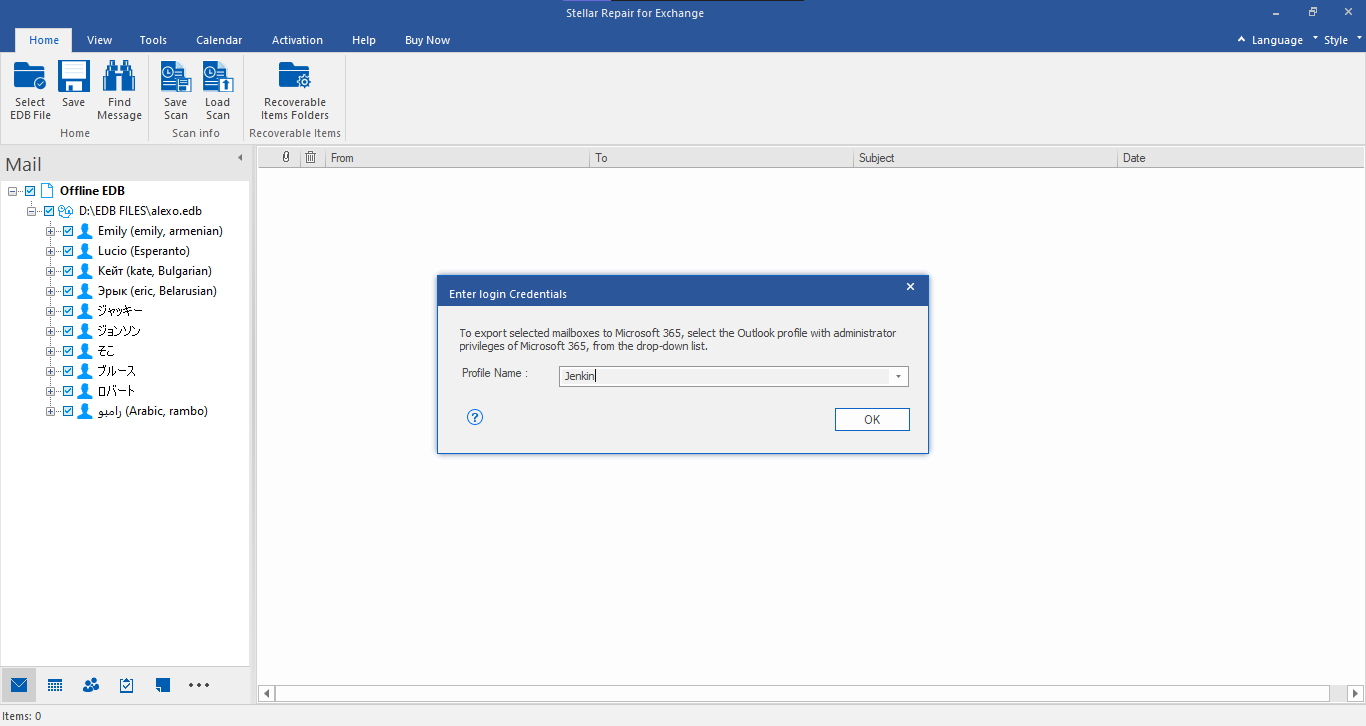
- In the Enter Login Credentials dialog box, fill in the following details:
- Choose Outlook Profile: Choose configured Outlook profile with Administrator privileges from the drop-down.
- Password: Enter Outlook profile password.
- ADS Name: Fill in the ADS name.
- Admin Mailbox: Enter the email ID of the Administrator.
- Password: Enter the administrator password.
- Click Next. A Map Mailbox window will appear with an Apply Filter option.
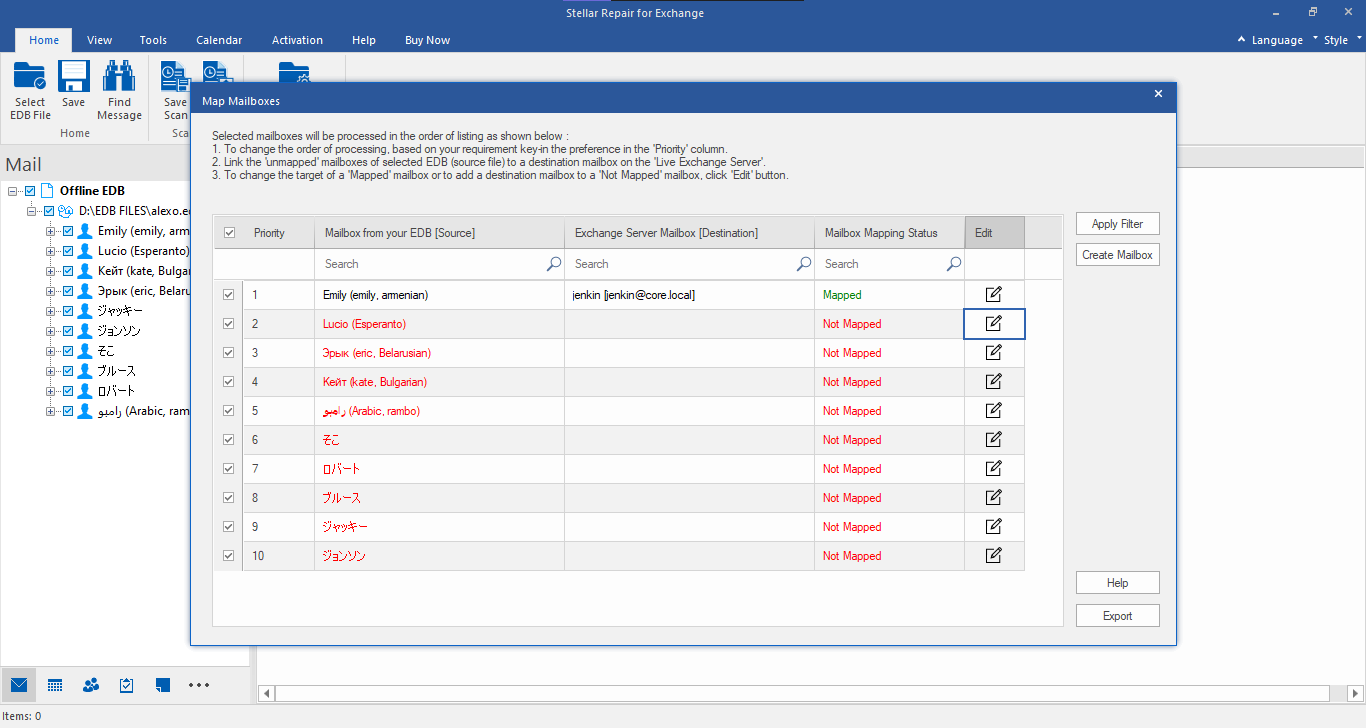
- Click on Apply Filter button to access Apply Filter screen. Then,
- Select the checkbox for Junk Mails and Deleted Mails if you want to exclude them.
- Select the Date Range and select Exclude or Include from the drop-down menu to exclude or include mails for the selected date range.
- Specify the email addresses to exclude the data from the selected mailboxes.
- Click Next to apply the filters and then click ‘Export’ to start saving mailboxes and mail items to the live Exchange server.
Export Mailboxes to Office 365 with Advanced Filter Option
- Once you have repaired the Exchange database and verified the mailboxes content, select the checkboxes to choose the mailboxes for export.
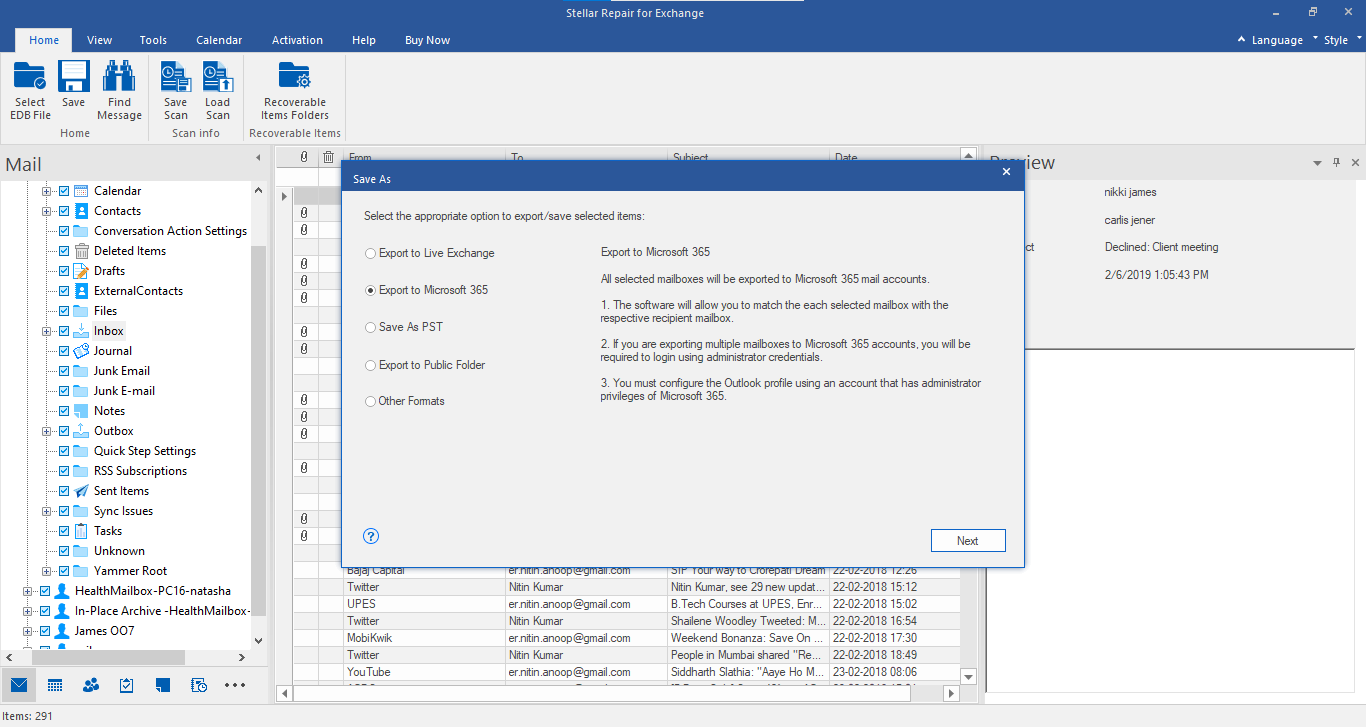
- Then go to the main menu and click Save. A Save As window appears with multiple saving options. Choose Export to Office 365.
- Click ‘Next.’ Enter Login Credentials dialog box will appear. Choose the configured Outlook profile with Administrator access and then click ‘OK.’
- A Map Mailbox screen will appear. Click on Apply Filter option to access Apply Filter screen. Then
- Select the checkbox for Junk Mails and Deleted Mails if you want to exclude them.
- Select the Date Range and select Exclude or Include from the drop-down menu to exclude or include mails for the selected date range.
- Specify and add the email addresses to exclude the data from the selected mailboxes.
- Click Next to apply the filters and then click ‘Export’ to start saving mailboxes and data to specified Office 365.
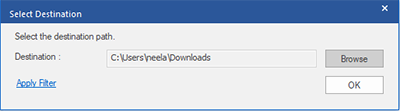
Note: You can also use the Apply Filter option to save filtered data in PST, MSG, EML, or RTF format, after browsing the save location. See the below screenshot.
- For more help, you can reach us via the Self Help and Support page.