

An image file is beneficial as the storage media is not required to recover the data, and the data can be retrieved later using just the image file.
For example, when you have a hard disk, which has bad sectors on it, or when one is not sure that a hard disk may work the next time properly, it is advisable to create an image and then recovers data from the image itself and not the crashed hard disk.
Stellar Data Recovery for Mac software creates a sector-by-sector image of the selected media. Users can also set a range of the media chosen to create an image. Later on, the software uses the Image to recover the data.
You can easily create the Image of the following storage media using the Create Image option of Stellar Data Recovery for Mac:
- Hard Disks
- Existing logical volumes in hard disks
- Removable media such as USB drives, external hard disks, etc.
Steps to create an Image file
Step 1: Launch Stellar Data Recovery for Mac.
Step 2: Click the Perform task with the selected item ![]() button and select Create Image from the drop-down list.
button and select Create Image from the drop-down list.
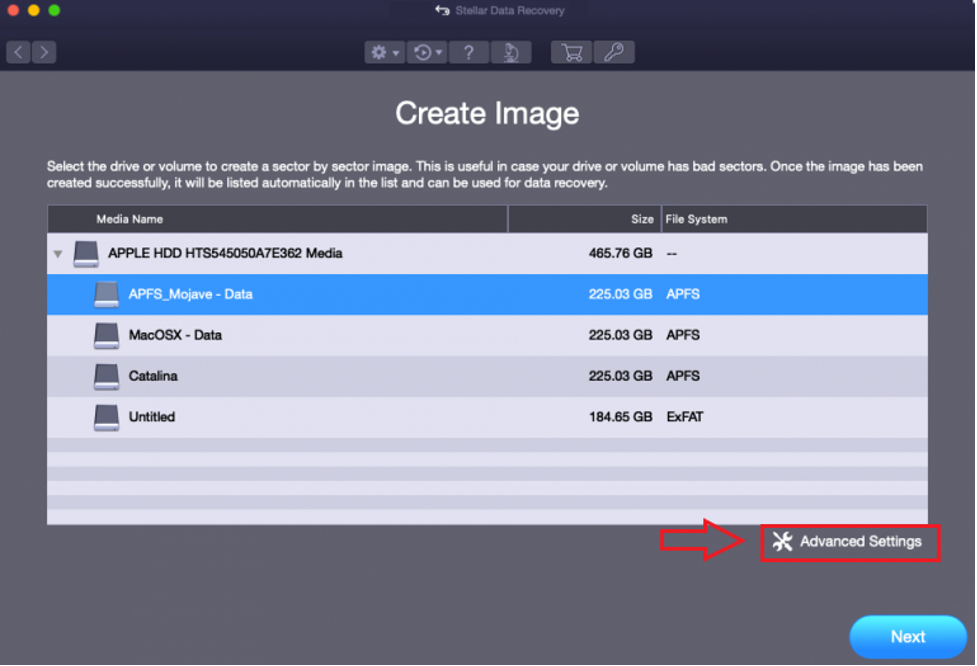
Step 3: Select the drive or partition for which you want to create an Image in the Create Image window.

Step 4: To create the Image for an entire disk or partition, click Next.
Note: Alternatively, to create an Image of a specific range, follow the steps below:
- Click Advanced Settings.
- From the Select Range to Create Image screen, adjust the sliders to define the starting and ending sectors for the Image.
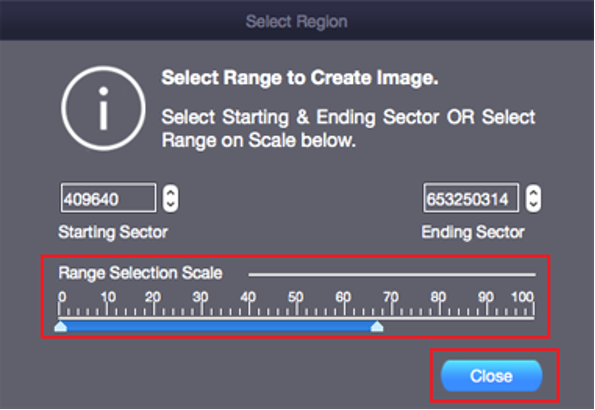
- Click Close > Next.
Step 5: In the Creating Media Image to Save dialog box, select where you want to save the image file.
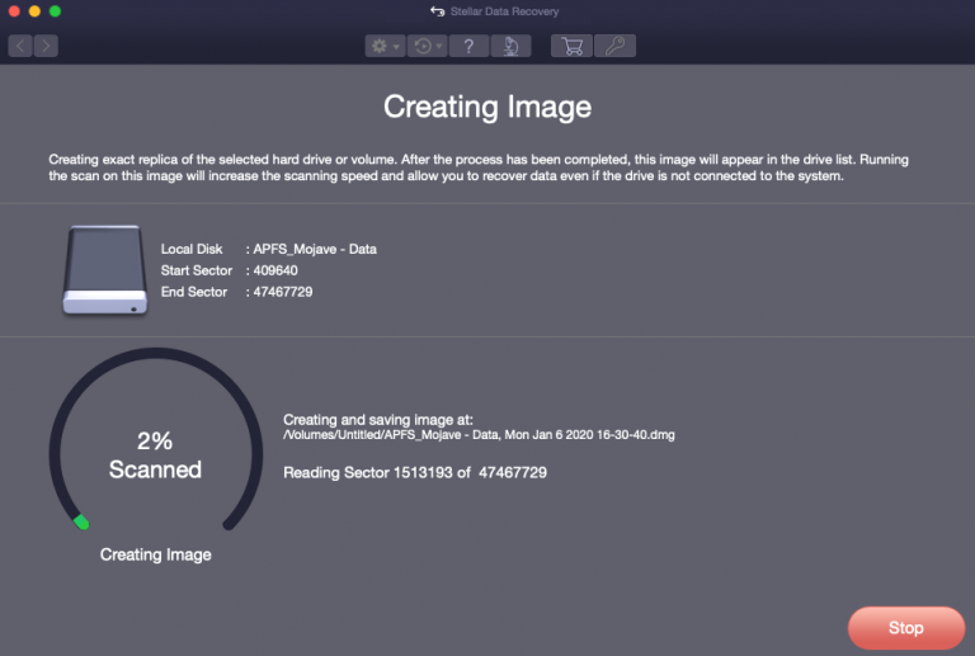
Step 6: In the Save As section, insert the name for Image and click Save. The software will start creating the Image. Wait for it to be completed.
Note: If you use the Stellar Data Recovery on a Mac with macOS High Sierra, Mojave, Catalina, BigSur, or Monterey, you need to allow your macOS to load an extension signed by Stellar Data Recovery. Know more.
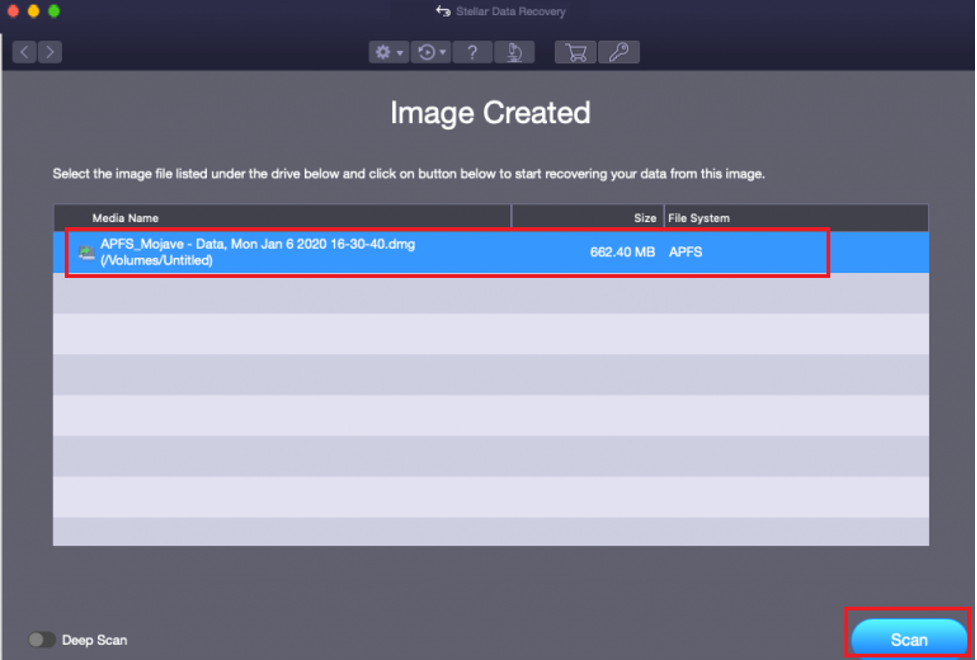
Step 7: Once the process is complete, a screen with your Image listed will appear. Click Scan to start the recovery.
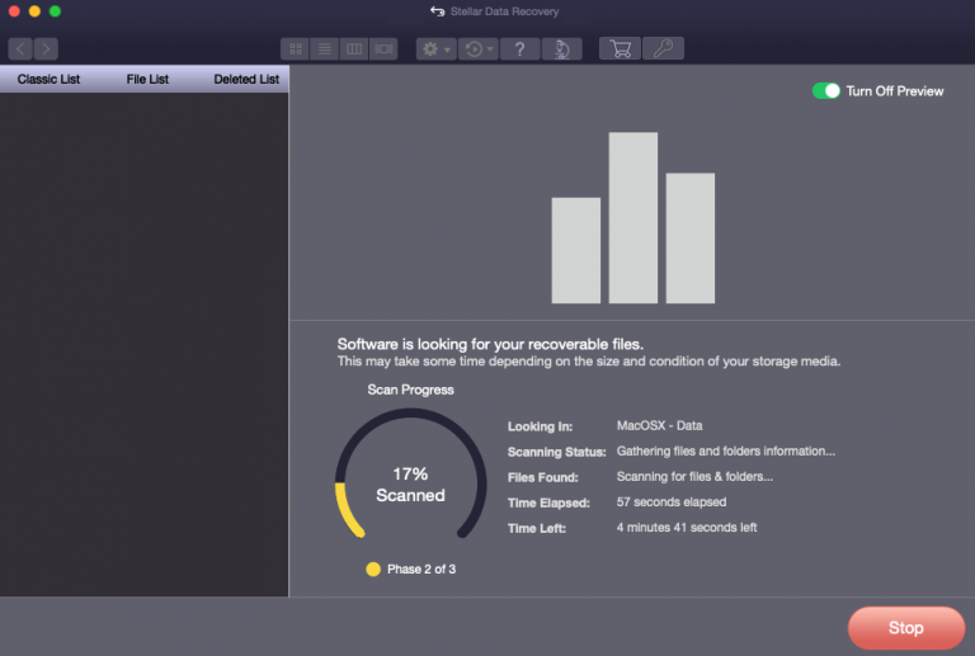
Step 8: The scanning process will commence. To stop scanning at any point, hit the Stop button at the bottom-right.
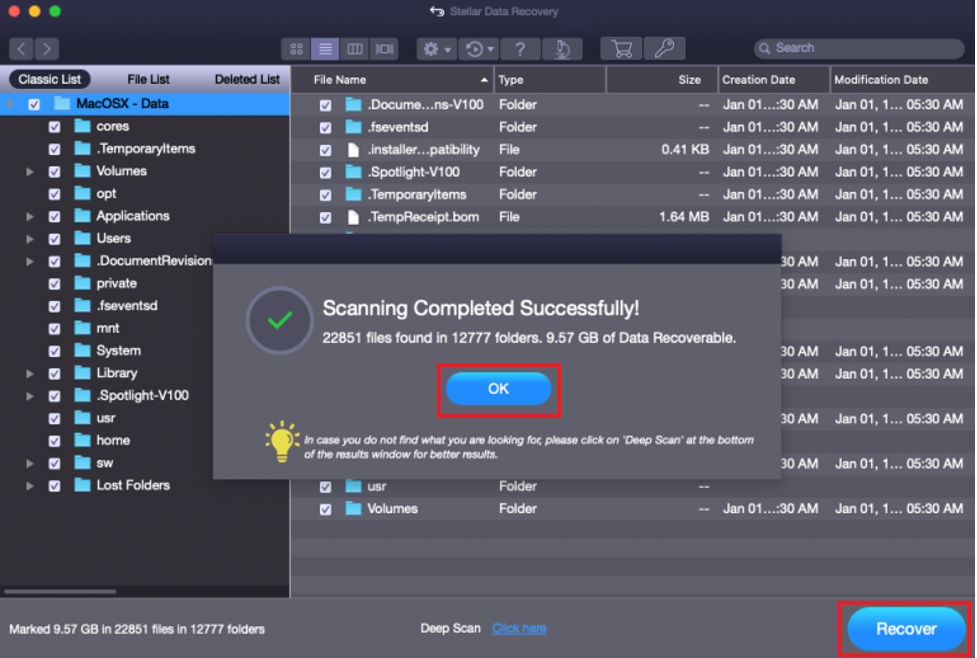
Step 9: When scanning is completed successfully, click Ok. The list of scanned files is displayed. Select the files you want to recover and click Recover.
Follow the instructions on your screen to complete the recovery process. You can also preview the scan results before saving them on your Mac.
You can also recover your lost data from an existing image file using Stellar Data Recovery for Mac.


