The first step to resolve this problem is to just restart your Mac and run First Aid again. This clears temporary glitches. Next, boot into macOS Recovery and run First Aid there. If that also fails, you can use command-line tools like diskutil or fsck (on older Intel Macs) to attempt repairs. As a last resort, back up your data and erase/reformat the drive and reinstall macOS.
If your Mac’s Disk Utility First Aid keeps on failing, we know that it can cause you worry but you have landed on the right page to get rid of it. Just don’t panic yet. We’ll identify the issue, get to the root of it, and resolve it using reliable troubleshooting methods.
You might have noticed some symptoms like Mac keeps freezing, crashes or unresponsiveness before seeing this First Aid error. This kind of error basically means the disk’s directory structure is too damaged for Disk Utility to fix. Other than that, permission issues, corruption in the container or maybe hardware failure can also be the reasons. In this case, the solution is to try deeper repair steps like recovery mode, command-line tools. We have listed all the solutions in the correct order, follow them to identify those underlying issues and resolve the problem wherever possible.
Methods to Fix Disk Utility First Aid Failures
If Disk Utility First Aid failed or First Aid could not repair the disk, go ahead and try these steps in order we have provided. Start with those simpler fixes and move up to more complex measures. Where instructions shall differ, Apple Silicon Macs use the power-button method to enter recovery and Intel Macs use those Command-key combinations.
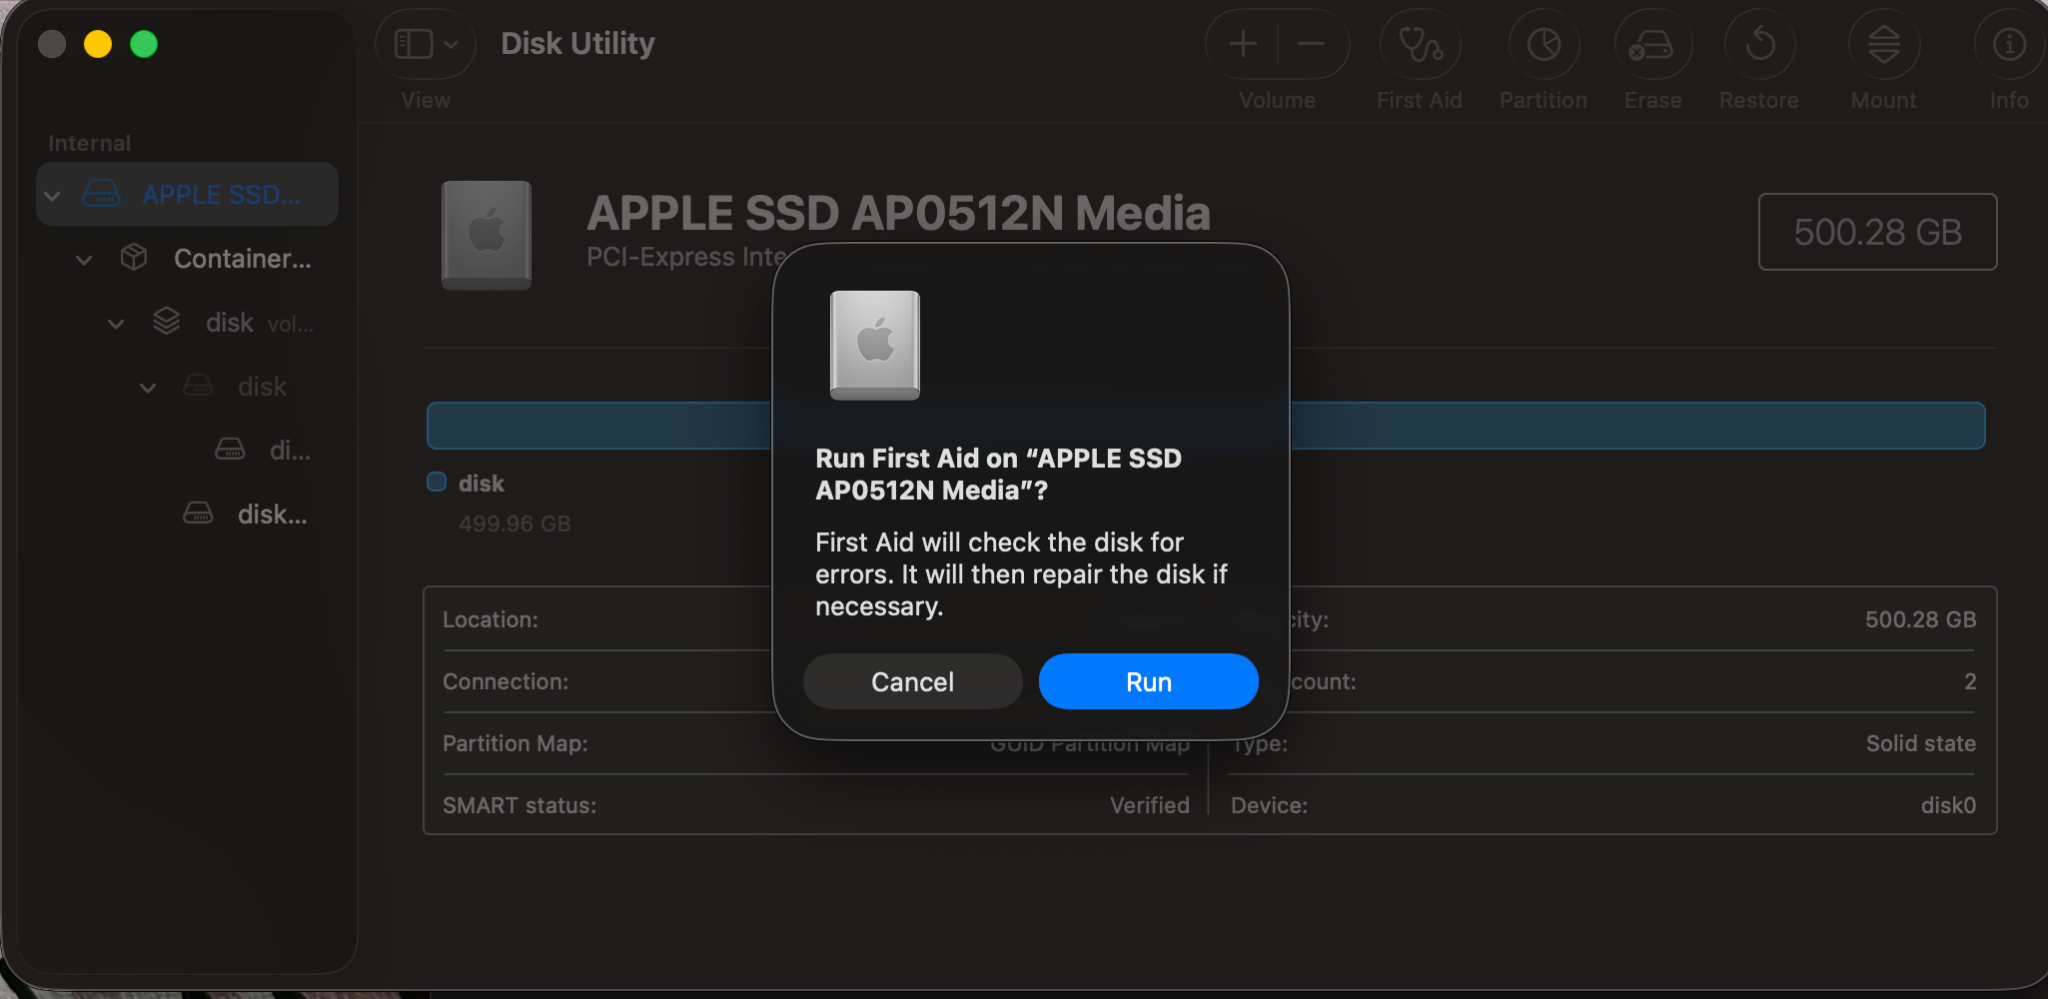
Method 1: Restart Your Mac and then Try Foirst Aid Again
Sometimes, the simplest of the fixes work. A reboot can clear temporary glitches on your Mac. Do it using these steps:
- Save all of your open documents and restart your Mac.
- When it is booted normally, just open Disk Utility by going to Applications > Utilities. Run First Aid after that.
- Now you just wait until it completes.
Restarting the Mac resets system caches and drivers and that actually can eliminate soft errors. If First Aid succeeds after a reboot, great… problem solved. If it still fails, we have other ways too.
Method 2: Run First Aid in macOS Recovery
First Aid, when you are in Recovery Mode, does not use the startup disk at all. This allows it to run deeper checks within your system and this gives you better chances of resolution. To do this:
- Boot Mac into Recovery:
- For Intel Mac, just restart while you hold Command (⌘) + R and keep pressing until you see the Apple logo.
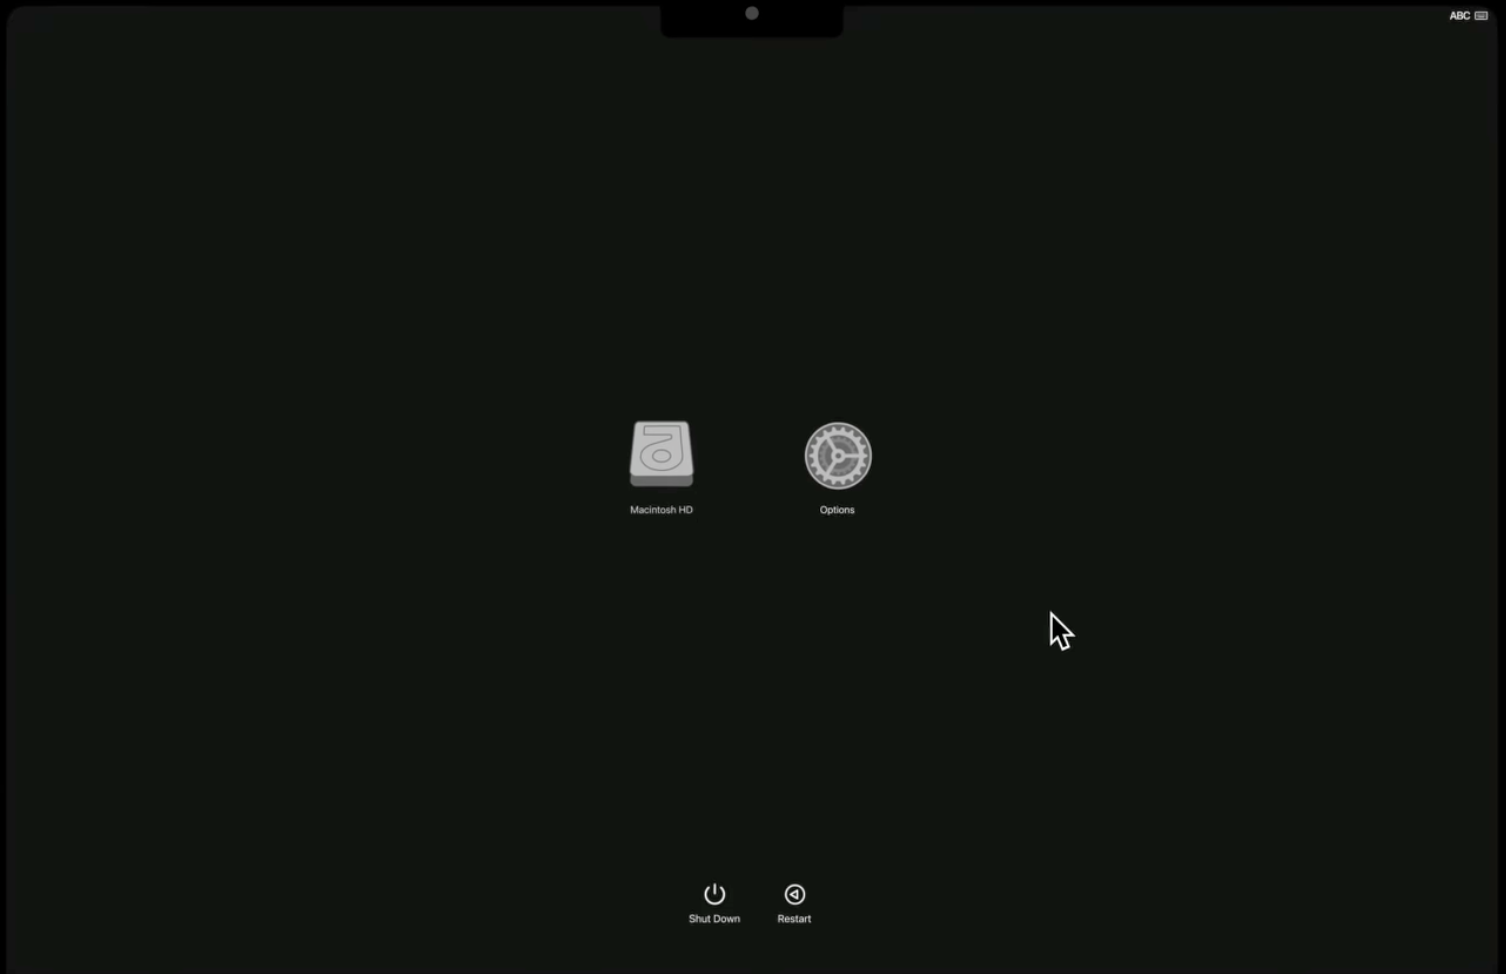
- For Apple Silicon Mac, shut the Mac down and hold that power button until you see the screen that shows “Loading startup options”. Click Options and then Continue here.
- In Recovery utilities, select Disk Utility and then just hit Continue.
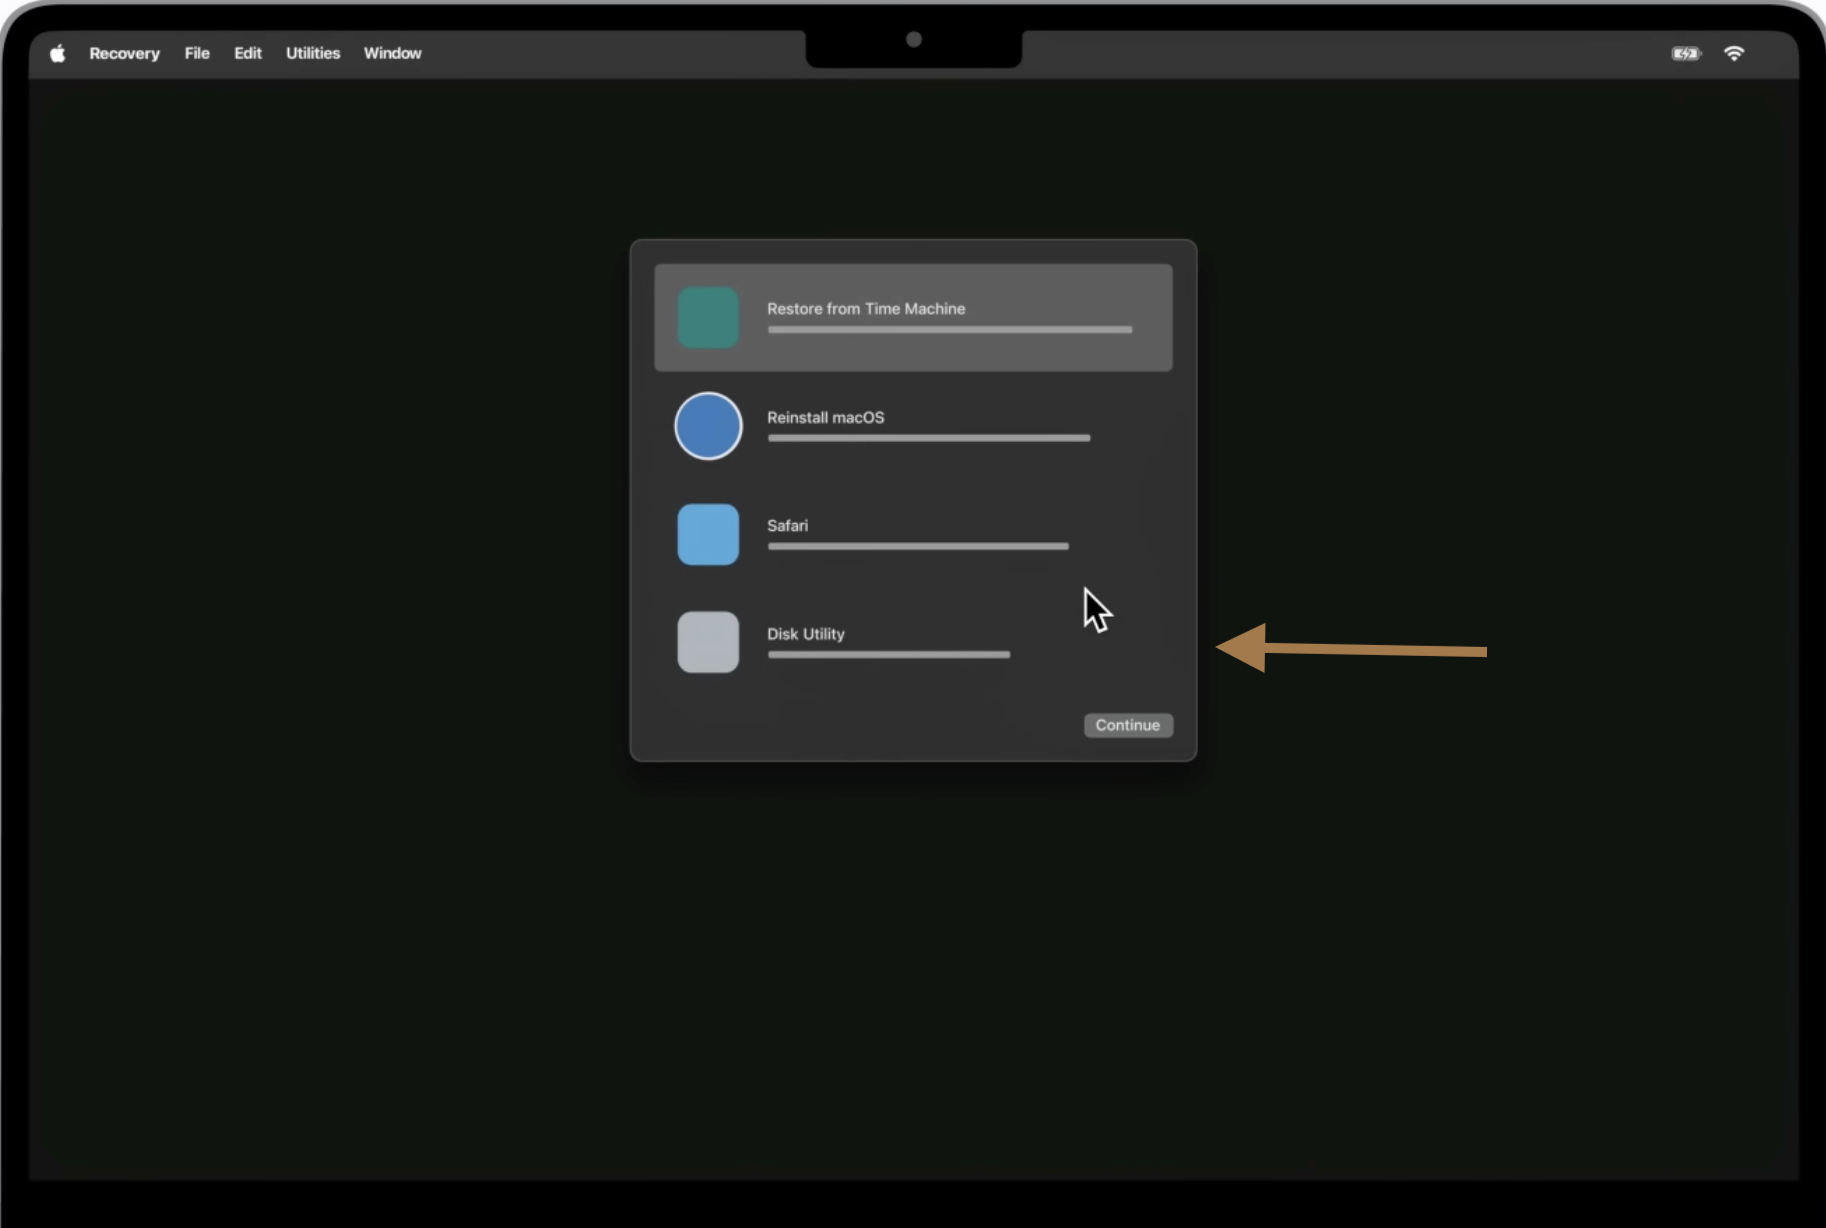
- In Disk Utility sidebar, start with that top-level drive and then click First Aid > Run. Allow it to unmount and check the disk.
- After it is finished, choose each of the other volumes, such as “Macintosh HD” or APFS containers under that disk and run First Aid on each one of them too.
- Click Done when you finish all those checks… then quit Disk Utility and restart normally.
In Recovery, macOS is not locking the volume, so First Aid can fix issues that were basically failing in normal mode. If errors are still there especially with the startup volume, make a note of any messages you see and proceed.
Suggested Read: macOS Recovery Mode and How to Use it
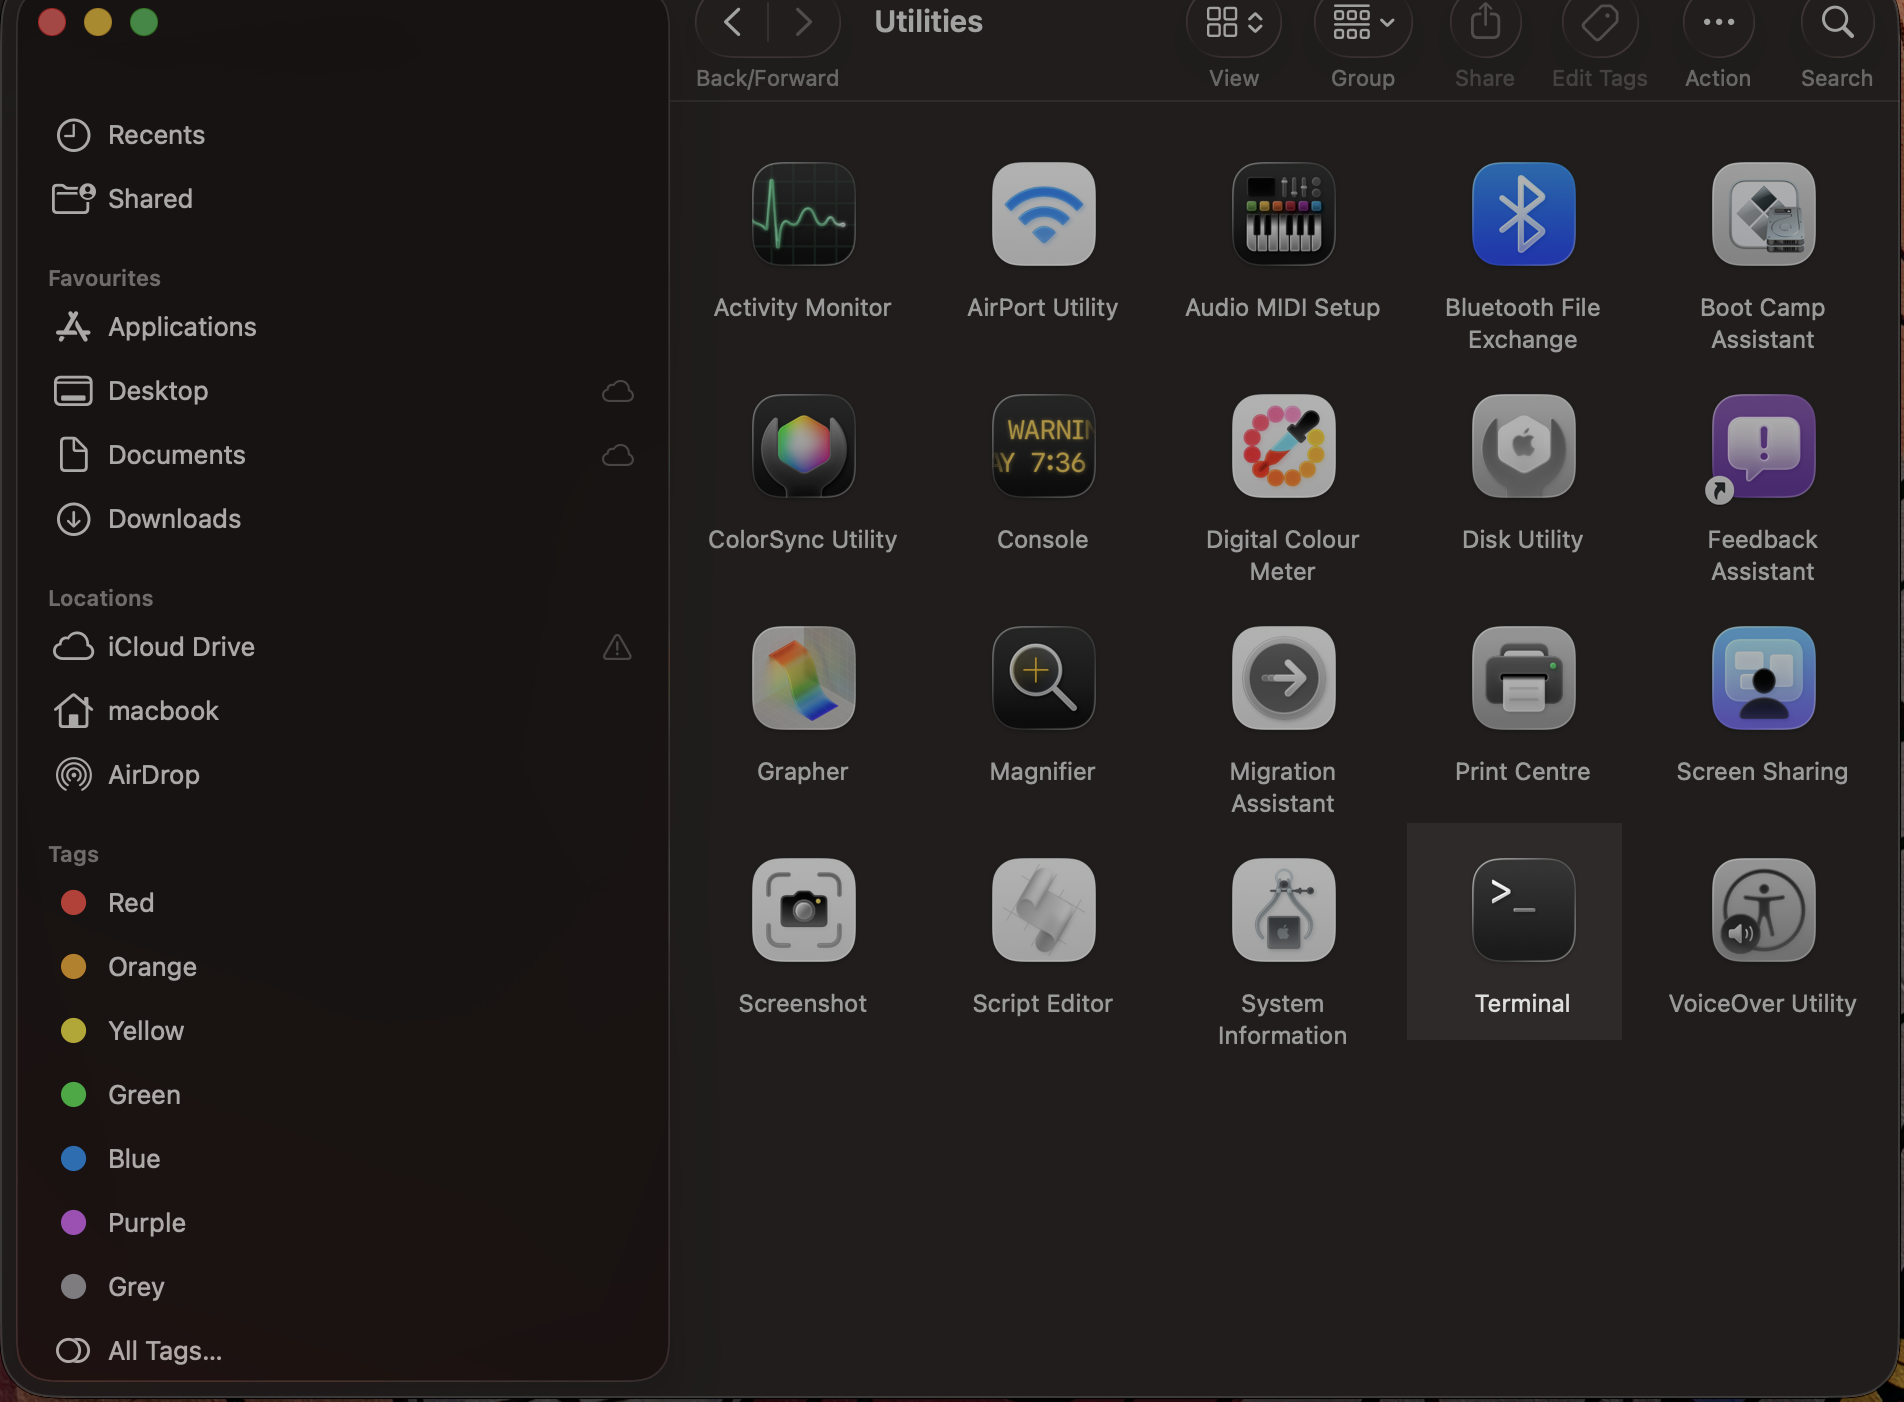
Method 3: Use Disk Utility or Terminal Commands
If that Disk Utility GUI still cannot do the job and still the macOS disk repair failed, it’s time for command-line tools. Follow the steps:
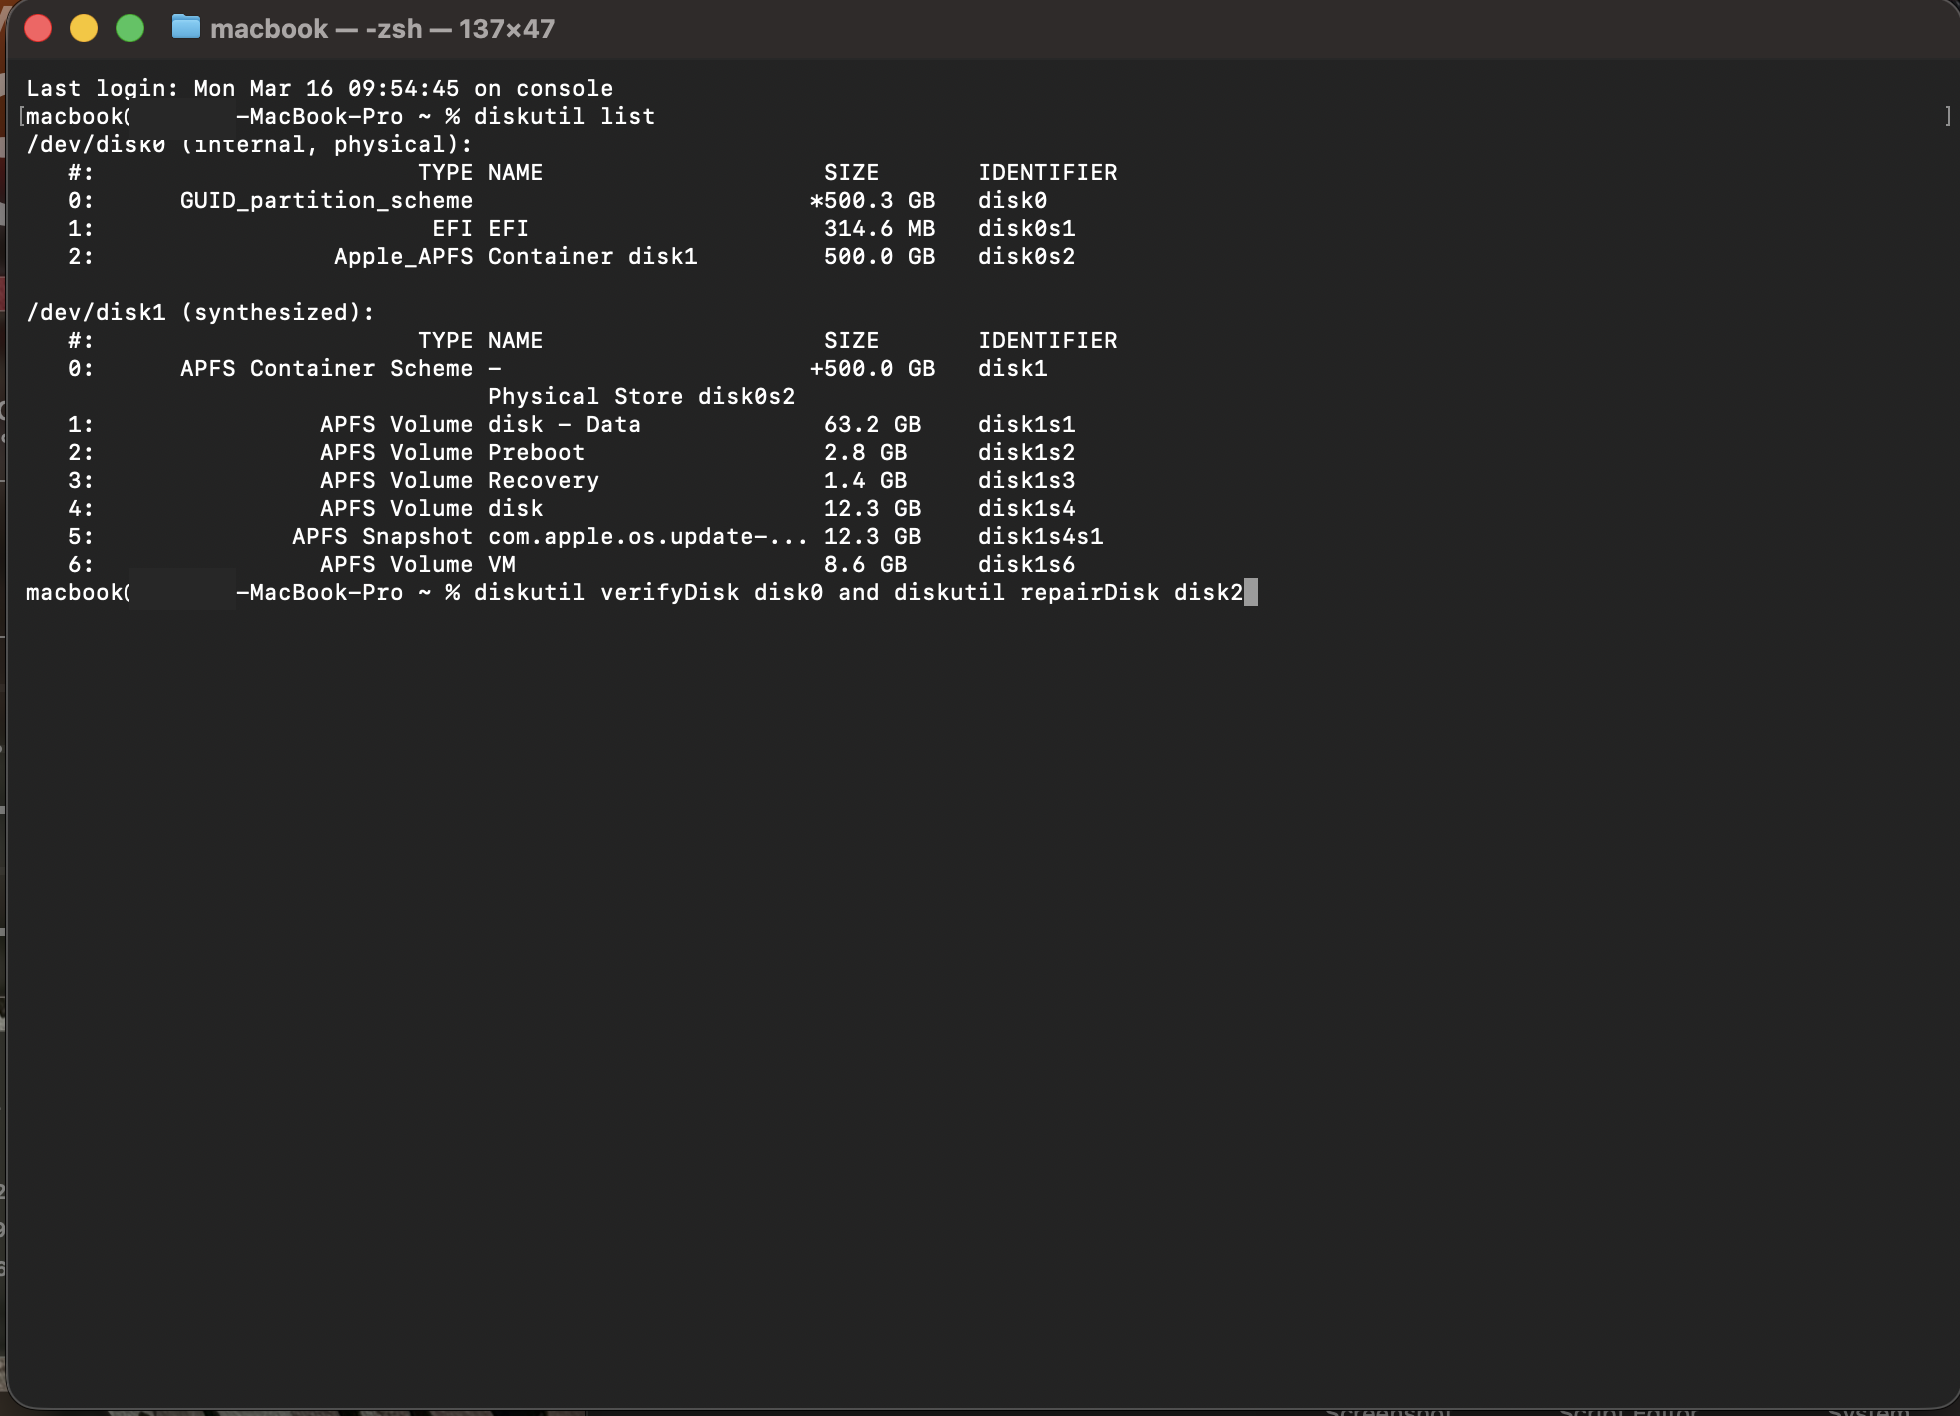
On Apple Silicon:
- Open Terminal by navigating to Applications > Utilities or just using Terminal in Recovery.
- Run diskutil list command so that you can identify your disk identifier (e.g. disk0). Now put:
diskutil verifyDisk disk0 and diskutil repairDisk disk0 for full disk.
or diskutil verifyVolume /dev/disk0s2 and diskutil repairVolume /dev/disk0s2 for individual volumes (just replace those identifiers as needed).
On Intel Macs
- You can just boot into Single-User Mode through a restart while holding Command+S and then at the console prompt, just run:
- This shall run the fsck, which is file system consistency check, on the startup volume. Keep running it until it says, “The volume (name) appears to be OK.”
After getting done, just type reboot to restart normally and run Disk Utility First Aid again to check and confirm. Using Terminal provides a lower-level way to repair drives and can resolve this.
Method 4: Check and Correct the Disk Format (Workaround)
Make sure the macOS’ drive file system is is finely working properly for macOS as First Aid can actually struggle on drives that are not formatted in Apple’s formats. Though it does not directly fix the issue, it is fine to check. To do it, select the disk or volume in Disk Utility and look at its Format in the info panel on the right.
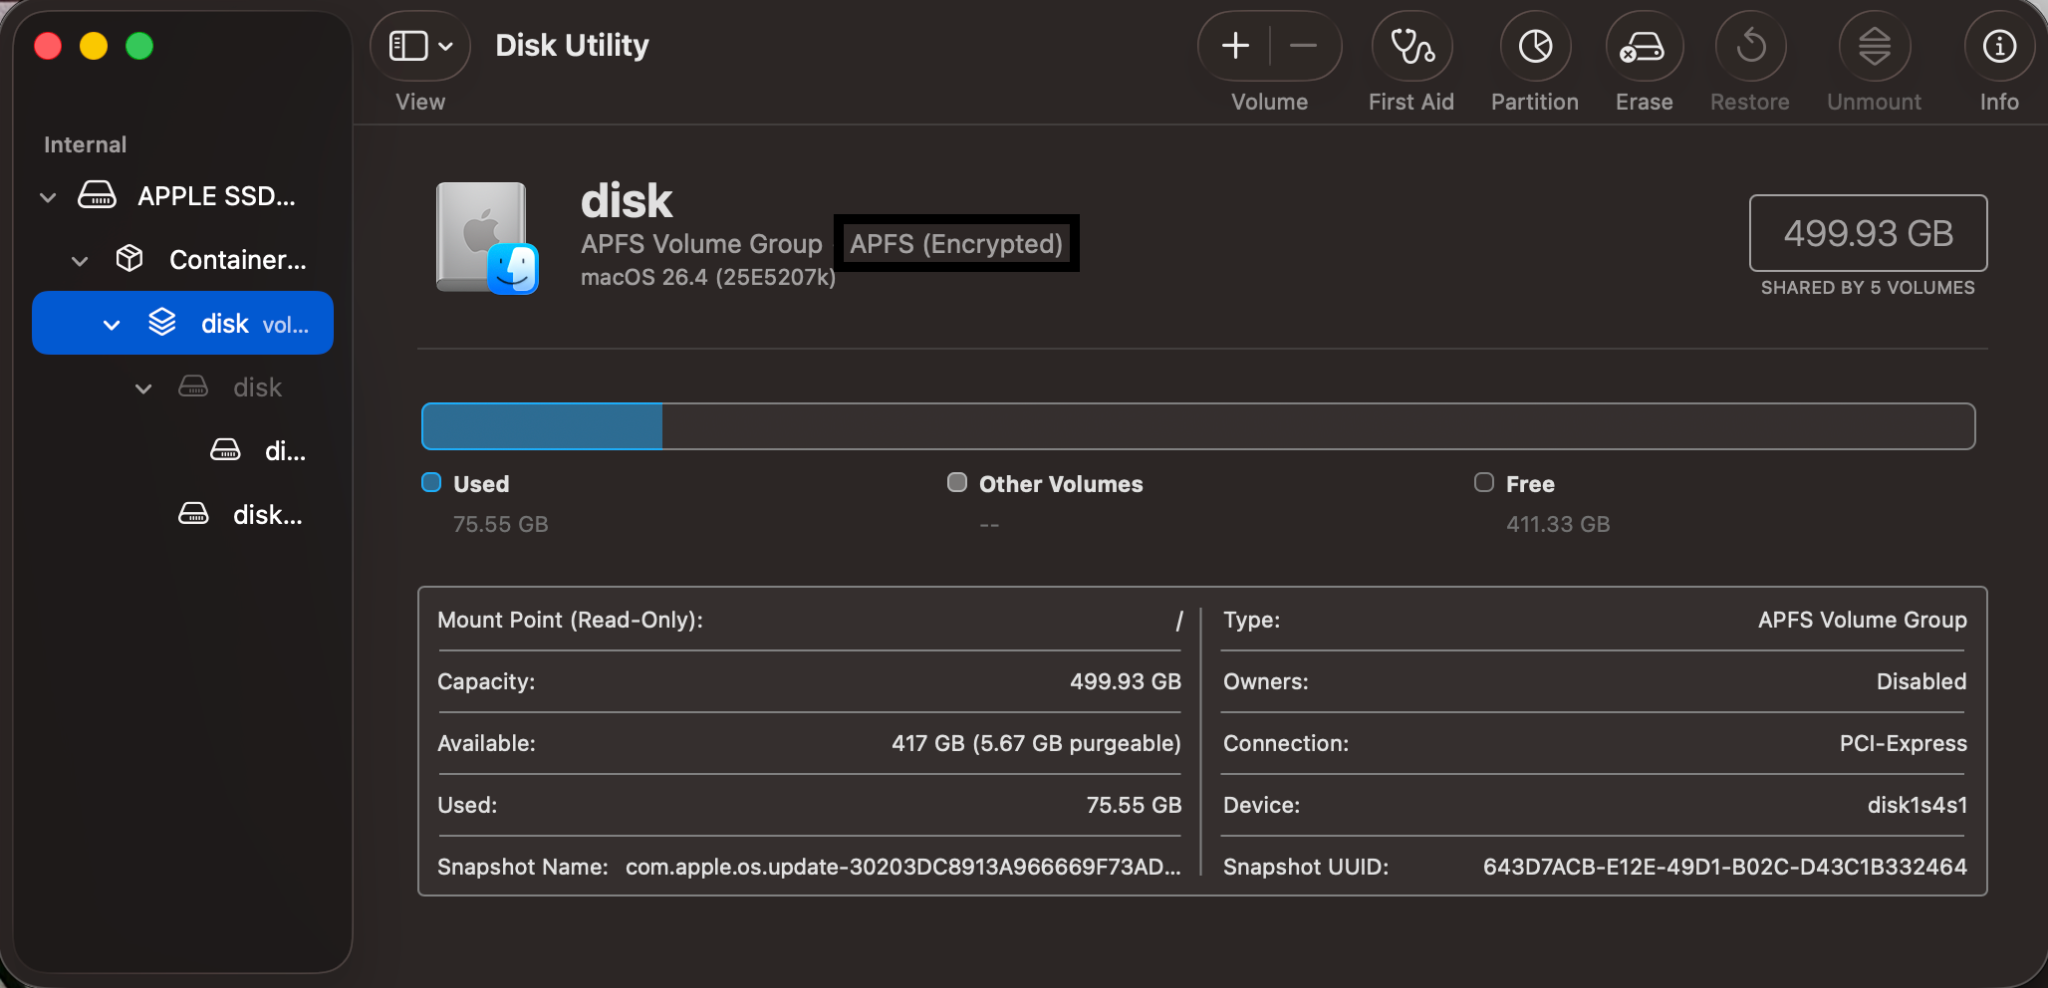
For Modern macOS it should be APFS (Apple File System) and older ones use Mac OS Extended (Journaled). If the drive is, let’s just say, formatted as exFAT or NTFS… then just back up your Mac data to another disk, erase the drive, and reformat it as APFS (for those SSDs, macOS 10.13+) or Mac OS Extended (for your older macOS or HDDs). Ensuring that your drive has a Mac friendly file system helps in avoiding those compatibility problems.
Method 5. Erase, Reformat the Disk, and Reinstall
If none of the above works, the disk’s file system is probably beyond repair. The most reliable fix is to erase the drive and reinstall macOS but only after you’ve backed up your data.
Warning: This step will permanently delete all your files on the disk. That is why we recommend that you should back your data up.
The steps are:
- Back up your data: Use the Time Machine or just manually copy those important files to an external drive.
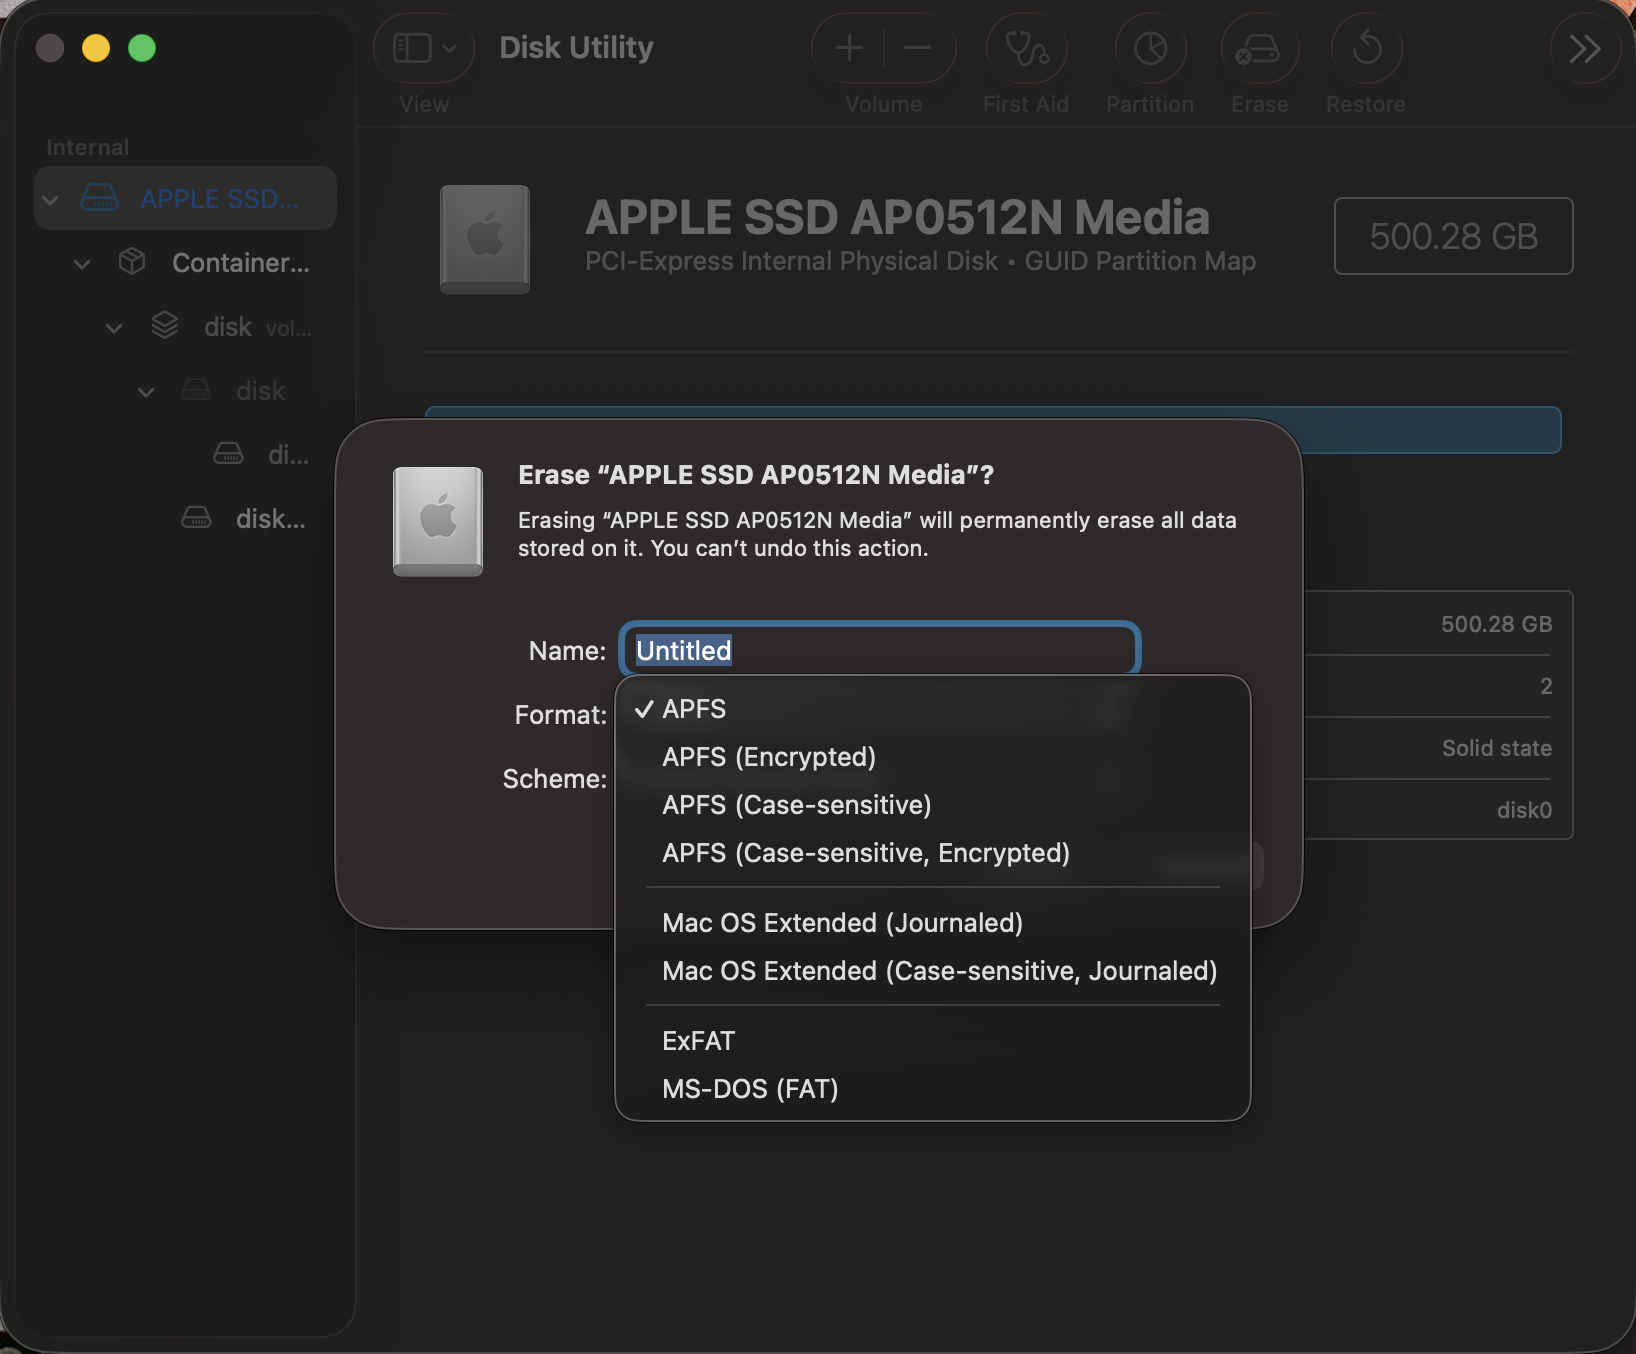
- Erase the disk: In Disk Utility (Recovery mode), choose your top-level disk first and click Erase.
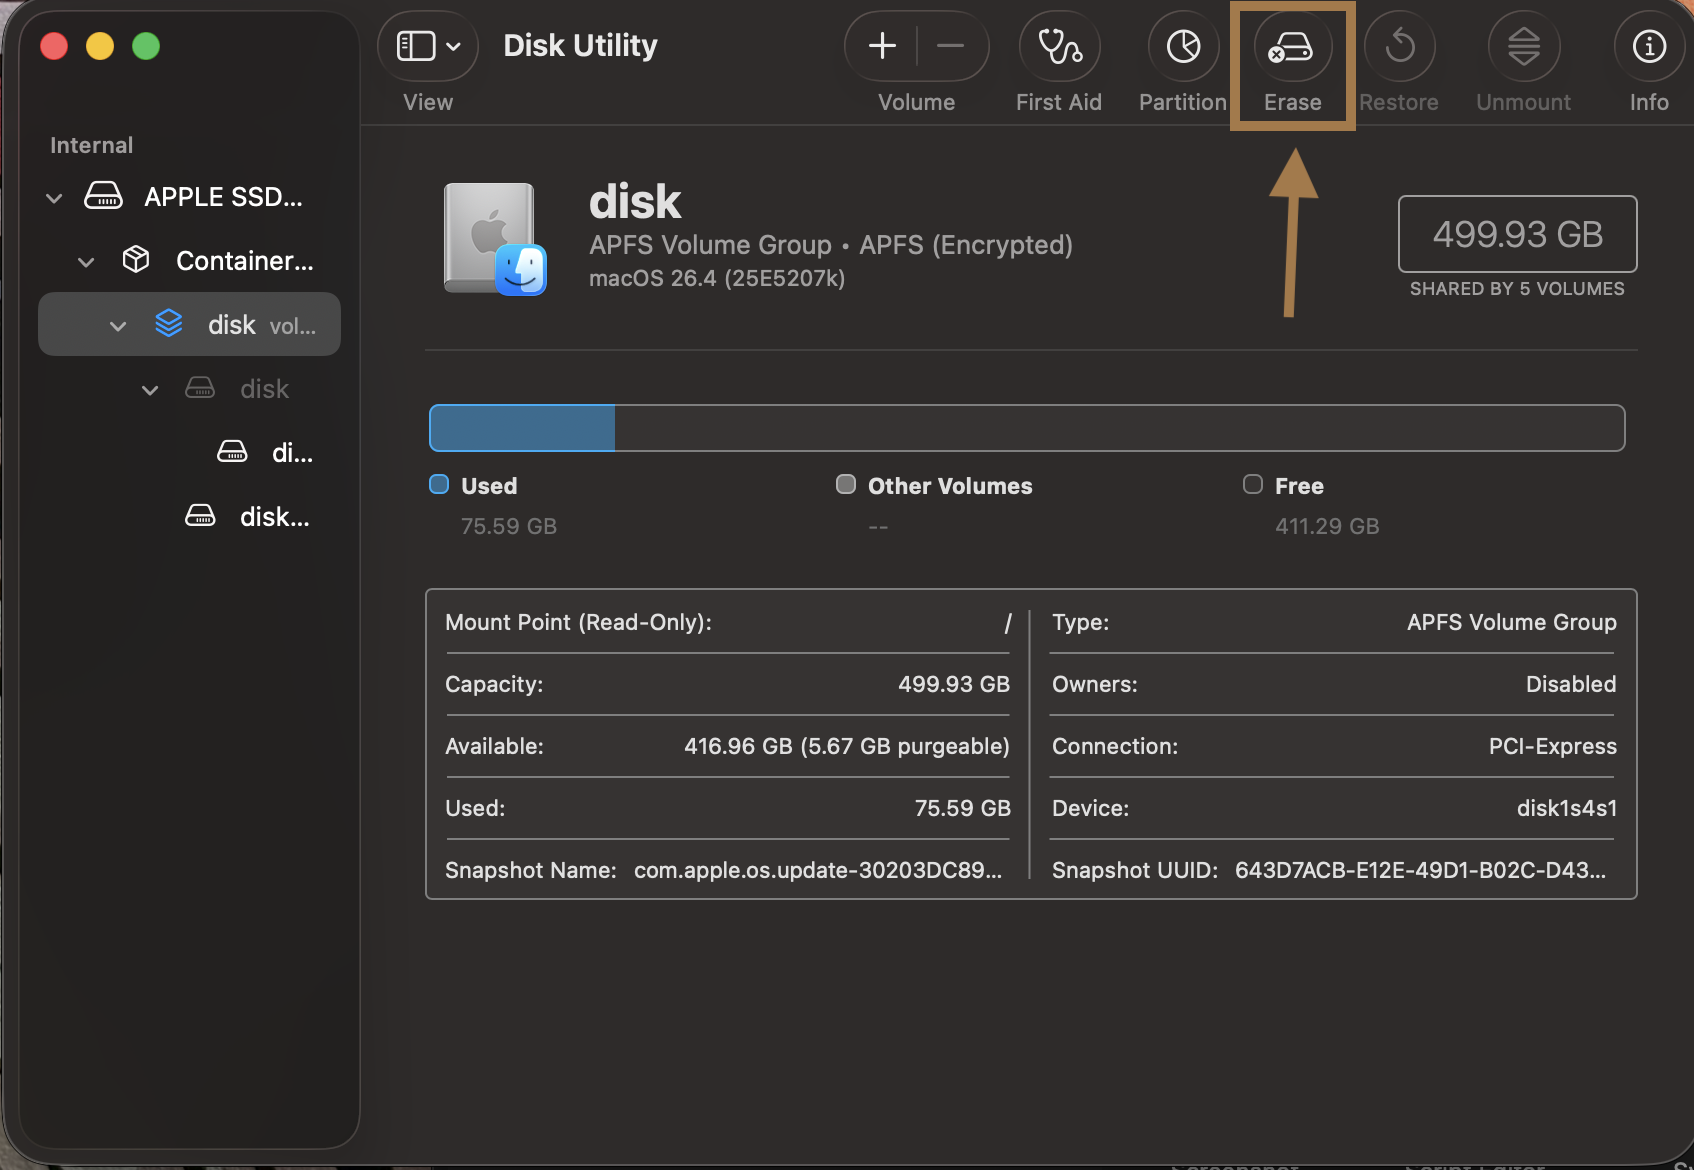
- Choose a format: Here you have to select APFS for SSDs and newer Macs or Mac OS Extended (Journaled) for older macOS and those spinning drives. Then just give this volume a name and erase to create a fresh and blank file system.
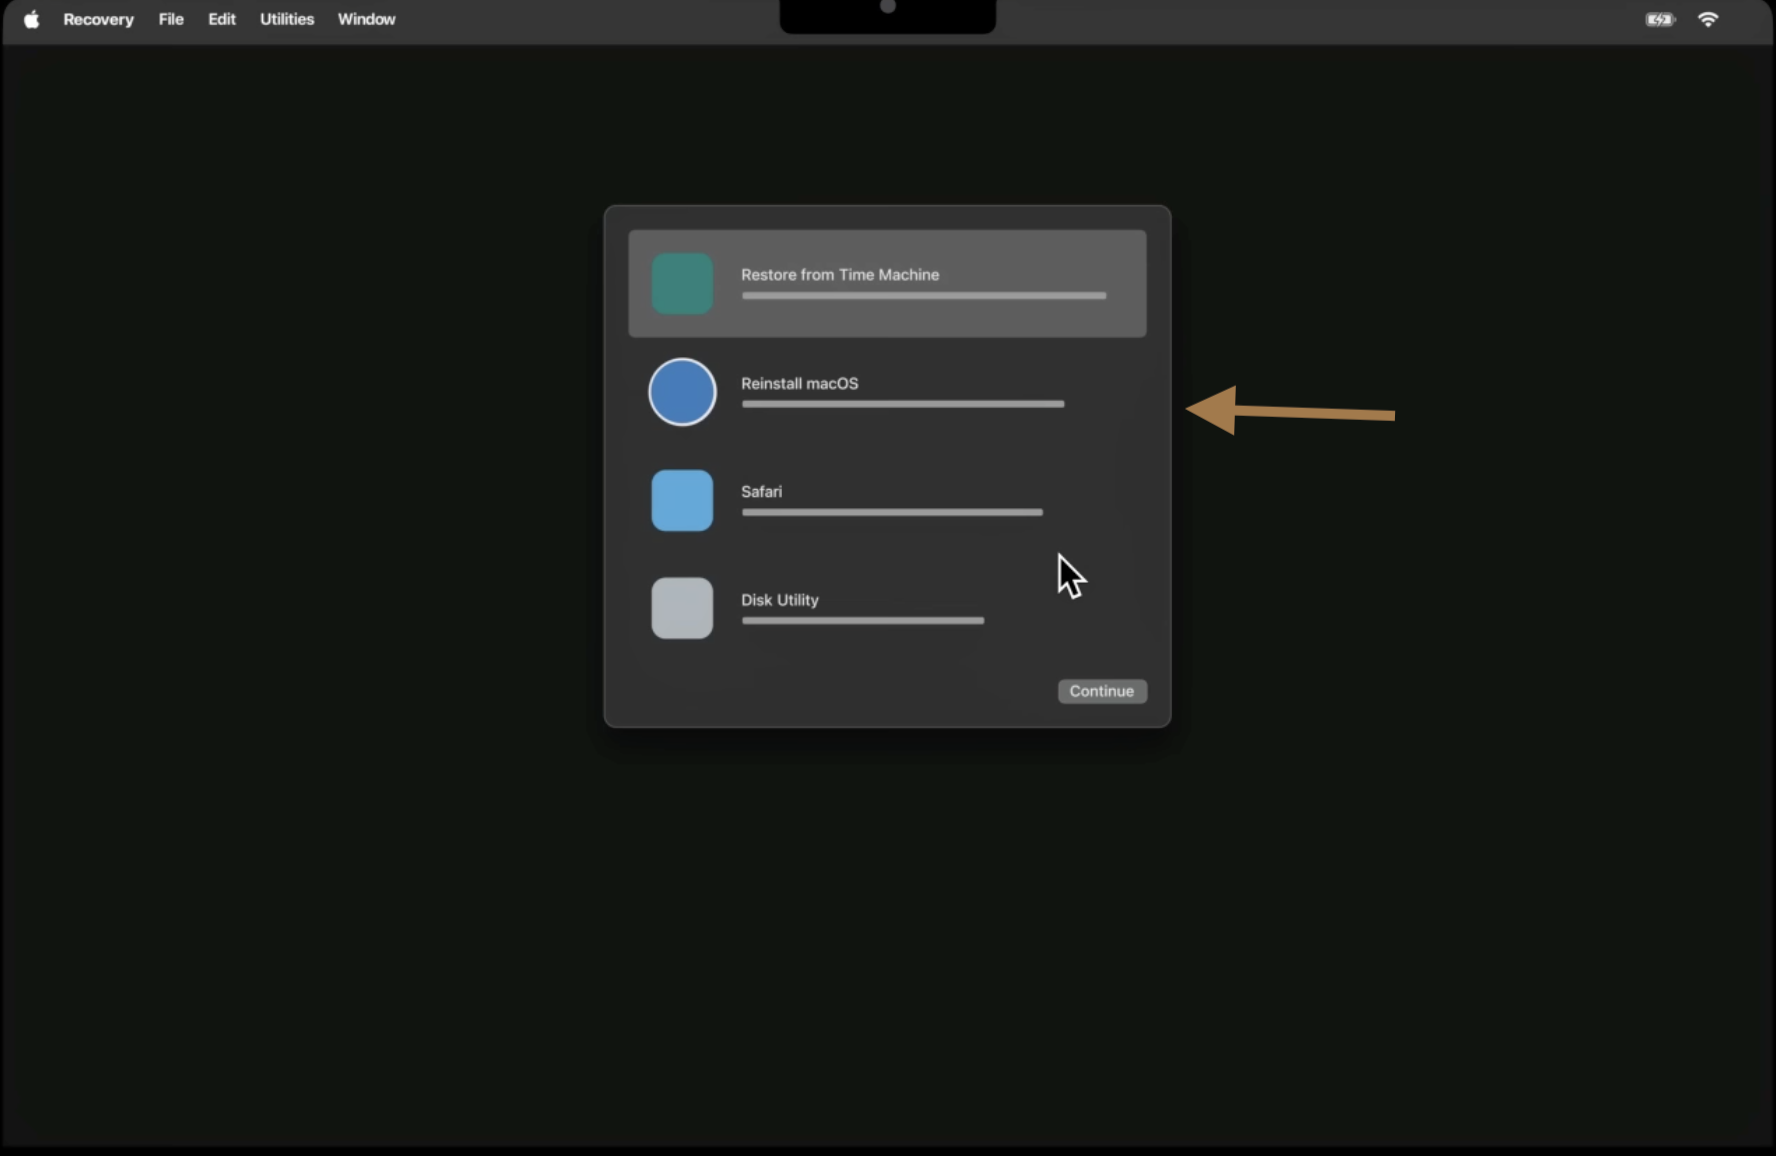
- Reinstall macOS: Go back into the main Recovery screen, choose Reinstall macOS and follow the prompts. This shall download and install a fresh copy of the OS in the newly erased disk.
- Restore your data: After this process, just copy your files from your backup or just restore from Time Machine if it was there.
This final method should fix your problem by building a new file system right from the scratch.
Recover Lost Files with Professional Software
After resolving this problem, if you find that some files that you backed up are missing, for example, if some documents or photos didn’t get restored or you just failed to back up your data, don’t worry. Your data can still be recovered. Stellar Data Recovery for Mac, a professional Mac data recovery software, can scan your disk and retrieve that lost data even after formatting. It works on crashed, reformatted, and even those non-booting Mac drives. Using it is straightforward… You select the drive to scan, let it find files that can be recovered and then restore the ones you need.
Causes of First Aid Failures
Disk Utility First Aid can fail for a number of underlying reasons. Common causes include:
- Severe file system corruption
- Drive hardware issues
- Unsupported or corrupted formats
- Malware or disk-busy processes
- Improper disconnection
- Corruption in APFS Container.
- SSD Wearing or Failure
In short, First Aid failures stem from either serious logical corruption or physical problems. After identifying the cause, apply the steps above: try repairing, and if needed, reformat and restore.
Precautionary Measures
To reduce the risk of disk errors and First Aid failures in the future, follow these best practices:
- Regular backups
- Use the right file system
- Safely eject drives
- Keep macOS updated
- Stable power
- Monitor disk health
- Limit heavy tasks
By taking these precautions, you can minimize the chances of encountering the dreaded First Aid failures. Regularly running First Aid (just for checkups) when things are normal can also catch issues early.
Conclusion
When First Aid in Disk Utility fails, it signals that there is a serious problem with your disk but with the right approach like we explained above you can usually fix the problem. Just always start with simple steps like restart, repeating First Aid and only then move on to Recovery Mode and command-line repair, if needed. If these methods fail, you can go ahead and erase your disk and then reinstalling macOS shall rebuild your disk’s file system. For any remaining missing files, a professional Mac data recovery tool can scan the drive and retrieve lost data. By following these steps and precautions that we provided above, you shall maximize your chances of fixing the disk and basically keep your data safe.


For this, you can just simply use a reliable Mac data recovery tool like Stellar Data Recovery for Mac. It shall recover those deleted data from your corrupted or reformatted drives. It supports recovering from non-booting Macs and even Time Machine backups.

Pallavi is a literature graduate turned content strategist, specializing in data recovery. She creates insightful, user-friendly content to help people rescue their data from hard drives, SSDs, memory cards, and more. When she’s not decoding tech for everyday users, she’s curled up with a book - or secretly planning her next adventure.
 6 min read