

Stellar Email Forensic comes with a comprehensive case management system that makes it easy to create and manage multiple cases. Follow these steps to create a new case in Stellar Email Forensic tool:
1. Run Stellar Email Forensic.
The New Case window will open [See Image 1].
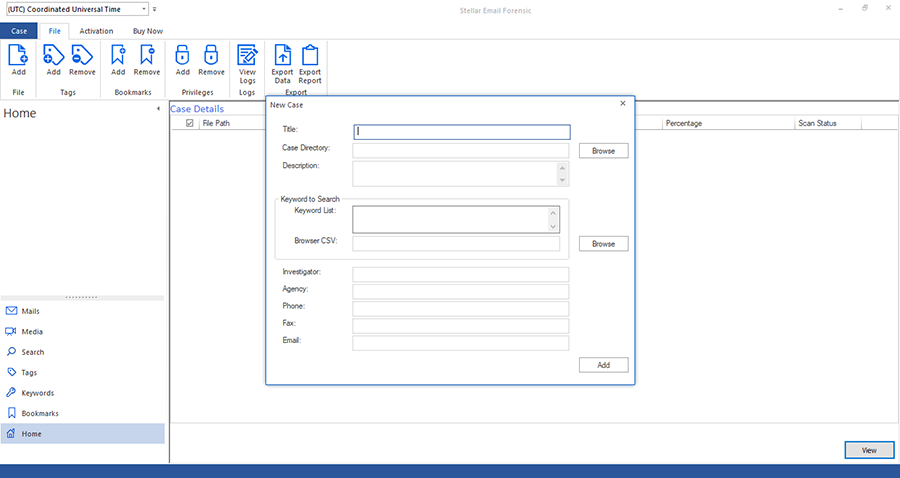
Image 1: Stellar Email Forensic New Case Window
Note: If you had already created a new case in the application, then a dialog box will appear with two options: Add Case and Open Case. Click Add Case to create a new case.
2. Enter details of the new case in New Case window.
The New Case window has the following fields:
-
- Title: Enter the name of the case in this field.
- Case Directory: Click the Browse button next to the Case Directory text box to select the location where you want to save the case files.
- Description: Enter a brief description of the case in this field.
- Keyword to Search:
- Keyword List: Enter the keyword(s) you want to include in your search in this field. You can enter multiple lines of text to include multiple keywords.
- Browser CSV: Click the Browse button next to the Browse CSV text box and select a CSV file that contains the keywords you want to search from the location on your system.
- Investigator: Enter the Investigator’s name in this field.
- Agency: Enter the name of investigator’s agency in this field.
- Phone: Enter the investigator’s contact number in this field.
- Fax: Enter the investigator’s fax details in this field.
- Email: Enter the investigator’s e-mail address in this field.
Note: The Title and Case Directory fields are mandatory to fill. The remaining fields are optional.
3. Click Add button which will display the Add File window [See Image 2]. Select the file-type and file location to add the file you want to examine.
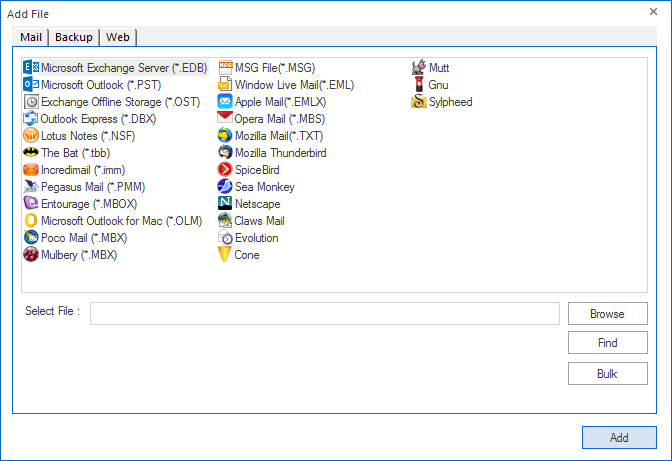
Image 2: Add File Window


