Stellar Converter for EDB exports mailboxes directly from Exchange Database files (EDB) to Live Exchange or Office 365. The software offers ‘Advance Filter’ option to exclude redundant or unwanted data before exporting the mailbox data.
Here are the steps to use Advance Filter while exporting mailboxes from EDB to Live Exchange or Office 365.
- Export mailbox to Live Exchange with Advance Filter option
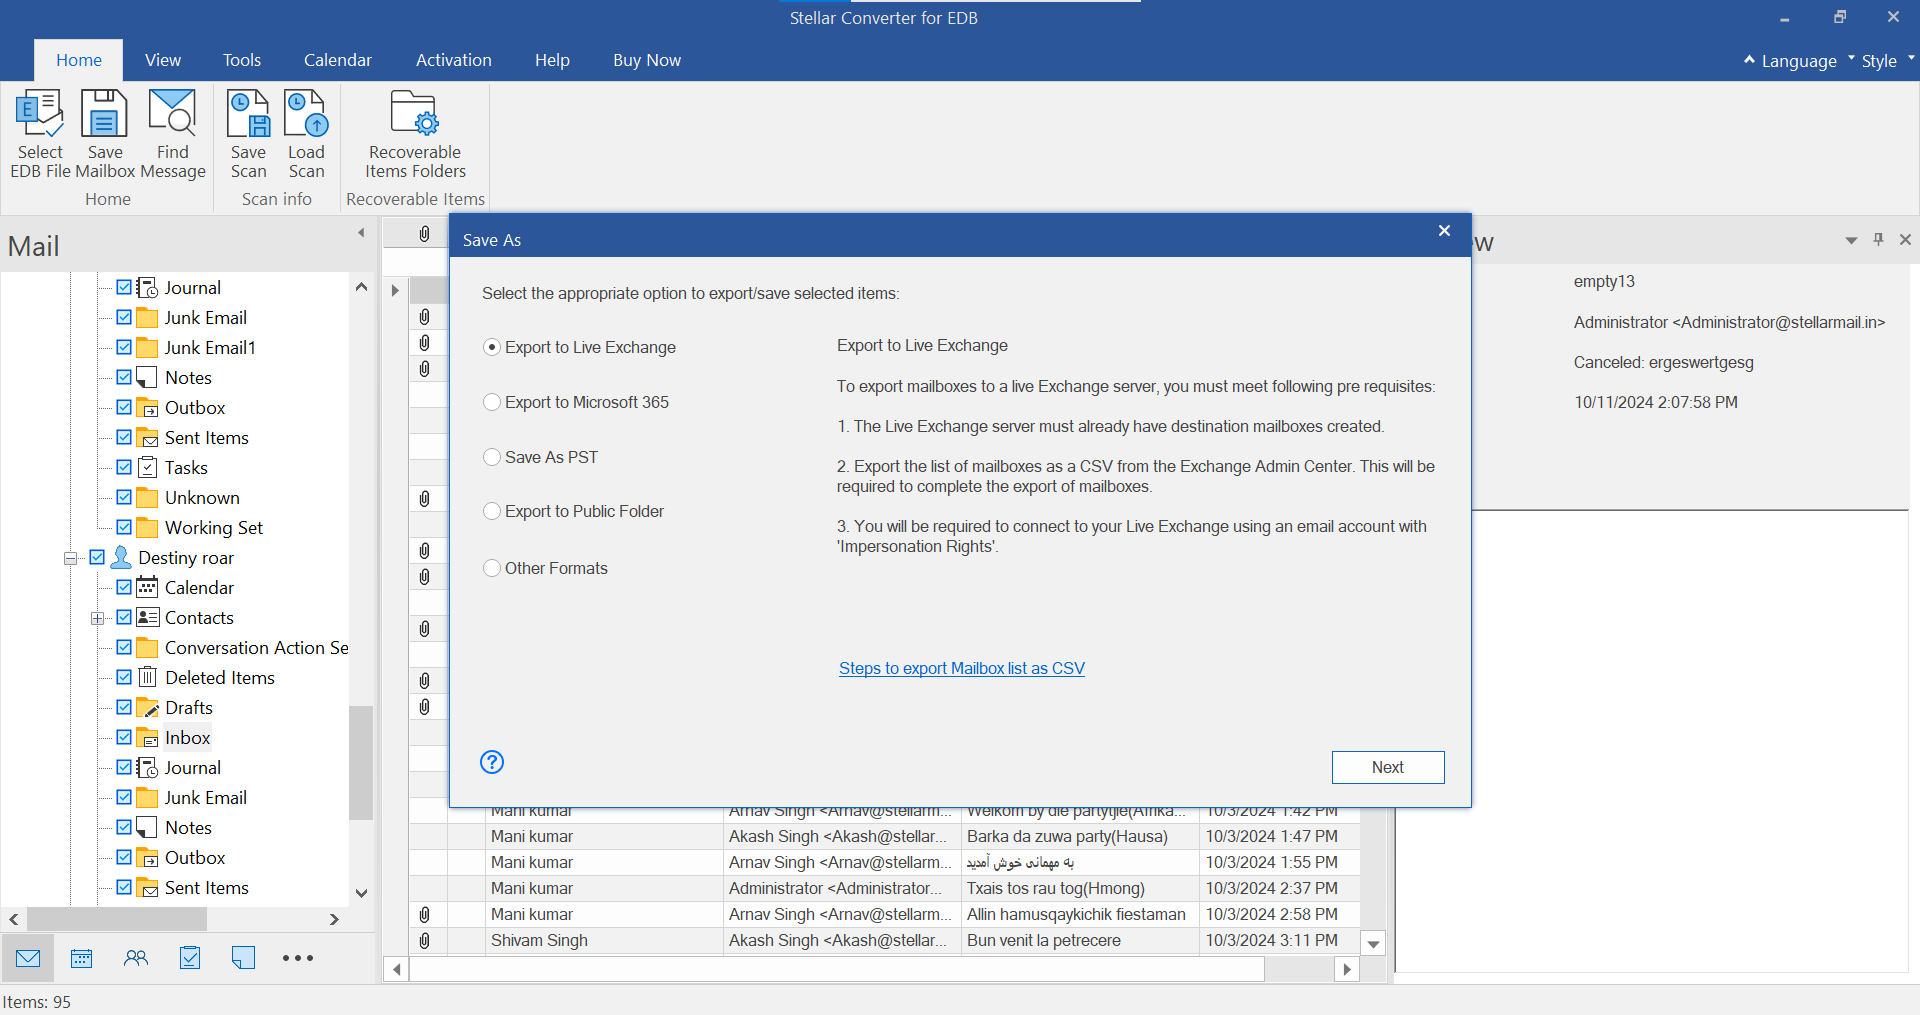
- Once the software has scanned the EDB file mailbox-data, click Save, and select the option Live Exchange as shown in the screen below:
- In the Enter Login Credentials dialog box, fill in:
- Server Name: Enter the name of the Exchange Server.
- Admin Email ID: Enter the administrator email id for the Exchange Server.
- Password: Enter the password of the administrator login id of the Exchange Server.
- Server Version: Select the Exchange Server version from the dropdown ribbon.
- Click Ok and the Map Mailbox screen will appear. Select the checkbox for mailboxes to Apply Filter.
- Click the Advance button to filter the scanned results. Apply Filter screen will appear.
- On the Apply Filter screen:
- Select the checkbox for Junk Mails and Deleted Mails to exclude them
- Select the Date Range and select Exclude or Include from drop down menu to exclude or include mails for the selected date range
- Specify the email addresses to exclude the data from the selected email addresses.
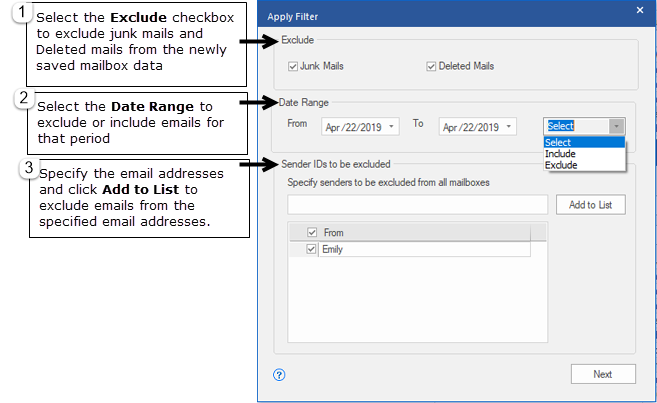
- Click Next to apply the changes and export the data to Live Exchange server.
- Once the software has scanned the EDB file mailbox-data, click Save, and select the option Live Exchange as shown in the screen below:
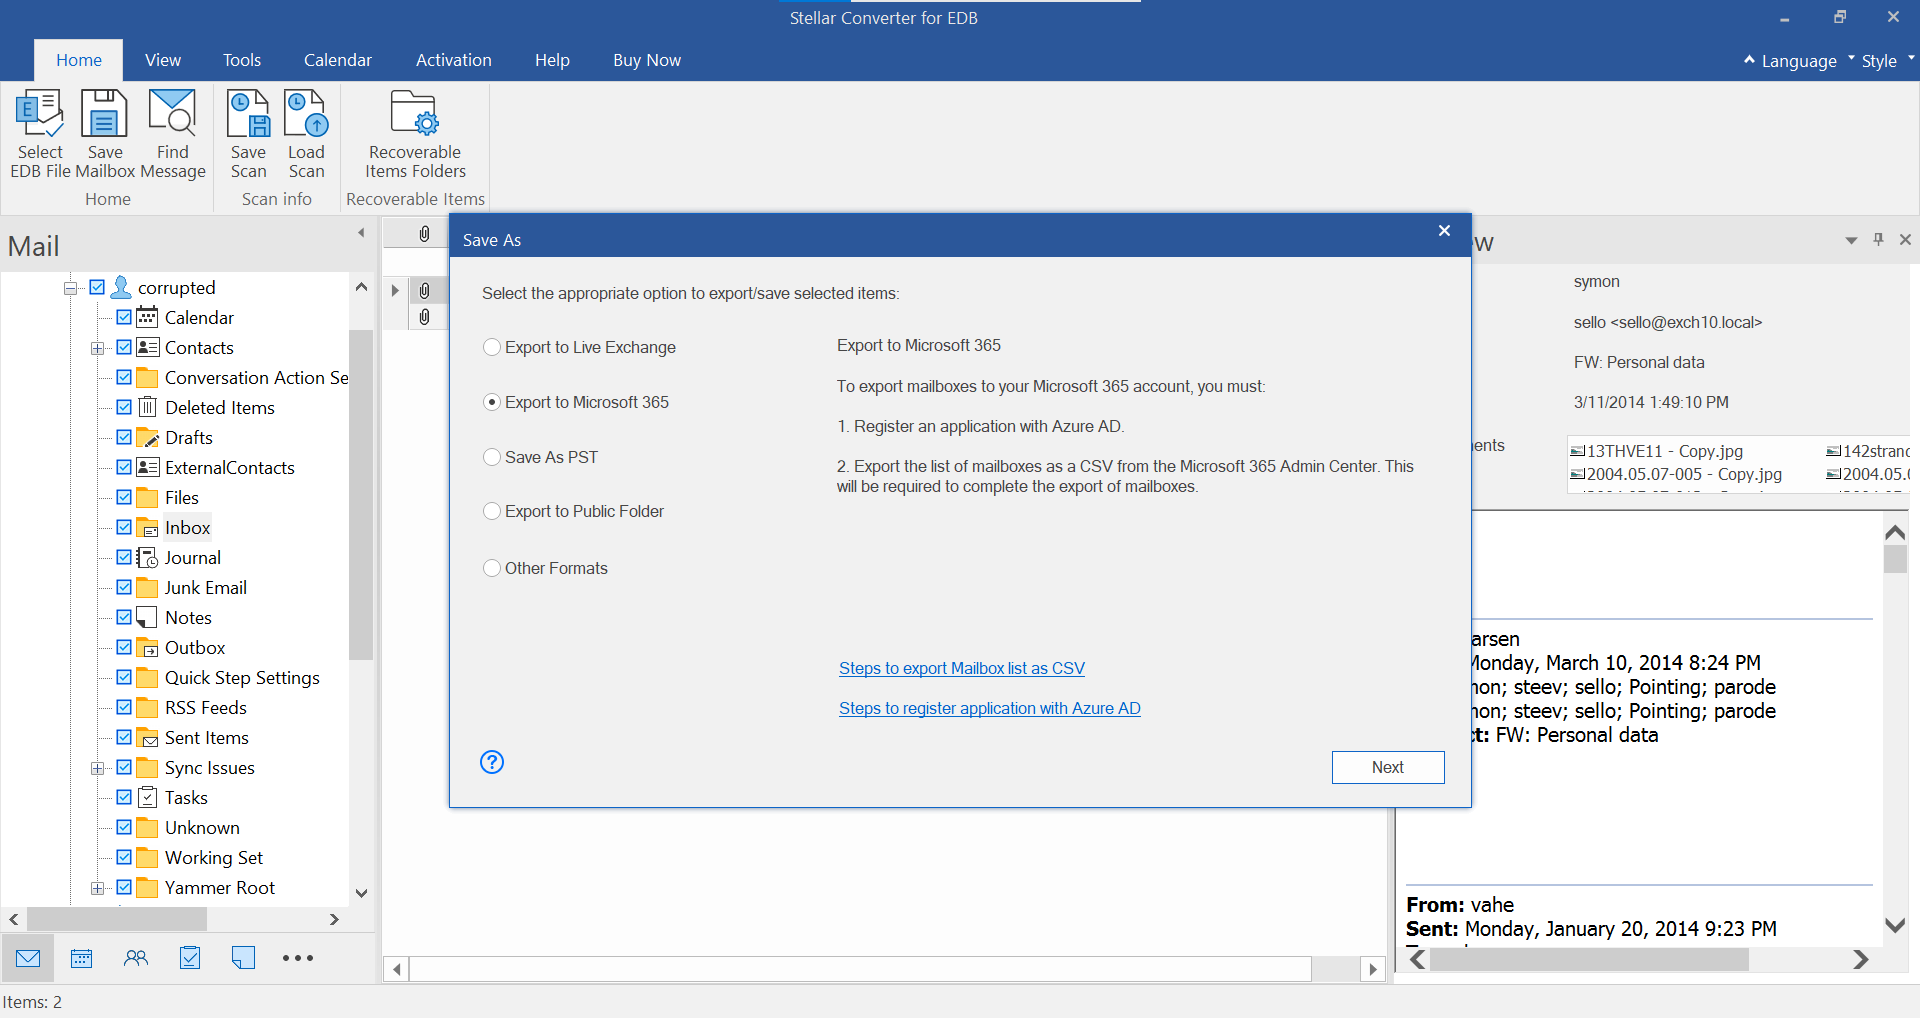
- Export mailbox to Office 365 with Advance Filter option
- Select the checkbox for Office 365
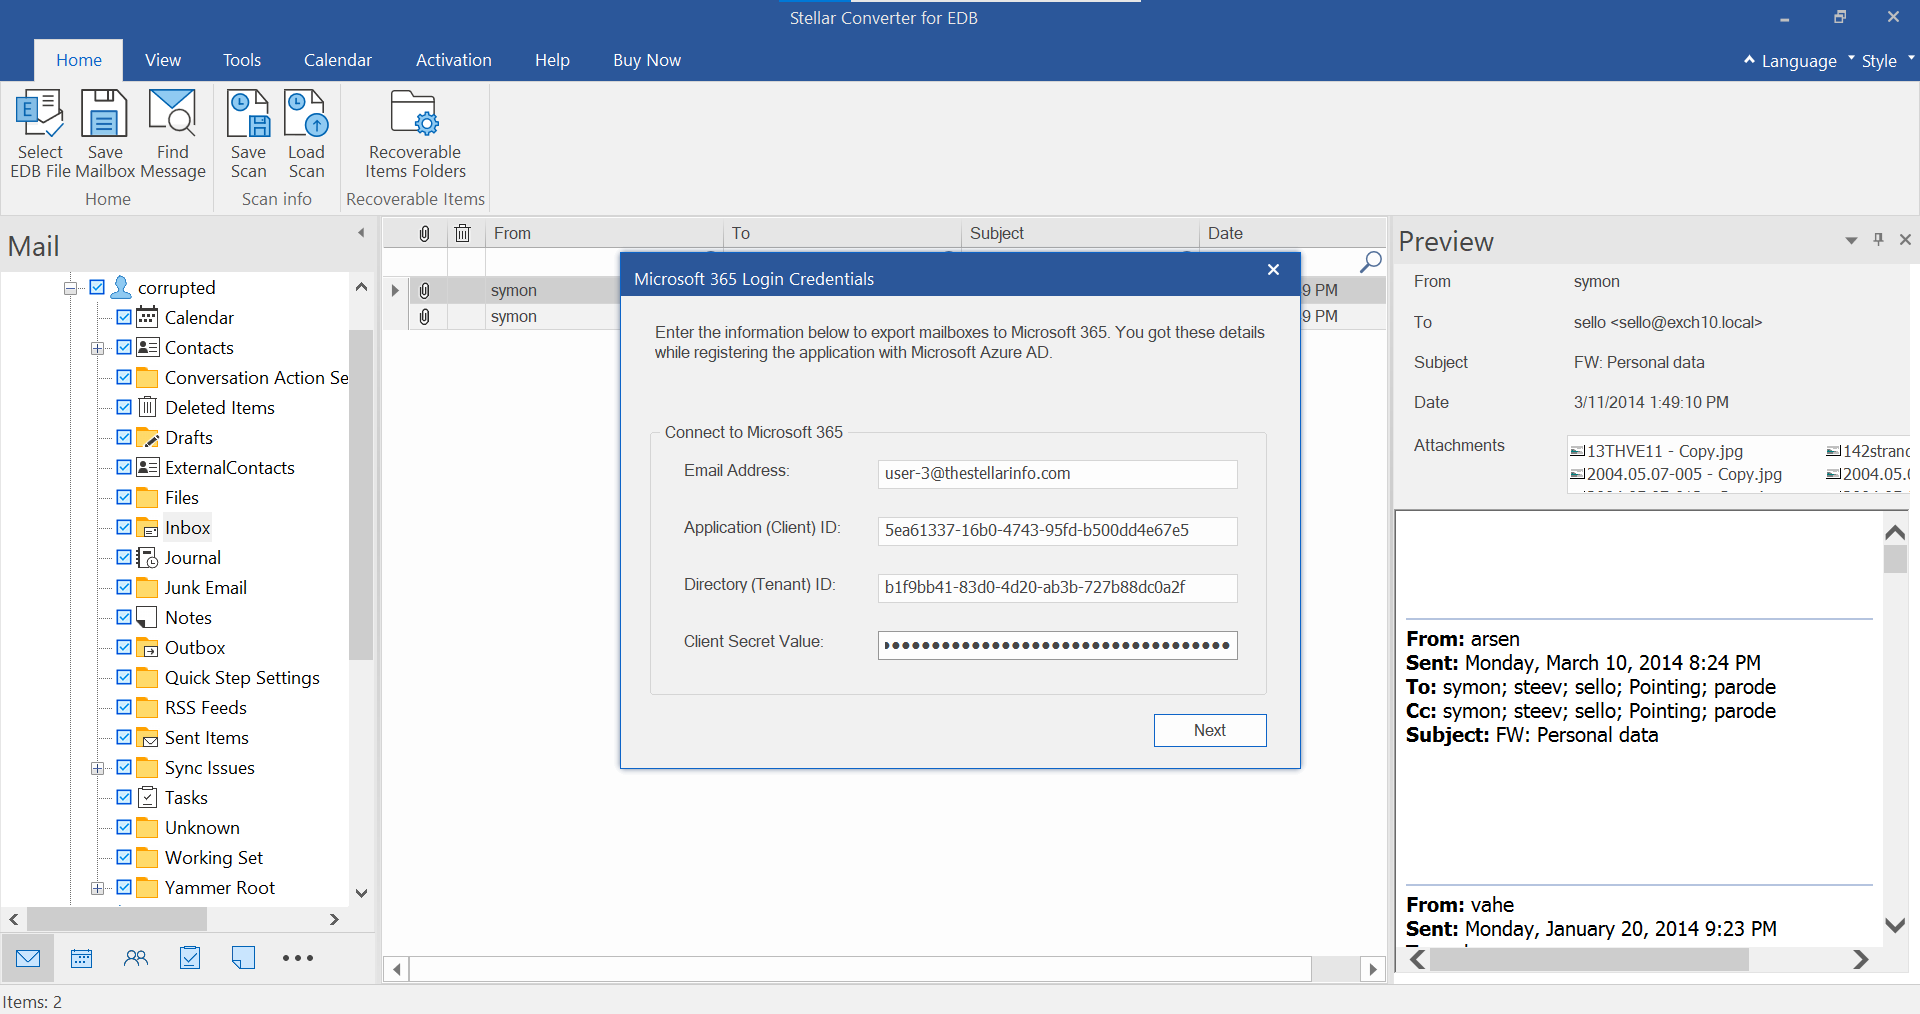
- Once you have selected the checkbox for Office 365, the Enter Login Credentials dialog box will appear. Select the Profile Name & click OK.
- The Map Mailbox screen will appear. Select the checkbox for the mailbox to export and click Export button.
- Apply Filter screen will appear.
- Select the checkbox for Junk Mails and Deleted Mails to exclude them
- Select the Date Range and select Exclude or Include from drop down menu to exclude or include mails for the selected date range
- Specify the email addresses to exclude the data from the selected email addresses.
- Click Next to apply the changes and export filtered mailbox data to specified Office 365.
- Select the checkbox for Office 365
Note: You can also use the Apply Filter option to save filtered data in PST, MSG, EML or RTF format.