Stellar Converter for EDB converts Exchange database (EDB) files and exports the mailboxes directly to Microsoft 365.
The steps to export data from the EDB file to Microsoft 365 using Stellar Converter for EDB software are given below.
Before You Begin
- Configure the Microsoft Microsoft 365 user account in MS Outlook on your system
- Install Outlook 2021, 2019, 2016, 2013, 2010 or earlier versions to save mailbox data in Microsoft 365
- Download and install Stellar Converter for EDB software.

To convert EDB file, follow these steps:
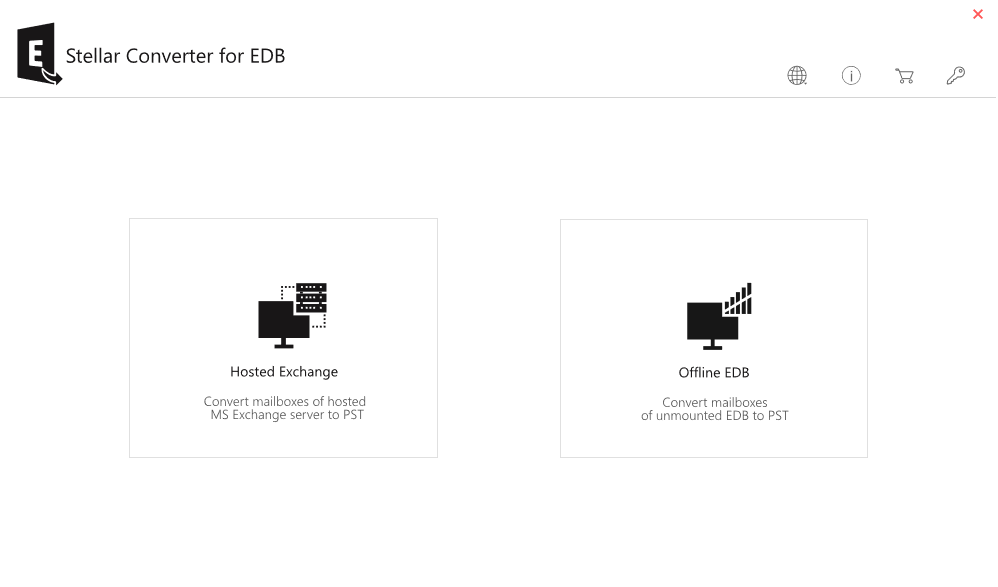
- Open EDB to PST Converter software. From the Home screen, click Offline EDB.
- The Select File window opens. Click Browse if the EDB file location is known. The software displays the selected EDB file in the Selected File Path.
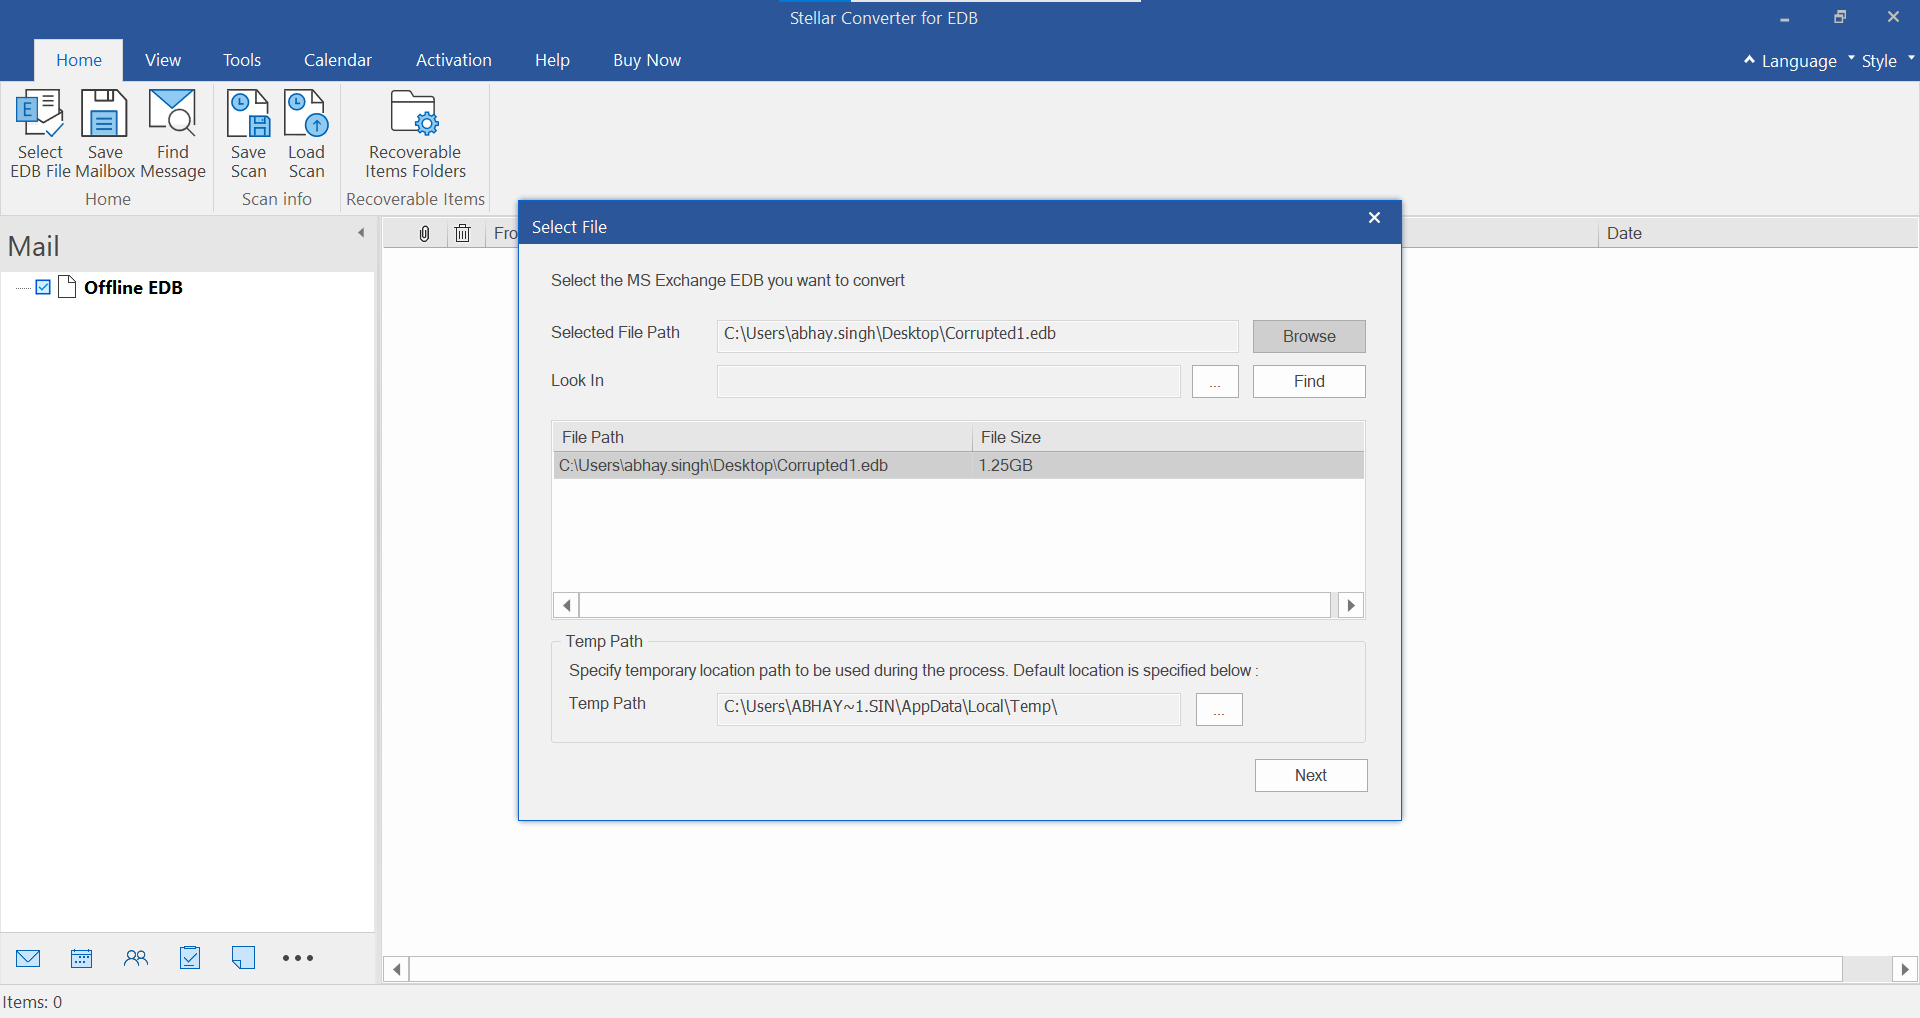
- Alternatively, click Find (if the location is not known) to locate the Exchange database file in a drive, folder, or subfolder.
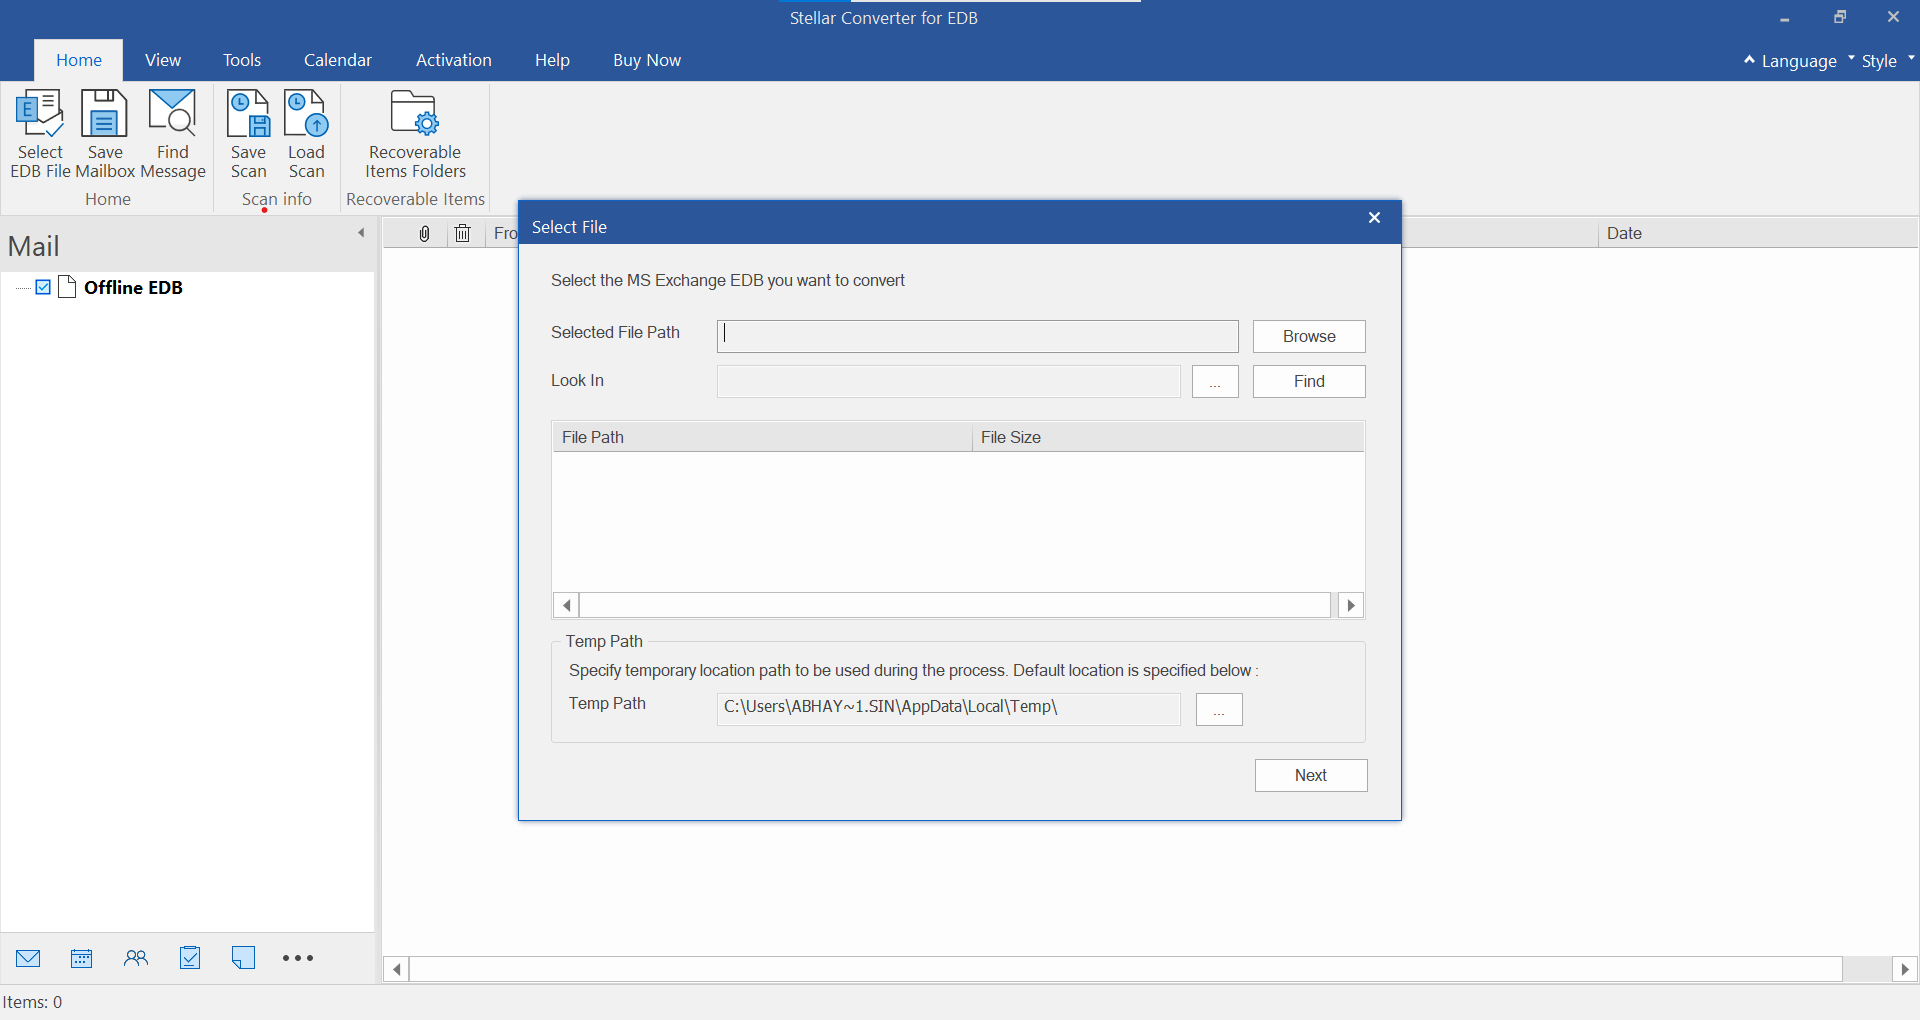
- Click Next to initiate the EDB file conversion process.
- The software scans the EDB file and displays a preview of the converted file. The preview option helps users to verify mailbox content before exporting to Microsoft 365.

To export multiple mailboxes to Office 365, follow these steps:
- Select the mailboxes from the left pane of the preview window that you want to export to Microsoft 365 and then click Save from the Home menu.
- From Save As dialog box, click the Microsoft 365 icon and click Next.
- A pop-up window to Enter Login Credentials will appear. Choose the configured Profile Name Then click OK.
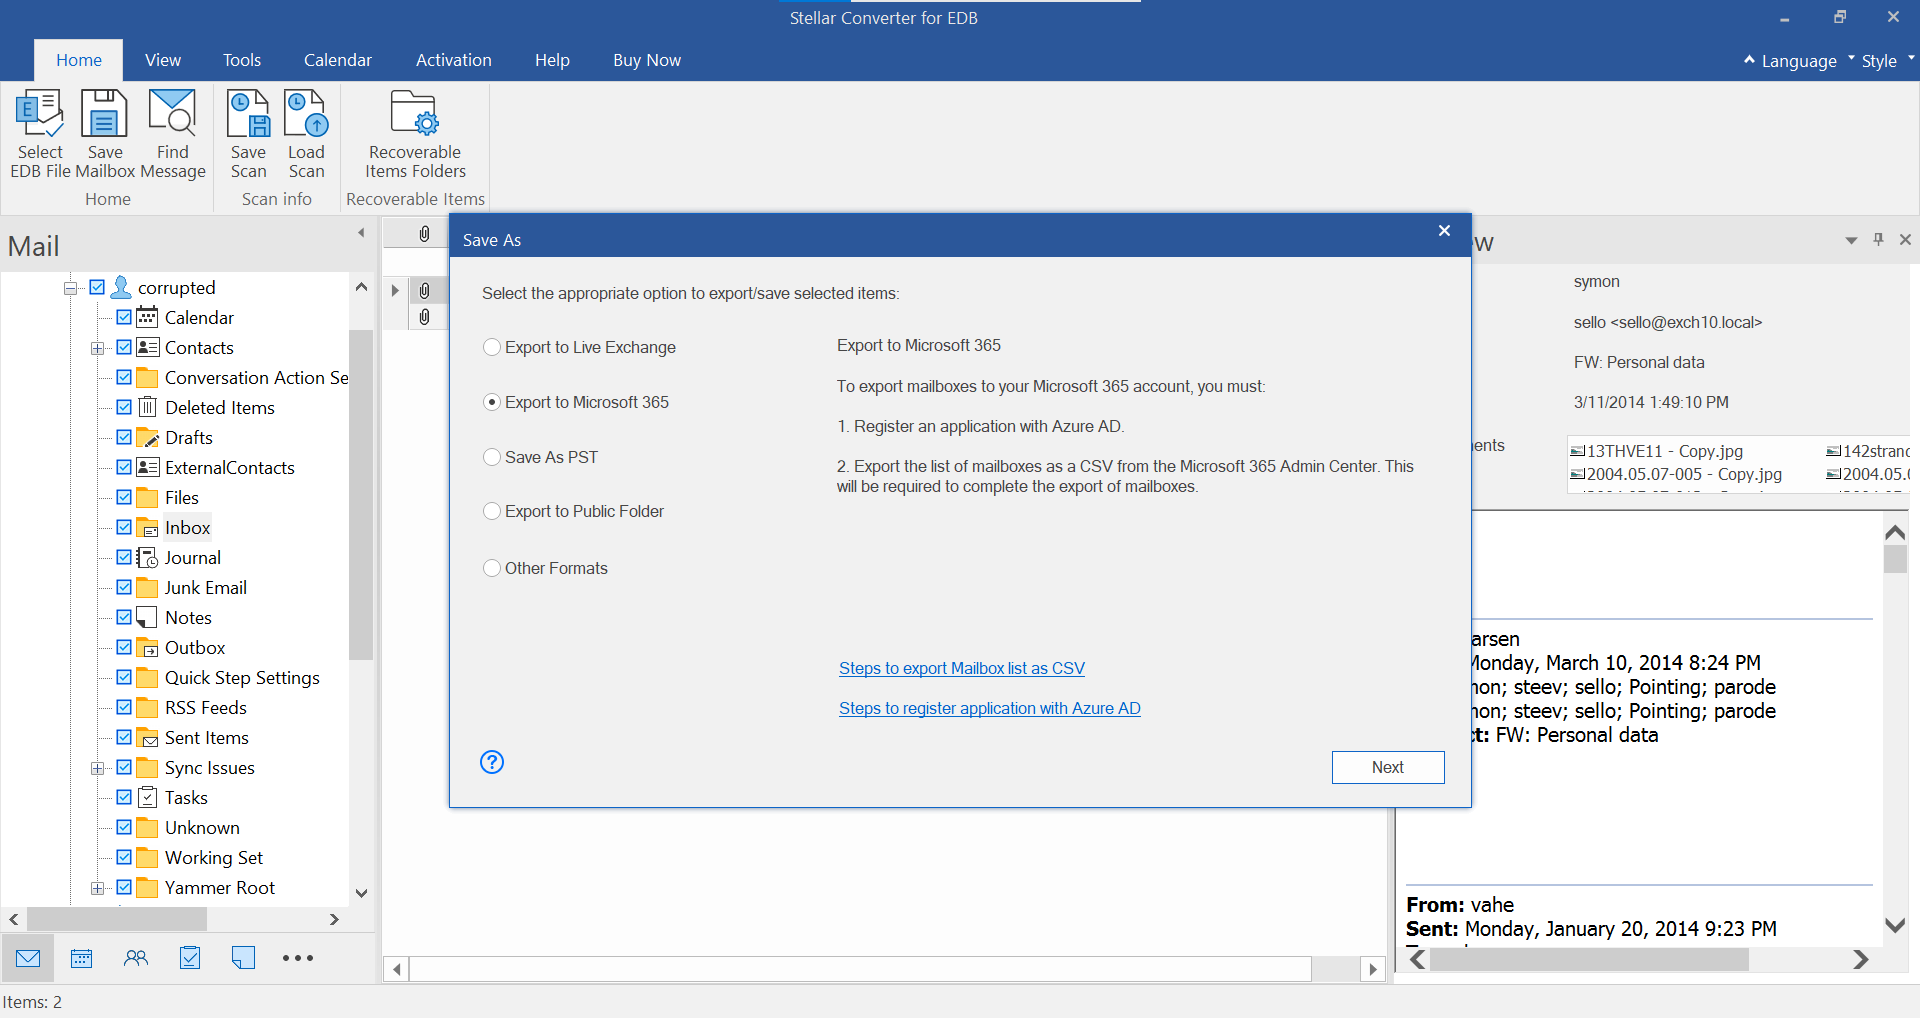
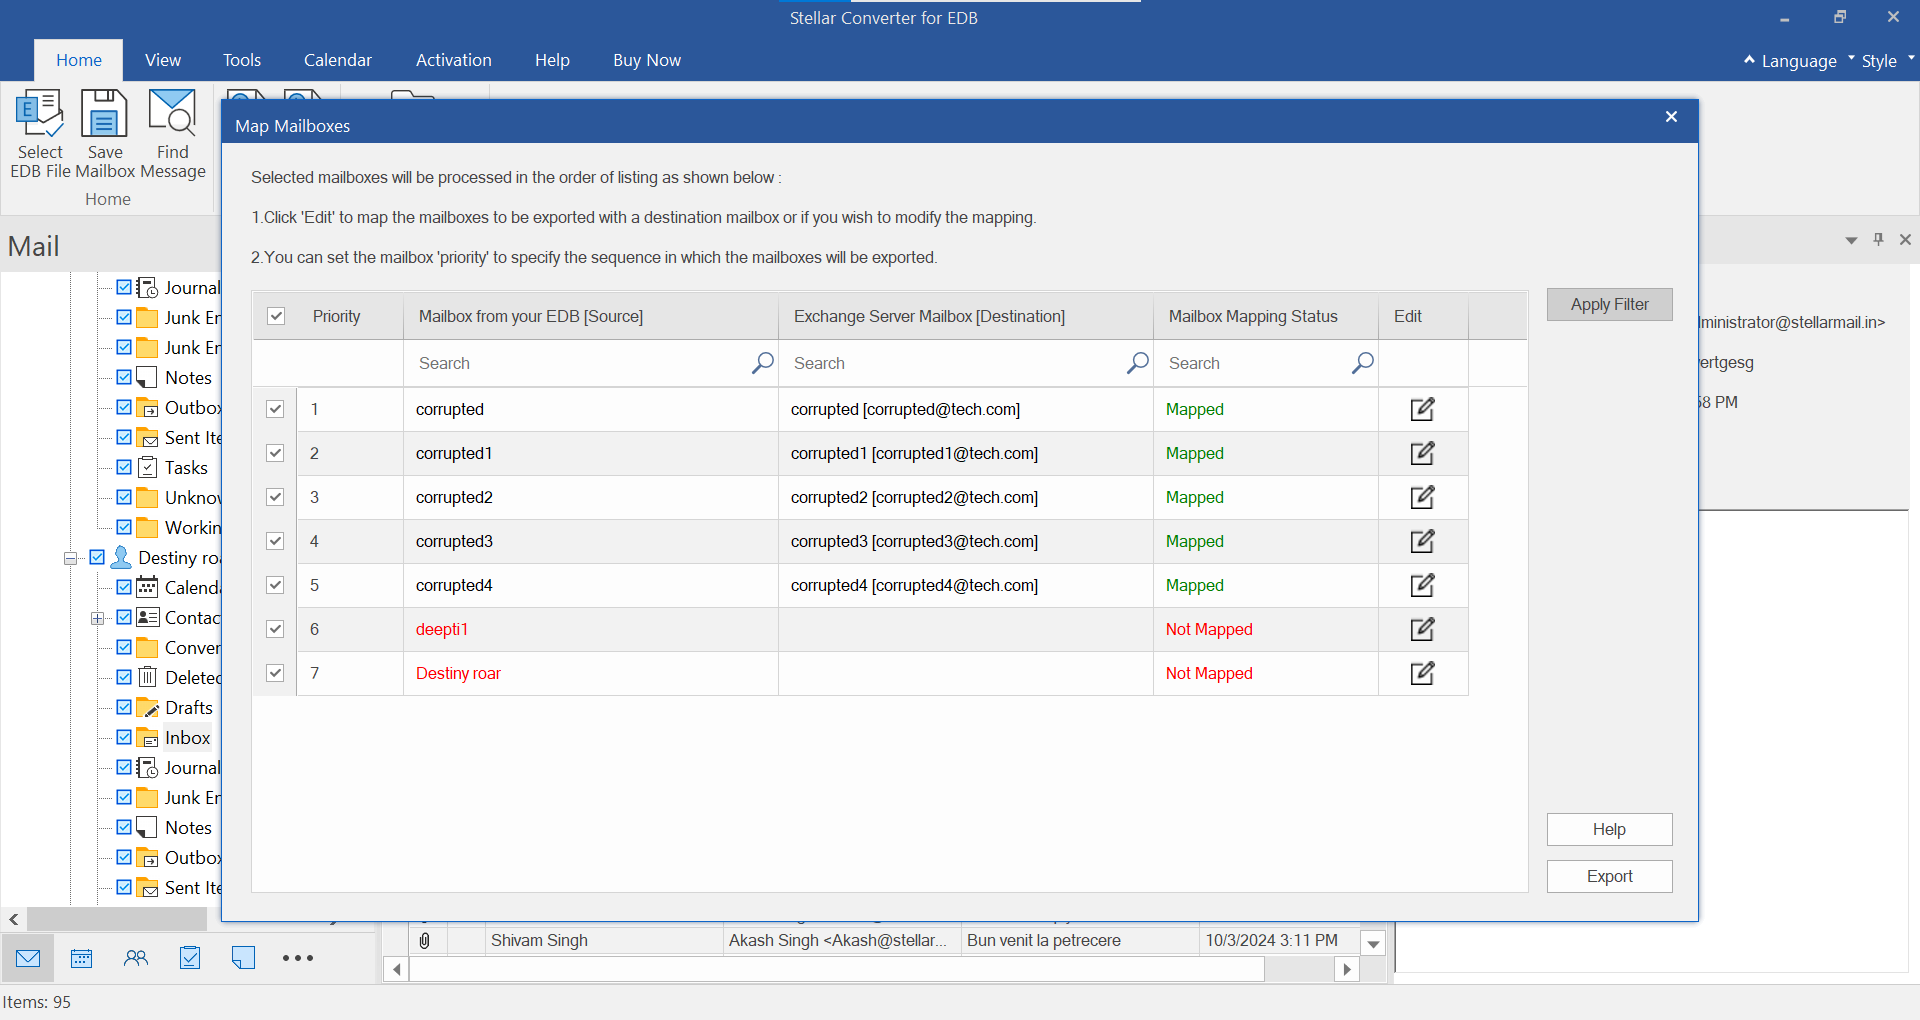
- A Map Mailbox screen will appear with the following three columns:
- Priority: To change or set mailbox export priority order. Helps export critical mailboxes first
- Mailbox from Your EDB (Source): Mailboxes available in converted EDB files.
- Exchange Server Mailbox (Destination): Mailboxes available in the Exchange Server database.
- Mailbox Mapping Status: Displays whether source mailbox is Mapped or Not Mapped with destination mailbox.
- Edit: Allows you to edit or change mailbox mapping.
Although the software auto-maps mailboxes, it also provides option to edit mailbox mapping. You can click on the Edit icon to manually map or change source mailbox to destination mailbox mapping.
Note: You can use Apply Filter option to filter the emails as per Date Range or based on email address. You can also exclude Junk emails and deleted mail items.
- After mapping mailboxes, click Export to export all selected mailboxes from the offline EDB to Microsoft 365.
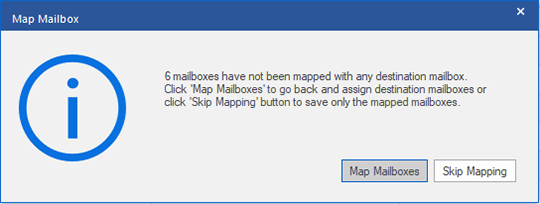
- If mailboxes are not mapped, a message box will appear. Click ‘Map Mailboxes’ to go back and map mailboxes or click ‘Skip Mapping’ to continue.
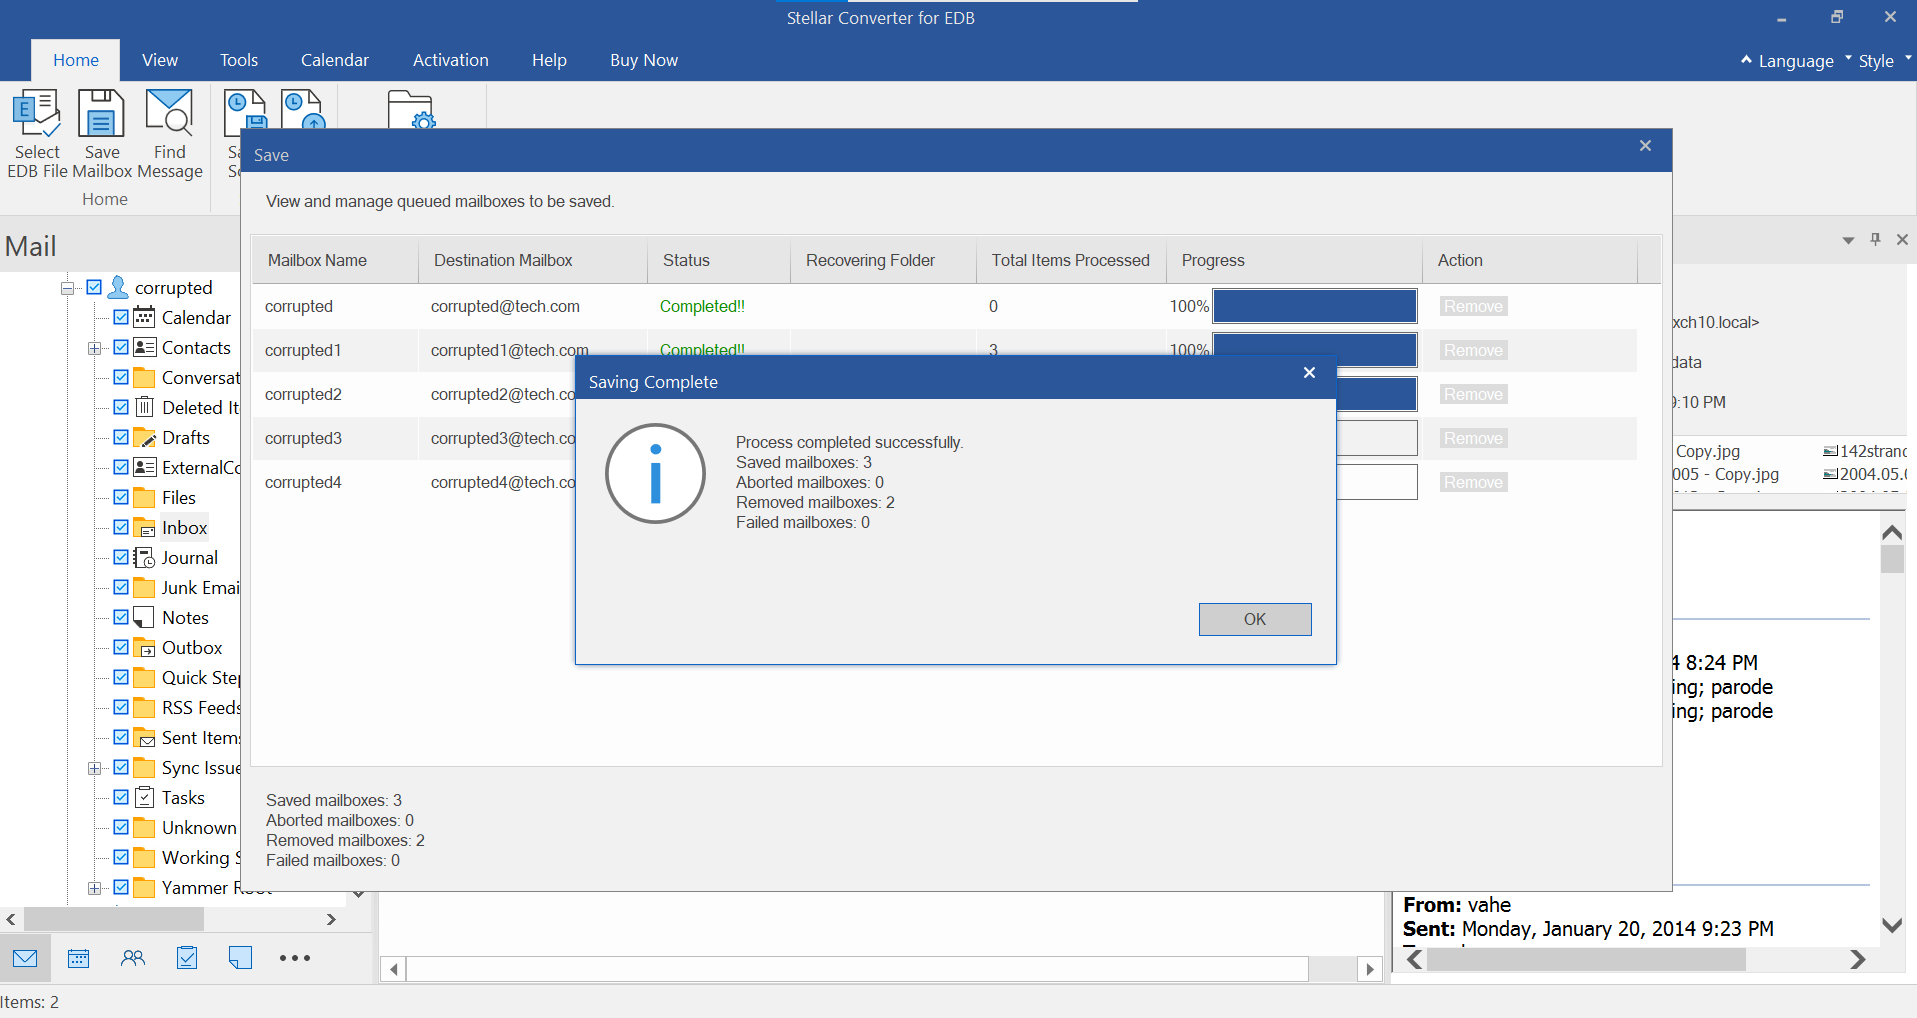
- In the Save dialog box, the software displays export progress.
- Once the process of exporting the EDB file to Microsoft 365 completes, the software displays a Saving Complete message box. Click ‘OK’ to close it.

Now you can verify the exported mailboxes on the destination Microsoft 365.
To export single mailbox to Microsoft 365, follow these steps:
- Right click on a particular mailbox and then click ‘Export to Microsoft 365’ to proceed.

- A pop-up window will appear – Enter Login Credentials. Select the Profile Name.
-right%20click.png)
- Click OK to export selected mailbox from the Offline EDB to Microsoft 365.
NOTES:
You cannot export offline EDB data to Microsoft 365 for Domain systems.
After mapping, the software displays the Email ID of the same domain that was used while logging.
For more help, reach us via Self Help and Support page.