There are different power-saving modes (Sleep mode, hibernation mode and more) designed for laptops and PC's. By default, these modes are primarily designed to make you power conscious during inactivity hours—especially when running on battery. On the other way, these may pause or stop your work which may take longer hours; for example- while downloading something from the internet or processing large size files with any software program. While working with Stellar Repair for Outlook, these modes stop the ongoing ‘PST file repair’ process like any other software program & the repair process has to be started again.
To avoid such situations during long-hour tasks, you can customize the default settings for these modes & disable the ‘Sleep’/‘Hibernate’ mode.
Disabling Sleep and Hibernate mode
Disabling Sleep Mode
To disable ‘automatic sleep mode’, execute the following steps:
- Go to ‘Control Panel’ in your Windows system.
- Open ‘Power Options’ in it. (In Windows 10, users can go there by placing a right-click on the ‘Start’ menu and going to ‘Power Options.’)
- Click on ‘change plan settings’ that is next to the ‘current power plan’.
- In ‘Put the computer to sleep’, click on the drop-down menu and select ‘Never’.
- Click on the ‘Save Changes’ button
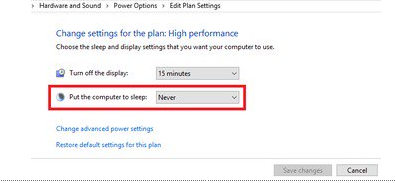
Tip: If the current power plan is set to ‘Balanced’, numerous devices go into a low power state and causes issues. If you have disabled ‘Sleep’, but are still facing issues on ‘Balanced’ power plan, change to ‘High performance’. In doing so, a bit more power is used, however the devices do not cause issues.
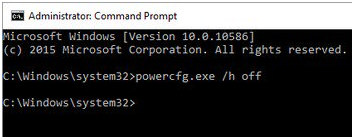
Disabling Hibernation
To disable ‘Hibernation’, execute the following steps:
- Launch ‘Command Prompt’ as an Administrator. In Windows 10, do this by placing a right-click on the ‘Start’ menu and then clicking on the ‘Command Prompt (Admin)’.
- Type “powercfg.exe /h off” without quotes and press ‘Enter’ key. (The cursor will start at a new line asking for new input.)
- Exit ‘Command Prompt’.