

With BitRaser File Eraser software, you can schedule your erasing tasks so that you don’t need to perform the erasure every time manually. The steps to schedule erasure tasks using BitRaser on your Windows PC are as follows:
a) Install BitRaser File Eraser on your Windows PC.
b) Run BitRaser File Eraser software. Enter the activation key, then click Activate.
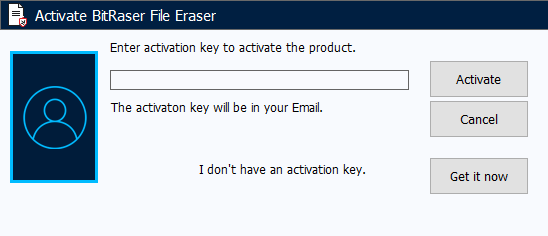
Image: Enter Activation Key to Open the Software
c) Explore the BitRaser File Eraser screen on your PC. From the sidebar, click Scheduler.
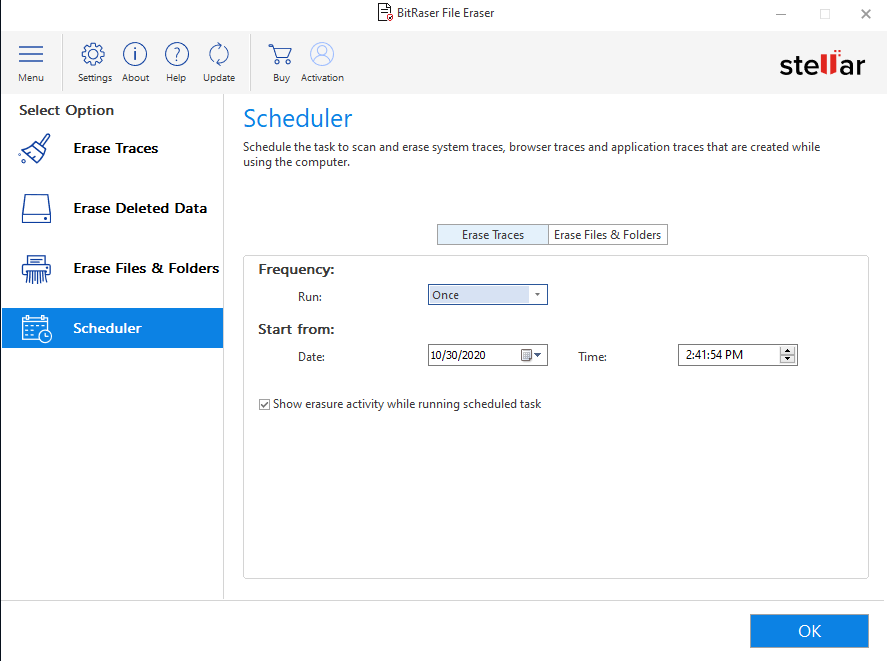
Image: Scheduler button in BitRaser File Eraser
d) On the Scheduler screen, the Erase Traces tab is in the select state by default. Specify the Frequency and Start from date and time, then click OK.
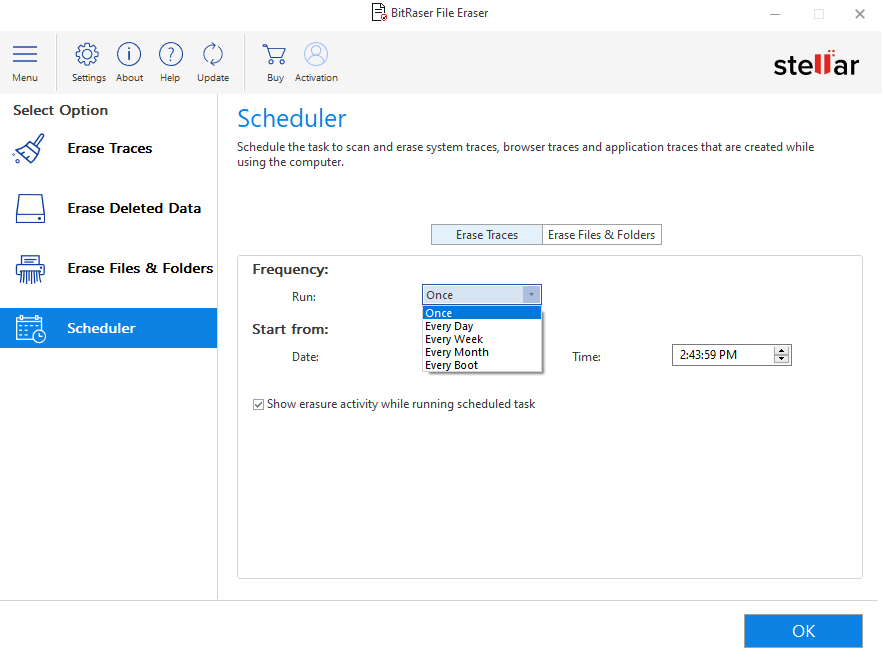
Image: Frequency Set to Once in BitRaser File Eraser
e) A pop-up message box appears that states “Schedule created successfully.” Click OK.
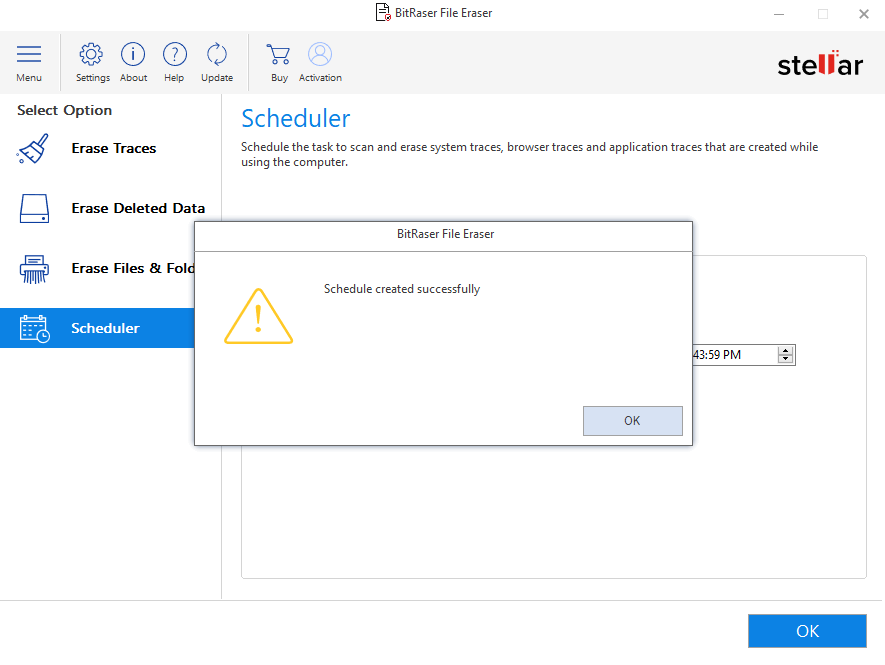
Image: Message Box Confirming the Successful Creation of Schedule
f) When you need to schedule the erasure of files and folders, click the Erase Files & Folders tab. Under Select Option, choose New Task. Specify the task name, click Browse to add the files or folders to the list, then click Next.
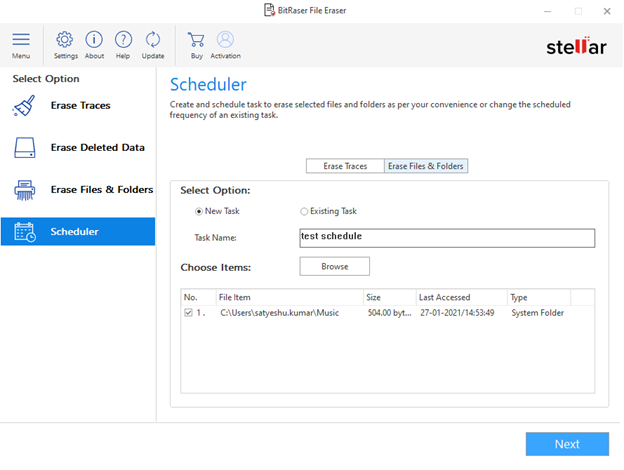
Image: Provide Schedule Details to Erase Files & Folders
g) On the next screen, specify the frequency, start date, and time. Next, click OK.
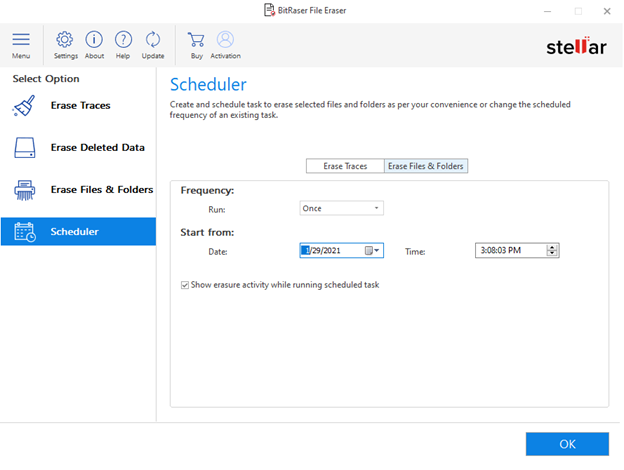
Image: Specify Schedule Frequency and Start from Date and Time
h) On the “Schedule created successfully” pop-up message box, click OK.
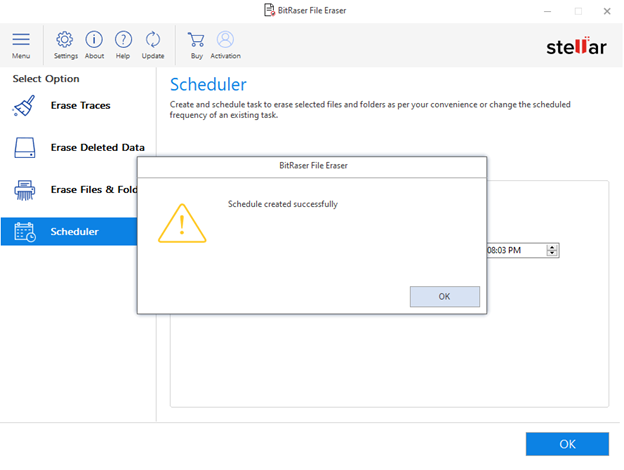
Image: Message Box Confirming the Successful Creation of Schedule
After the schedule is created, BitRaser File Eraser software will run the schedule at the specified time, provided your computer is ON during the scheduled period.
i) See the list of all schedules by choosing the Existing Task under the Select Option radio button.

Image: Check the Existing Task and Manage It Easily
j) To modify an existing task, select a task, then click Edit. On the pop-up window, specify your preferences to schedule a task, then click OK.

Image: Edit the Existing Task
k) To delete an existing task, select a task, then click Delete. On the message box, click OK. The task is removed from the existing task list.
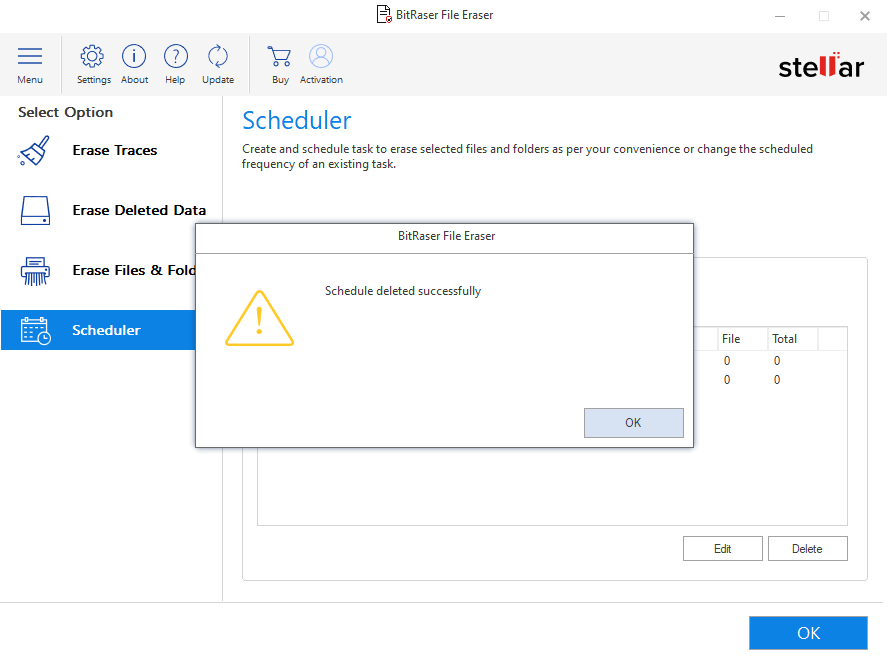
Image: “Schedule deleted successfully” Message Box


