You need to fulfil following requirements to export all selected mailboxes data to Office 365 mail accounts.
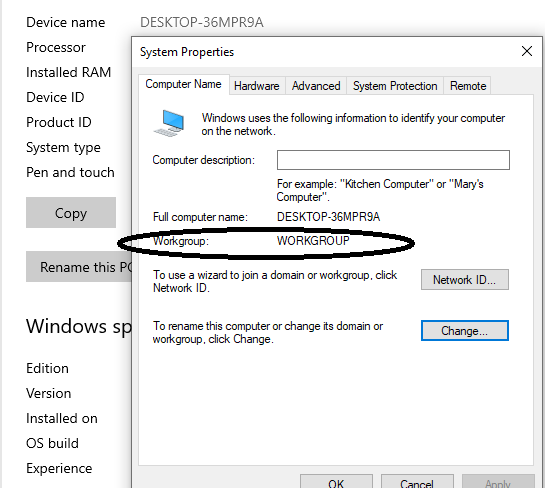
- Computer should be in WORKGROUP.
- The software will allow you to match the each selected mailbox with the respective recipient mailbox.
- If you are exporting multiple mailboxes to Office 365 accounts, you will be required to login using administrator credentials.
- You must configure the Outlook profile using an account that has administrator privileges of Office 365.

- <!-- wp:list-item -->
- All the mailbox on office 365, in which client want to export the data should have Admin rights. <!-- /wp:list-item -->
- <!-- wp:list-item -->
- To Give Admin rights : <!-- /wp:list-item -->
- <!-- wp:list-item -->
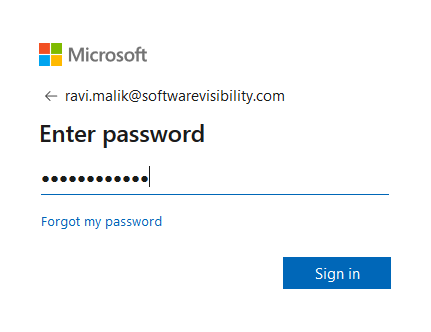
- Login on Microsoft Office 365 with Admin Id and password <!-- /wp:list-item -->
- <!-- wp:list-item -->
- Open Microsoft 365 admin centre. <!-- /wp:list-item -->
- <!-- wp:list-item -->
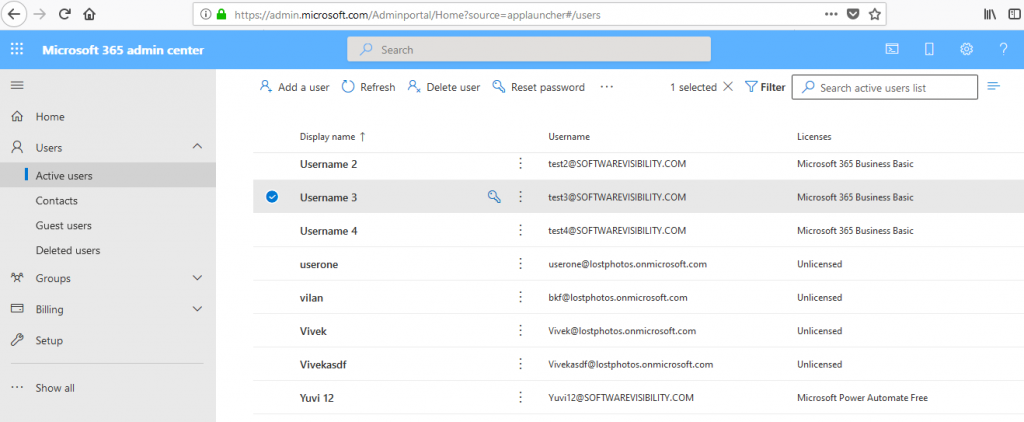
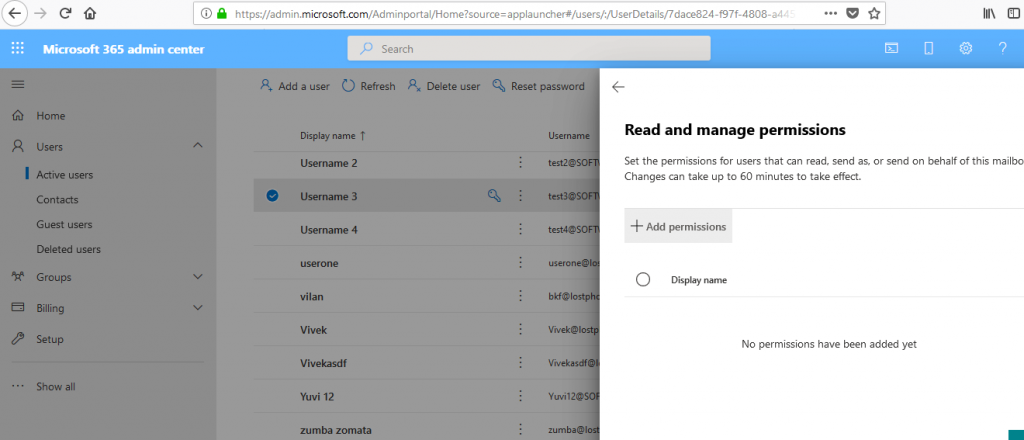
- Click on Users->Active users <!-- /wp:list-item --><!-- wp:list-item -->
- Click on any user <!-- /wp:list-item -->
- <!-- wp:list-item -->
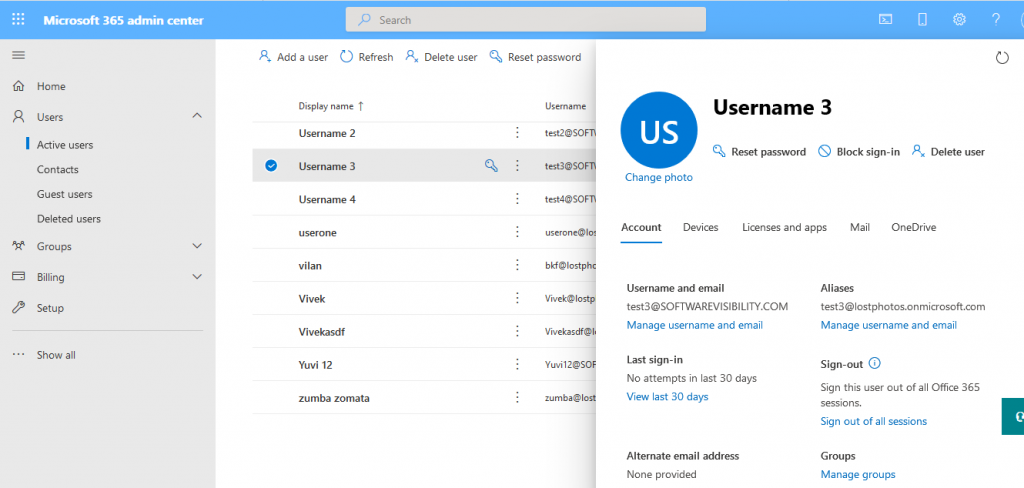
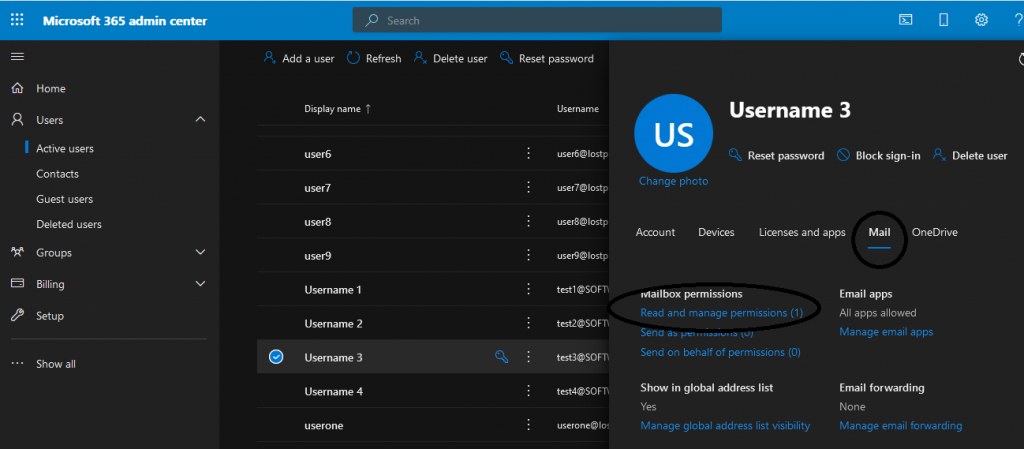
- Click on Mail and then click on Read and manage permission property for example see below screen shot. <!-- /wp:list-item -->
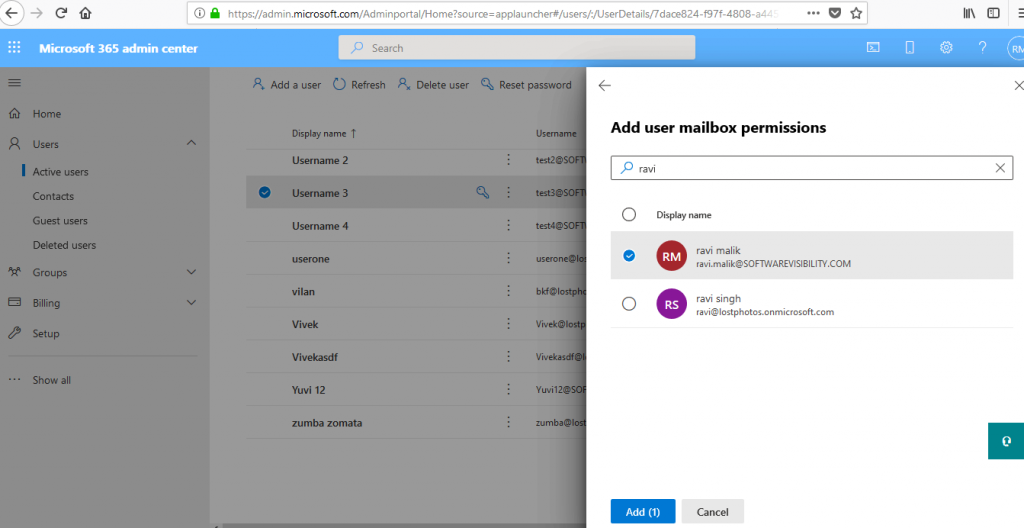
- <!-- wp:list-item -->
- Now click on +Add permission and search the Administrator name <!-- /wp:list-item -->
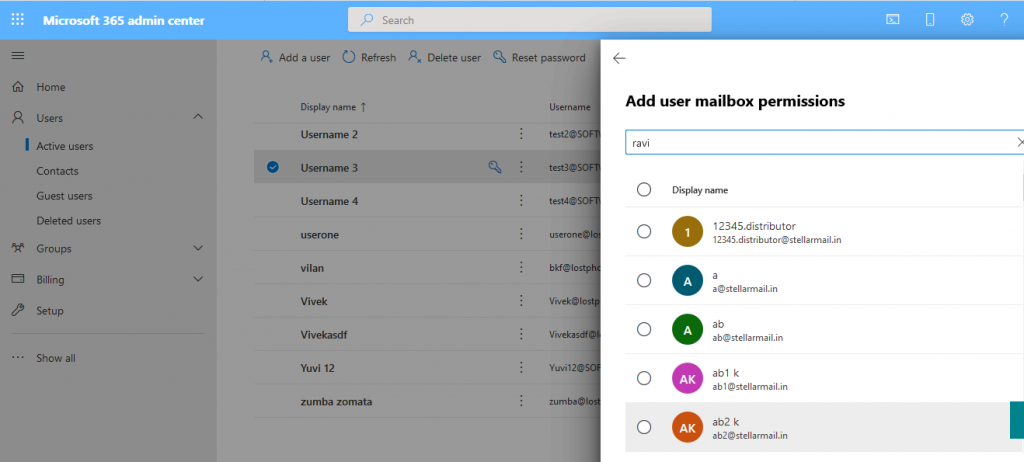
- <!-- wp:list-item -->
- Now Select the Administrator and add it. <!-- /wp:list-item -->
Changes can take up to 60 minutes to take effect.
<!-- /wp:paragraph --><!-- wp:image {"id":154209,"sizeSlug":"large","linkDestination":"none"} -->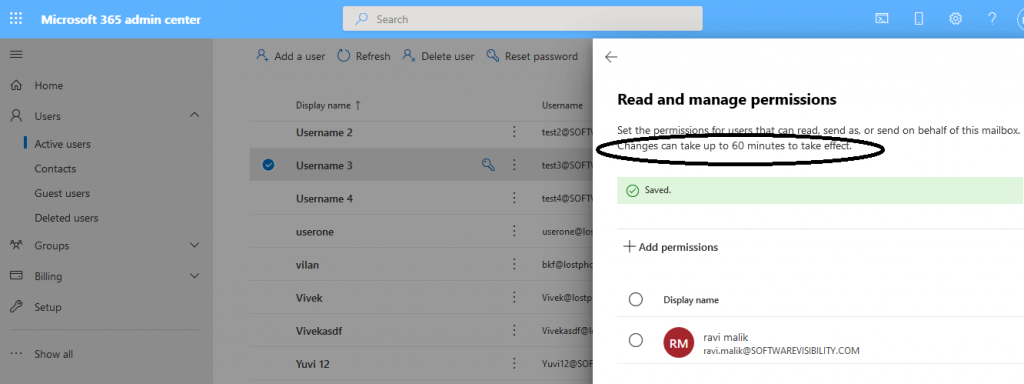
After given Admin right to the user mailbox, It should be sync in outlook. To verify it open outlook with configured Office 365 Admin profile and check that user mailbox visible in left pane view below the Admin mailbox.
<!-- /wp:paragraph --><!-- wp:image {"id":154210,"sizeSlug":"large","linkDestination":"none"} -->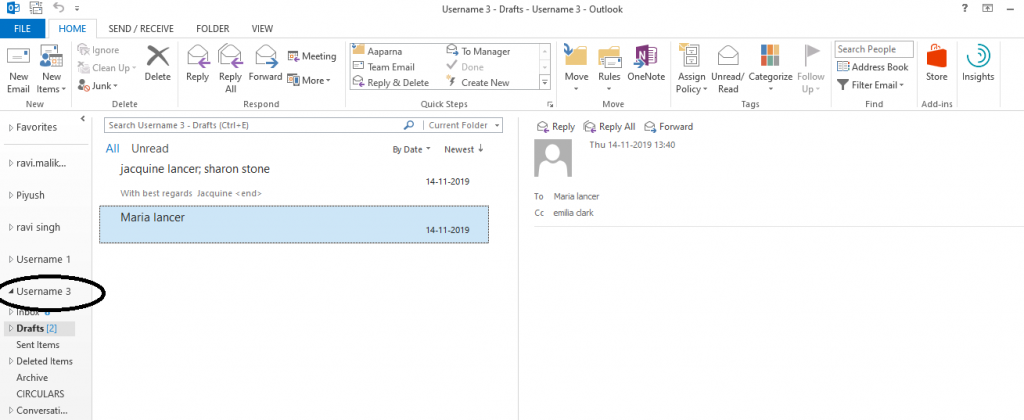
Below screenshot is related to build provided to handle Client Cases only.
<!-- /wp:heading --><!-- wp:paragraph -->This has both options of Login into Office 365
<!-- /wp:paragraph --><!-- wp:list {"ordered":true,"type":"1"} -->- <!-- wp:list-item -->
- Via Outlook Profile <!-- /wp:list-item --><!-- wp:list-item -->
- Via Office 365 Admin credentials. <!-- /wp:list-item -->
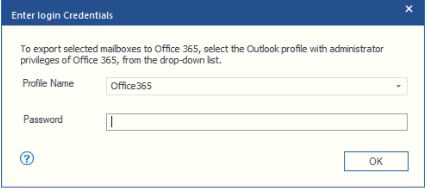
If Using Office 365 Admin Id and password for Login.
<!-- /wp:paragraph --><!-- wp:image {"id":154211,"sizeSlug":"full","linkDestination":"none"} -->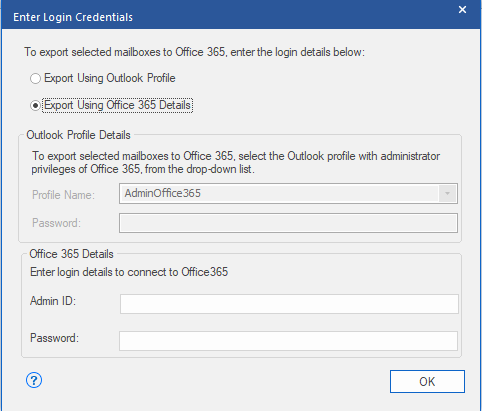
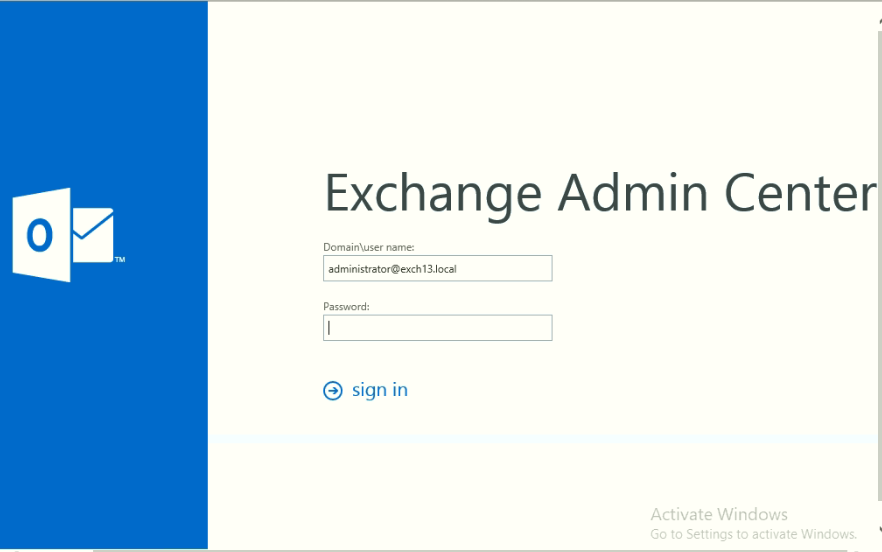
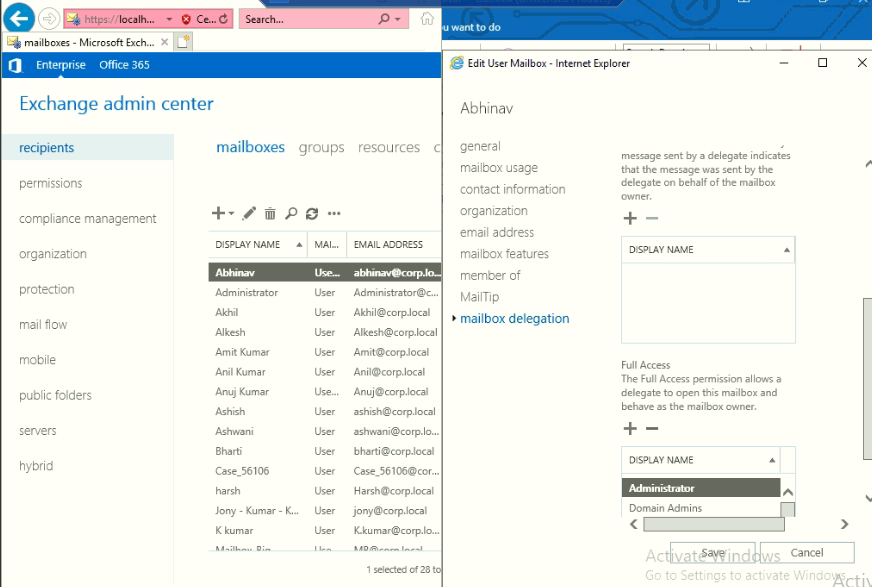
Steps to provide Admin rights in Exchange Server (2013/2016/2019):
<!-- /wp:heading --><!-- wp:list -->- <!-- wp:list-item -->
- Open ECP (Exchange Admin centre) <!-- /wp:list-item -->
- <!-- wp:list-item -->
- Click on recipients and then Double click on the user to which you want to provide Admin rights <!-- /wp:list-item -->
- <!-- wp:list-item -->
- Click on mailbox delegation then click on + sign and then search the Administrator and Add it and then click on Save button. <!-- /wp:list-item -->
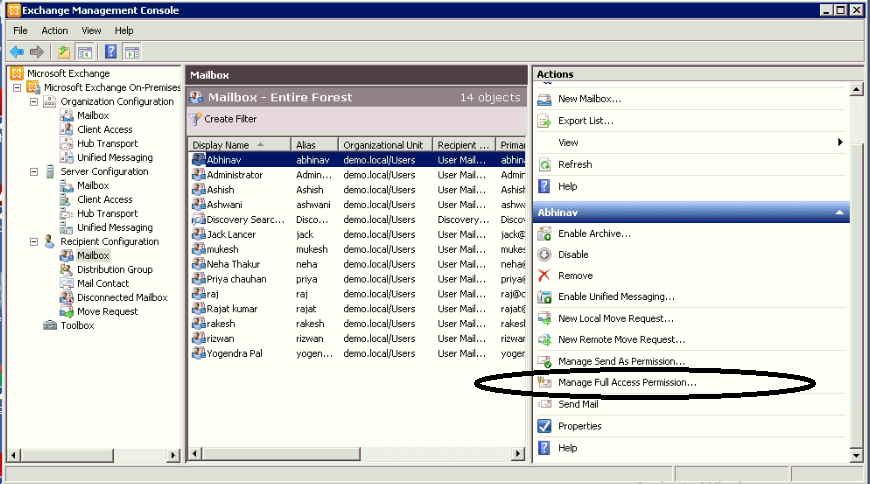
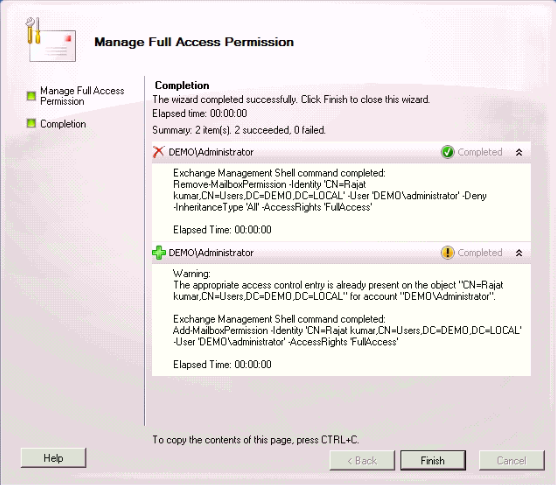
Steps to provide administrator rights on Exchange Server 2010 :
<!-- /wp:heading --><!-- wp:paragraph -->Procedure
<!-- /wp:paragraph --><!-- wp:list {"ordered":true,"type":"1","start":1} -->- <!-- wp:list-item -->
- Click Start > Programs > Microsoft Exchange Server 2010 > Exchange Management Console. The Exchange Management Console window opens. <!-- /wp:list-item -->
- <!-- wp:list-item -->
- In the Console tree, click Recipient Configuration -> Mailbox <!-- /wp:list-item --><!-- wp:list-item -->
- Now select any user then in right view click on Manage Full Access Permission <!-- /wp:list-item -->
- <!-- wp:list-item -->
- Now click +Add button <!-- /wp:list-item -->
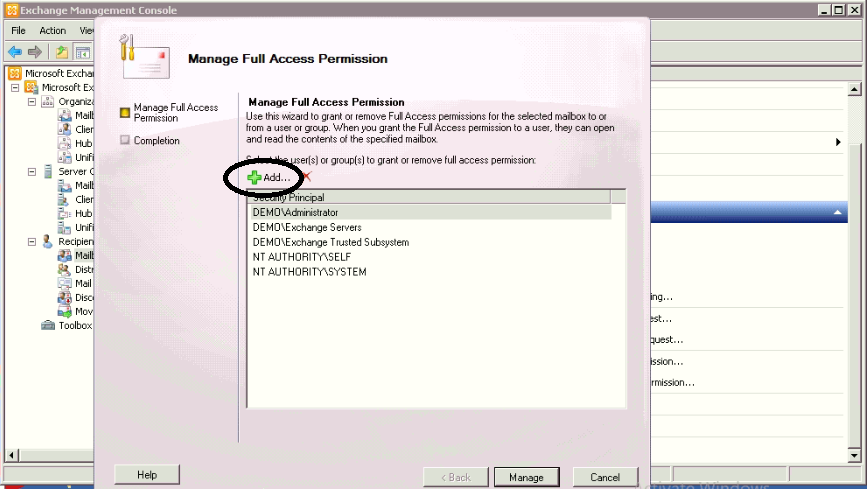
- <!-- wp:list-item -->
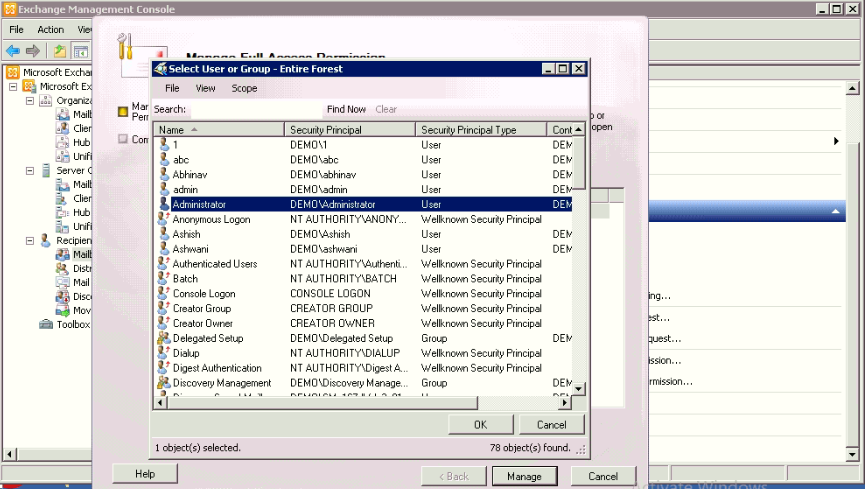
- Now search or select the Administrator and click on Ok <!-- /wp:list-item -->
- <!-- wp:list-item -->
- Now click on Manage button <!-- /wp:list-item -->
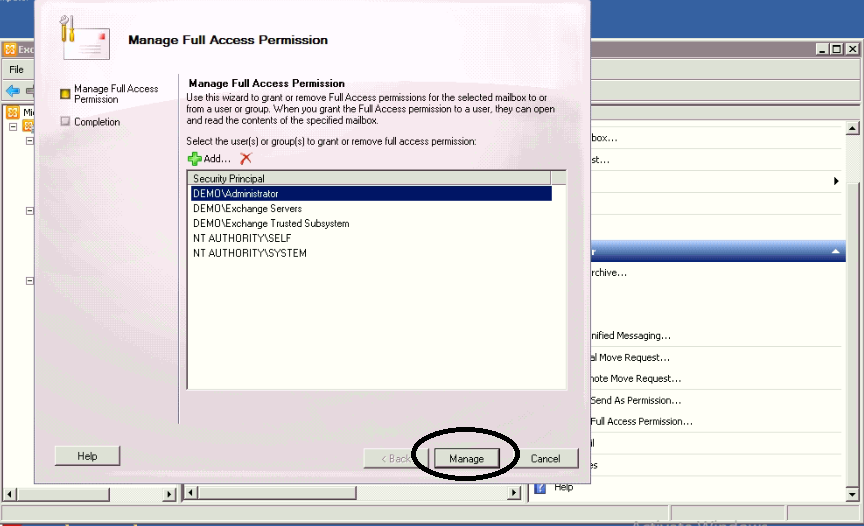
- <!-- wp:list-item -->
- Now click on Finish button. <!-- /wp:list-item -->
After given Admin right to the user mailbox, It should be sync in outlook. To verify it open outlook with configured Exchange Admin profile and check that user mailbox visible in left pane view below the Admin mailbox.
<!-- /wp:paragraph --><!-- wp:image {"id":154221,"sizeSlug":"full","linkDestination":"none"} -->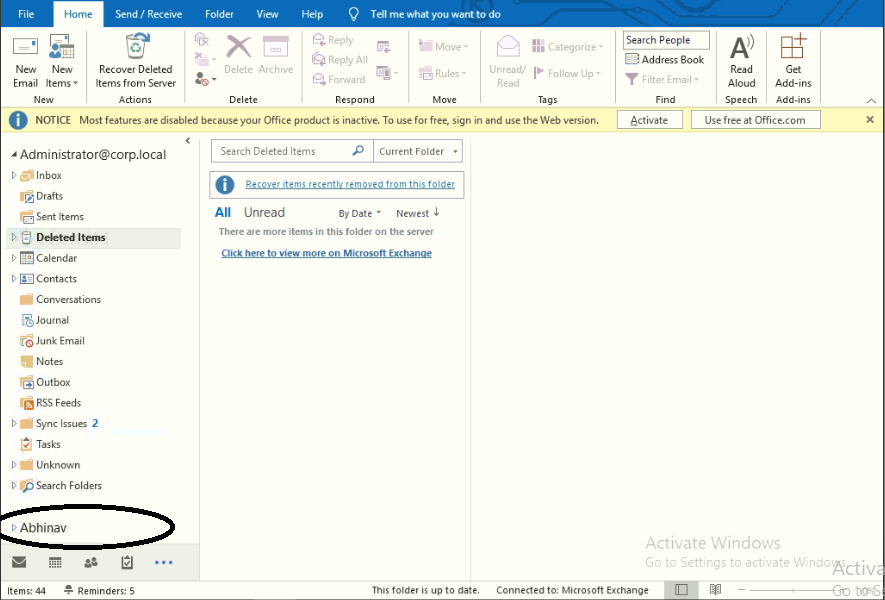
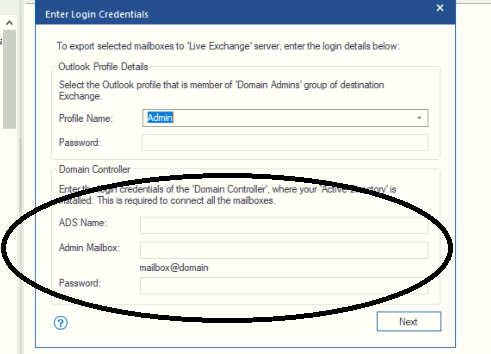
If Administrator account is exist in corrupt data base then client have Dialtone recovery option. (https://www.stellarinfo.com/article/dialtone-recovery-exchange-server.php)
<!-- /wp:paragraph --><!-- wp:paragraph -->If Client is not getting mailbox mapping windows or getting “Server is operational” error then check the AD details is correct or not. Like ADS Name, Admin Email Id and Password.
<!-- /wp:paragraph --><!-- wp:image {"id":154222,"sizeSlug":"full","linkDestination":"none"} -->